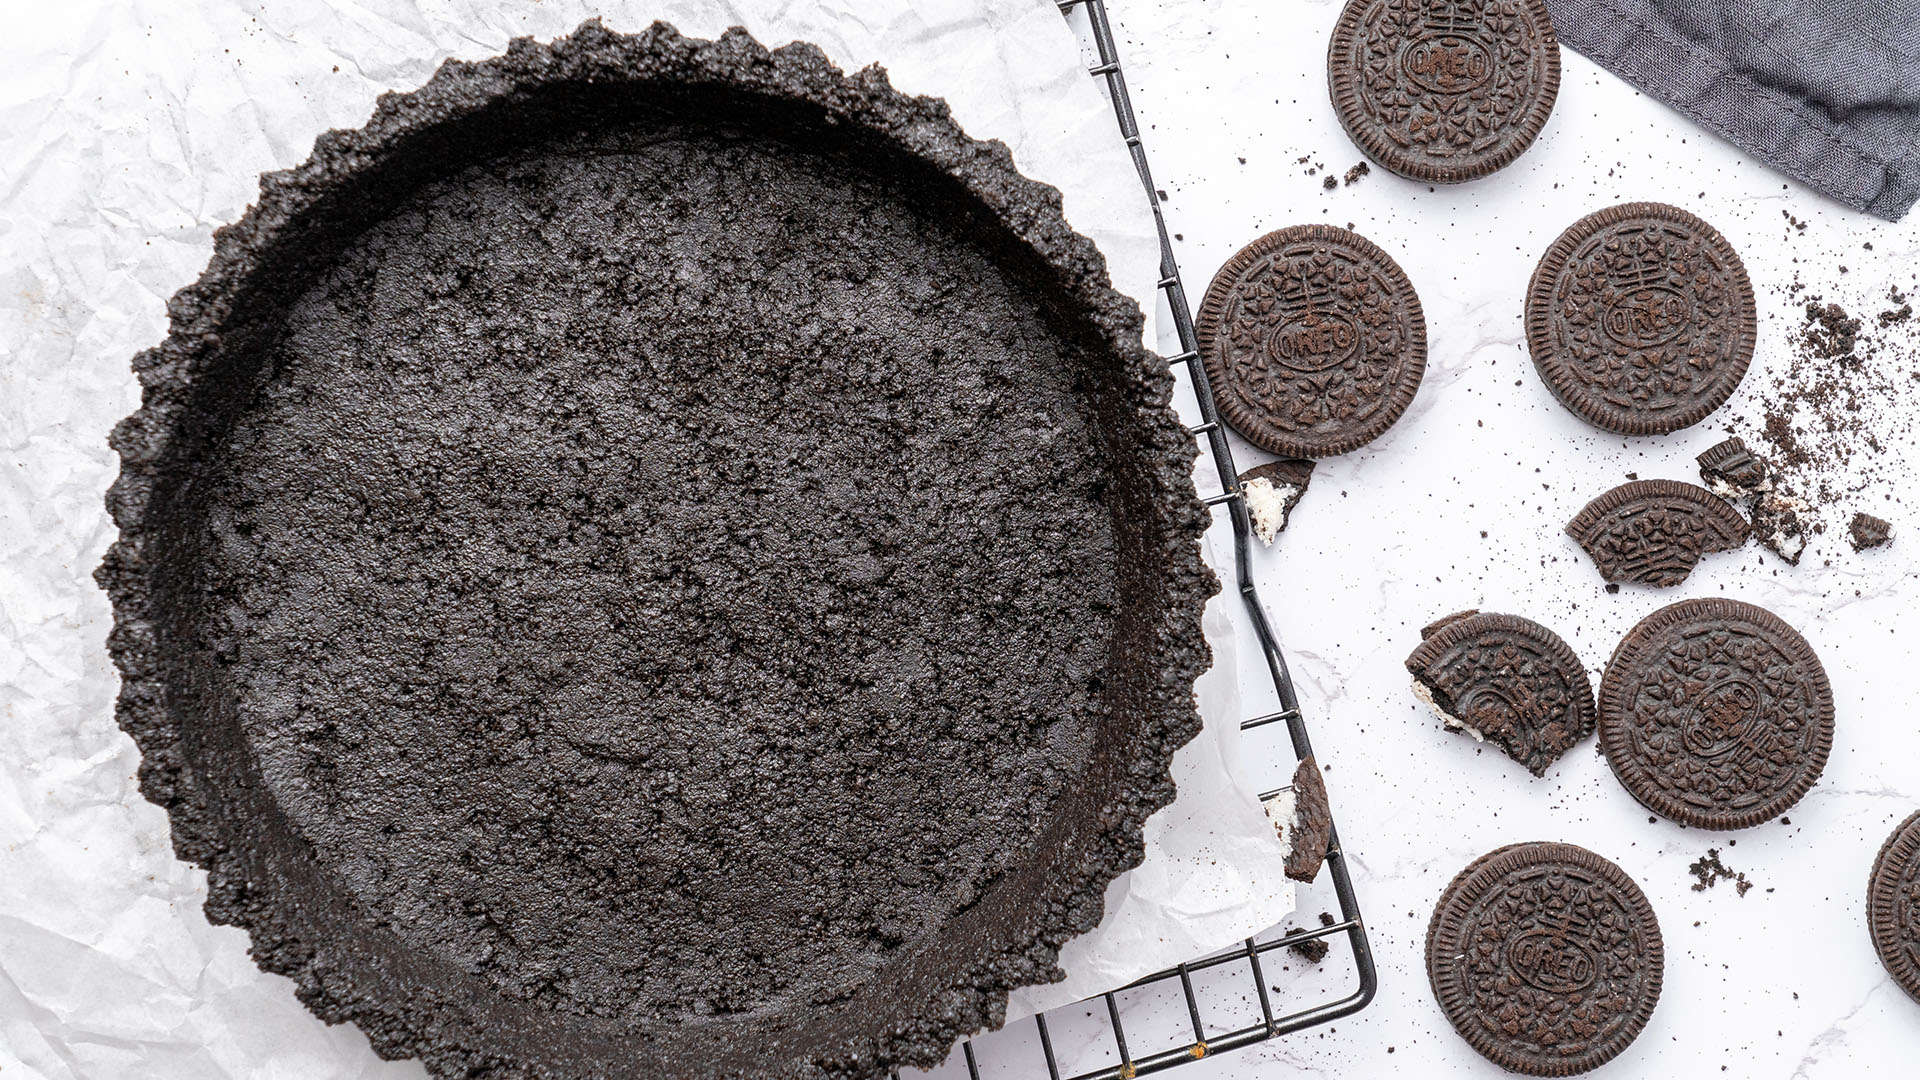
With the perfect balance of buttery richness and cookie crunch, this decadent 3-ingredient Oreo pie crust is the ideal way to incorporate everyone's favorite chocolate sandwich cookies into desserts! Whether you're creating a luscious chocolate cream pie with a no-bake crust or preparing a velvety cheesecake with a baked crust, this easy and versatile crust is the ultimate chocolate lover's fantasy!

Jump to:
🌟 Why this is the best recipe
- It’s ridiculously easy - Forget store-bought crust, this recipe teaches you how to make Oreo cookie crust from scratch in just a few simple steps! You don’t need to have any fancy baking skills to master this simple cookie crust recipe.
- It’s 3 ingredients - What is Oreo crust made of? All you need to make this easy homemade Oreo crust is about two dozen chocolate sandwich cookies, some butter, and a pinch of salt. That’s it! Easy peasy and uncomplicated.
- It’s super yummy - With classic chocolate Oreos and butter, this crust captures the essence of cookies and cream with a touch of buttery goodness. It’s the perfect balance of chocolate cookie crunch and creamy indulgence.
- It’s versatile - You won’t have any trouble deciding what to do with Oreo pie crust! You can use it for both no-bake and baked desserts and fill it with anything from fruity fillings to creamy puddings.
📝 Ingredient notes
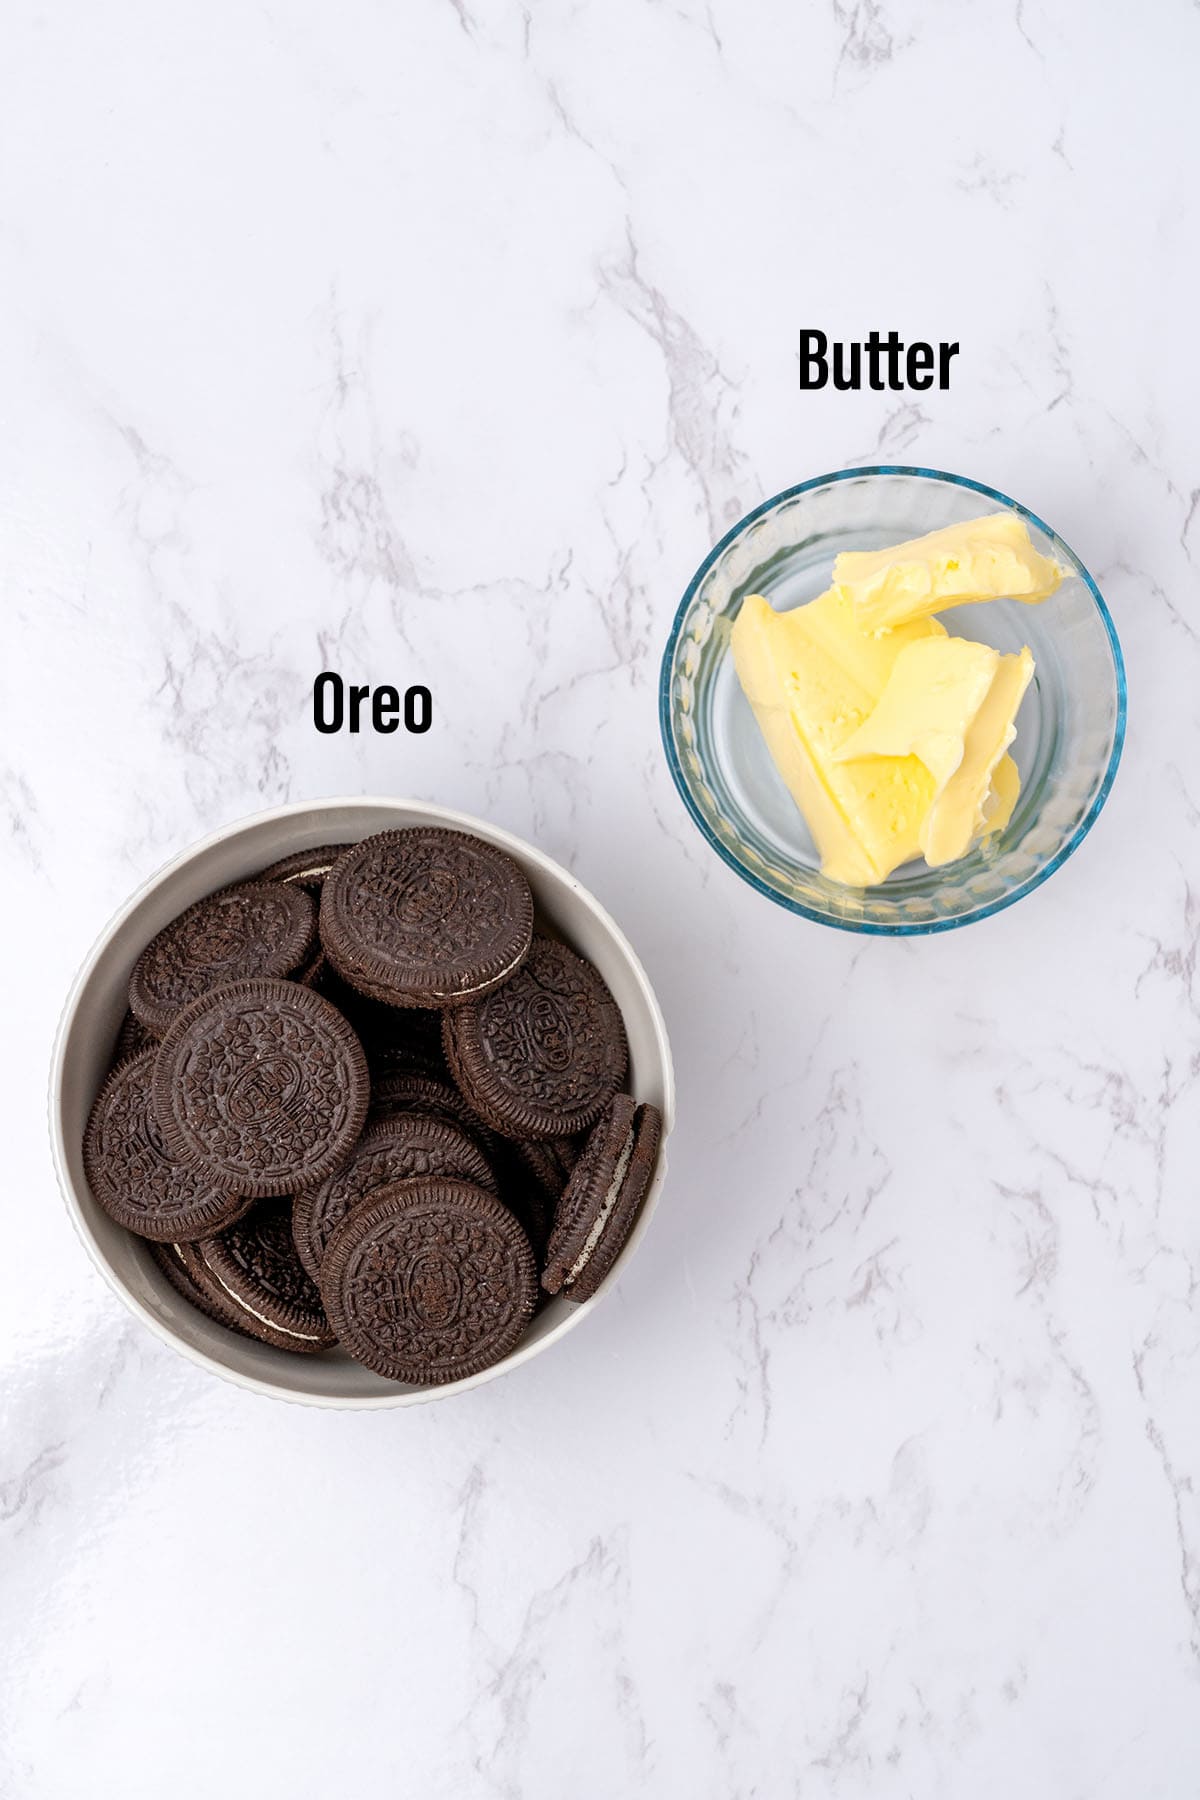
- Butter: Serves as the binding agent for the crust, you should always use unsalted butter in baking. In this recipe, it also needs to be warm and melted, but not hot.
- Oreo Crumbs: Our star! And how many Oreos for Oreo crust will you need!?! The recipe calls for 22 whole Oreo cookies if you are using the brand name version, but you should still measure them out with a digital scale for the best results.
- Salt: Don’t leave out this important ingredient. A pinch of salt highlights the chocolate flavor and balances the sweetness.
🛒 You’ll find detailed measurements for all ingredients in the printable version of the Recipe Card at the bottom of this post
👩🍳 How to make this recipe
1. How to make Oreo crumbs
When making homemade Oreo cookie crusts, there are two different ways to make the cookie crumbs.
Method 1: Food Processor
- Put the cookies in a food processor.
- Then pulse them until they turn into uniform fine crumbles
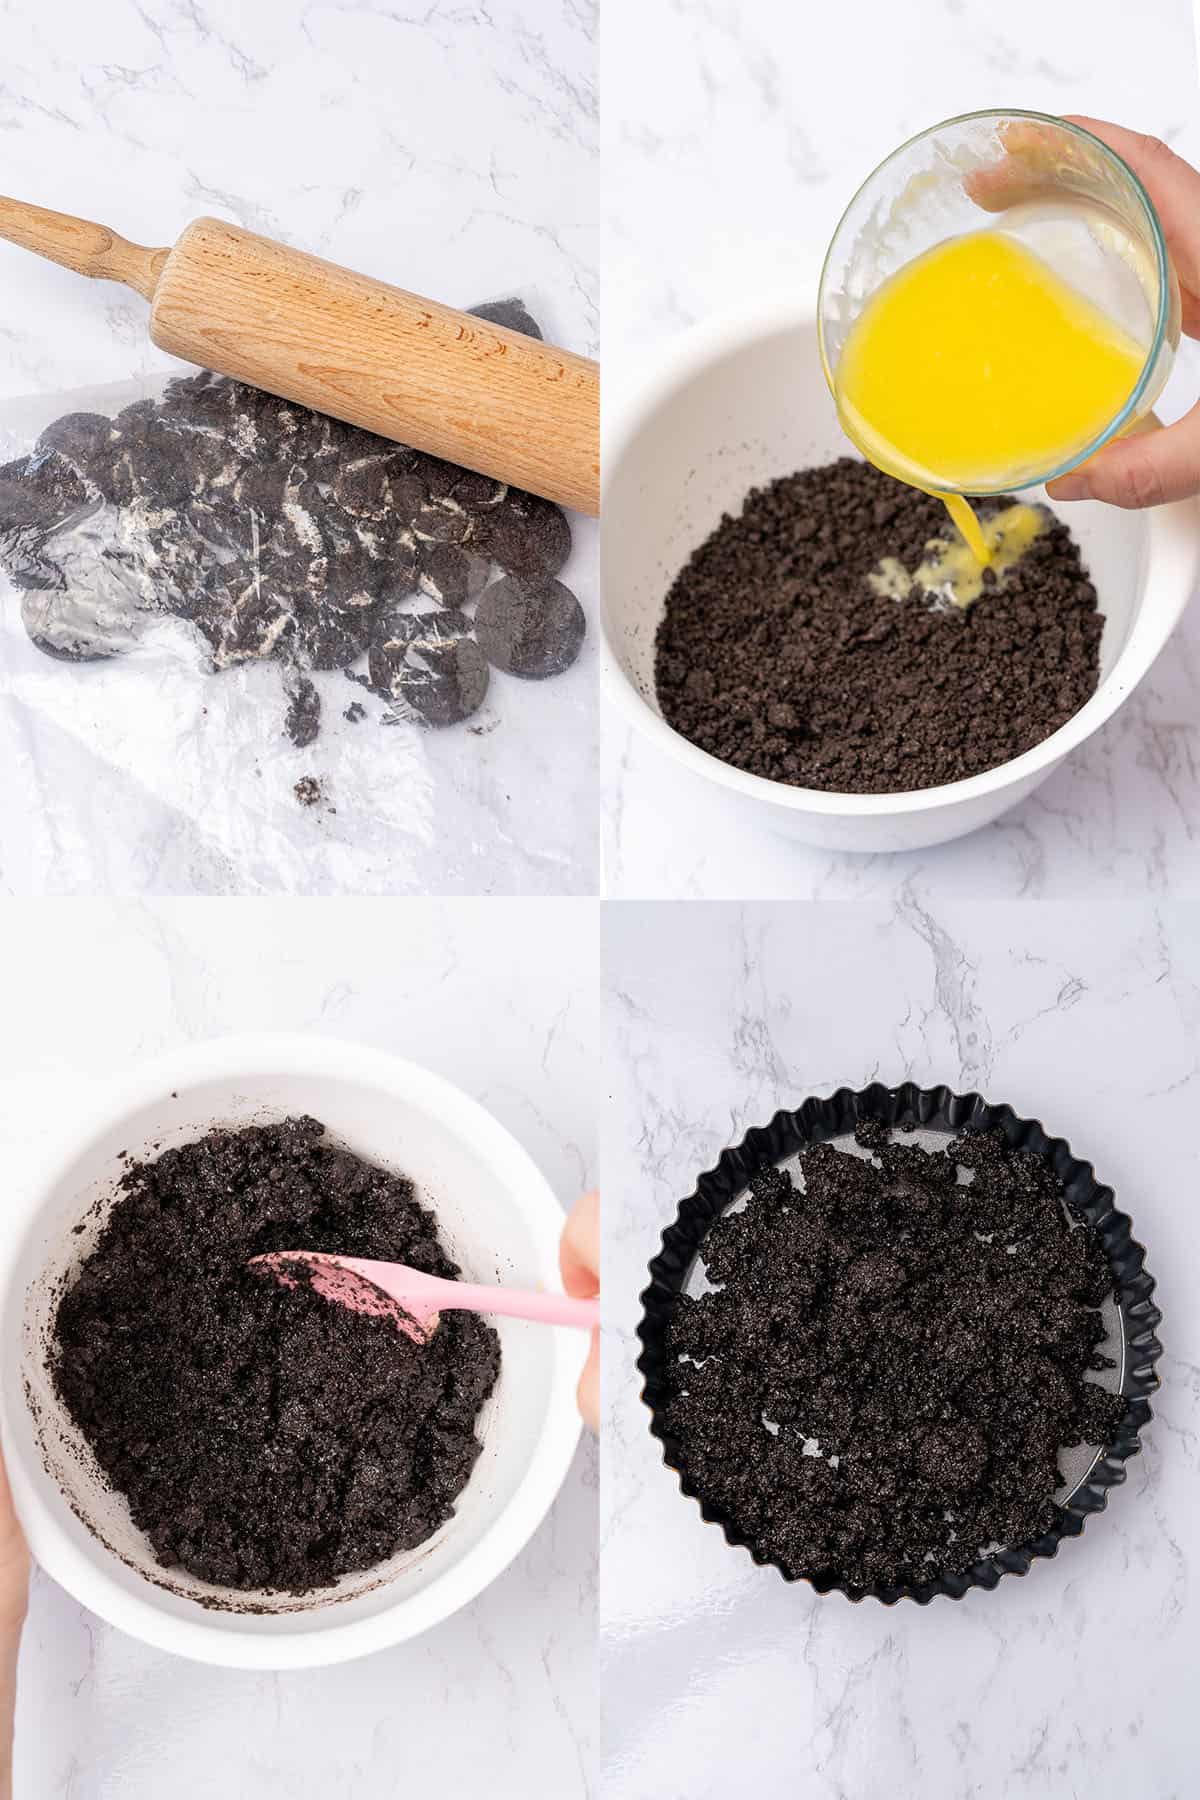
Method 2: Rolling Pin
- Place the cookies in a sealed freezer bag and lay it on a flat surface.
- Beat the cookies with a rolling pin to crush them into fine crumbs.
💡 Top Tip: There should be no large chunks of cookies. The crumbs should be very fine and all about the same size.
2. How to assemble the Oreo Pie Crust
- Melt the unsalted butter on low power in the microwave. Then let it cool down a bit until it’s just warm.
- Make your cookie crumbs using the rolling pin method or a food processor.
- Mix the crumbs together with the warm butter and a pinch of salt until they are evenly coated in butter. If the mixture seems runny, put it in the fridge for a few minutes to chill.
- Pour the cookie mixture into your pie dish or springform pan and then press it evenly into the pan starting at the sides and finishing with the bottom. I like to use a flat bottom glass or bent spoon to form my crust, but you can also use your fingers.
- For a baked pie or cheesecake, prebake the crust per the directions of your recipe. Typically, 10 minutes at 347°F / 175°C.
- For a no-bake dessert, just put it in the freezer for 15 minutes before adding the filling.
- Store the Oreo pie crust in the fridge for 2 to 3 days or in the freezer for up to 3 months (in the pie plate).
💡 Top Tip: Make sure to use liquid but not hot butter to ensure that the crust properly binds together. However, if you use hot butter by mistake, just let the cookie mixture cool in the fridge for a few minutes before forming the crust.

✨ Do you need to bake Oreo pie crust?
Does Oreo cookie crust need to be baked? The answer depends on your desired outcome and the recipe you’re using. For a quick and fuss-free crust, just follow the instructions for how to make Oreo pie crust no-bake.
On the other hand, you can easily pre-bake the cookie crust if your recipe calls for a baked crust. Just keep in mind that this crust isn’t made with dough, so it doesn’t need to be blind baked for a long period of time like a regular pie crust.
✨ Flavor variations and substitutions
You can customize this easy Oreo cookie crust with substitutions to cater to dietary restrictions or jazz it up with other flavors!
- Chocolate Mint: Make the pie crust minty by using mint-flavored Oreos.
- Vanilla: Make a Golden Oreo crust.
- Orange: Add a little orange zest to the cookie mixture to make a chocolate orange crust.
- Nutty: Replace some of the cookie crumbs with finely ground hazelnuts, pecans, or peanuts.
- Spices: Add a dash of cinnamon, ginger, or cardamom for a bit of warm spice.
- Fruity: Mix in a bit of ground freeze-dried strawberries, raspberries, or mango.
- Gluten-Free: Use gluten free Oreos.
- Dairy-Free: Use vegan butter in place of the unsalted butter.
Check out my baking guides to learn even more about the science of baking!
🎓 Troubleshooting this Oreo cookie crust
Even the easiest recipes can sometimes encounter a bump. Fear not! Here are some simple solutions to a few common issues.
Problem: Crust Too Dry
Solution: If your crust mixture seems too crumbly and isn’t binding together, try gradually adding a bit more melted butter until the mixture achieves the proper consistency.
Problem: Crust Too Wet
Solution: If your cookie mixture seems overly wet and sticky, start by placing it in the fridge to chill for a bit. If it still remains too wet, consider adding more crushed cookies to help balance out the moisture.
Problem: Uneven Thickness
Solution: To ensure an even thickness of the crust, use a flat-bottomed glass or bent spoon to firmly press the cookie mixture into the pie dish. Applying consistent pressure will help create a uniform base.
Problem: Soggy Bottom
Solution: If your crust is soggy, consider pre-baking for a few minutes before adding the filling next time. This will help maintain the crust's crispness.
Problem: Difficulty Removing Slices
Solution: To ensure easy slicing and serving, refrigerate the pie for 30 minutes after assembling. This allows the butter in the crust to firm up, making it easier to cut neat slices.
🎓 Expert tips
- You must crush the cookies into fine crumbs for them to properly bind with the butter and form a crust.
- Avoid using hot melted butter. You need to allow it to cool slightly before combining it with the cookie crumbs or it won't achieve the proper texture.
- The cookie-to-butter ratio is tailored to Oreos. For other cookies with no creamy filling, you will need to use a recipe with a higher butter content like my graham cracker crust recipe.
- If you are making a no-bake Oreo crust you must let it chill in the freezer for at least 15 minutes before adding your filling.
- Butter begins to soften at room temperature, so don’t keep the crust outside of the fridge for more than 20 minutes.

🥣 Equipment notes
This Oreo pie crust recipe is super simple! But having the right tools is essential for the best results!
Always use a digital scale to ensure that you accurately measure your ingredients. This is the magic secret to baking!
In addition, you’ll need a 20 cm / 8 inch loose base pie tin to form your delicious crust!
❓Recipe FAQs
No, classic Oreo cookies contain wheat flour, which contains gluten. If you need a gluten-free option, you can use gluten-free Oreos.
No, the cream filling adds flavor and moisture to the crust, contributing to its overall texture and taste.
Place it in an airtight container or wrap it tightly in plastic wrap and then keep it in the refrigerator for 2 to 3 days.
Yes! It can be frozen for up to 3 months. Keep the crust in the pie pan and wrap it tightly in plastic wrap. Then place it in an airtight container or a freezer-safe bag.
🥧 How to use Oreo cookie crust
Now, let’s talk about what to put in Oreo Pie crust! There are loads of options. Whether you are going for a no-bake recipe or baking your crust, deciding what kind of pie to make with Oreo crust is the best part!
- Chocolate Cream Pie: Fill your crust with rich chocolate crémeux or namelaka and top it with whipped cream.
- Vanilla Custard Pie: Fill the crust with vanilla pastry cream and then top it with fresh berries.
- Cheesecake: Make this Oreo cookie crust for Oreo cheesecake! Or, fill it with my strawberry cheesecake or pistachio cheesecake filling.
- Chocolate Strawberry Pie: Use this strawberry compote recipe to fill the crust and then pipe some of my mascarpone frosting on top.
- Ice Cream: Create an ice cream cake by filling the crust with my no-churn coffee caramel ice cream or pistachio ice cream. You do not need a machine for either recipe!
- Peanut Butter Pie: Use this Oreo crust recipe to make a version of my no-bake peanut butter pie. You could even make the crust with peanut butter Oreos too!
- Nutella: Spread a layer of Nutella frosting over the crust and top with sliced bananas and some whipped cream.

Have you tried this recipe?
Please leave a 5-star ⭐️⭐️⭐️⭐️⭐️ rating on the recipe card and consider leaving a comment as well! I would love to hear about how your dessert turned out and your feedback also helps other Readers!

Oreo Pie Crust
Ingredients
Crust
- 76 g (⅓ cups) Unsalted butter melted - warm but not hot
- 250 g (22 pieces) Oreo cookies crumbs
- Pinch of salt
US customary cup measurement is an indicative figure only. Measure the ingredients with a digital scale by weight (gram). Baking is art but also science which requires precision and accuracy.
Instructions
- Melt the butter in the microwave on low heat and then let it cool down slightly while you make the Oreo cookie crumbs.
- Make the Oreo crumbs by either pulsing the cookies in a food processor or by putting them in a zip bag and beating them with a rolling pin. Just make sure that the crumbs are fine and that there are no visible big chunks left.
- Mix the crumbs with the warm butter and a pinch of salt until the mixture comes together and the crumbs are evenly coated in butter. If the mixture is too runny, place it into the fridge for a few minutes.
- Spread the cookie mixture in your pin tin and then press it evenly into the pan starting at the sides and finishing with the bottom. You can use your fingers for this step, but I also find that a flat bottom glass of the back of a spoon helps to firmly pack it into the pan.
- For a baked pie or cheesecake dessert, pre-bake this crust as per your recipe instructions eg. for 10 minutes at 347°F / 175°C.
- For a no bake pie or cheesecake, I almost never pre-bake the crust. Instead I freeze it for 15 minutes before pouring in the filling.
- Store the pie crust in the fridge for 2-3 days or in the freezer for up to 3 months (in the pie tin).
Notes
- Whether using the food processor or rolling pin method, make sure that the crumbs are super fine.
- When melting the butter, make sure that you do not overheat it. It needs to slightly cool before mixing it with the cookie crumbs.
- The butter acts as a binding agent in this recipe. Once it is cooled in the fridge, it will set. You may have a bad experience in the past with Oreo crust being too crumbly and not holding its shape. This was likely due to not using enough butter in the recipe.
- If the mixture is too wet, chill it for a few minutes before pouring it into the pie dish.
- The cookie to butter ratio works with normal Oreos. So if you are using other cookies eg. with more or less or no filling at all, you will need to change the ratios. Check out this graham cracker crust recipe that has a higher butter content if you are using cookies with no filling.
- The one and only secret to making a firm, neat crust is to press the crumbs firmly and evenly into the side and the bottom of your pie tin. A bent spoon is probably the best tool for this step.
- Because butter softens at room temperature, it is not recommended to keep this crust out of the fridge for longer than 20 minutes or the crust will start to "melt".
Leave a Reply