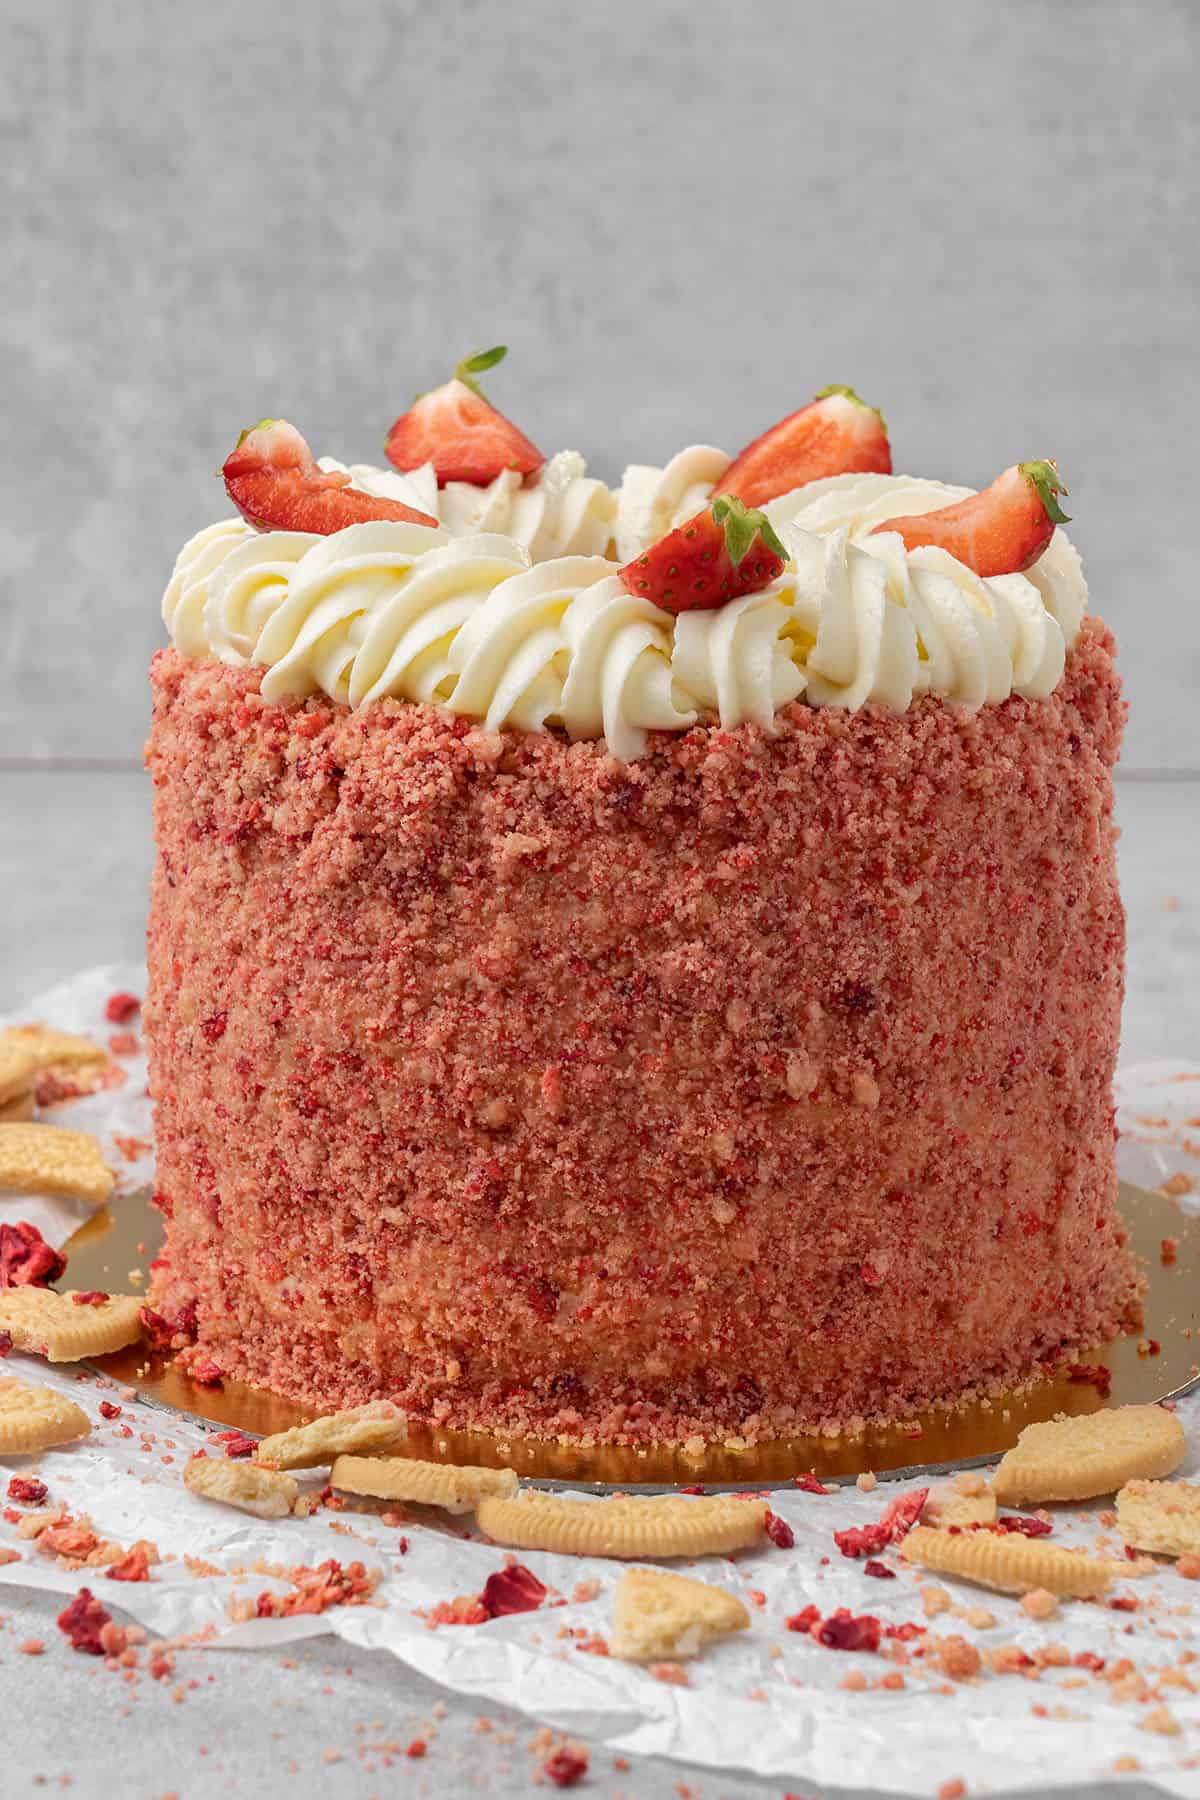
You are going to fall in love with this easy-to-make delicious Strawberry Crunch Cake! Inspired by the legendary frozen Strawberry Shortcake Ice cream bars this cake tastes just like that ice cream transformed into an amazing cake! It's a moist 3-layer sponge, full of fresh fruity strawberry flavor with a yummy light cream cheese frosting, and then beautifully decorated with tasty strawberry crunch!
Jump to:
📖 What is Strawberry Crunch
If you grew up in the US, you must remember those Good Humor Strawberry Shortcake Ice Cream Bars! If not, you must try them when you next visit the States! Full of vanilla and strawberry flavor with just the right amount of crunch from Golden Oreos and freeze-dried strawberries is what makes my strawberry crunch recipe irresistible! It's an amazingly good nostalgic taste and super versatile.
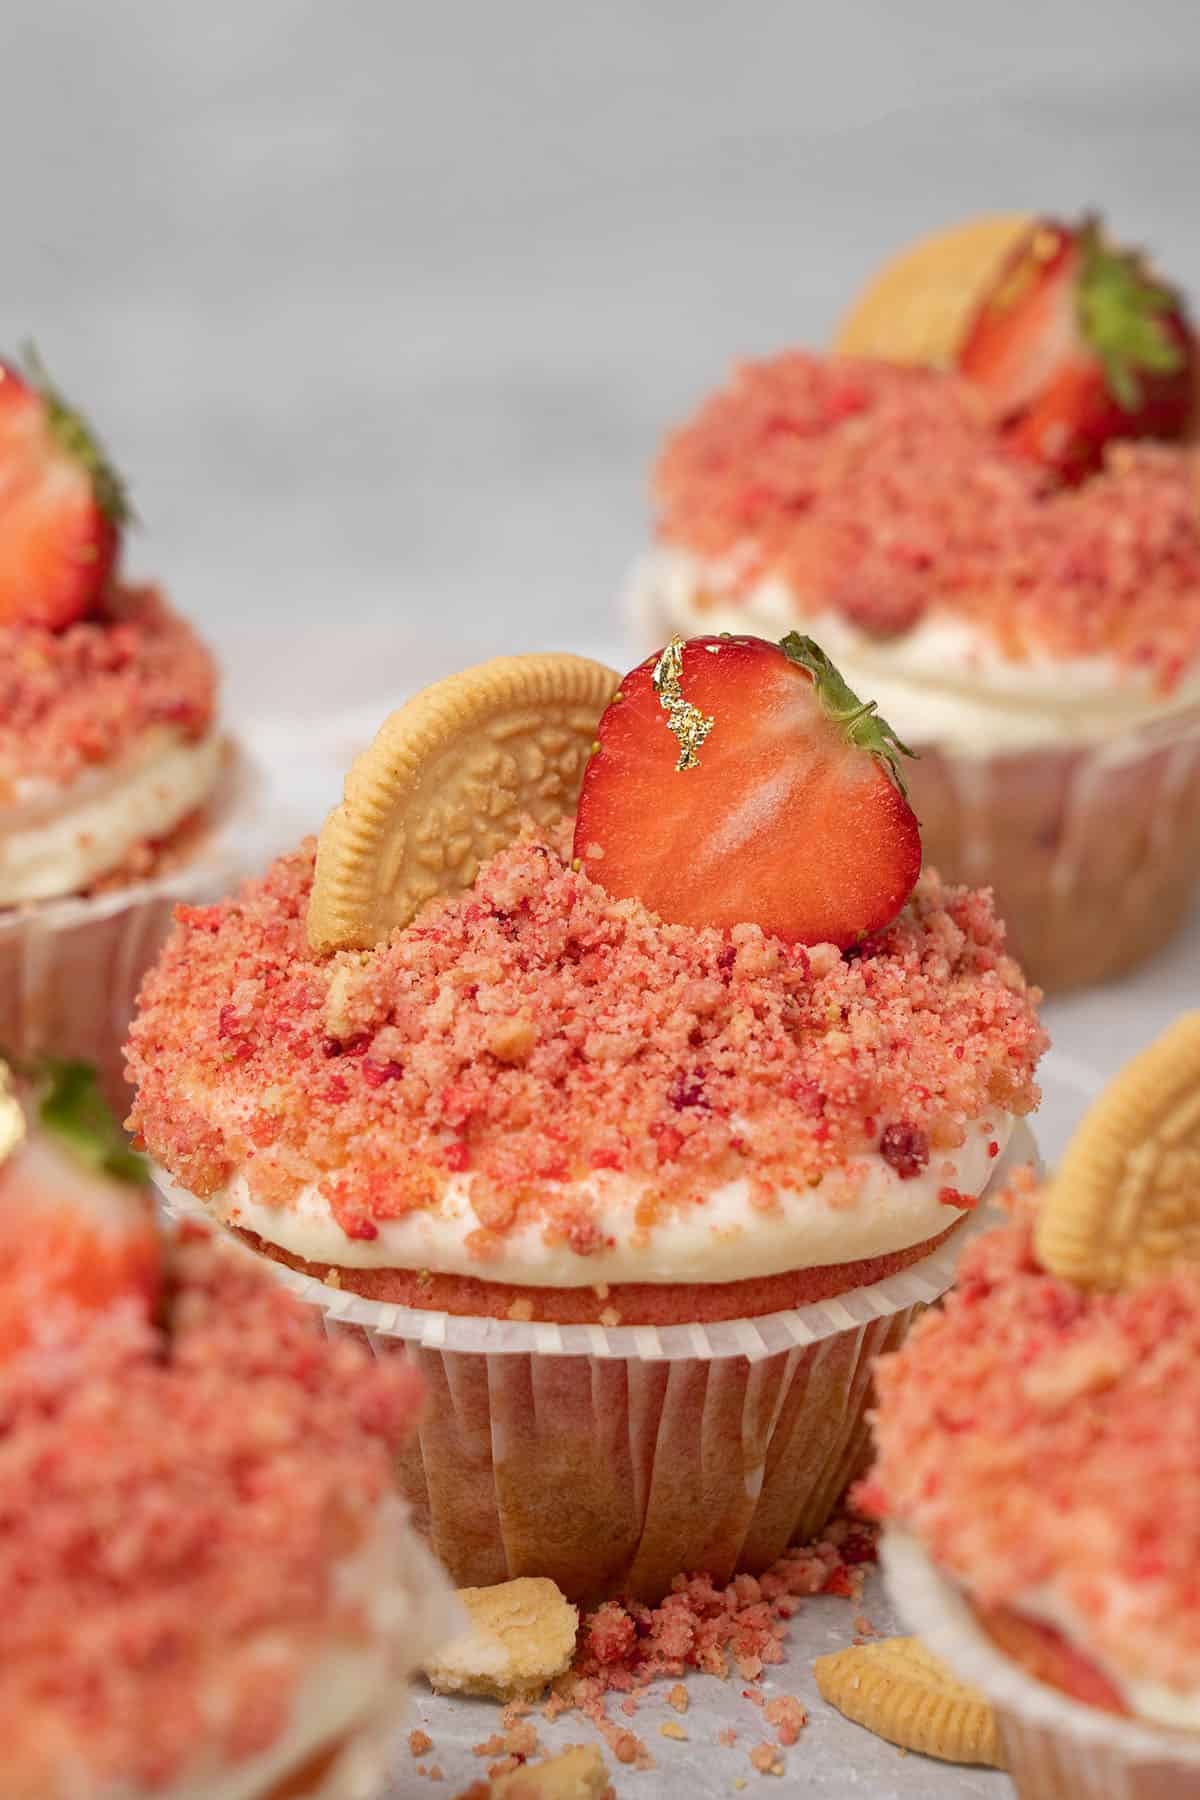
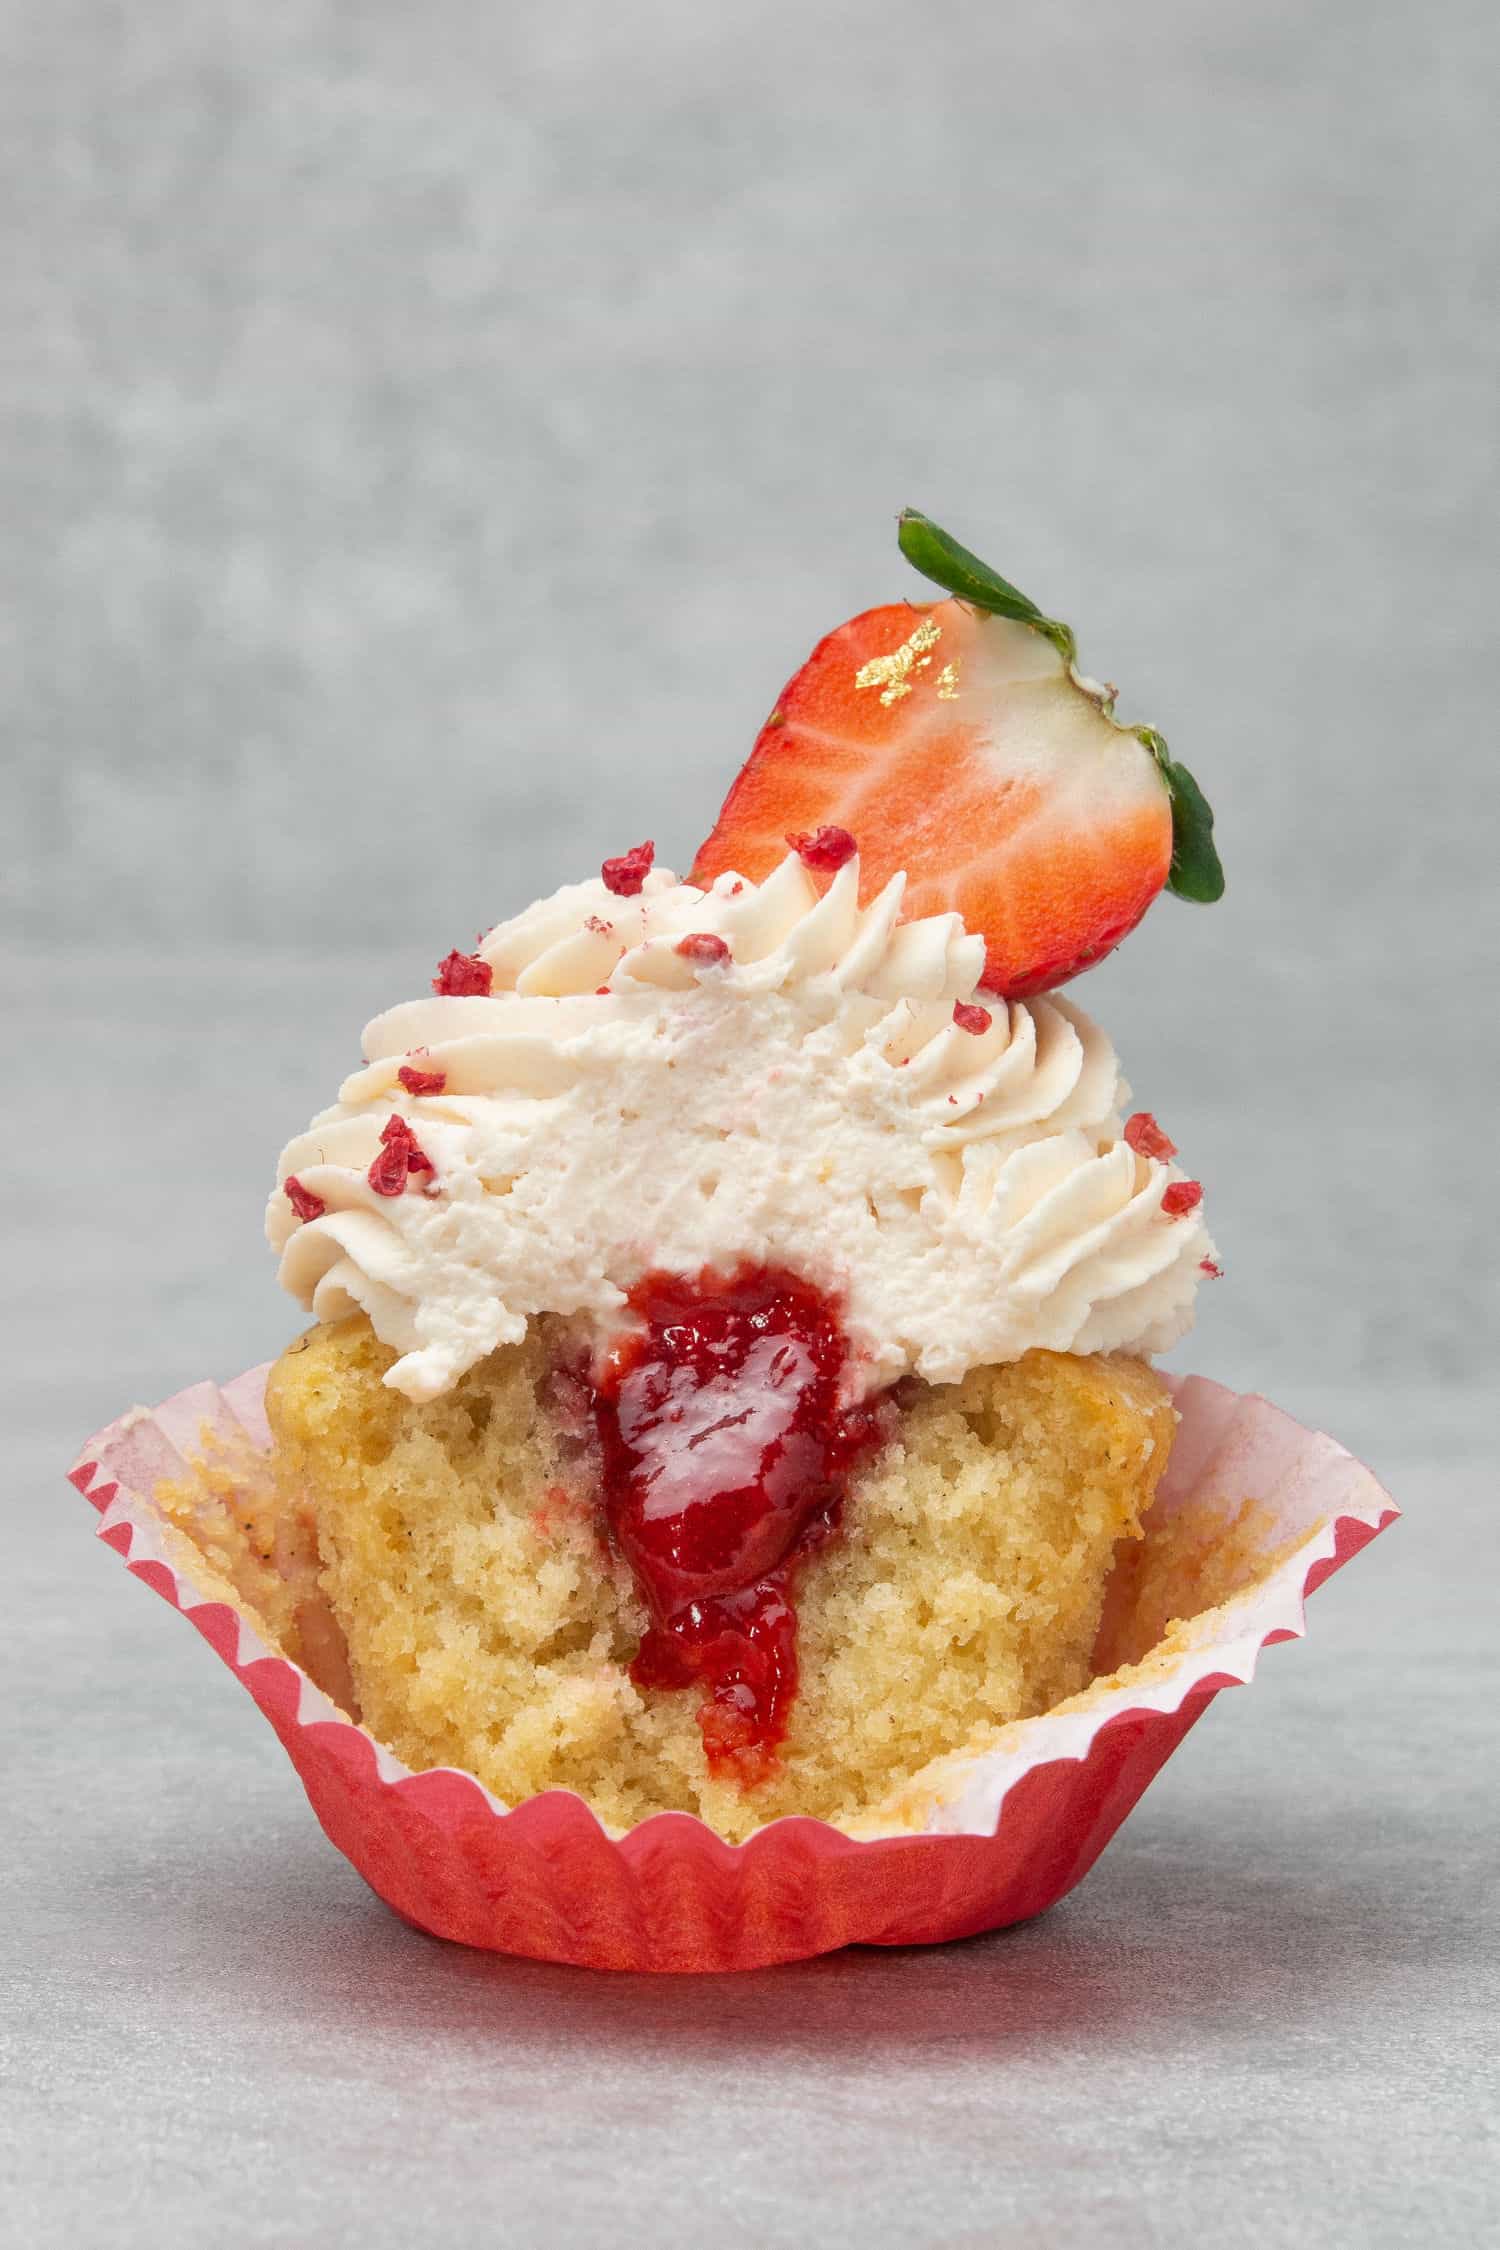
You can sprinkle strawberry crunch on ice cream, yogurt, oatmeal, and frostings, or even add it to batters. Strawberry crunch is easy to make and the perfect addition to so many different desserts just like this Strawberry Crunch cake or these Strawberry Crunch Cupcakes!
🌟 Why this is the best recipe
- It is super delicious – I never compromise on taste! Moist strawberry sponges and yummy cream cheese frosting with just the right amount of sweetness make this Strawberry cake absolutely irresistible! No need to stress over making a difficult buttercream, my cream cheese frosting is way easier, quicker, and more delicious
- It is extremely easy – The Strawberry Crunch Cake ingredients are not fancy and the cake is very easy to make from scratch for even the most beginner bakers
- It is super quick – The steps are clear and uncomplicated. By using my signature 3 ingredient cream cheese frosting without butter, the cake comes together fairly quickly. And the strawberry reduction and crunch topping take just minutes to make
- From scratch recipe – Some recipes call for a boxed cake mix to keep it simple. My recipes are always made from scratch, but so easy and never complicated. Baking from scratch produces the most tender and moist cake. You just can't get that from a box mix and you'll find that my easy from-scratch Strawberry Crunch Cake recipe is so simple even for the most novice baker
- No special equipment is needed – All you need is a few round cake pans to bake the cake and a nozzle tip for piping the decoration
- It is super pretty - Strawberry Crunch Cake is so colorful with its bright pink layers and speckled crunch! It presents beautifully and will impress both kids and adults alike
- It is an honest, detailed tutorial – While this recipe might look long, all the information I have written here, every tip and trick will help you achieve the perfect results without any issues on the way. Remember, baking is a science, and every little detail written here is to help YOU!
📝 Ingredient notes
For the Strawberry Cake
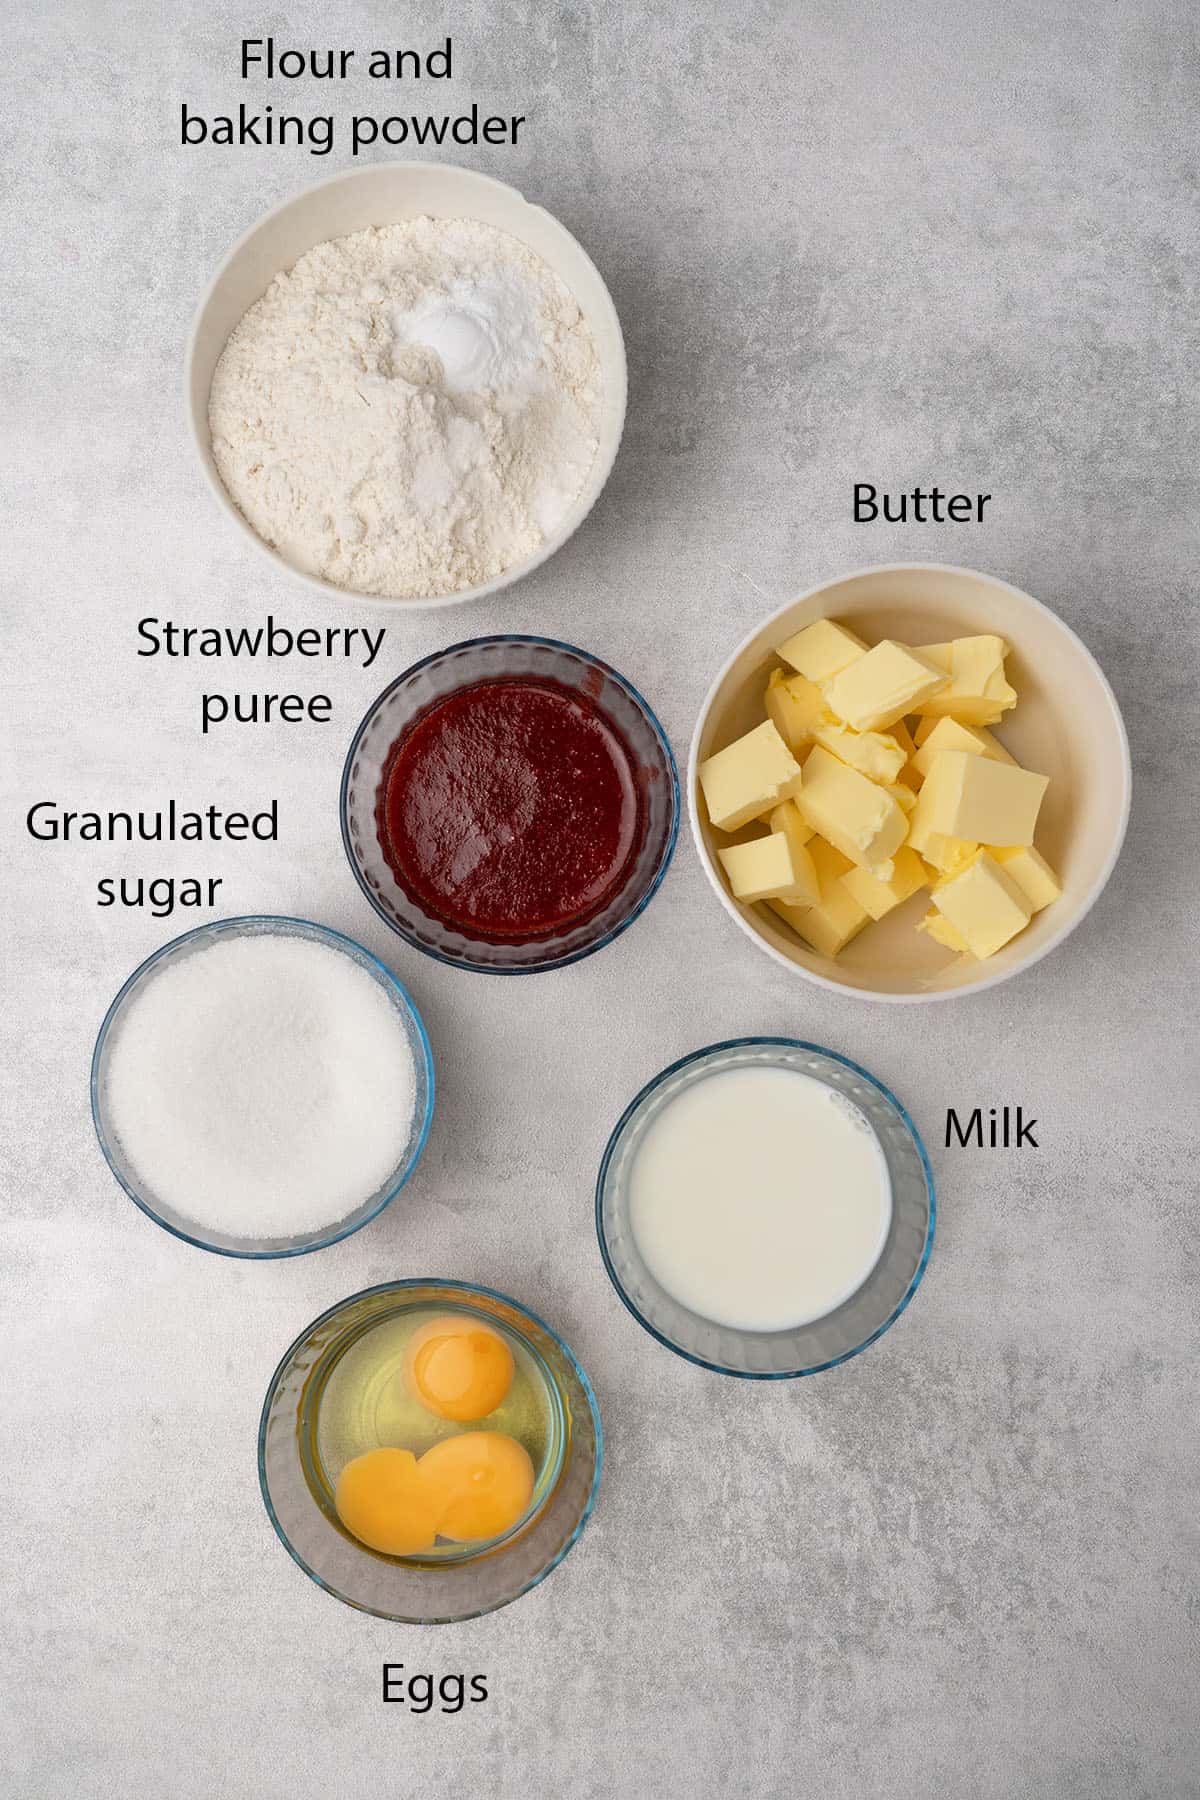
- Butter: Always use unsalted butter in baking to control the quantity of salt. I use European-style butter with an 82% fat content in all of my recipes. For this strawberry crunch cake, the butter needs to be at room temperature, which technically means soft enough to be able to cream. Yet, not too soft or runny. So I suggest you avoid using the microwave to soften the butter. It's best to just let the butter sit out on the counter to come to room temperature
- Sugar: Standard, all-purpose granulated or white sugar is perfectly fine for making strawberry cake. No fancy sugar is needed. If you want to learn about the different types of sugar and how to use them in baking, please read my sugar guide.
- Egg: Always use room temperature eggs when baking. Cold eggs will not emulsify properly with the rest of the ingredients.
- Vanilla bean paste or Vanilla extract: For the best flavor avoid using artificial vanilla. There are several great brands of fine pure vanilla. I love to use Nielsen Massey and highly recommend the brand.
- Flour: All-purpose flour or pastry flour makes the best cakes. They are so-called “soft flour”, which is low in protein and creates a delicate and tender texture. It is also always a good idea to sift your flour as it tends to form lumps. If you want to be a pro when it comes to deciding what type of flour to use in your baking, please read my flour guide.
- Salt: An essential ingredient in most dessert recipes. Salt balances sweetness and enhances the flavor of the other ingredients.
- Baking powder: It has two important functions. It increases the volume and lightens the texture of the cake.
- Milk: Room temperature whole milk is the best choice.
- Strawberry reduction: One of the most important strawberry cake ingredients is strawberry reduction, which is a sort of strawberry concentrate that adds freshness to the cake and depth in flavor. See the ingredient and how to make notes below for more detailed information.
- All-natural strawberry extract: You will need a high-quality natural strawberry extract to help intensify and develop the strawberry flavor of the reduction and sponge. The strawberry reduction alone will only produce a mild strawberry taste
- Pink food coloring: You will need some type of pink food coloring to make this recipe. I am all for natural food colorings like beetroot powder etc., yet they will not provide a bright enough color for the Strawberry Crunch Cake. Whenever using food coloring, try to choose a high-quality concentrated gel or powder to achieve the best results. I love Silikomart or Wilton for the brightest colors. And in terms of quantity, how much food coloring to use is hard to give measurements because it largely depends on the brands available in your country. As a general rule, start with a small amount (using a toothpick) and increase it gradually. Please note that while the strawberry reduction does add a pink tone to the batter, it alone will not create a bright enough pink color for this particular cake recipe
🛒 You’ll find detailed measurements for all Ingredients in the printable version of the Recipe Card at the bottom of this post
For the Strawberry reduction
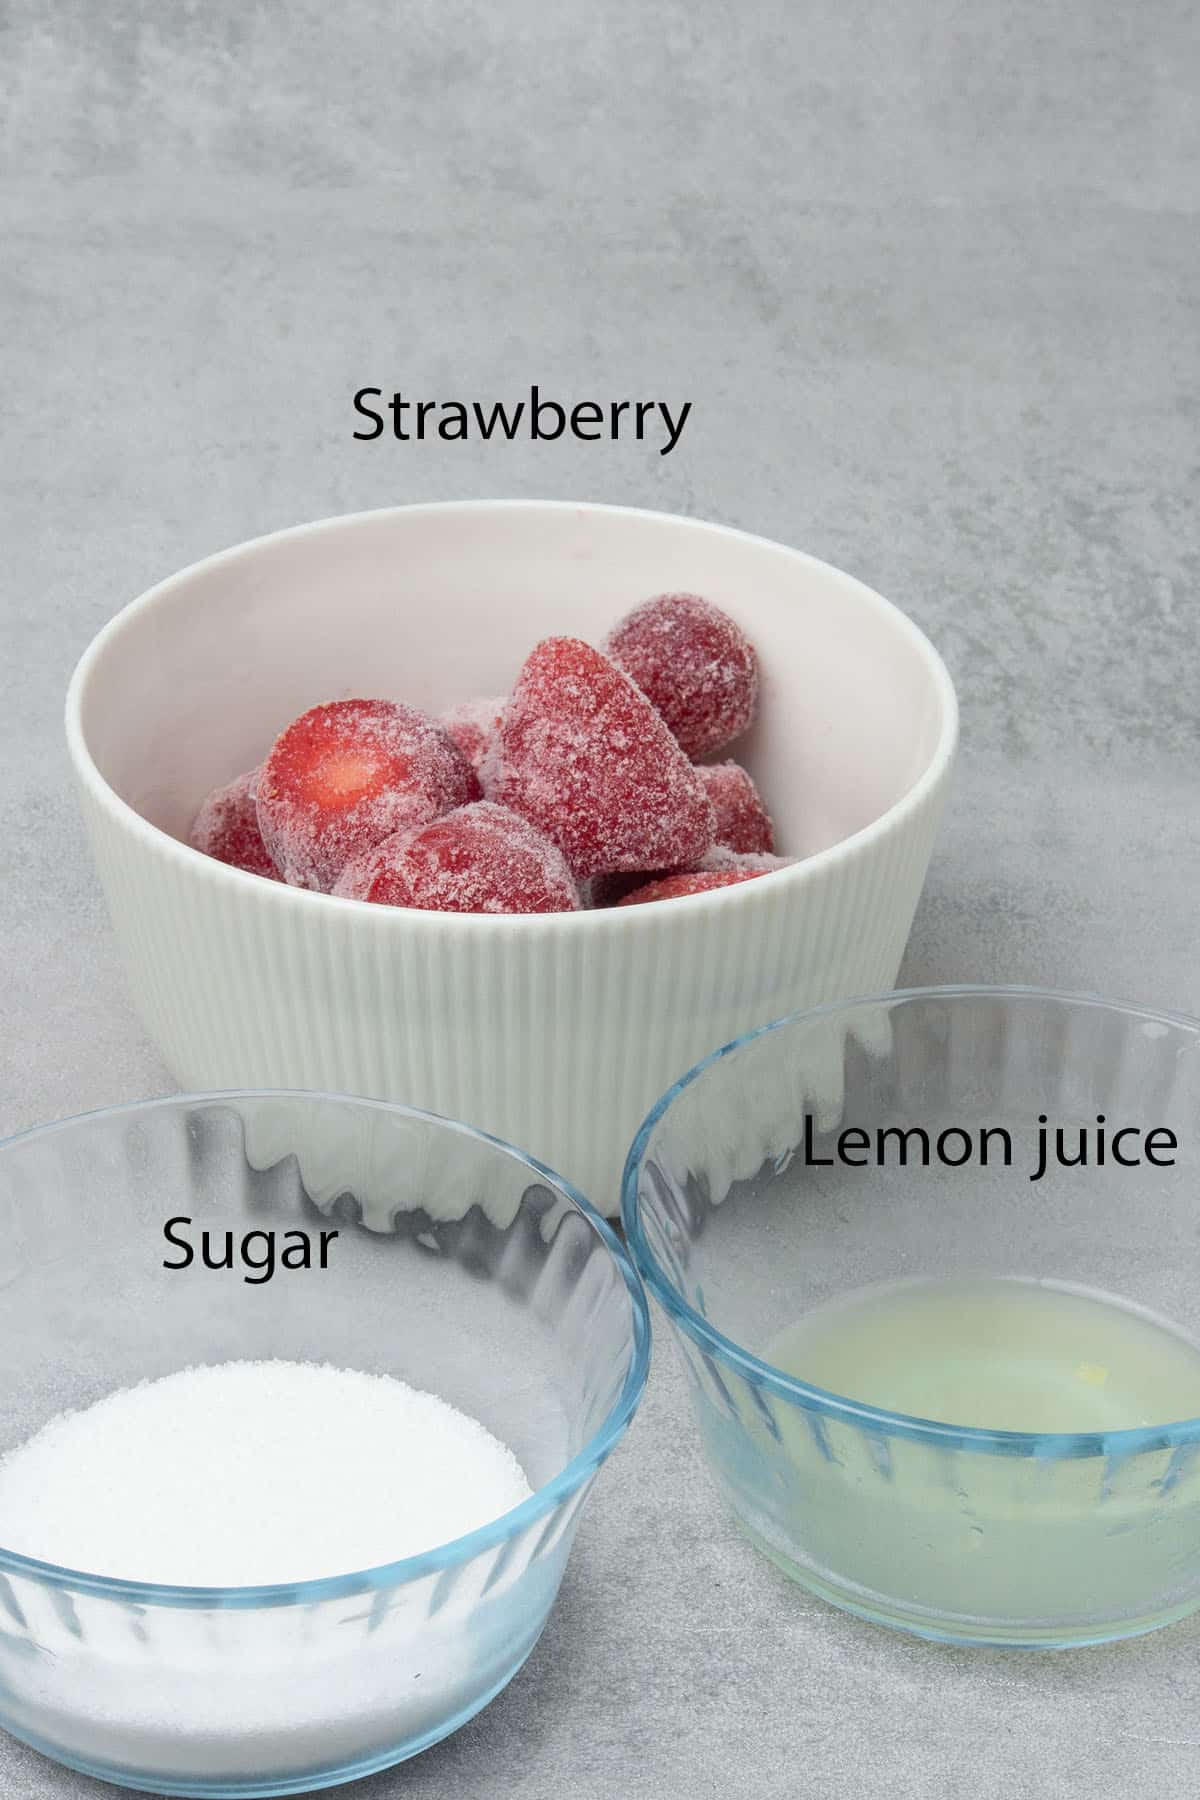
- Strawberries: You will need either fresh or frozen whole strawberries
- Sugar: As per above.
- Lemon juice: Fresh lemon juice is needed to add a touch of acid that will both bring out the flavor of the strawberries and round out the sweetness
🛒 You’ll find detailed measurements for all Ingredients in the printable version of the Recipe Card at the bottom of this post
For the Cream cheese frosting
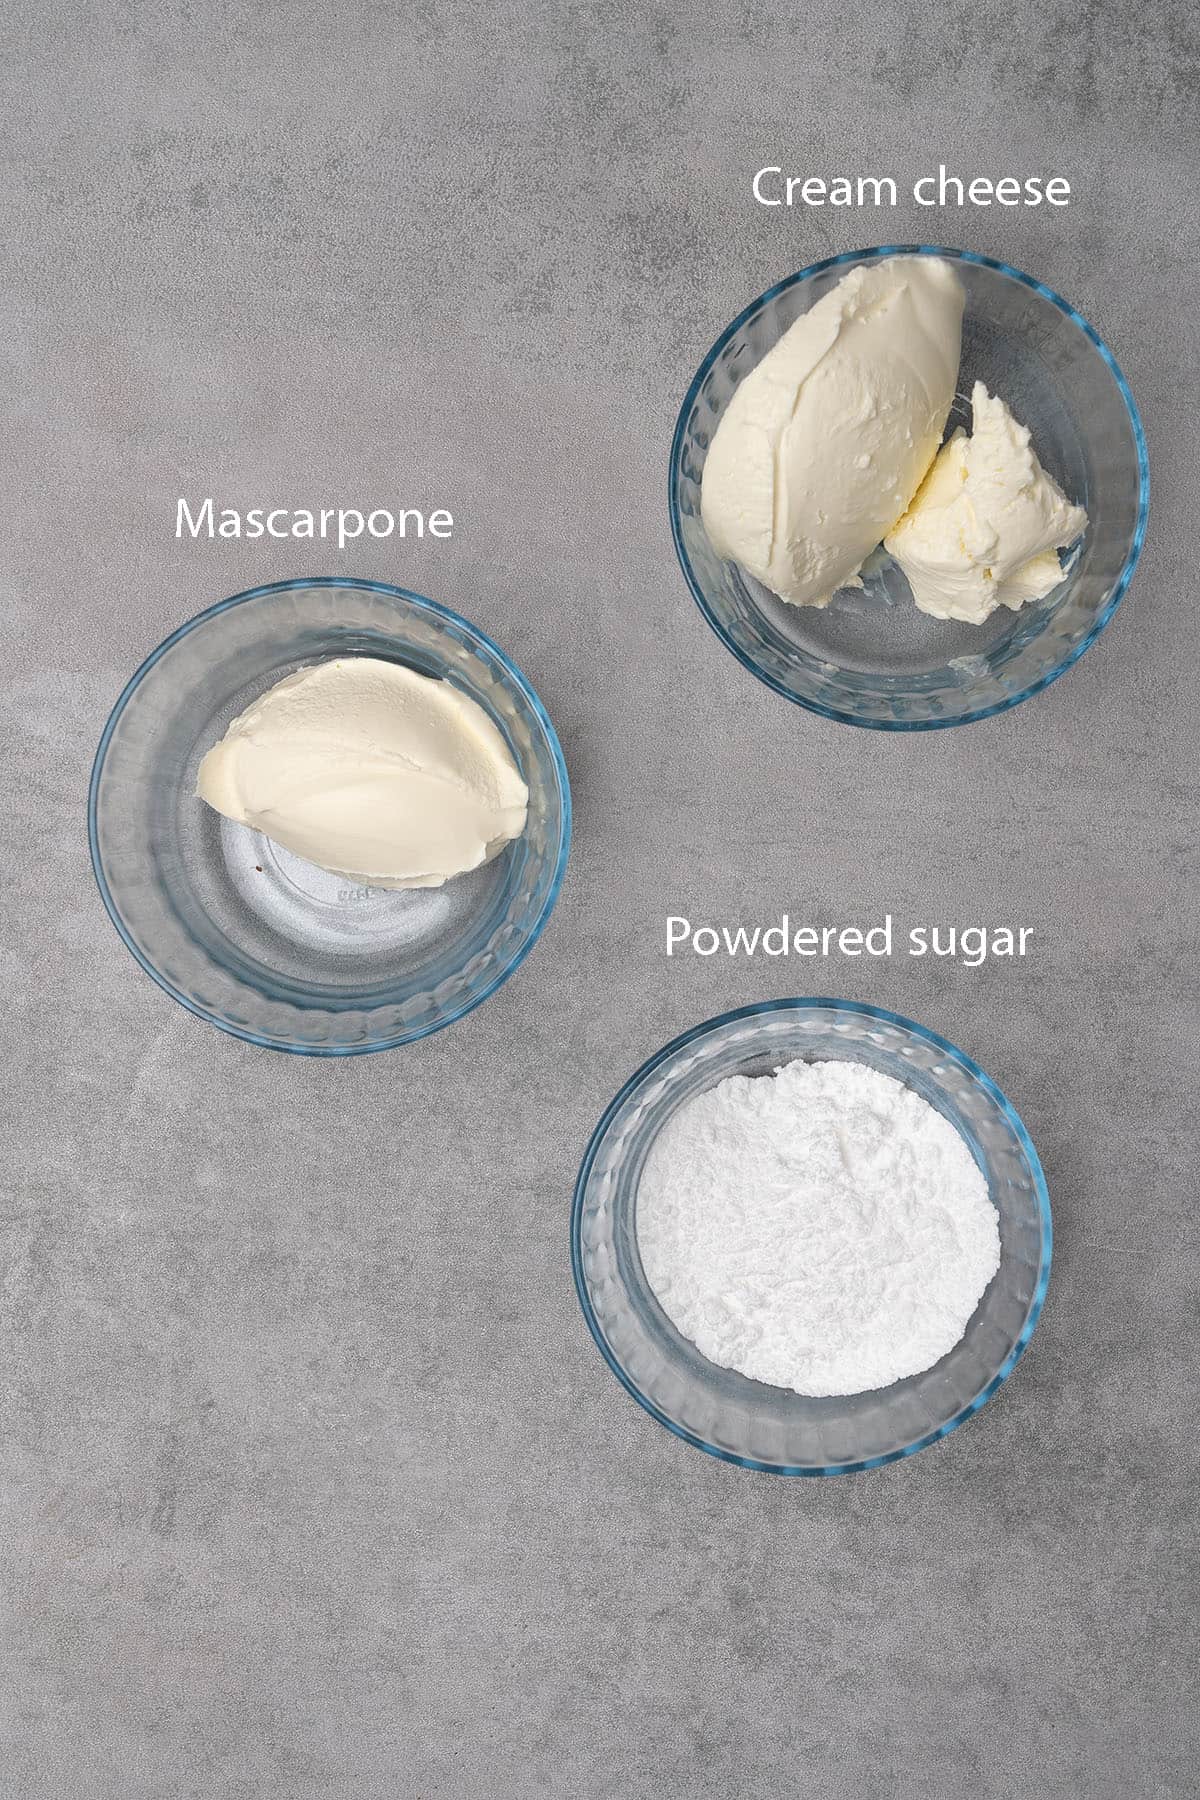
- Mascarpone: A very rich Italian cream cheese that is exceptionally smooth and easy to spread or whip. The flavor is milky and slightly sweet. Always use the full-fat version for this frosting recipe.
- Cream cheese: I always use full-fat Philadelphia cream cheese in all my recipes. I find it the easiest to cream and has a very pleasant taste.
- Icing sugar / Powdered sugar: Powdered sugar is the first choice when it comes to whipping up the frosting. The question I often get is whether or not the quantity is a typo. NO, it's not! You do not actually need a lot of sugar when you are using mascarpone in frosting! Instead of adding more sugar, I like to allow the mascarpone and cream cheese flavors to shine. You will find my tips below for whipping up the perfect cake frosting without butter and without tons of sugar.
- Vanilla bean paste: As per above.
🛒 You’ll find detailed measurements for all Ingredients in the printable version of the Recipe Card at the bottom of this post
For the Strawberry Crunch
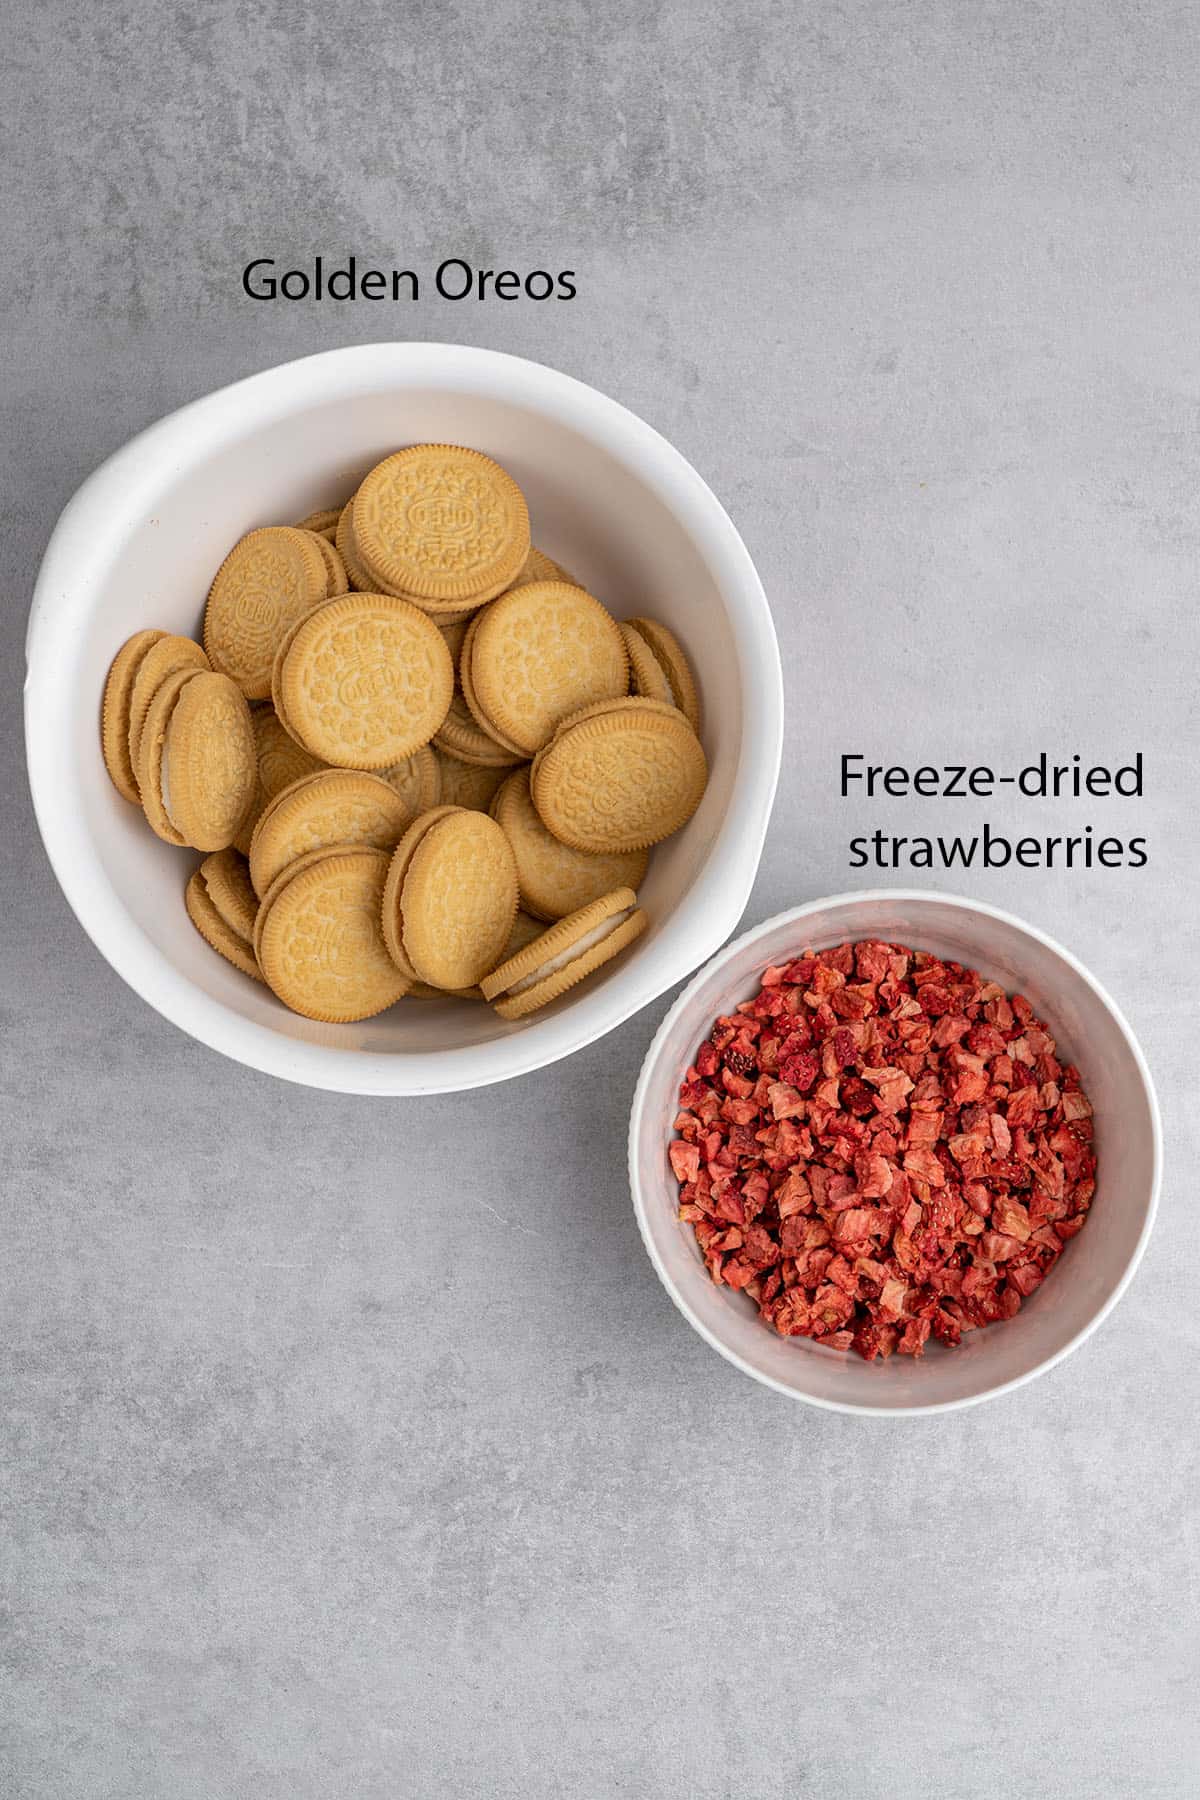
- Freeze-dried strawberries: You want to use freeze dried strawberries for the best results. They are not only the most all-natural choice, but will also add the most flavor to the strawberry crunch.
- Golden Oreos: These are the vanilla-flavored version of the classic Oreo with the same yummy cream center. They add the cookie crunch texture to the crumble.
- Butter: This ingredient is optional depending on your desired crumble size. If you like a more crumbled texture then omit the butter. For a more sticky crumble and bigger chunks use the butter. In desserts, unsalted butter is the best choice to help control the saltiness. I use European-style butter with an 82% fat content in all my recipes.
- No strawberry jelly: I don't use jelly in my recipe. Unlike the butter, jelly turns the crumble crunch into mush over time and simply doesn't work. That's why the freeze-dried strawberries are the star of the show in this recipe. When crushed the freeze-dried strawberries not only add the most delicious sweet strawberry flavor, but add even more color and brightness to the crumble without the use of food dyes and chemical extracts.
- Salt: As per above.
🛒 You’ll find detailed measurements for all Ingredients in the printable version of the Recipe Card at the bottom of this post
👩🍳 How to make this recipe
1. How to make Strawberry reduction
Making strawberry reduction is a very simple process. You can use either fresh or frozen strawberries and it takes very little effort. To begin, you will need to make a puree by putting the strawberries in a food processor and blending them until smooth. If you are using frozen strawberries, you will want to allow them to partially defrost before making the puree. Once the strawberries have been turned into a puree, all you have to do is follow these few easy steps and your strawberry reduction will come out perfect!
- Pour your strawberry puree into a saucepan. Then, add the sugar and fresh lemon juice and stir to combine.
- Place the saucepan over medium-high heat and bring the strawberry mixture to a boil while stirring occasionally
- Lower the heat and simmer for about 20 minutes to allow the reduction to thicken up and become concentrated
- Once the strawberry reduction has reduced in volume and coats the back of a spoon, remove it from the heat
- Allow the strawberry reduction to fully cool down before adding it to the cake batter. Room temperature ingredients are imperative to the success of your Strawberry Crunch Cake
💡 Top Tip: This strawberry reduction can be also the perfect filling for your summer cakes and cupcakes
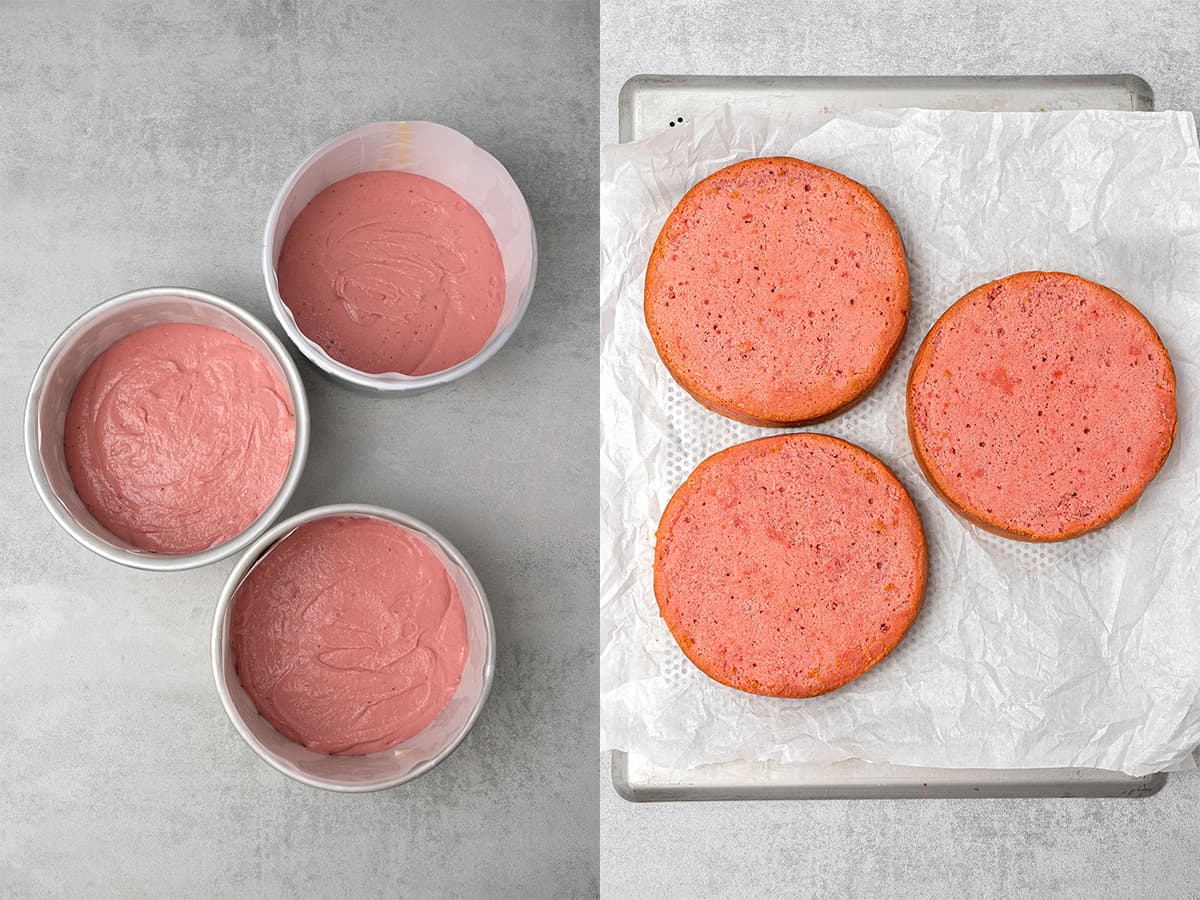
2. How to make Strawberry sponge layers (from scratch)
This strawberry cake is not complicated and very easy to make. All you have to do is follow my simple instructions below and you will have 3 moist delicious layers of sponge in no time! Start by checking how many cake pans you own. Ideally, you want to bake all 3 layers at once to save time and for even baking.
- Preheat your oven to 170 C / 338 F no fan.
- Ingredients must be all measured with a Digital scale.
- Prepare the baking pans (3x 15 cm (6 inch) round cake pan). See more tips below on how to properly prepare baking pans.
- The eggs, butter, milk, and strawberry reduction must all be at room temperature so that they will properly emulsify.
- In a bowl, mix the pink gel food coloring into the milk. It's hard to give a quantity, so use a toothpick and start with a small amount. The milk at this point should be a very bright pink color.
- Add the room temperature strawberry reduction and natural strawberry extract to the colored milk mixture. Then, stir well to combine - these are your "wet ingredients"
- Sift the flour, salt, and baking powder together - these are your “dry ingredients”
- Cream the room temperature butter and sugar together until it is pale and fluffy. Then, beat in the eggs one at a time, followed by the vanilla bean paste.
- Add the wet and dry ingredients gently into the whipped mixture (butter+sugar+egg) in 4 steps: first, add half of the wet, then half the dry, then the remaining wet, and then the remaining dry. Make sure you finish with the dry ingredients.
- At this point, if you are unhappy with the color of your batter, you can mix in some more food coloring until you are happy with the result.
- Divide the cake batter into 3 prepared baking pans by using a Digital scale.
- Bake for approximately 20 minutes. Do not open the oven door while the cake layers are baking.
- Once done, cool the layers and chill the sponges before assembling the cake
Should you come across any issues, please check my article about potential baking problems eg. sinking cake, and how to avoid it.
💡 Top Tip: Do not overbake the sponges as that will result in a dry texture. After 20 minutes of baking, check the middle of the cakes using a toothpick. You want to bake the sponges until a toothpick inserted comes out clean. You can also monitor the edges of the sponge as they will slightly separate from the side of the pan when done.
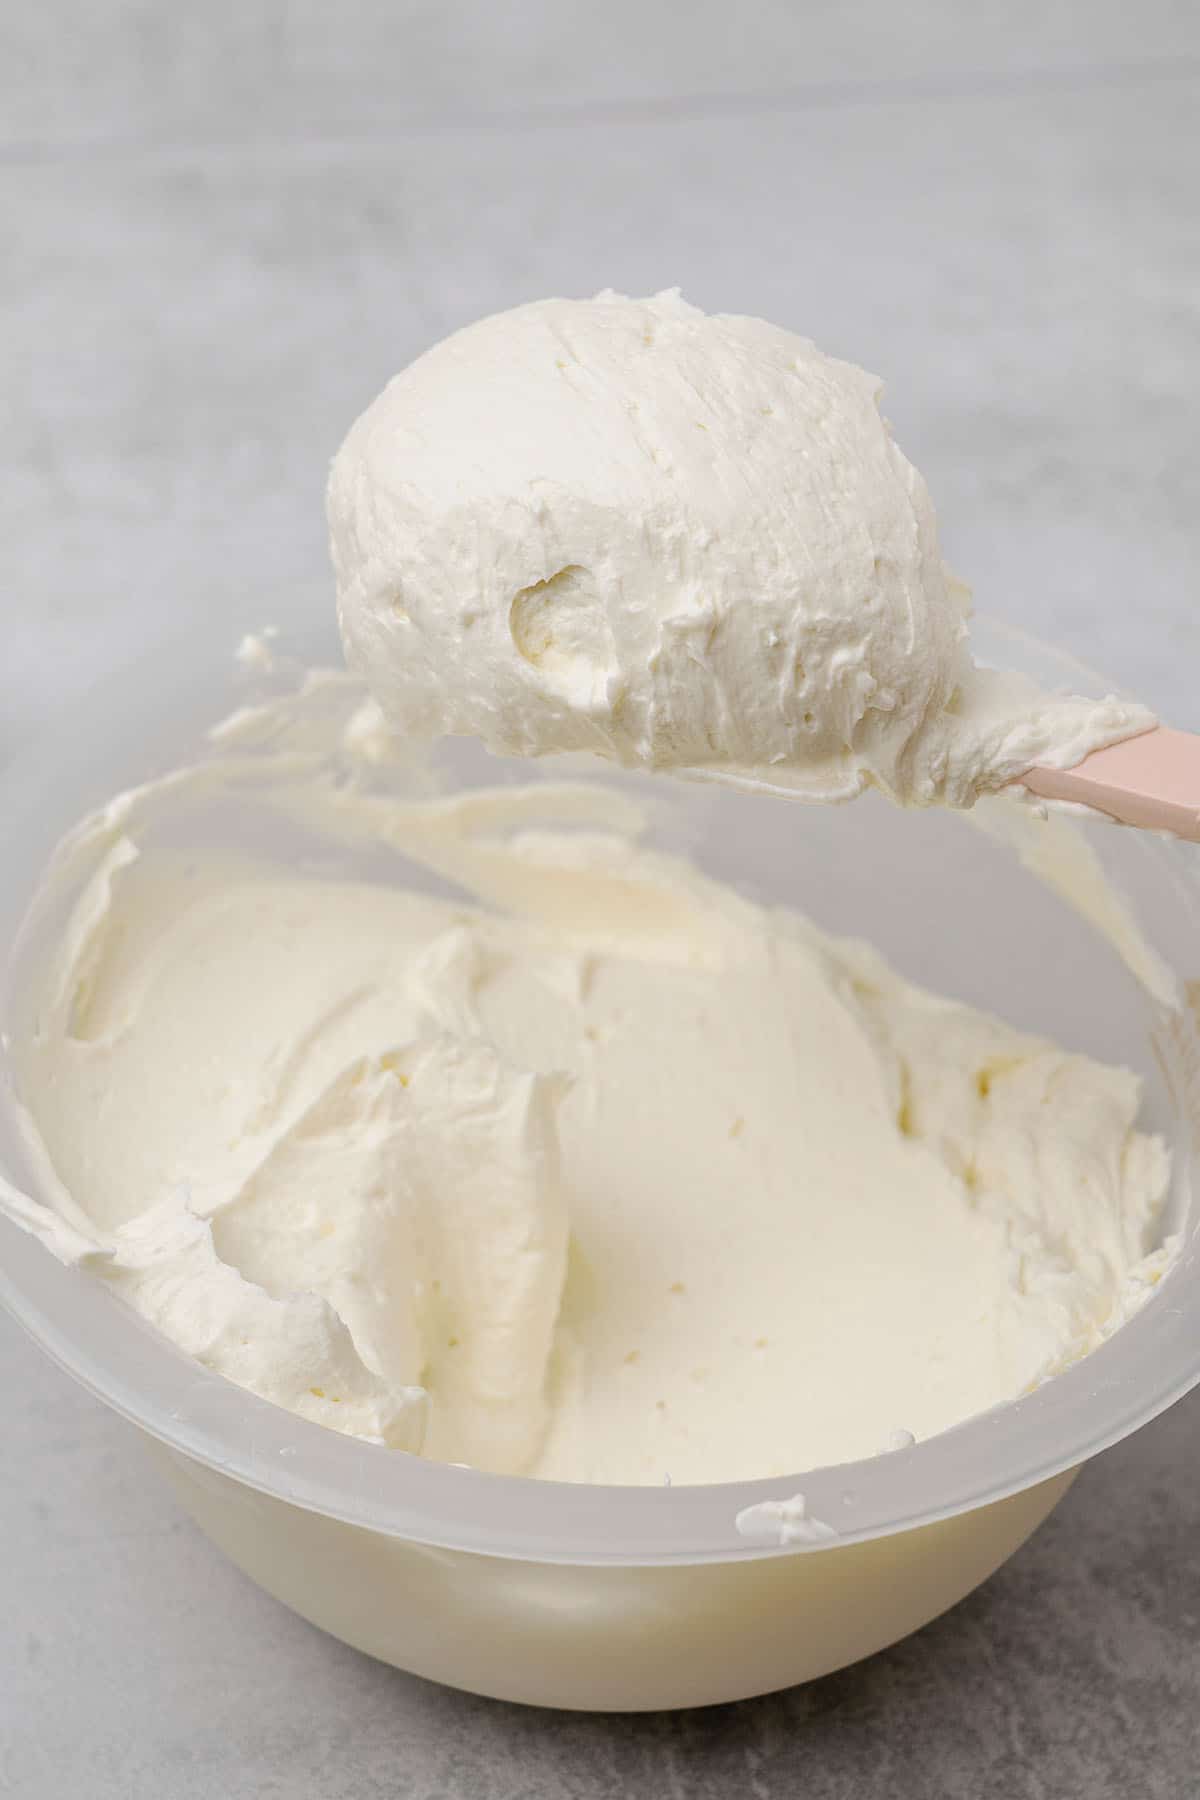
3. How to make cream cheese cake frosting
This frosting is super simple however if you want to learn more about it, check my ultimate cream cheese frosting without butter guide.
It consists of full-fat Philadelphia cream cheese, mascarpone, and a small amount of icing sugar / powdered sugar whipped until it is a pipeable fluffy consistency. I love this recipe and use it to frost my pink cupcakes and my pumpkin bread with cream cheese frosting as well.
It is a super stable frosting that is creamy and milky. Much less sweet than buttercream and way more delicious!
Using the right ingredients at the right temperature is extremely important while making cream cheese frosting.
- The mascarpone should be cold and the full-fat version (41%+) should be used.
- The cream cheese should be also cold and the full-fat version.
- Powdered sugar must be sifted to avoid lumps.
Whip the mixture with an electric hand mixer for a minute or two until it reaches a creamy, fluffy consistency, and then stop. It won't get any stiffer after this point. In fact, if you overbeat it, it will get only runnier and then it will break. I never use my stand mixer to whip this frosting because it really is so easy to overwhip it.
💡 Top Tip: If you do not have mascarpone, the recipe also works with very cold high-fat content (36%) heavy cream as well. But it must be very cold!
4. How to make the Strawberry Crunch Cake crumble
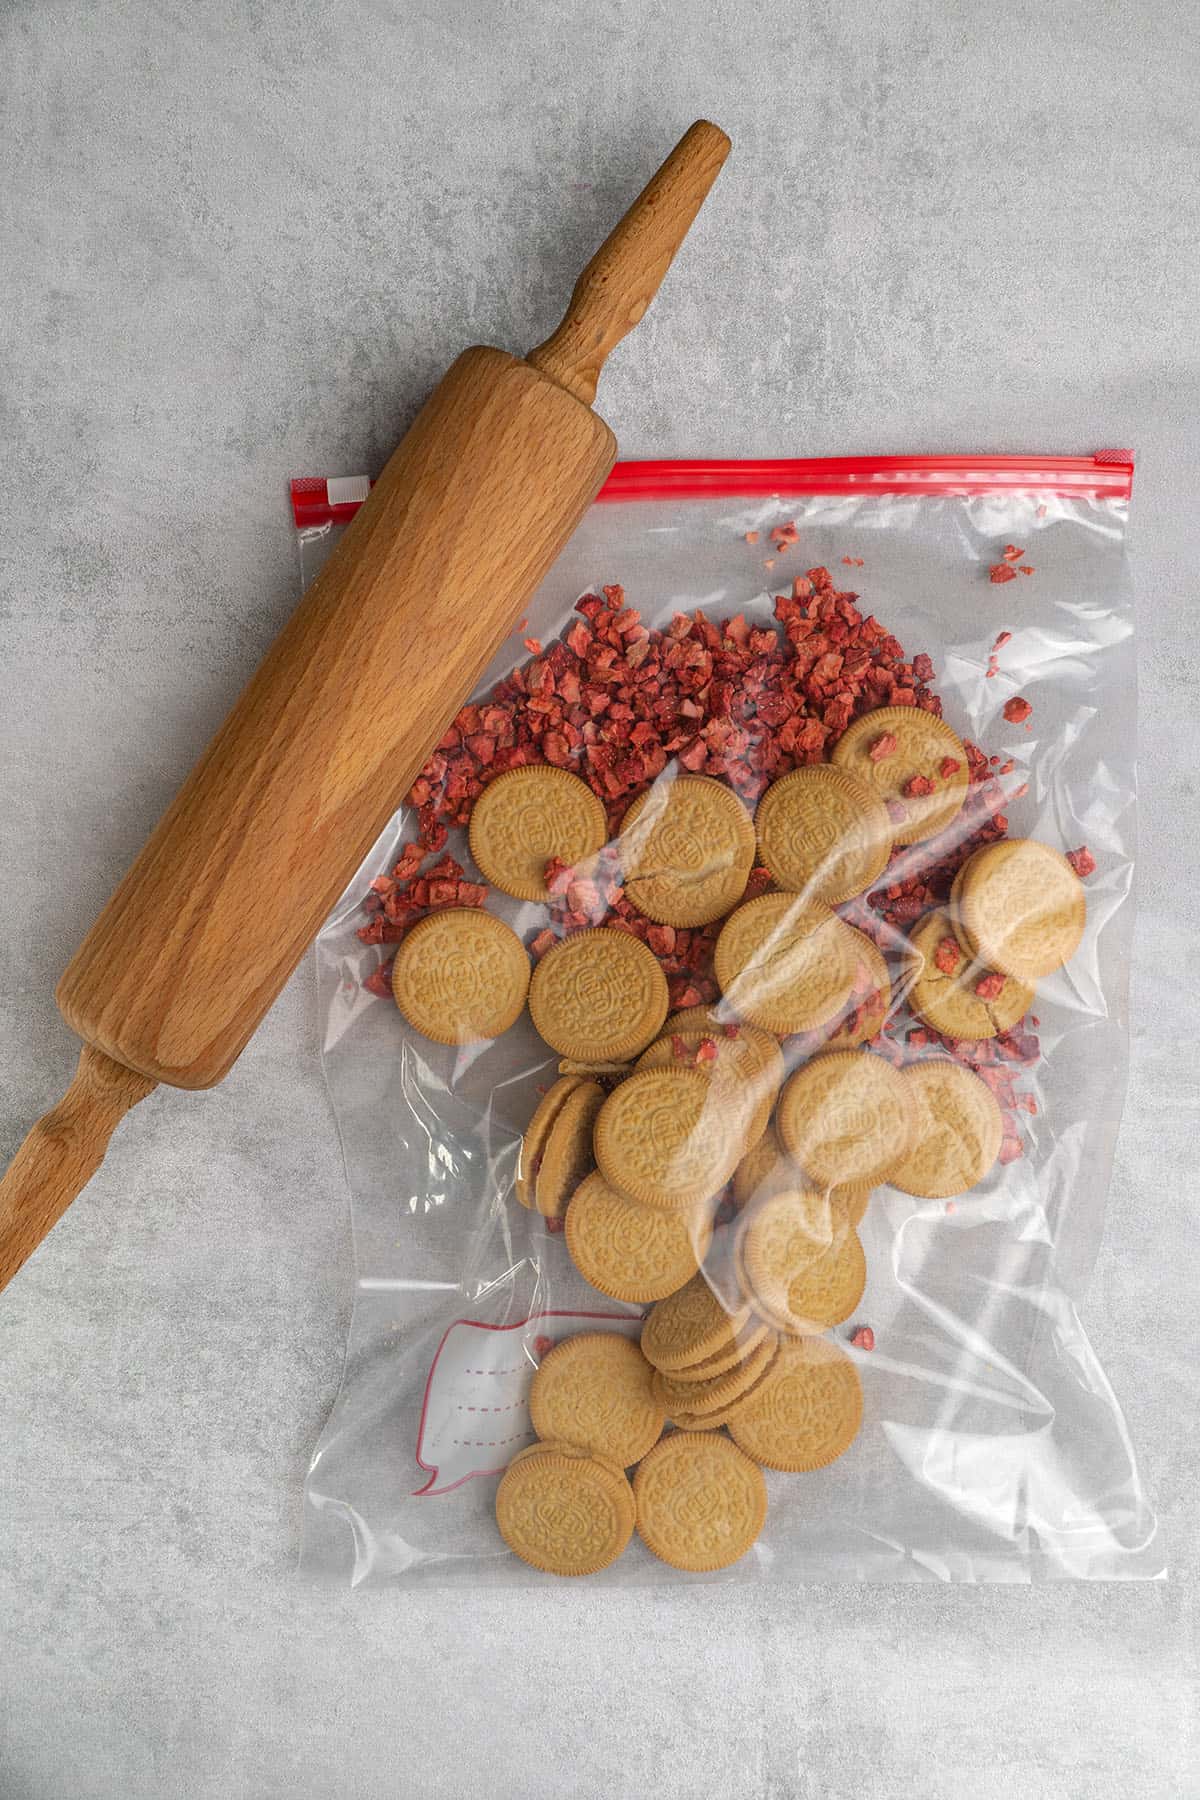
Making strawberry shortcake crumble is a quick and easy process. And it is totally up to you as to whether or not you want to keep it as simple as possible and omit the butter. Or, use the butter in the recipe for added crunch texture and bigger chunks.
You have two different options when it comes to turning the Golden Oreos and freeze-dried strawberries into crumbles for the strawberry crunch. The modern way is by putting the freeze-dried strawberries, Golden Oreos, and salt into a food processor and pulsing them together until they are evenly sized crumbles.
Or, you can do it the old-school way by putting the cookies, strawberries, and salt into a ziplock bag and beating it with a rolling pin.
- Once you have crumbled the cookies and strawberries using a food processor or rolling pin, put the mixture into a large bowl and add the salt if you haven't already. You don't want to forget this step as it helps to bring out and balance the sweetness of the strawberry crunch topping.
- Add the butter to the mixture and combine together with the crumble. The butter needs to be melted and still runny for this step. But once the crumble is placed in the fridge the butter cools off and acts as a binding agent creating a yummy crunchy texture.
- After the melted butter is added the mixture may seem a little runny depending on the temperature of the butter, but you do not need to add more crumbled Golden Oreos. The mixture will quickly firm up once it is placed in the fridge.
- Use a plate or sheet pan to spread the crumble out before placing it in the fridge to set. You can also put it in the freezer for about 20 minutes if you are short on time. Just don't forget about it!
As an added bonus! Because this strawberry crumble topping only uses cookies, freeze-dried strawberries, salt, and butter - if you like, there is no need to bake it! It's an amazing no-bake recipe that is super versatile and easy to make!
💡 Top Tip: Do not omit the salt! It beautifully balances out the sweetness and brings out the fruity strawberry flavor
5. How to assemble the cake
Assembling this Strawberry Crunch Cake is a rather simple step-by-step process that is easy to follow. I recommend making the strawberry reduction and cake first. Then, make the strawberry crunch topping while the sponge layers are baking in the oven. Then, once the cake layers are baked and have completely chilled, prepare the cream cheese frosting as per the recipe instructions.
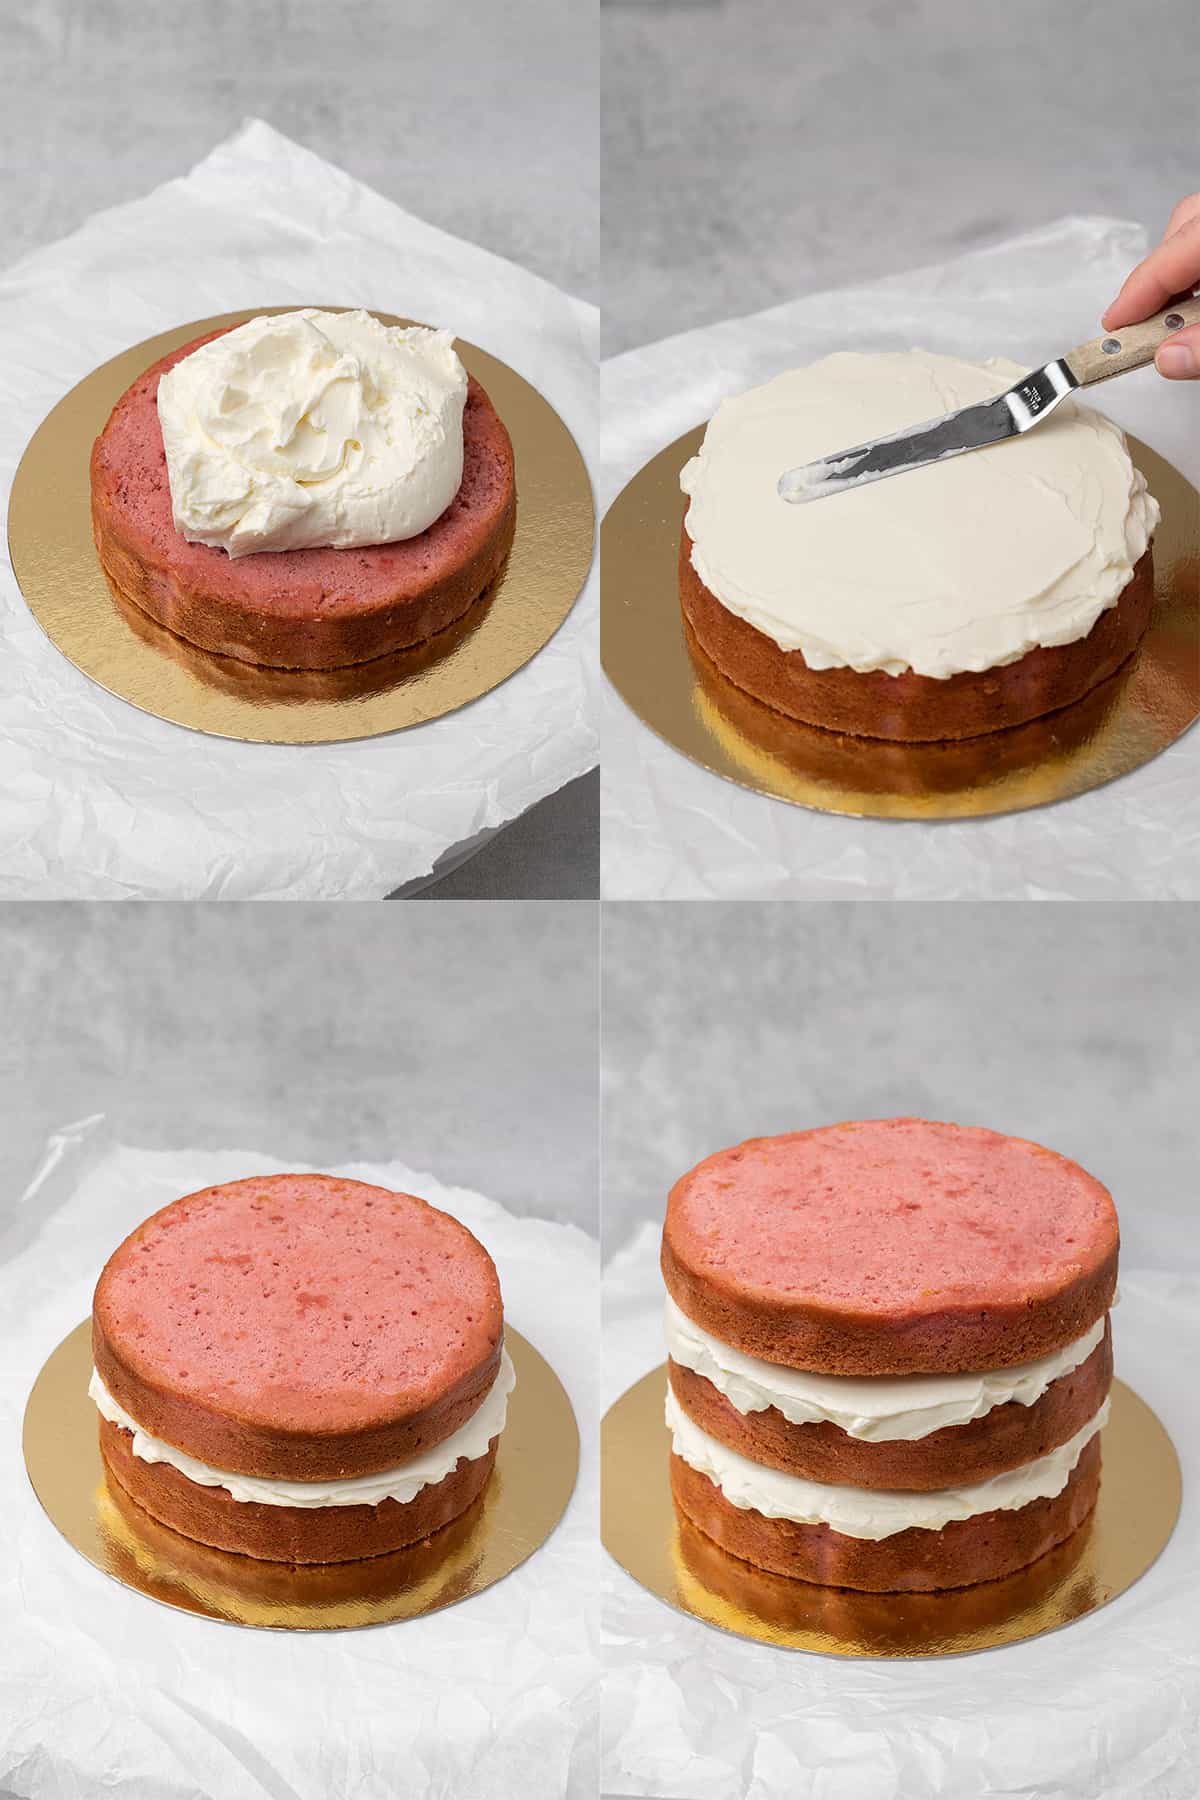
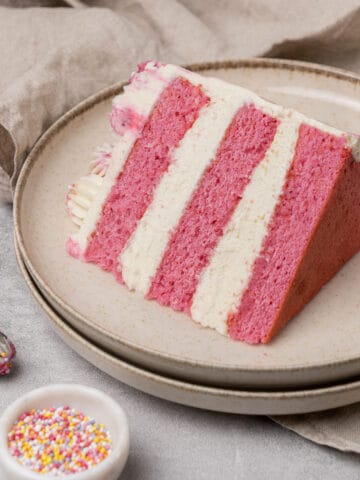
The cake consists of the following layers from bottom to top:
- Pink sponge layer
- 200g Cream cheese frosting
- Pink sponge layer
- 200g Cream cheese frosting
- Pink sponge layer
I suggest the following process:
- Grab your Digital scale and measure the frosting so that the layers will look identical when you cut the cake
- Start to build up the layers from the bottom to the top
- Once the last pink layer is placed, chill the cake for a min of 30 min
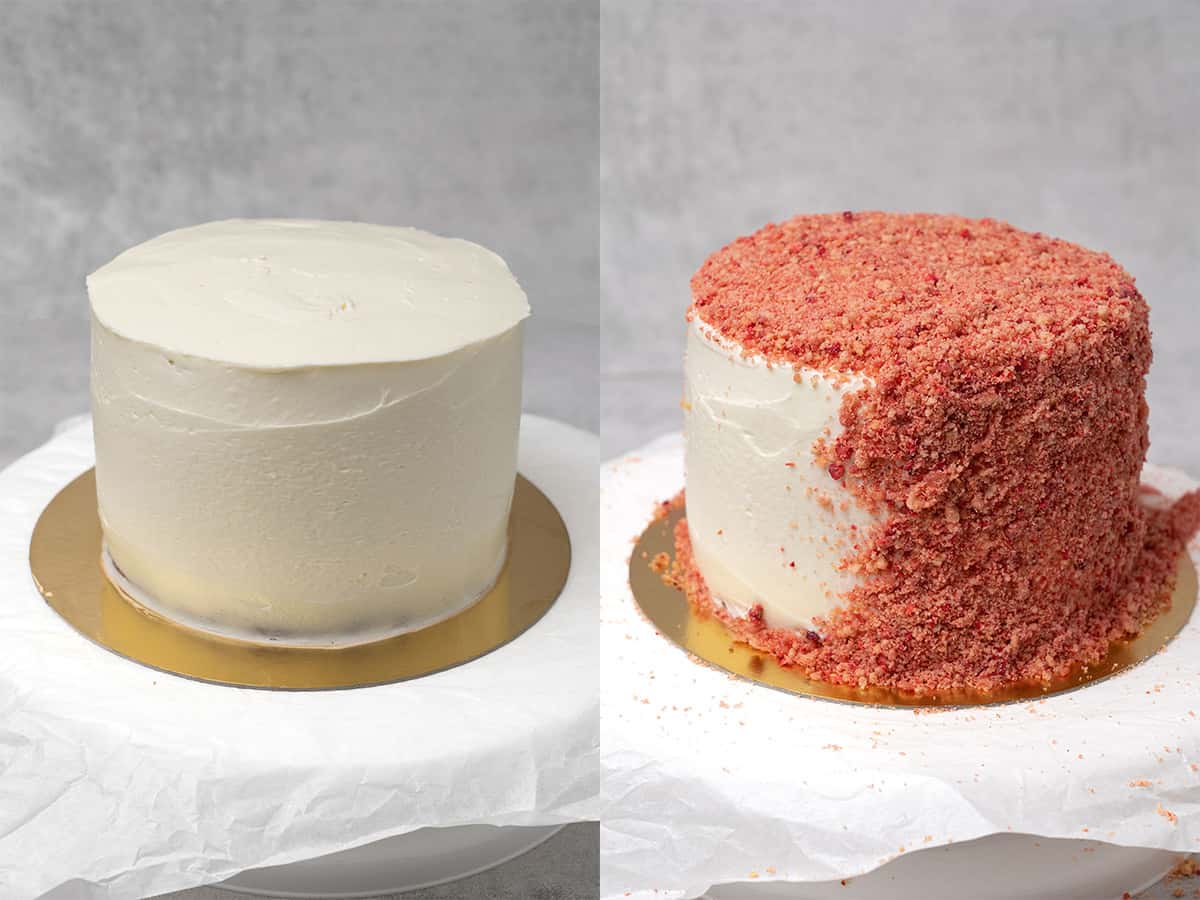
- Crumb coat the cake and then chill the cake again for another 30 min
- Apply the final coating of frosting.
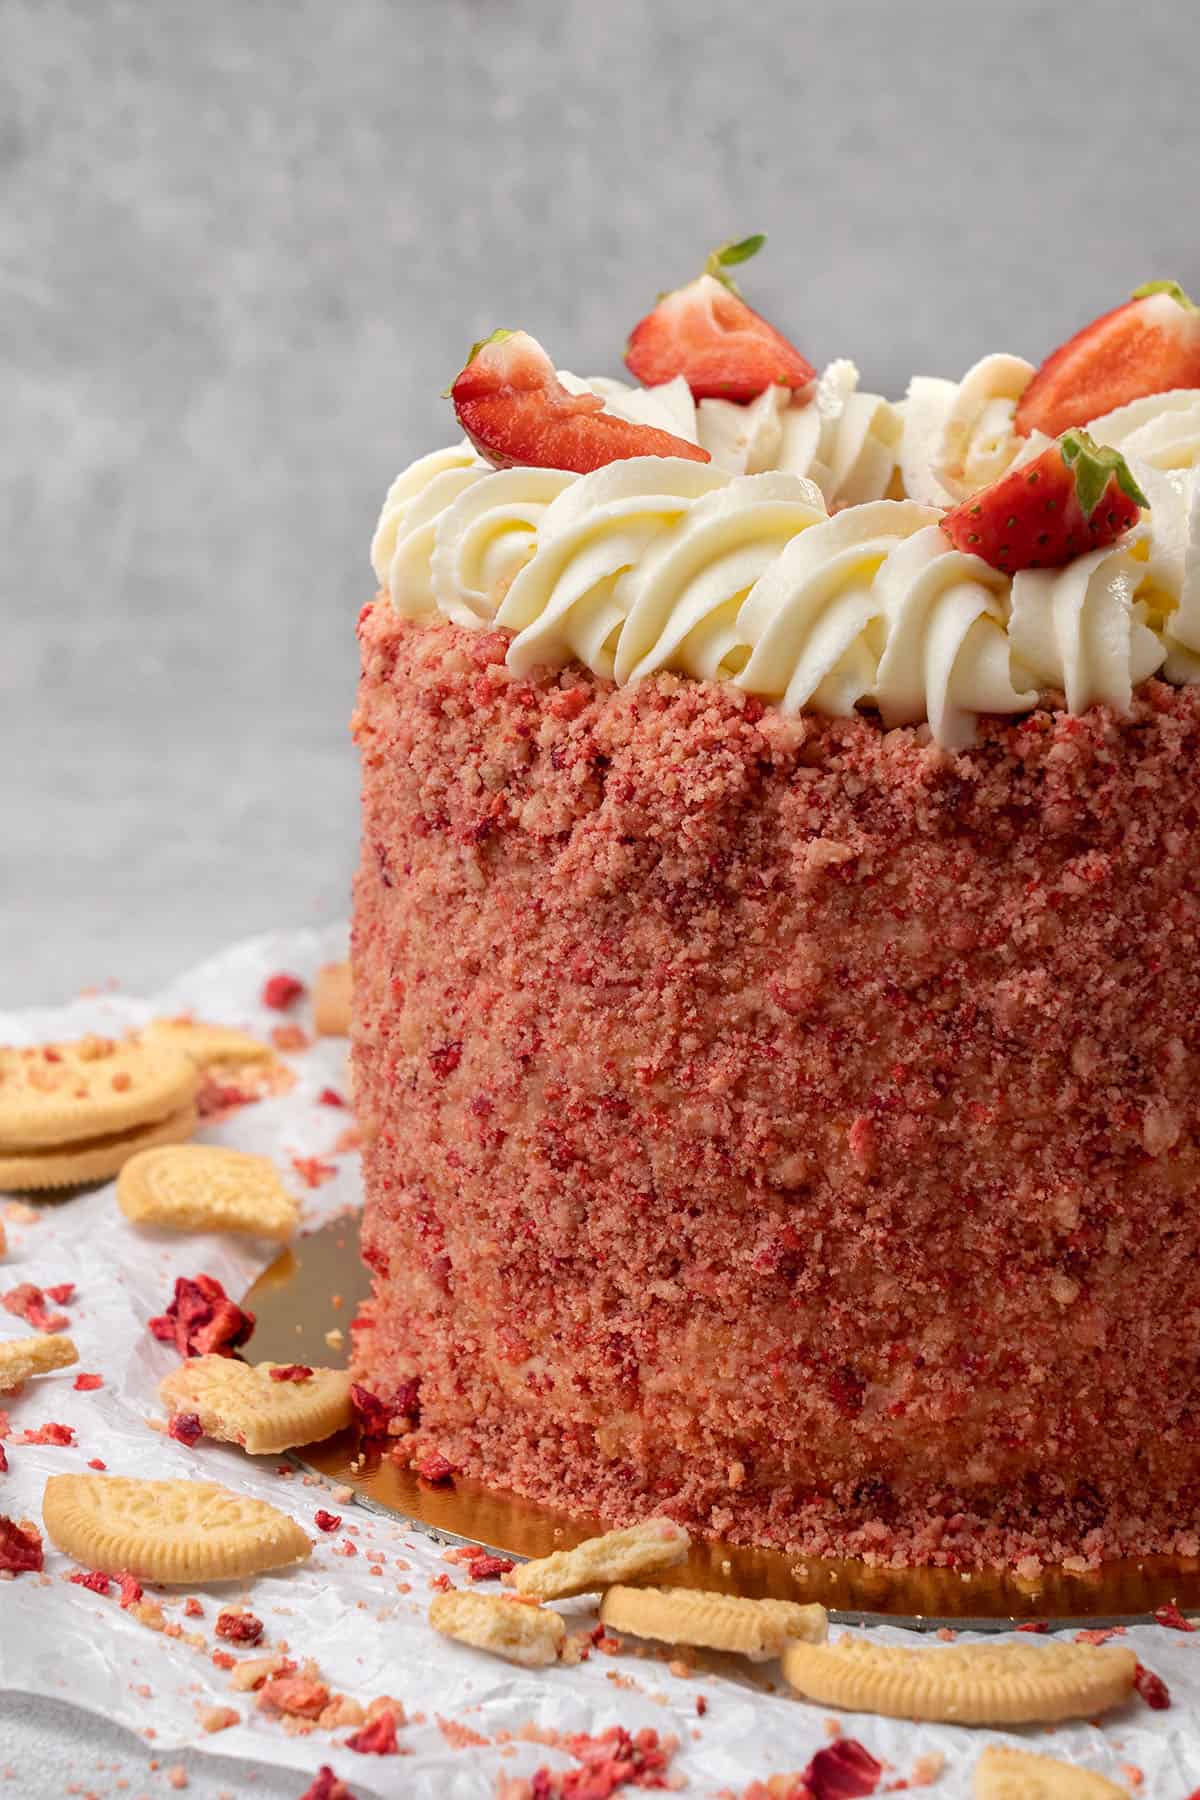
- Cover the cake completely on the top and all sides with the strawberry crunch. You might need to apply the crunch in a few rounds in order to have a thick coating
- Chill the cake one last time for 30 min in the fridge before decorating
Please note that after the final coating you should have enough frosting leftover for the decoration.
💡 Top Tip: If at any point the frosting feels soft or the cake feels unstable, place it into the fridge for 1 hour to chill and then continue on with the next layer.
6. How to decorate
This beautiful Strawberry Crunch Cake with Golden Oreos is very easy to decorate. But it is very important that the cake has fully chilled in the fridge for 1 hour before you begin.
Also, at this point, you need to test the consistency of the frosting to make sure it is stable enough to start piping on the top of the cake. To do this, pipe some of the frosting onto a plate to check. If the frosting won't hold its form or it is too runny you will need to put it in the fridge to firm up and chill.
- Make sure the cake is fully chilled.
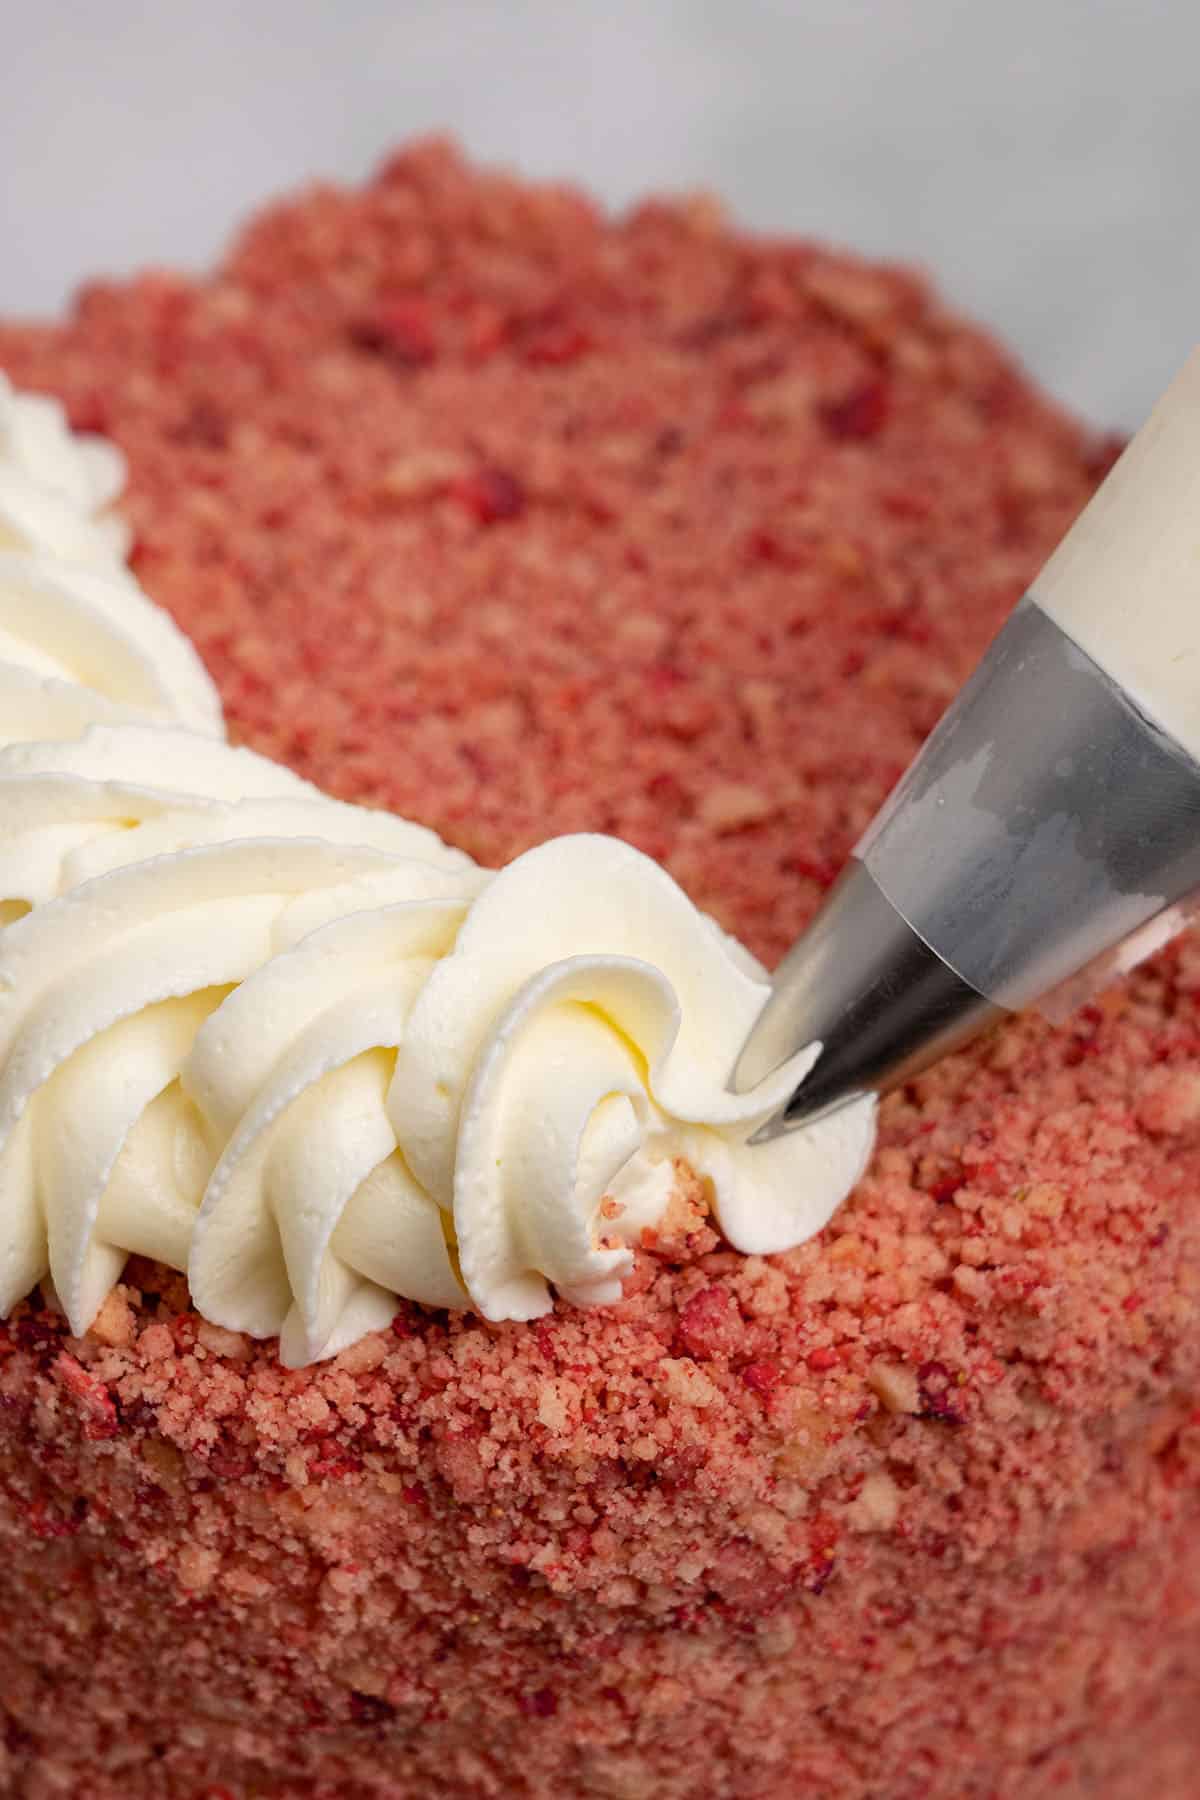
- Pipe the decoration on top of the strawberry cake using a piping bag with a Wilton 1m nozzle tip.
- Add fresh strawberries on top for more decoration and freshness. Or, why not decorate the cake with these white chocolate covered strawberries?
- Place the decorated cake into the fridge to chill for one hour.
And that's it! Your cake is decorated and complete. The Strawberry cake is best served on the same day. Any leftovers can be stored covered in the fridge for 1-2 days.
💡 Top Tip: I find that the cake has the moistest texture 30-60 minutes after removing it from the fridge (straight out of the fridge you might find that it is a bit hard - this is due to butter in the cake batter).
🥣 Equipment notes
I am using relatively small, 15 cm (6 inch) round cake pans. You can use bigger or smaller cake pans if you wish. However, you will need to adjust the ingredients and baking time. You also need to make sure that you divide the batter evenly between the pans for even baking.
To prevent your sponge layers from sticking, it is very important that you properly prepare the cake pans so that you can easily remove the sponges from the tins after baking. To do this: Use a pastry brush, just brush the inside of the cake pans with a tiny bit of oil, and then use parchment paper to line the bottom and sides of the pans as well. The oil is only needed for the parchment to stick to the pans. And make sure you prepare the cake pans before you start mixing the ingredients!
To assemble the cake, a Cake turntable and an Offset spatula are super handy. For decorating the cake I suggest a Piping bag and a Wilton 1M piping nozzle tip.
🎓 Expert tips
- Always use room temperature ingredients so that they will properly emulsify. If your butter, milk or egg is too cold, the cake batter might even break.
- Do not overbake your sponge layers as that will result in a dry texture.
- For the best strawberry flavor do not omit the natural strawberry extract. The Crunch cake recipe needs the extract to develop more flavor
- Allow the strawberry reduction to fully come to room temperature before adding it to the cake batter.
- When using food coloring, avoid cheap supermarket liquid food coloring and aim for high-quality gel or powder food coloring that creates a bright color without needing to use a lot of it.
- Be careful not to break down the cookies and freeze-dried strawberries too much when making the strawberry crunch. You want the texture to be crumbly not like dust.
- Do add the salt to the strawberry crunch topping as it adds depth to the flavors and balances out the sweetness.
- Cream cheese frosting is very easy to overwhip. When whipping the frosting stop as soon as the mixture has reached a fluffy consistency (this will take 1-2 minutes). It won't get any stiffer after this point. In fact, if you overbeat it, it will get only runnier and then break.
- You must chill the sponges before assembling the cake.
- If at any point the frosting feels soft or the cake feels unstable during assembling, place it in the fridge for 1 hour to chill before continuing on with the next layer.
❓Recipe FAQs
Yes of course you can, this recipe works no matter what size or shape of cake you want to bake. However, you will need to adjust the baking time and ingredients accordingly
Probably yes, you can. However, you can't just leave out or change an ingredient without reformulating the entire recipe. When one ingredient changes, some other ingredients need to be changed too in order to keep the balance in the texture and flavor. Sadly, I am not able to provide substitutes for different types of allergies and diets
The most common reasons for dry cake are that the ingredients were not measured correctly, improper mixing technique, or the cake has simply been over-baked
You will want to follow my tips above regarding the frosting ingredients and how to properly whip cream cheese frosting. Both the cream cheese and mascarpone must be the high-fat versions. Also, you must make sure that you stop whipping the frosting as soon as the mixture is fluffy and pipeable. A minute too long will cause it to break and become runny
You can only achieve bright color by using high-quality gel food colorings eg. Wilton, Silikomart, etc. Always avoid using cheap supermarket liquid food colorings, and for this recipe, natural food colorings as well
If you are using the butter in the crunch recipe then non-cream filled cookies will work. However, if you are making your crumble butter free then you must use creme filled cookies to add some fat, which is needed as a binder for the crunchy bits
You may have overprocessed your cookies too much when turning them into a crumble. And if you are using the butter in the recipe, it's possible you may have used too much butter, too little butter, or you simply didn't give it enough time to chill in the fridge to set
Once you assemble the Strawberry Crunch Cake, it should be stored in the fridge. I suggest you cover the cake to make sure it does not absorb any smell from the fridge. Leftover cake - if there is any - can be stored in the fridge for 1-2 days in an airtight container.
I do not recommend freezing the entire cake as the frosting does not freeze well, but you can easily freeze the sponges prior to assembling the cake
🍰 More Cake Recipes
Make sure to also check out my Spring Desserts recipe collection!
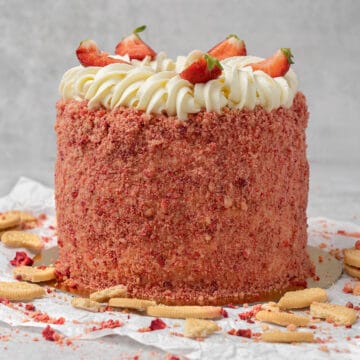
Strawberry Crunch Cake (VIDEO)
Equipment
- Digital scale
Ingredients
Strawberry reduction
- 135 g (½ cups) Strawberry puree Fresh or frozen
- 30 g (2 tablespoons) Granulated sugar
- 8 g (1½ tablespoon) Fresh Lemon juice
For the 3 Strawberry cake layers
- 190 g (¾ cups) Unsalted butter room temp
- 170 g (¾ cups) Granulated sugar
- 3 Eggs room temp
- 1 tablespoon Vanilla bean paste pure paste, eg. Nielsen Massey
- 300 g (2½ cups) All purpose flour sifted
- ½ teaspoon Pinch of salt
- 2 teaspoon Baking powder sifted
- 100 g (⅓ cups) Whole milk room temp
- 90 g (⅔ cups) Strawberry reduction room temp
- Pink food coloring Silikomart or Wilton
- Natural Strawberry extract
Cream cheese frosting
- 900 g (4 cups) Cream cheese full fat eg. Philadelphia
- 300 g (1⅓ cups) Mascarpone full fat
- 150 g (1¼ cups) Powdered sugar sifted
- 1 tablespoon Vanilla bean paste pure paste, eg. Nielsen Massey
Strawberry Crunch
- 215 g (1⅓ cups) Golden Oreos
- 21 g (⅓ cups) Freeze dried strawberry
- 36 g (2 tablespoons) Unsalted butter Melted but not hot. Butter is needed to create the bigger chunks, can be left out if aiming for a more crumble texture
US customary cup measurement is an indicative figure only. Measure the ingredients with a digital scale by weight (gram). Baking is art but also science which requires precision and accuracy.
Instructions
For the Strawberry reduction
- Place strawberry puree, sugar and fresh lemon juice into a saucepan over medium-high heat and bring the strawberry mixture to a boil while stirring occasionally
- Lower the heat and simmer for about 20 minutes to allow the reduction to thicken up and become concentrated. Once it coats the back of a spoon, remove it from the heat and let it cool
For the Strawberry sponge layers
- Heat the oven to 170 C / 338°F (no fan) and prepare 3 baking pans
- Mix food coloring and strawberry extract into room temp milk, then mix it with the strawberry reduction. This is your "wet ingredients"
- Sift flour, salt, and baking powder together, this is the “dry ingredients”
- Cream room temperature butter and sugar together in a stand mixer until pale and fluffy then beat the eggs in, one at a time, finally mix in the vanilla extract
- Add the wet and dry ingredients gently into the whipped mixture (butter+sugar+egg) in 4 steps: first, add half of the wet, then half the dry, then the remaining wet, and then the remaining dry. Make sure you finish with the dry ingredients.
- Pour the cake batter into 3 different baking pans
- Bake them for 20 min or until a skewer inserted comes out clean. Let them cool on a cooling rack before frosting
Frosting
- For the frosting whip mascarpone, cream cheese, vanilla bean paste and powder sugar until smooth and fluffy, this will only take a few minutes. Use a hand mixer and do not over beat as it can become runny
Strawberry Crunch
- Start with the melting butter in the microwave, then let it cool slightly while preparing the crumbs
- The Crumble can be made either in a food processor, or in a ziplock bag beating it with a rolling pin until the cookies and strawberries are evenly broken up not leaving any big chunks
- Then, add a good pinch of salt to balance the sweetness. Add melted but not hot butter to the mixture.
- Once the crumble is placed in the fridge the butter cools off and acts as a binding agent creating bigger chunks. Use a plate or sheet pan to spread the crumble out before placing it in the fridge to set
Assemble and Decoration
- Start building up the cake from the bottom to the top (red) and spread the frosting in between the layers equally. I suggest 200g frosting per layer, use a digital scale to measure
- If at any point the frosting gets soft or the cake gets unstable, place it into the fridge to chill then only after continue
- Once all the layers are assembled, place the cake into the fridge for min 30min to set
- On a turntable apply your first crumb coat around the cake. then let it set for min 30min refrigrated
- Cover the cake completely on the top and all sides with the strawberry crunch. Then, chill the cake one last time for 30min in the fridge before decorating with the remaining cream cheese frosting
- Pipe the decoration on top of the strawberry cake using a piping bag with a Wilton 1m nozzle tip. Add fresh strawberries on top for more decoration and freshness.
- Store the cake in the fridge however let it come to room temp for 30-60min before serving for the softest, most moist texture
Notes
- Measure your ingredients with a Digital scale for accuracy
- While preparing the sponges, make sure all ingredients are at room temperature
- Use high-quality 82% fat content European butter and the best quality vanilla for the frosting
- For the best strawberry flavor do not omit the natural strawberry extract. The Crunch cake recipe needs the extract to develop more flavor
- When using food coloring, avoid cheap supermarket liquid food coloring and aim for high-quality gel or powder food coloring that creates a bright color without needing to use a lot of it.
- Make sure you read my Expert tips section above to maximize your success. A short recipe alone is not able to cover all the necessary details, and science behind baking.
- While baking the sponge layer, remember not to overbake it. Over-baked sponge cake can become too dry
- Cream cheese frosting is very easy to overwhip. When whipping the frosting stop as soon as the mixture reached a fluffy consistency (will take 1-2 minutes). It won´t get stiffer after this point, in fact, if you overbeat it, it will get only runner, then it will break
- Chill the sponges before assembling
- During assembling, if at any point the frosting feels soft, the cake feels unstable during assembling, place it into the fridge for 1h to chill then continue with the next layer


Leave a Reply