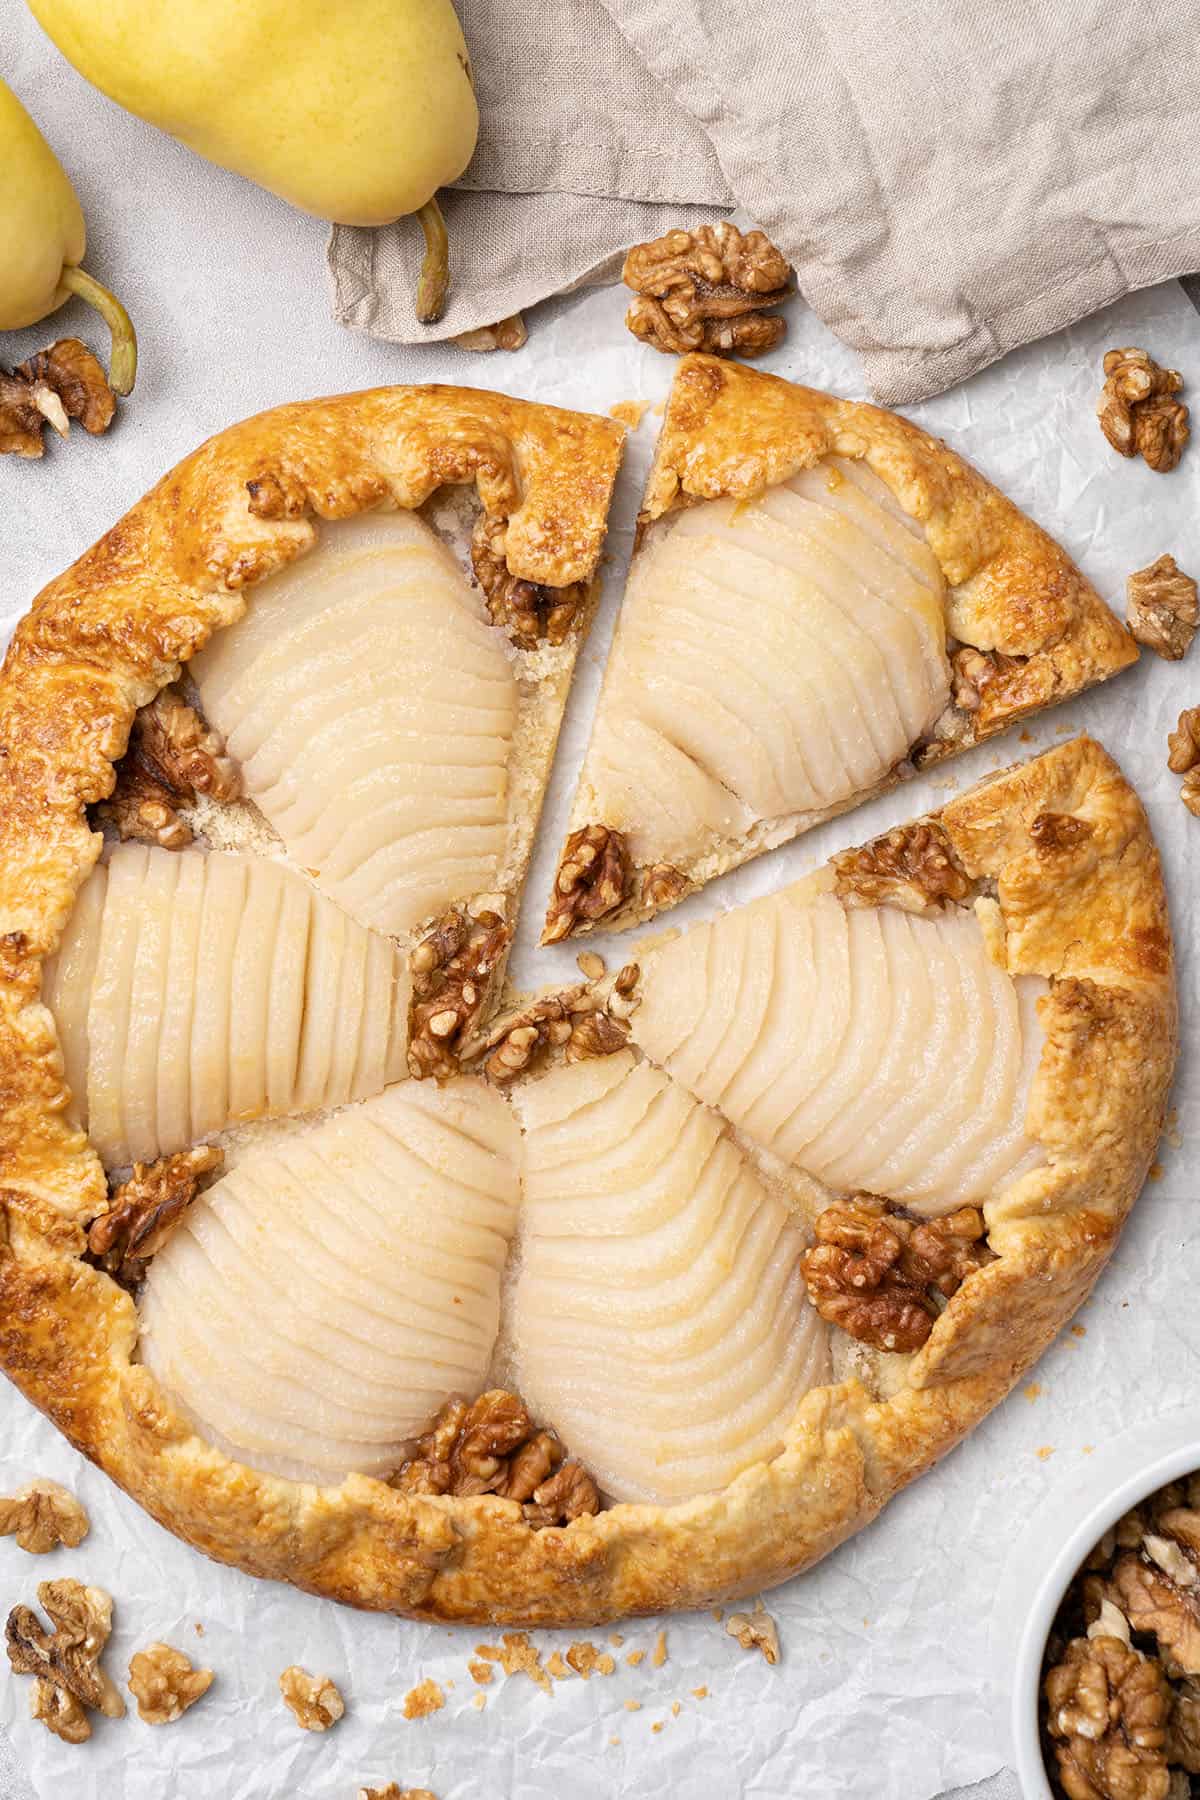
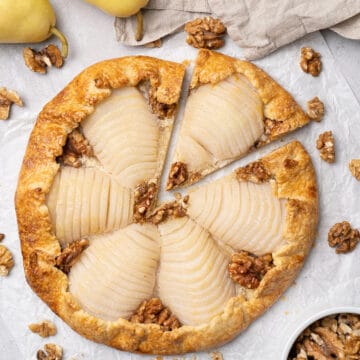
This incredibly delicious Fall Pear Galette is the perfect dessert to welcome the colder weather. Easier to make than pie, it's a super rich and buttery rustic crust that is layered with perfectly spiced tender poached pears that melt in your mouth and some crunchy roasted walnuts to finish with!
Jump to:
📖 What is a galette
A galette is a rustic French dessert that is a cross between a free-form tart and an open-faced pie. This lazy dessert requires no special equipment or fancy techniques. Galettes are the perfect introduction to French pastry for beginners who want to give pie making a go but without all the fuss. They are probably my favorite type of pies!
These free-form pies are quick to make and shaped using just your hands. And just like my popular Strawberry Galette and Peach Galette, they can be filled with almost any type of delicious fruit, nuts, or even cheese. So feel free to be as creative as you like. I even sometimes make a pear frangipane galette by whipping up some frangipane and spreading it on top of the pastry before placing the poached pears on top!
Not to mention, these delicious galettes can be formed into any shape. For example, using this easy pear galette recipe you can make one full-size galette or 2 smaller ones simply by dividing the recipe in half. For a French dessert, you can’t go wrong with a galette!
🌟 Why this is the best recipe
- Easy recipe – This rustic pear galette is super simple to make and perfect for even the most novice baker. I've developed this recipe using basic pantry ingredients and it requires no special skills.
- Crazy delicious – A rich and buttery pie crust is filled with perfectly spiced sweet poached pears to make this incredibly delicious fruit dessert. You can serve it as is, with whipped cream, or topped with a scoop of creamy vanilla ice cream.
- Perfect texture – It's the perfect balance of crisp flakey crust to tender fruit filling. And with a little sprinkle of almond flour on the dough, it not only adds another layer of yumminess but also prevents a soggy bottom!
- No fancy equipment – You don't need any fancy cooking equipment or pans to make this recipe. Your hands, fridge, and oven do most of the work.
- Honest detailed tutorial - This recipe might look long and it does take a few steps, but it's actually not all that complicated to make. Baking is science and the details do matter. However, your success is my goal, so please do not skip my expert tips and FAQs!
📝 Ingredient notes
For the dough
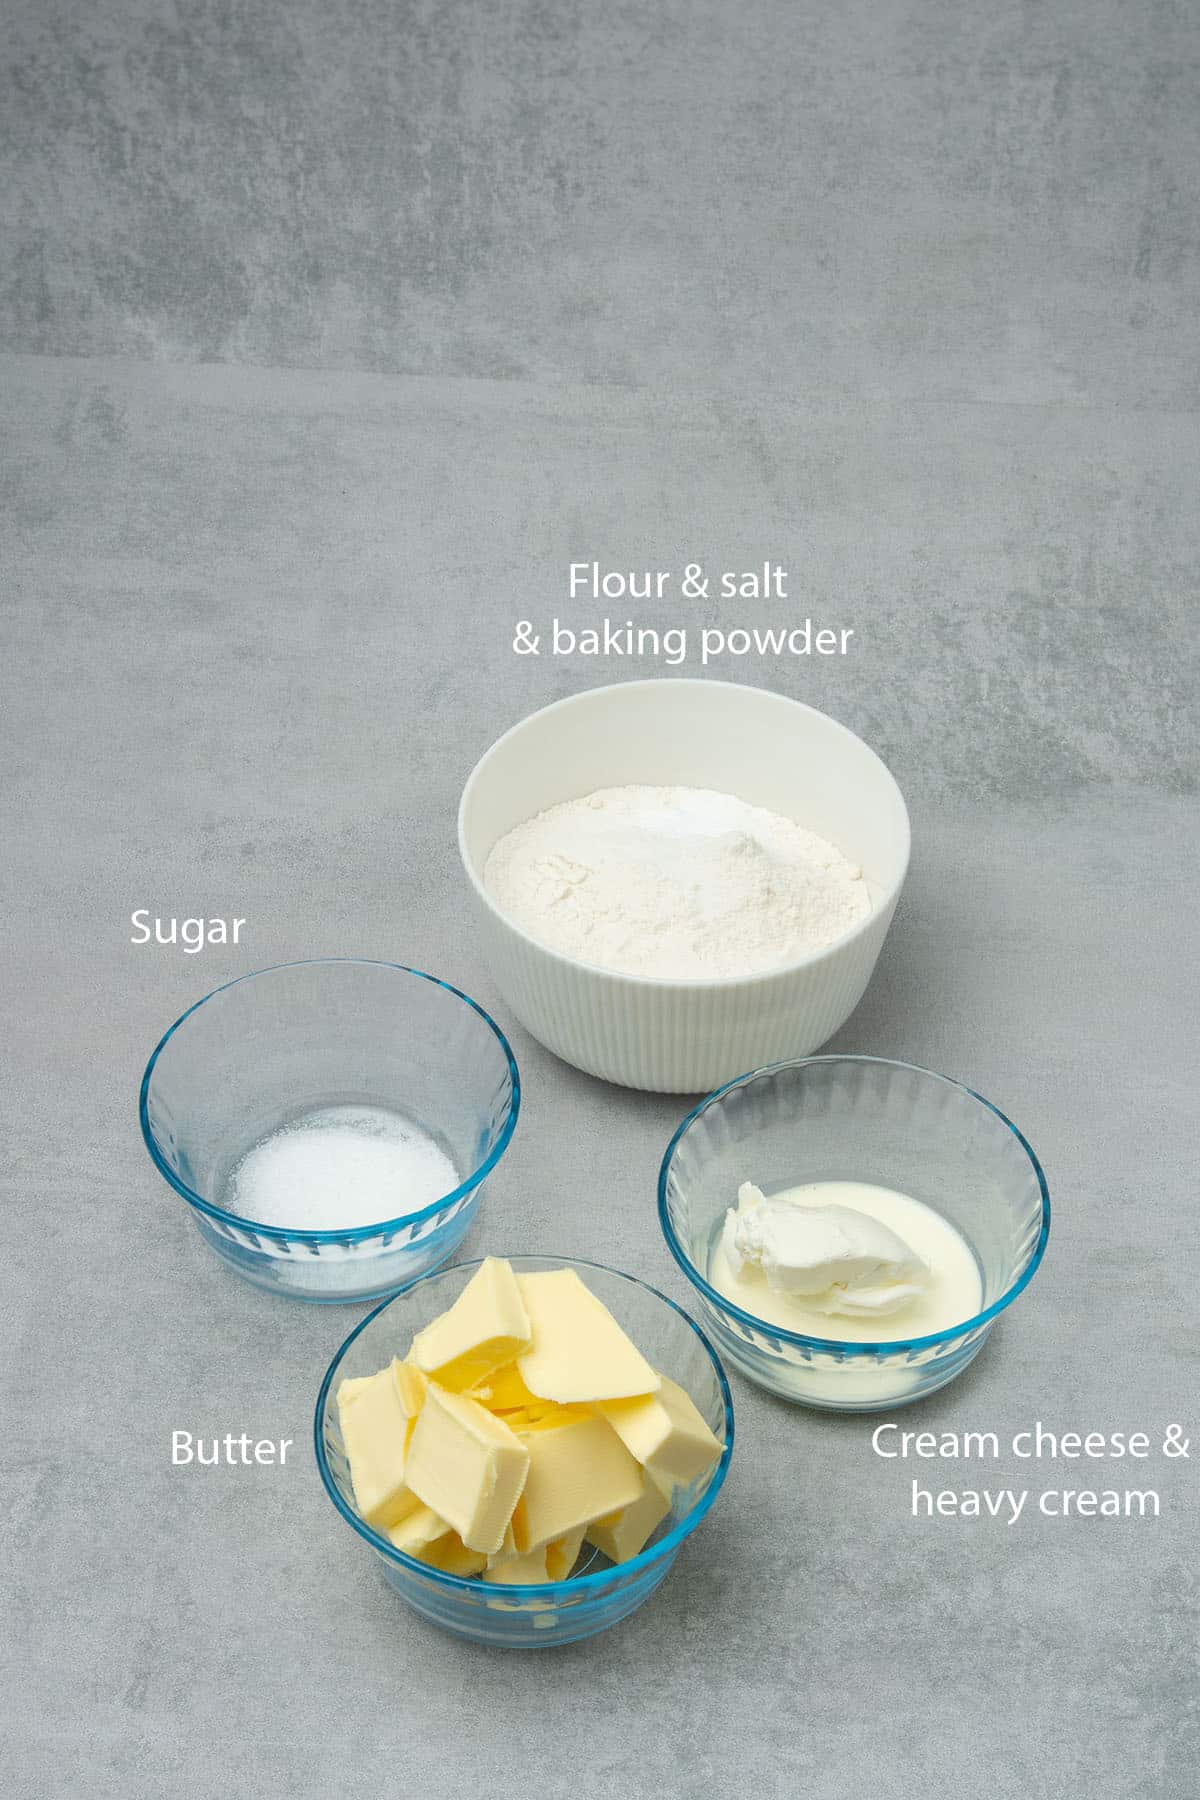
- Flour: You need all-purpose flour or pastry flour for this pear galette recipe. If you want to learn more about different types of flour and how to use them in your baking check out my flour guide.
- Salt: An important ingredient in almost all dessert recipes. Salt helps to both enhance and balance the flavors of all the ingredients.
- Baking Powder: Used as a leavening agent. Just a pinch gives the crust a little rise.
- Sugar: A small amount of granulated sugar complements the sweetness of the pears. However, it's not necessary for the recipe and you can leave it out if you prefer. If you want to become a pro at using different types of sugar in baking, please read my sugar guide.
- Butter: Always use unsalted butter to control the amount of added salt. I use European-style butter with a fat content of 82% in all my recipes. And for this pie crust recipe, the butter must be cold to create the proper dough consistency.
- Heavy Cream: Most pie dough recipes include a small amount of ice-cold water. However, for my galette crust, I prefer using cold heavy cream instead. But if you prefer not to use heavy cream or don't have any on hand, feel free to use an equal amount of cold water in its place.
- Cream Cheese: Cream cheese helps to create an even more tender crust and can not be omitted from this recipe. But Italian mascarpone cheese, which is similar to cream cheese could work as well.
🛒 You’ll find detailed measurements for all Ingredients in the printable version of the Recipe Card at the bottom of this post
For the filling
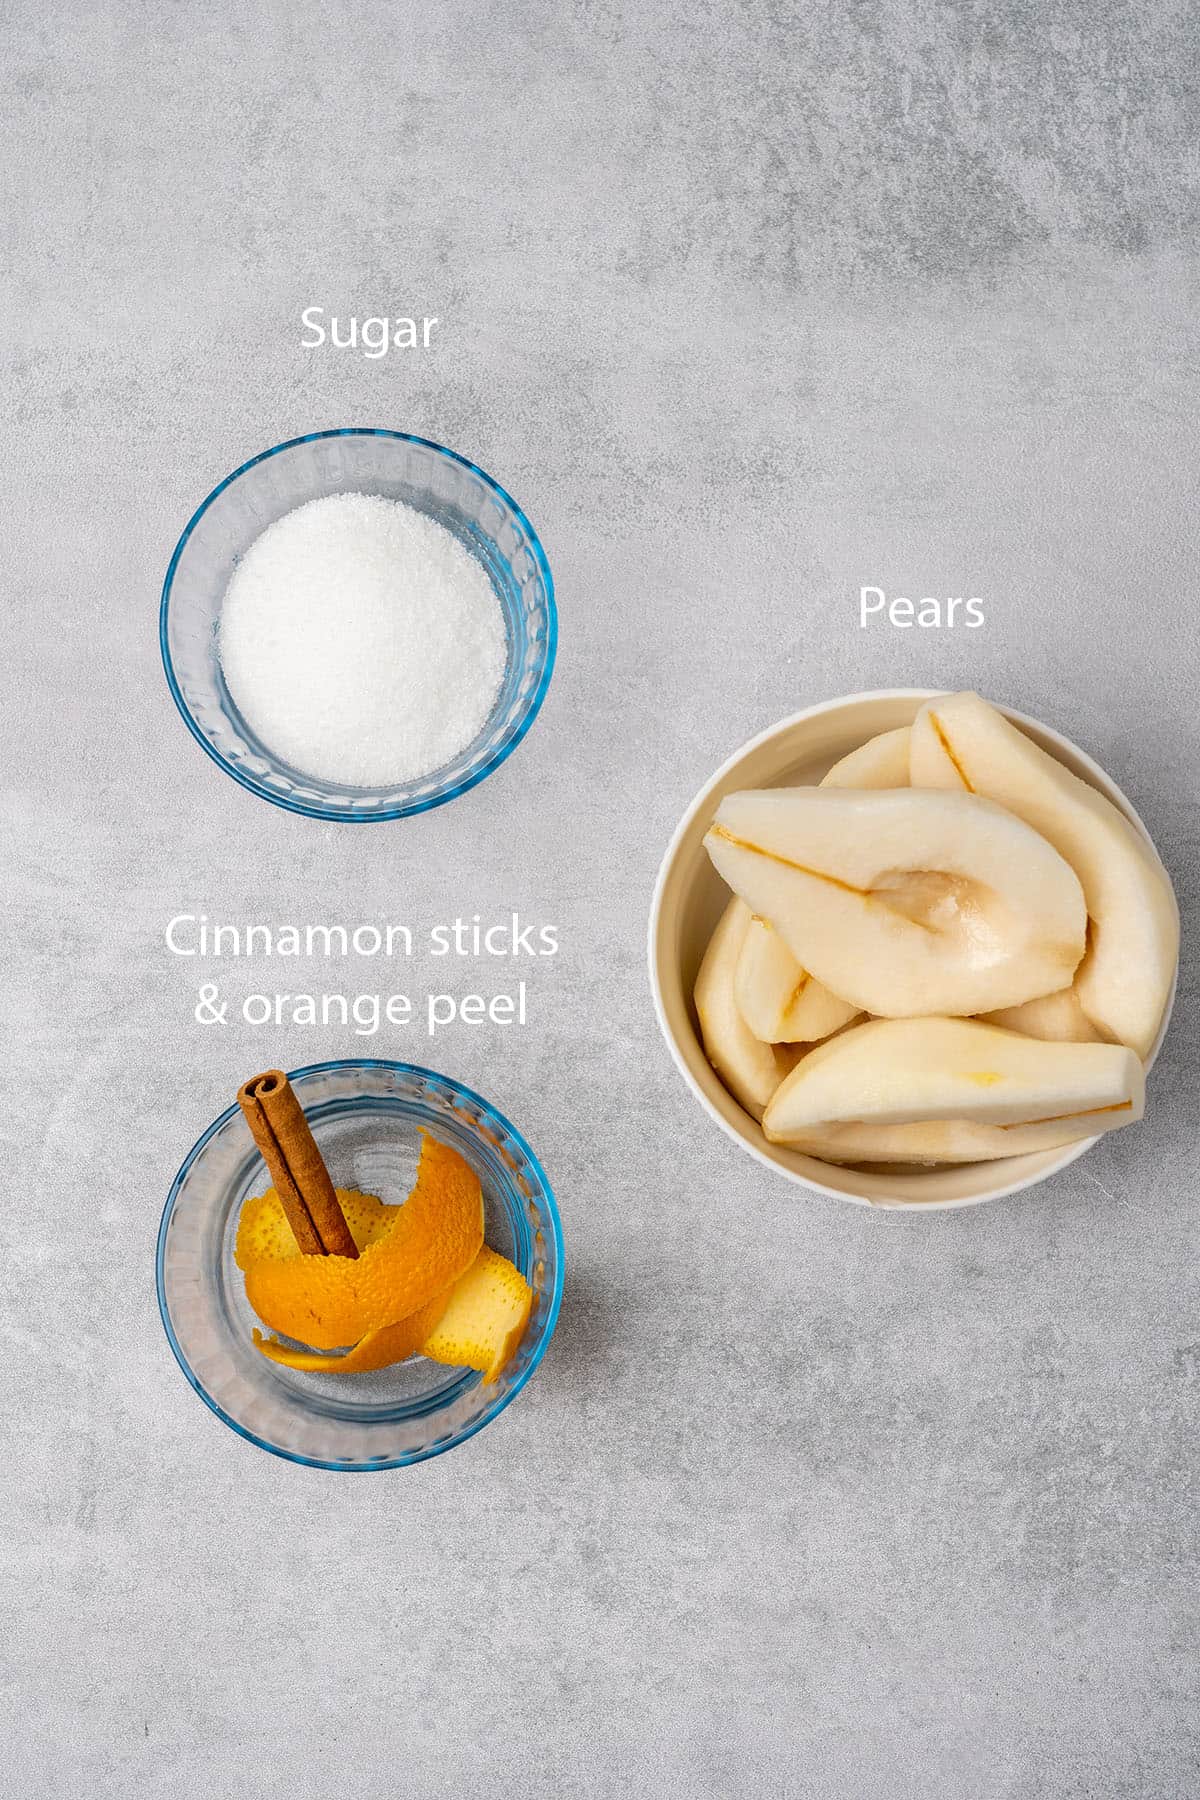
- Pears: You need to choose pears that are firm but crisp like Bosc and Anjou, which will cook perfectly and maintain their shape. Avoid using Bartlett pears because they are far too soft and will turn to mush. You could also use Asian pears if you like to make an apple pear galette.
- Water: Plain water works just fine as the base for the poaching liquid. Yet, you can also replace half of the water with red or white wine if you prefer to poach your pears in alcohol.
- Sugar: Granulated white sugar is used to sweeten the pears, but any type of sugar or brown sugar can be used.
- Spices: Cinnamon sticks, whole cloves, and orange peel are used to flavor the liquid. You could also add some fresh ginger if you like to make a ginger pear galette.
- Walnuts: This is an optional filling ingredient that adds a lovely crunch and another layer of flavor.
🛒 You’ll find detailed measurements for all Ingredients in the printable version of the Recipe Card at the bottom of this post
👩🍳 How to make this recipe
Now, let's dive into the recipe. How to make pear galette? It's very simple and much easier than making pie. Just follow these easy steps and your galette is sure to come out perfect!
1. How to make the pie crust for the galette
The crumbling method is used to make the dough, which is very similar to how my Pâte Sablée recipe is made. The technique is really easy and produces a super flakey pie crust.
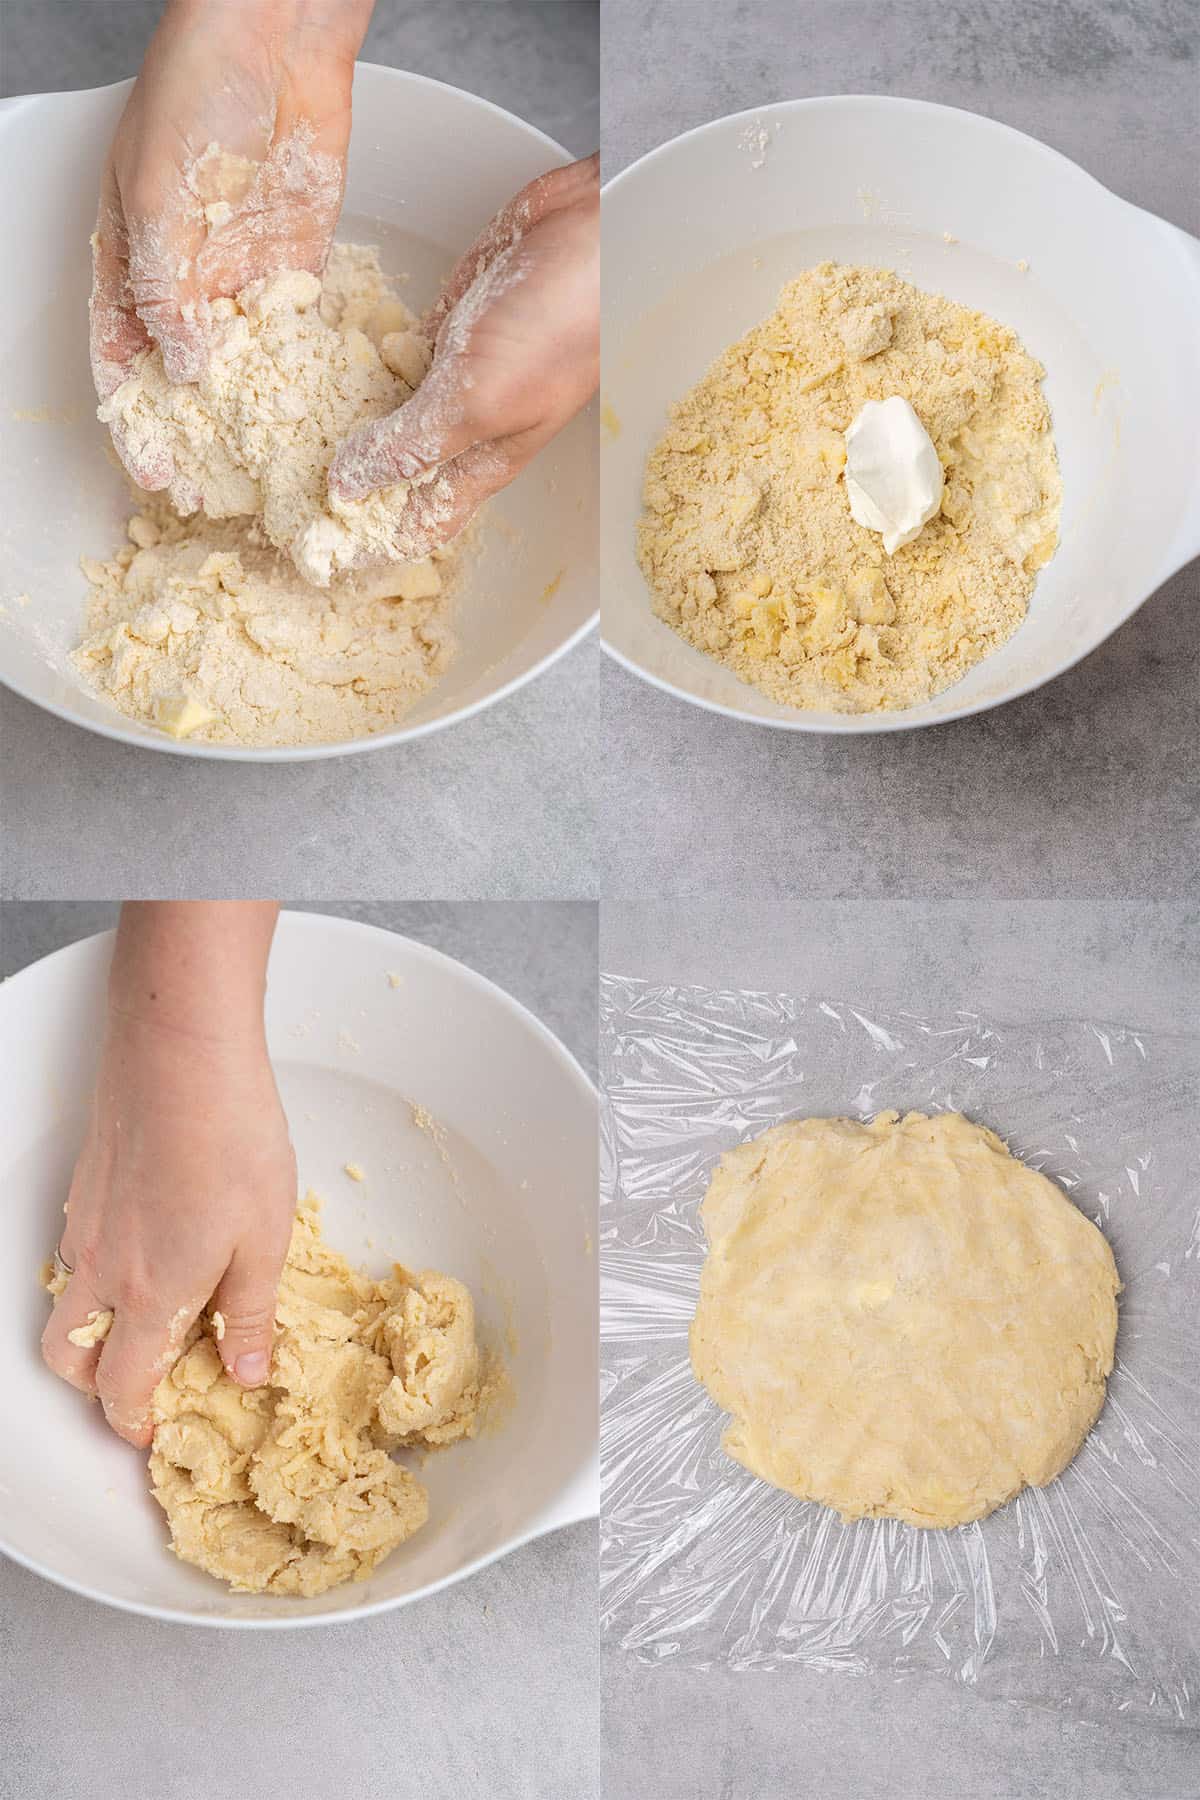
- Sift the all-purpose flour, sugar, baking powder, and salt together in a large bowl and then whisk.
- Add very cold chunks of butter to the flour and rub the mixture between your fingers until it resembles the texture of sand. It's also important to leave some bigger chunks of butter to create a flaky crust.
- Add the cold heavy cream and cream cheese to the mixture. Then mix everything together once again with your hands, but just until the dough comes together.
- Knead the dough for just about a minute with the palm of your hand until it becomes smooth and is no longer crumbly. It's important not to overdo this step and knead the dough too much. It will come pretty together quickly. That's also why you should never use a mixer or food processor for this recipe.
- Form the dough into a disk, wrap it in plastic wrap, and then place it in the fridge to chill for at least one hour and up to overnight. The dough must be chilled properly before you can roll it out.
💡 Top Tip: You want to work fairly quickly when making the dough so that the ingredients stay nice cold, which is what makes the crust super flaky.
2. How to poach pears
This step takes no special skills, my Poached Pears explains how to both poach the pears and use them as a stand-alone dessert. Yet, in this case, we are going to poach them and use them as our fruit filling!
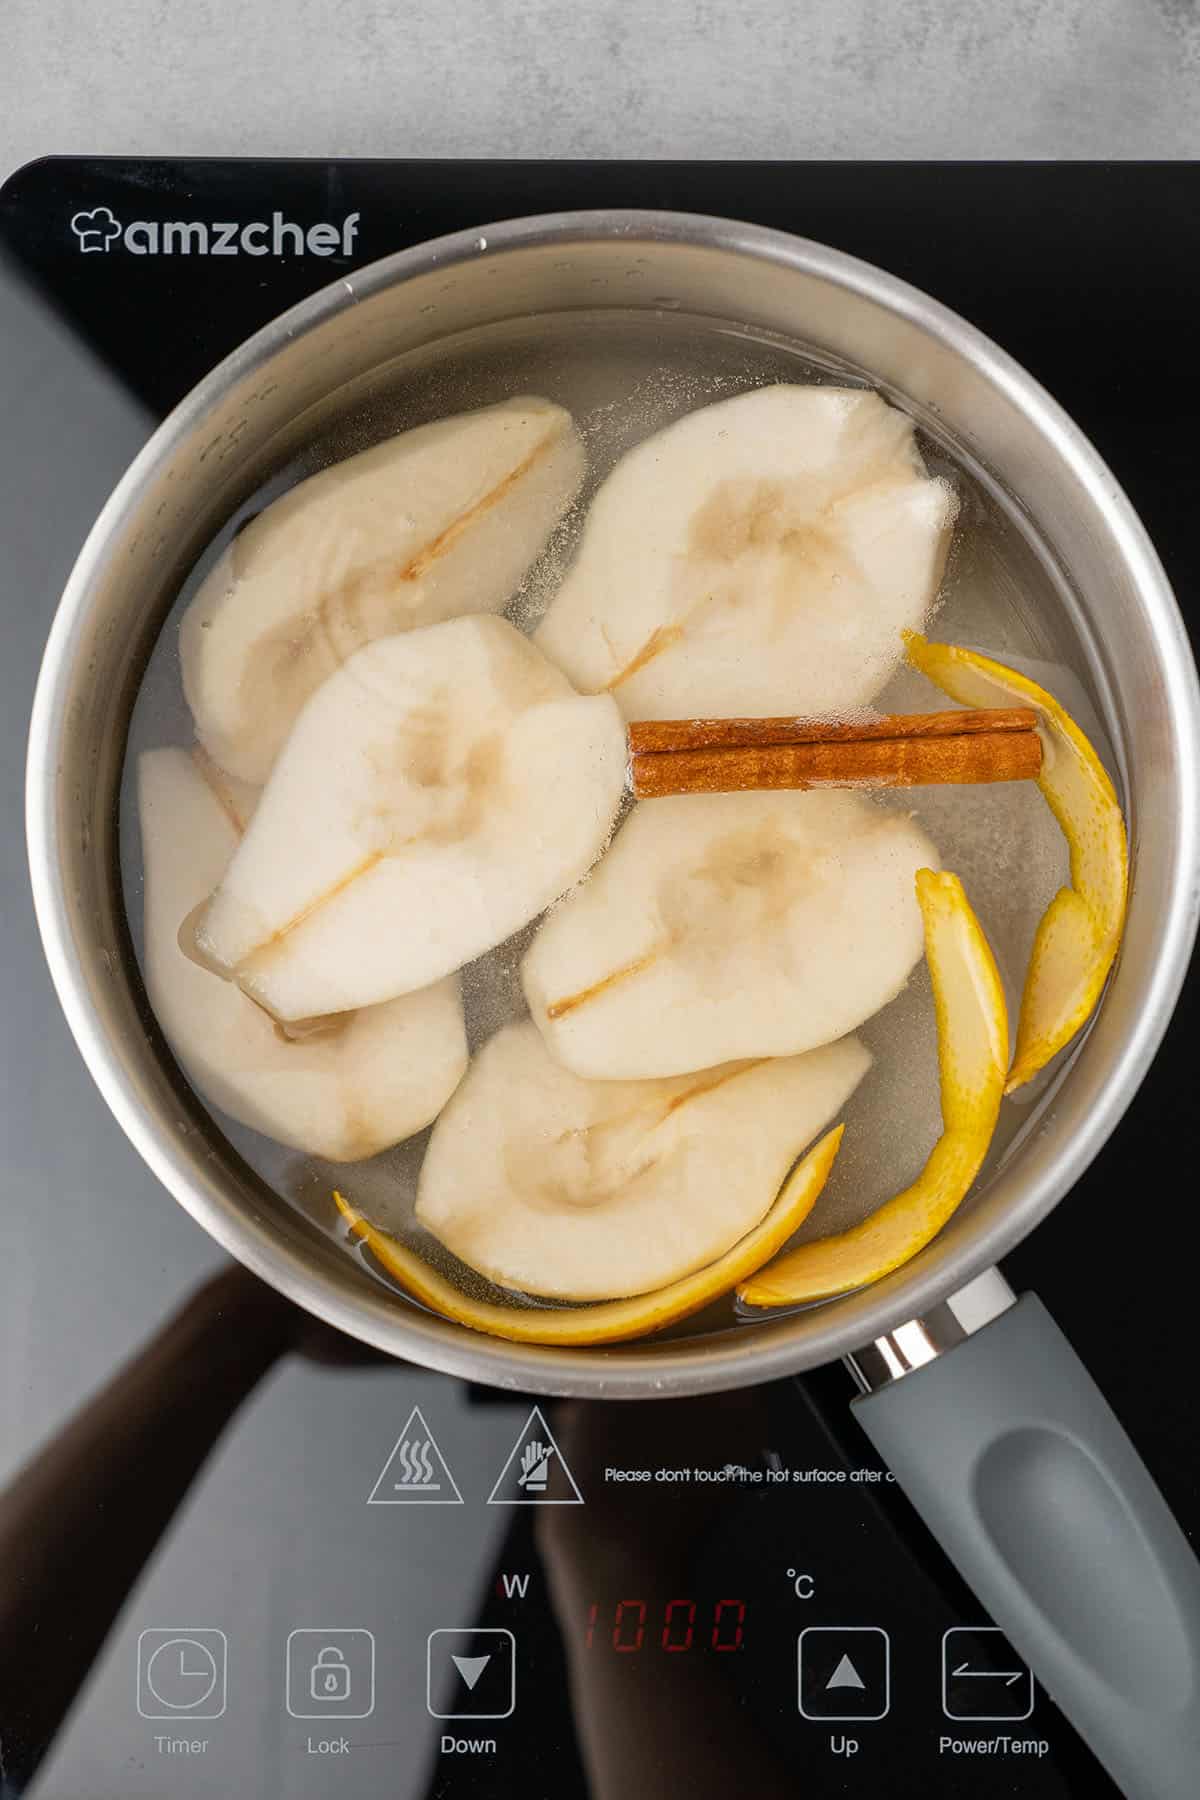
- Make the poaching liquid by putting the water, sugar, cinnamon sticks, whole cloves, and orange peel in a large saucepan and bringing it to a boil. Make sure the pan is big enough to hold all the liquid and the pears without overflowing.
- Peel the pears first and then cut them in half vertically.
- Put the pear halves in the hot poaching liquid in the saucepan. Then cook them for about 10 to 20 minutes on medium heat until they are tender. It's crucial that you do not overcook the pears. In fact, it's better to slightly undercook them.
- Place the cooked pears onto paper towels to soak up all the extra liquid. The pears need to be as "dry" as possible before adding them to the pie dough.
💡 Top Tip: To avoid overcooking the pears, remove them from the saucepan as soon as they are tender. If they sit in the hot poaching liquid they will continue to cook.
3. How to assemble
Galettes are actually pretty easy to construct if you just keep an eye on the temperature of the dough. That's the true key. The dough needs to be cold enough to work with so that it won't stick to the counter or tear, but not so cold that it breaks or crumbles.
There is a sweet spot when it comes to rolling out pie dough, but it's really easy to find once you get the hang of it. And the great thing about pie dough is that you can pop it in and out of the fridge as much as needed to find that spot.
- Remove the chilled pie dough from the fridge and place it on the kitchen counter to rest for a few minutes to warm up just a bit.
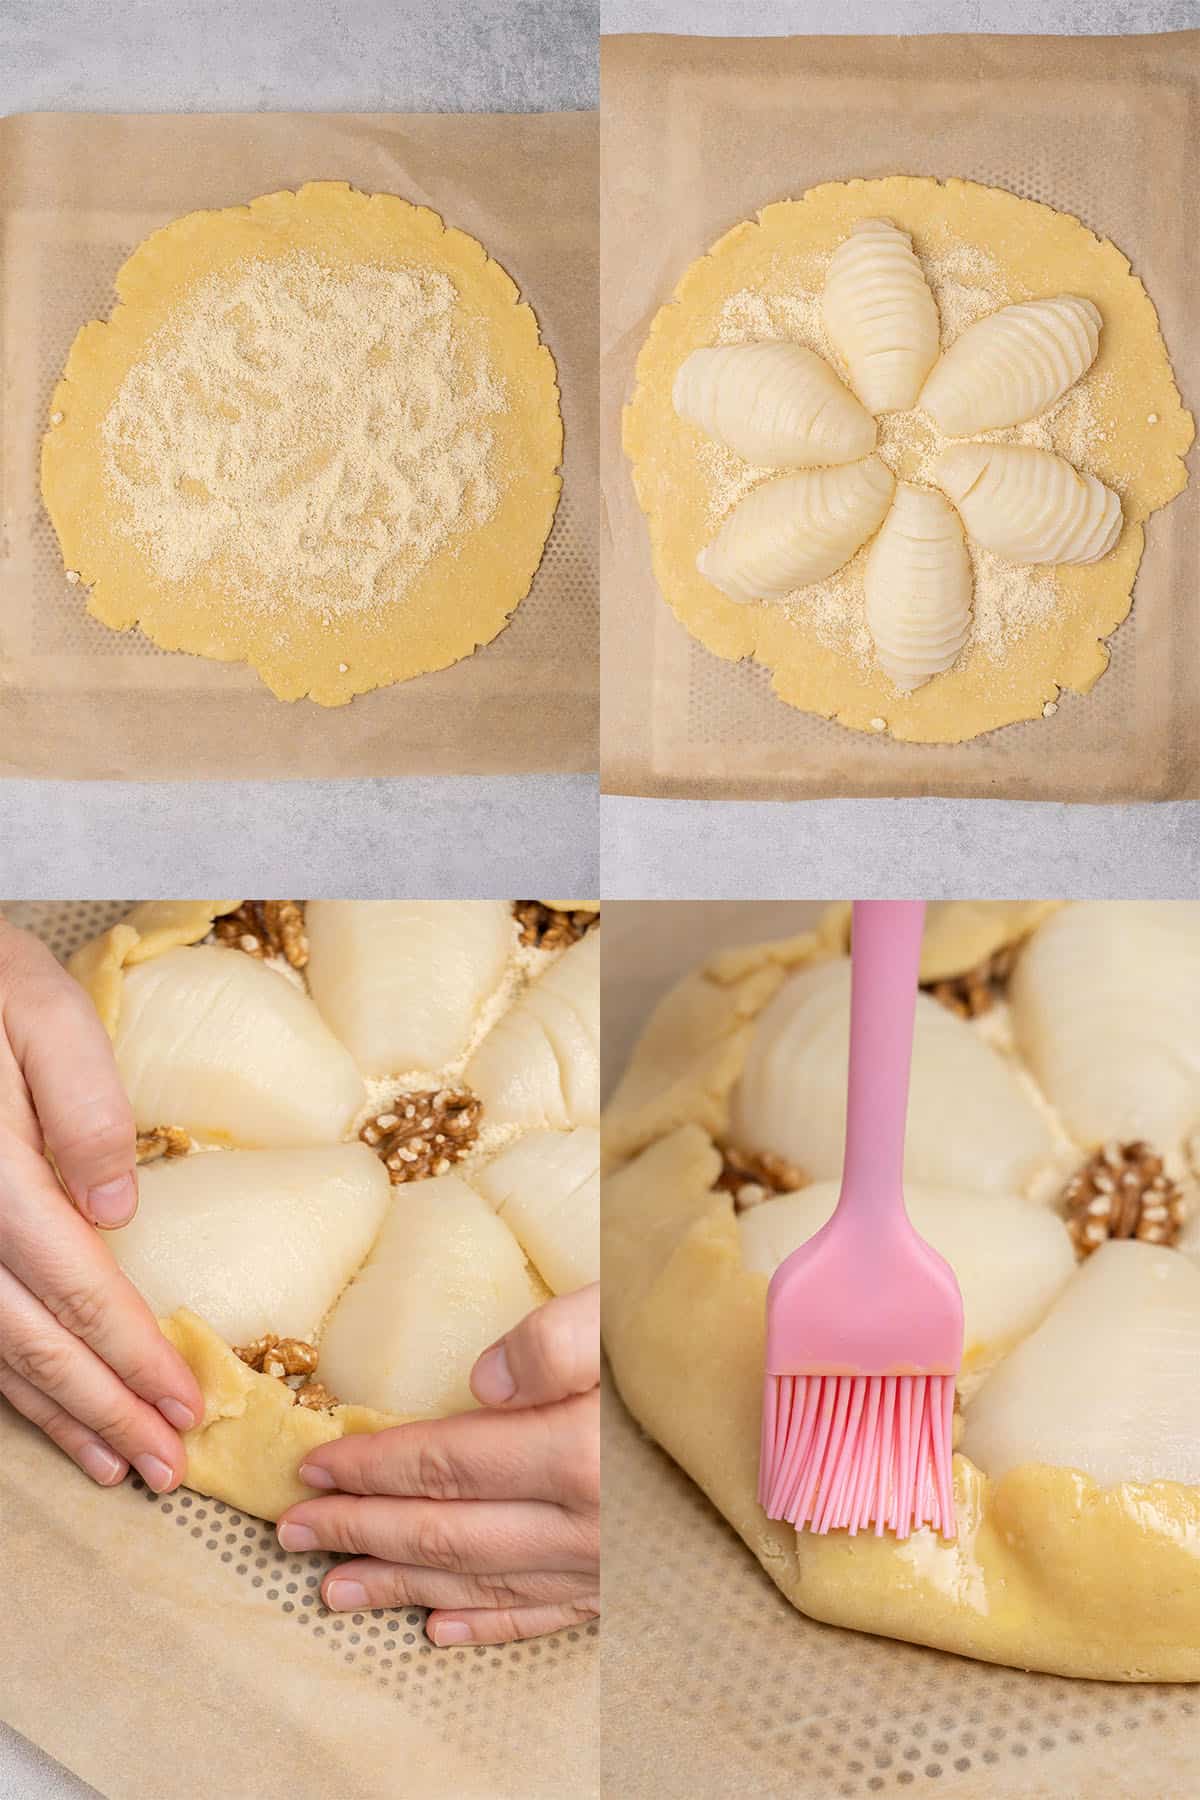
- Use a rolling pin to roll the dough out between 2 silicone baking mats to form a circle. But if you prefer, you can also roll the dough out on the same parchment paper you will use later to bake it on. Also note, the dough itself should be cold enough to keep it from sticking, so you don't need to add any flour. However, if it does stick that means you need to chill it a bit before trying to roll it out.
- Sprinkle the pie dough with almond flour to prevent a soggy bottom. You can also use other nut flours like hazelnut if you like.
- Cut the pear halves into thin slices and then carefully place each pear on top of the dough using an offset spatula. It's important that when you move them that the slices remain uniformly stuck together.
- Neatly place the walnuts around the pears if you are adding them. This step is optional.
- Very gently and tightly fold the edges of the dough over the filling all the way around the galette. You want to complete this step within 1 to 2 minutes so the dough doesn't start getting too warm from your hands. However, you also don't want it to break at all during this process. So be extra careful. Then apply a light egg wash to add a bit of shine to the crust. If you aren't sure how to apply egg wash, don't worry! Just take a peek at my egg wash guide and you'll be all set.
- Put the unbaked galette into the freezer to chill for about 10 to 15 minutes. Then preheat your oven to 200 C / 392 F (no fan) to get it ready for baking.
💡 Top Tip: To prevent a soggy bottom you must put something like almond flour between the fruit and the pie dough to absorb the excess moisture. However, if you have a nut allergy, semolina makes a great substitution.
4. How to bake
As with all pastry, your oven must be preheated for at least 10 minutes before placing the galette in to bake. Not doing so will impact both the cooking time and the final outcome.
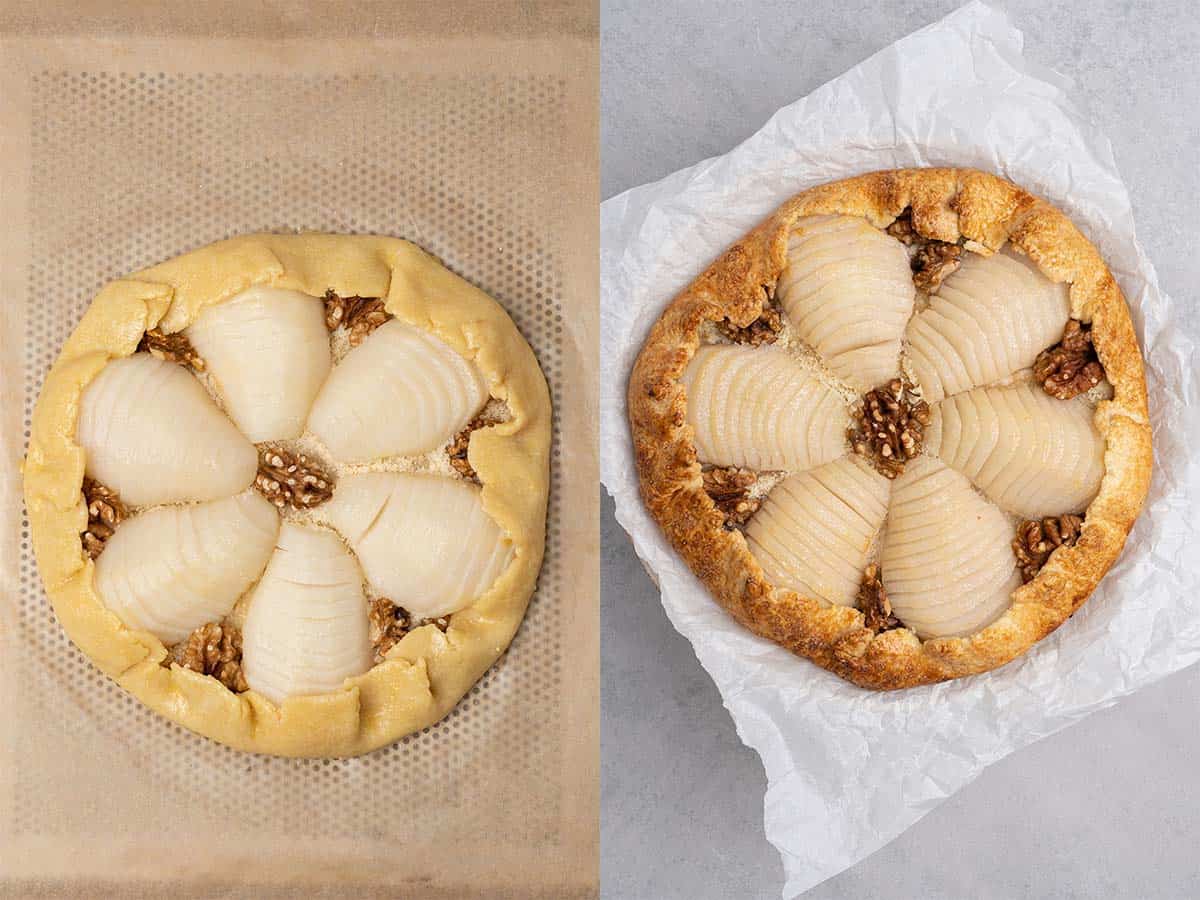
- Transfer the fresh pear galette to the oven to bake for 30 minutes or until the edges of the crust are golden brown in color and the bottom is fully baked.
- Allow the galette to cool on the pan for a few minutes before moving it to your serving dish and serve warm.
💡 Top Tip: Only cut the galette after it cools to room temperature and the pears and crust have had a little time to set.
🎓 Expert tips
- For the richest buttery crust use European-style unsalted butter with 82% fat content.
- The butter, cream cheese, and heavy cream must be very cold at all times when making the dough. So if at any point the dough begins to warm up too much or gets soft, you need to chill it for a few minutes before you can continue.
- Knead the dough carefully to avoid overworking it or making it too warm. And never use a mixer or food processor to make this crust.
- When you assemble the galette do it quickly to prevent the dough from getting too warm from your hands.
- Dust the dough with almond flour before adding the pears to prevent a soggy pie bottom.
- Choose pears that are all about the same size and equal in ripeness for even cooking. The best pear choices are Bosc and Anjou. Never use Barlett pears as they are far too soft.
- Use a proper vegetable peeler to peel the pears. You want them to maintain their pretty shape, so you just want to remove the skin.
- Use less sugar in the poaching liquid to make a healthy pear galette.
- Drain the pears well on paper towels before placing them on the galette. Wet pears can cause a soggy bottom.
🥣 Equipment notes
Rule number one in baking is that you should always use a Digital Scale to weigh ingredients. It's the only way you can be totally sure that your measurements are correct. I also recommend getting yourself a Digital Oven Thermometer. All ovens vary slightly by a few degrees and using a thermometer is an easy way to know if you need to make any adjustments.
As for the galette, the only tool you really need is a decent Rolling Pin. And it's not necessary but I find rolling pie dough between two Silicone Baking Mats works super well to ensure that it never sticks to the counter. It also makes both moving the dough and cleanup really easy.
❓Recipe FAQs
Yes, they are the same thing. This particular recipe does have cream cheese in the dough and my pie dough recipe on this blog does not, but any pie dough can be used to make a galette.
A galette is basically a free-from pie formed using your hands and baked laying on a baking sheet. Whereas, a pie is molded to bake in a pie dish.
Yes, of course. This recipe works no matter what size or shape you make your galettes. However, you will need to adjust the ingredients and baking time accordingly.
Probably, but I've not tried. Keep in mind that you can't just replace flour with gluten-free 1:1 flour without reformulating the whole recipe. When one ingredient changes others often need to be changed as well in order to keep the balance of the texture and flavor.
Yes, you can make a pear galette with puff pastry. However, there is a chance of a soggy bottom so be sure to use almond flour if you decide to go this route.
Leftovers can be stored in the fridge for 1-2 days in an airtight container.
I don't recommend freezing galettes as it impacts both the texture of the pie crust and the filling as well.
🥧 More Pie Recipes
Pear Galette
Ingredients
Pie dough
- 190 g (¾ cups) All purposer or pastry flour
- Pinch of salt
- Pinch of baking powder
- 10 g (¾ tablespoon) Granulated sugar
- 115 g (½ cups) Unsalted butter very cold
- 15 g (1 tablespoon) Heavy Cream
- 30 g (2 tablespoon) Cream cheese
Poached pear filling
- 3 Pears cut into half vertically
- 1 l (4¼ cups) Water optionally replace half of the water with red or white wine
- 150 g (¾ cups) Granulated sugar
- 1 large Cinnamon stick
- 1 Orange peel
- Cloves
Other
- 2 tablespoon Almond flour under the filling
- handful of Walnut optional filling beside the poached pear
- 1 Egg with a drop of milk to egg wash
US customary cup measurement is an indicative figure only. Measure the ingredients with a digital scale by weight (gram). Baking is art but also science which requires precision and accuracy.
Instructions
Start with making the pie dough
- Sift together dry ingredients; flour, sugar, baking powder, salt
- Add very cold butter chunks and rub the mixture between your fingers until it becomes a sand like consistency
- Add cream and cream cheese and mix with your hands just until the dough comes together
- Knead the dough with the palm of your hand for a minute (do not over-knead and do not use a mixer) just until the dough becomes smooth
- Form a disk out of the dough, wrap it with kitchen foil and refrigerate for 2 hours
Continue with Poaching the Pears
- Bring all ingredients to boil (except pears) in a large enough saucepan
- Peel the pears and cut them into half vertically
- Cook the pears for 10-20 minutes (depending on the size of the pears) on medium heat. Do not overcook the fruits, it is better to slighly udercook them
- Place pears onto paper towels to soak the unnecessary liquid in. Make sure the pears are "dry" before placing them onto the pie dough.
Assembling
- Once the dough is chilled, take it out of the fridge and let it rest for a few minutes on the kitchen counter to slightly warm up
- Roll the dough into a circle in between two silicone baking mats. Alternatively, roll the dough on parchment paper (the one you will bake on later)
- Dust the dough with almond flour to avoid soggy bottom on your pie
- Cut each pear half into thin slices and carefully move them on top of the dough with an offset spatula making sure that they stick together
- Place a handful of walnuts around the pears (optional)
- Gently and tightly fold the pie dough edges over the filling and apply a light egg wash
- Pop the unbaked galettes into the freezer for 10-15 minutes while pre-heating the oven to 200 C / 392 F (no fan)
- Bake for 30 minutes or until the crust turns even golden in color and the bottom of the pie is also well baked
- Store at room temperature or refrigerated for 2-3 days
Notes
- Measure your ingredients with a Digital scale for accuracy
- Use high-quality 82% fat content European style very cold unsalted butter
- Use almond flour underneath the fruit filling to avoid a soggy bottom
- Make sure you read my Expert tips section above to maximize your success. A short recipe alone is not able to cover all the necessary details and science behind baking
- While assembling and kneading the dough, work as quickly as possible without 1. overworking the dough 2. making the dough too warm. Kneading should not take more than a minute or two
- The temperature while working with this dough is super important. Too warm? The pastry dough will tear. Too cold? The pastry dough will break. Aim for the in-between, a cold enough dough that is comfortable to work with. Use your fridge or freezer to chill the dough if it gets too warm
- Once the pears are poached make sure to soak them with a kitchen towel until they feel dry
- I strongly advise using a Digital oven thermometer to be able to measure your exact oven temperature



Carmen
The tips Spatula gave in this recipe help a lot !
Long time I used to make similar pie but a problem I faced frequently was soggy dough , because for this specific type “ galette” you don’t pre bake the dough , and the fact that I followed all the instructions and advises helped a lot !
I definitely recommend this one as a Sunday brunch dessert
Life_after.40
I’m so happy that I’ve tried! I always thought that it should be so difficult.
But was easy & so gooood 🥰🥰🥰
admin
Thank you, happy you found it easy and delicious!