
This Graham Cracker cheesecake crust is made from just two ingredients: butter and Graham crackers. And you probably already have both at home in your pantry and fridge! It's unbelievably easy and versatile, with the loveliest biscuit flavor, a perfect crunchy texture, and a hint of sea salt that balances the sweetness.
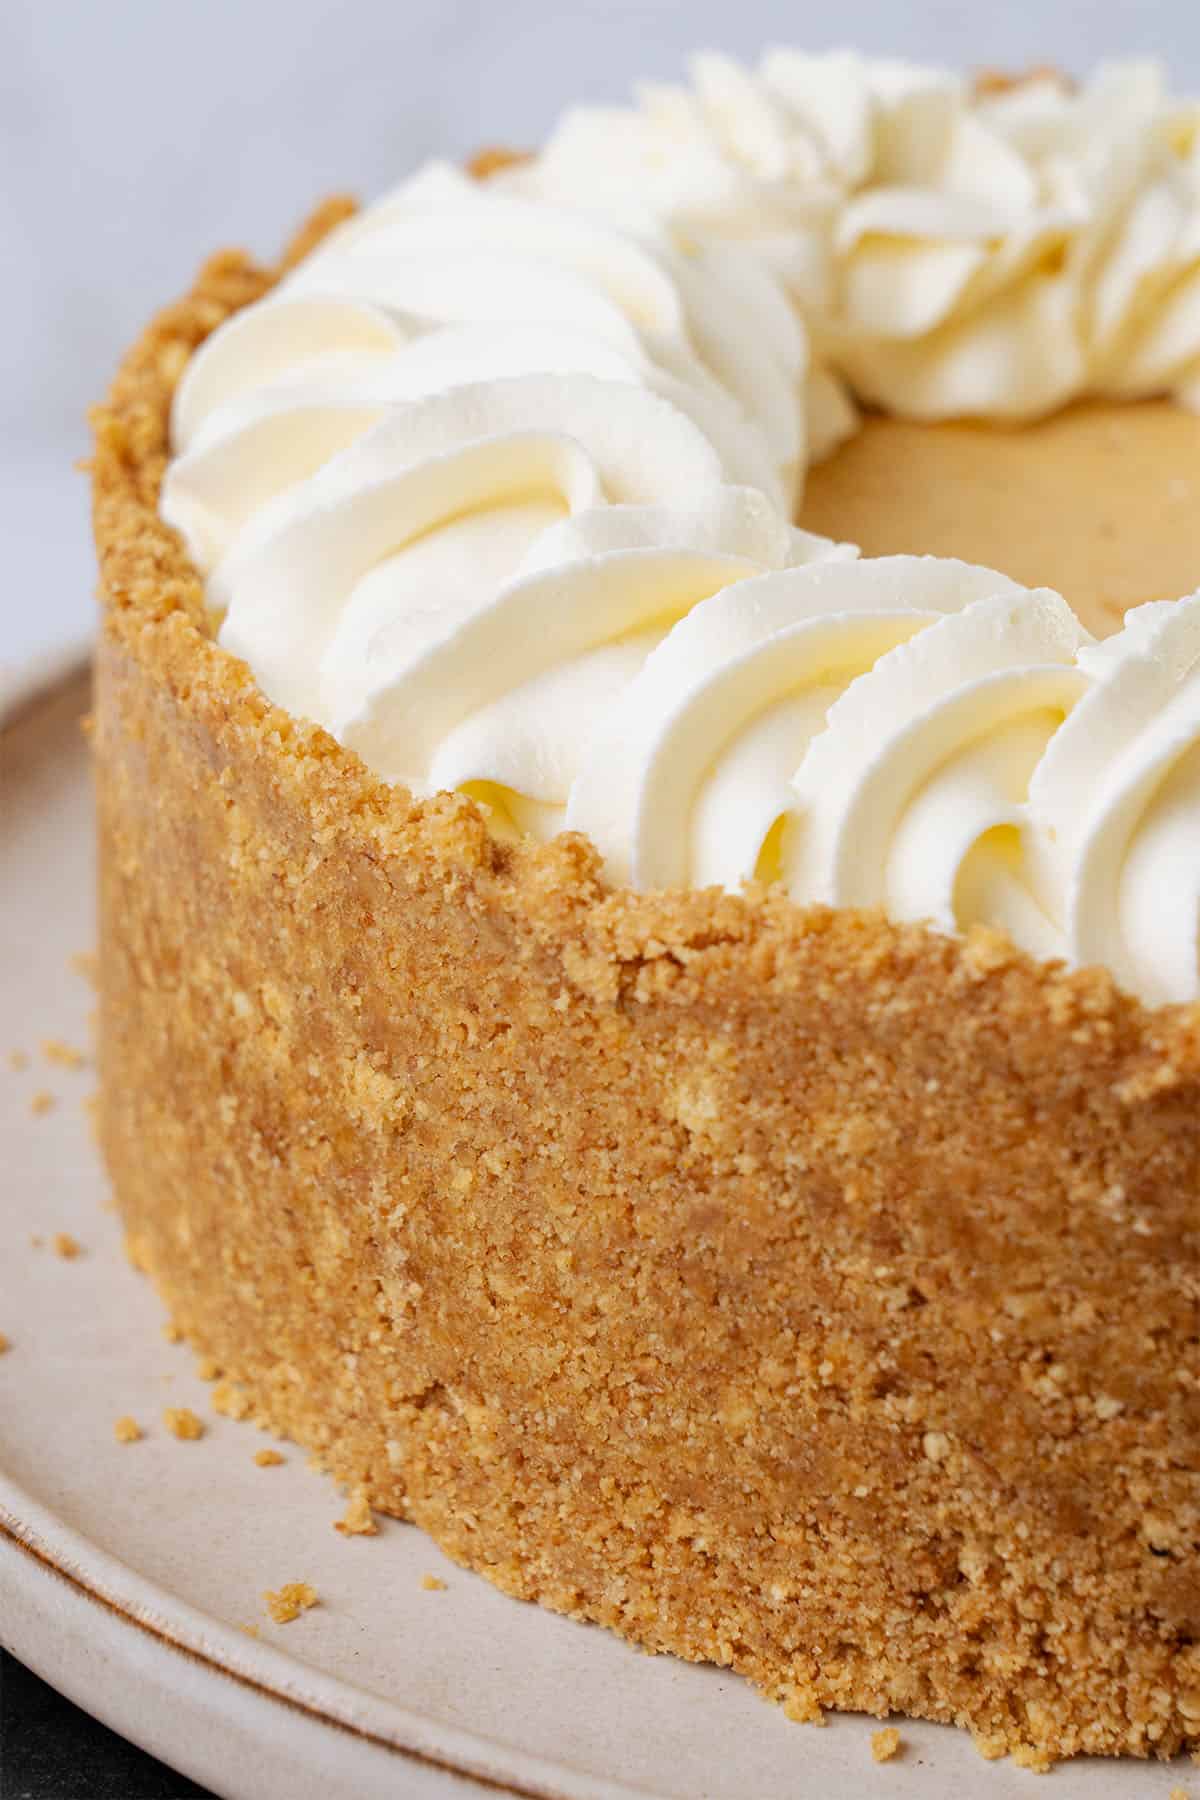
This is the only Graham Cracker cheesecake crust tutorial that you will ever need. It is a thick crust that is very stable and holds its shape. You can adapt it in many ways to suit your needs, and I'll give you some ideas below for how you can add your own twist.
Katalin’s key take on how to keep Graham cracker crust from falling apart
The key to a perfect Graham cracker crust is the ratio of ingredients. You do not need additional sugar to bind it together, only good quality European-style butter with a high fat content (mine has 82%), which will fuse the Graham cracker crumbs together as it hardens. If there's too much crumb, the crust won't hold together; if there's too little, it will be runny because the ratio of fat is not in balance.
I have tested this recipe with Graham crackers and a few different alternatives (such as Digestive biscuits or Nilla wafers), and other cookies like Oreos and Speculoos. I also tested it for both baked and no-bake cheesecakes. And as long as you weigh your ingredients to get the right ratio and follow my simple instructions on the best crust, it will not fall apart.
What Graham crackers are best for cheesecake crust?
The quantity of Graham crackers is far more important than the type of cracker. I always talk about the importance of weighing ingredients, and it is really important in this recipe too! Let's look at an example using a standard box of Graham crackers, such as Honey Maid. At the time of writing, one box is 14.4 oz, which is roughly 400g. It contains 3 sleeves with nine 9 sheets in each, for a total of 27 full sheets.
I use 300 grams of Graham crackers for this crust, which is equivalent to 20 sheets. However, different brands might vary, and manufacturers can also change the weight of the sheets at any time. Therefore, it is best to stick to the quantity in ounces or grams, rather than always using 20 sheets.
Measuring cookie crumbs in cups is also very inaccurate, as everyone blitzes the cookies to different levels and packs the cup differently. I always provide cup measurements (and in this recipe, I list 2 ½ cups of Graham crackers), but I strongly recommend you weigh out 300 grams instead.
For a printable recipe card incl. substitutions and flavor variations, visit the original Graham cracker cheesecake crust recipe.
How to make biscuit crumb, 2 ways
There are generally two ways of making biscuit crumb, either the old-fashioned way or using a food processor.
To make cookie crumbs in a food processor, weigh the Graham crackers and pulse them for a few seconds until no larger pieces remain and the crumbs are all the same size.
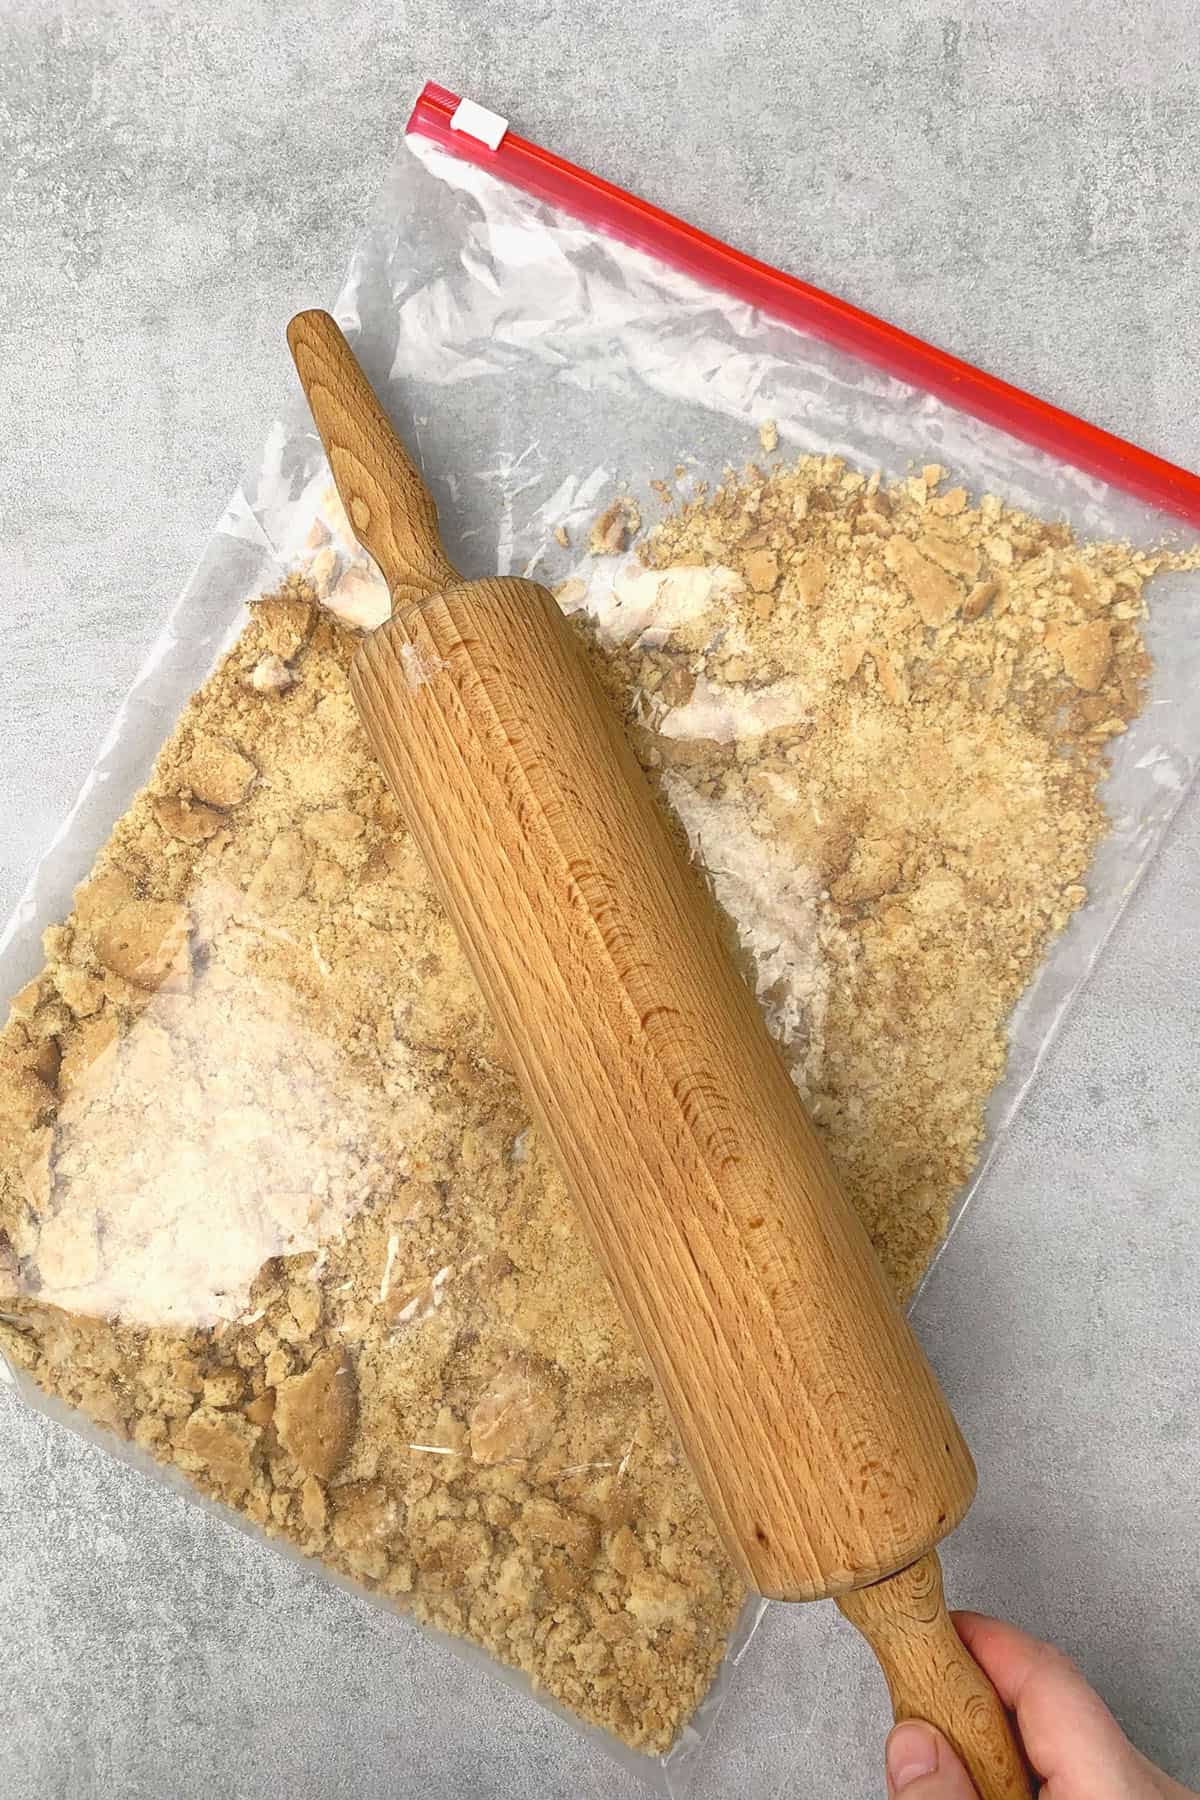
The old-fashioned way is to place the weighed Graham crackers into a plastic freezer bag/ziplock bag on the counter, zip it shut, and then hit it with a rolling pin until you have a fine biscuit crumb.
I actually prefer the rolling pin method, as it can be easier to over-process the cookies in a food processor, which can leave you with a mixture more akin to cookie batter. If you are using a zip bag, ensure it is large and strong enough to withstand the process without tearing. This is my favorite method:
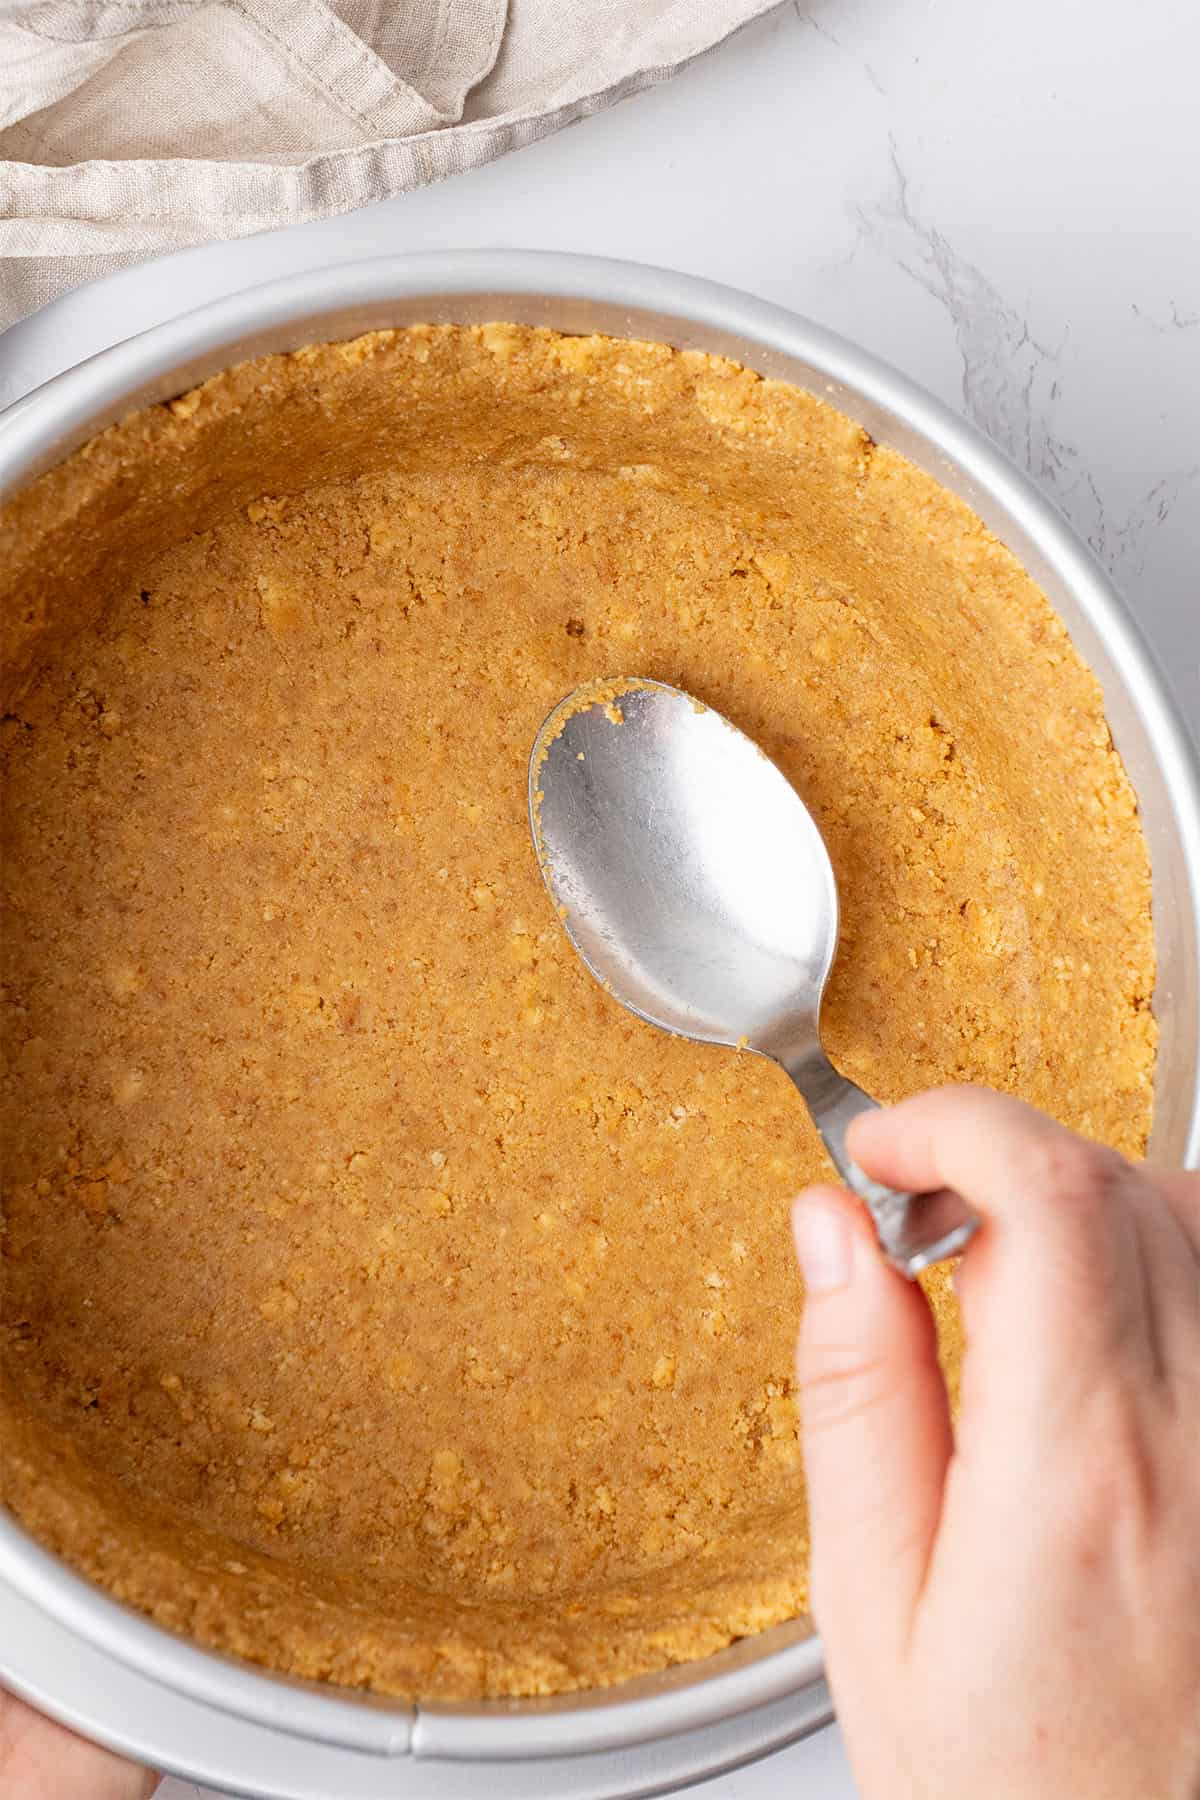
What tools are the best to assemble the Graham cracker crust nicely and tightly?
To achieve the best Graham cracker crust, pack the crushed crackers and butter mixture tightly into the pan to ensure they fuse together. You can do this one of three ways.
Use your hand and fingers, although it can get a bit sticky!
You can use a flat-bottom mug, measuring cup, or even a drinking glass.
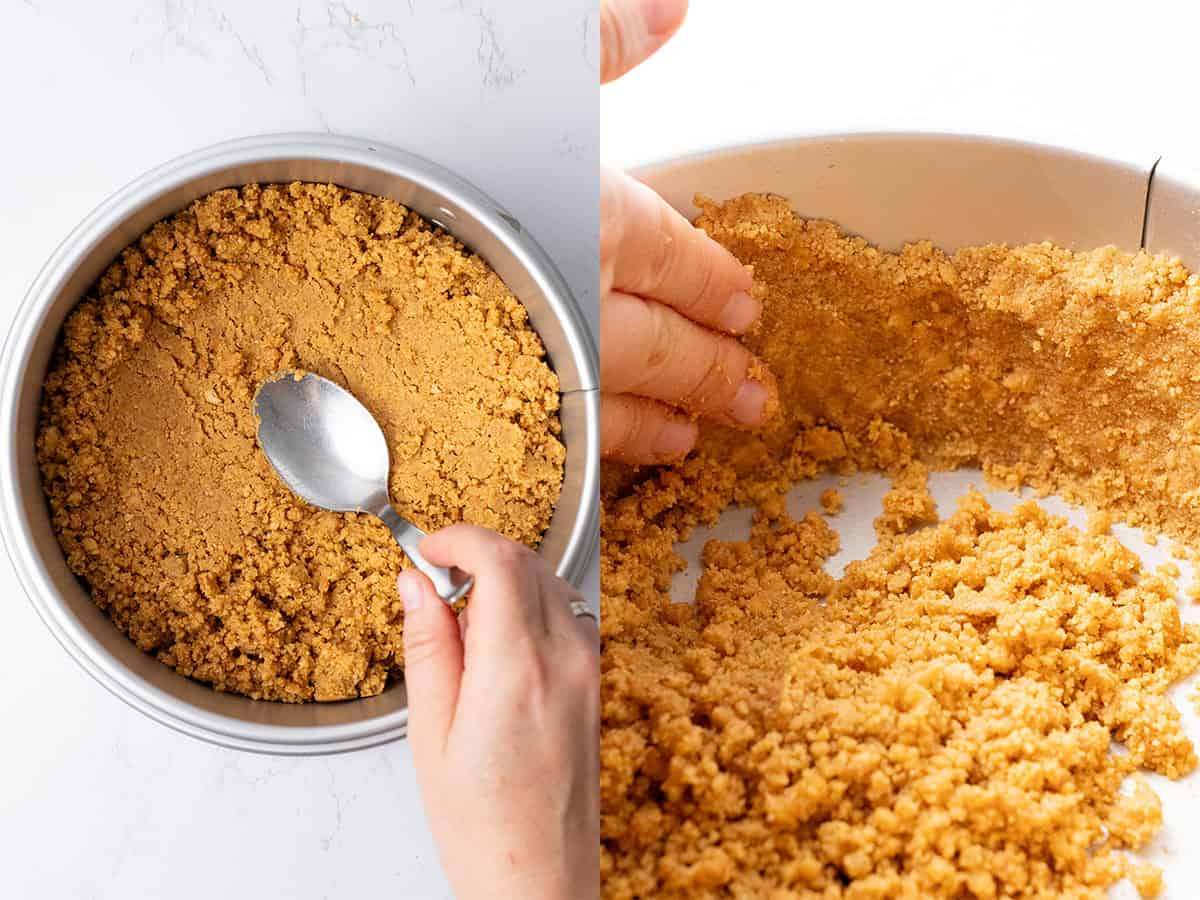
But my preferred method is to use a metal spoon with a bent handle. It allows you more control and to exert even pressure on the crumbs to press them together.
Ok, now let’s assemble the crust
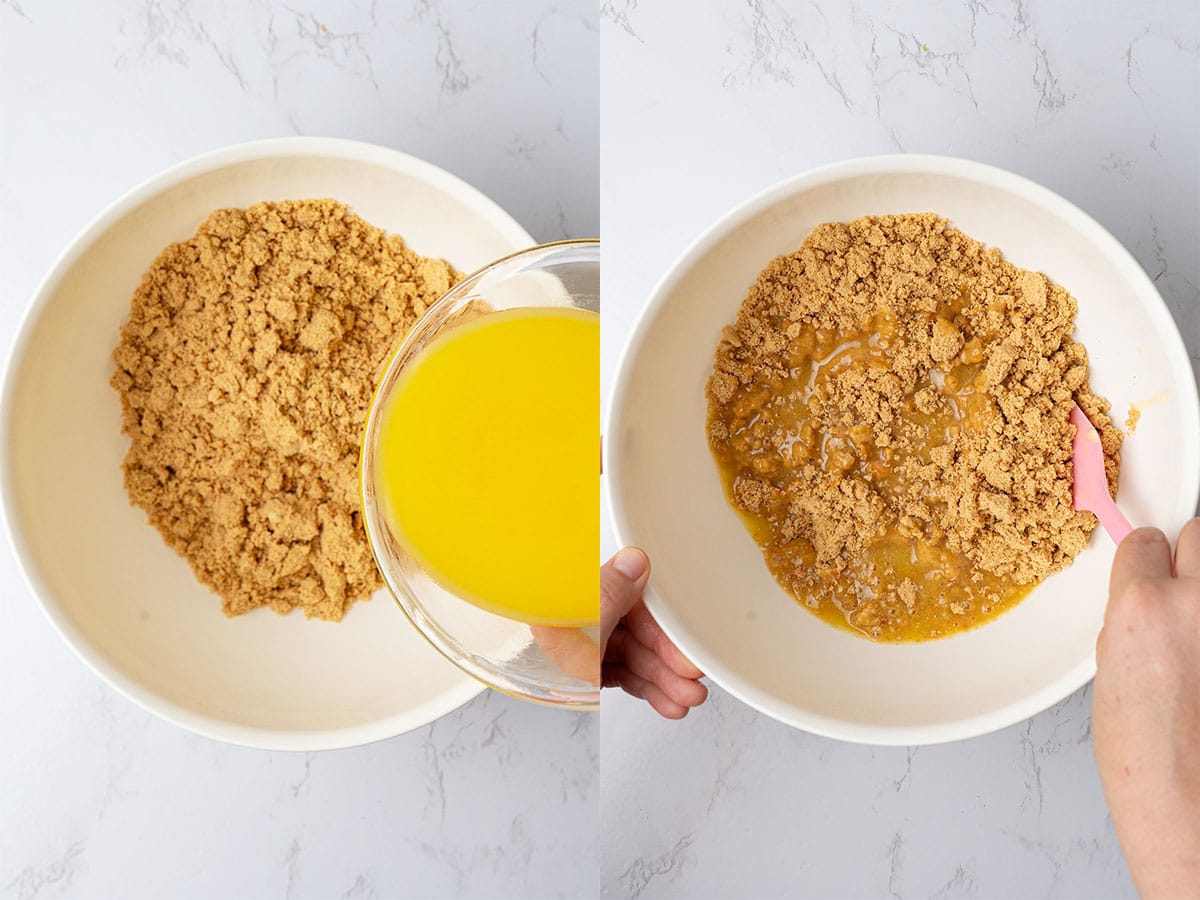
Weigh and melt the butter. You can do this in the microwave on medium strength in 20-30 second increments, or in a pan on the stove.
Let it cool slightly while preparing the Graham Crackers using one of the methods above and placing them into a mixing bowl with the salt. The butter needs to be liquid, but not hot, or it will be greasy.
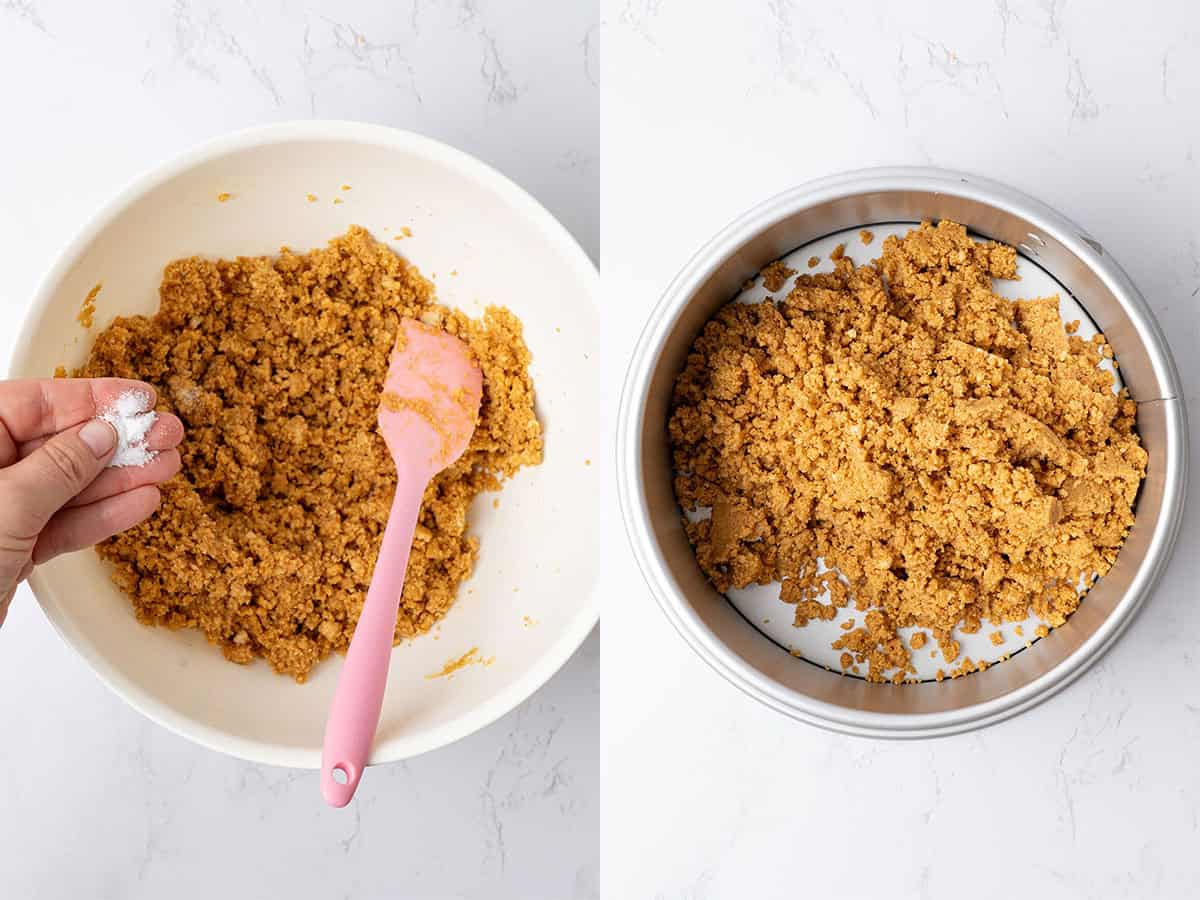
Pour the melted butter over the cracker crumbs while the butter is still runny. The mixture should have the consistency of wet sand, but if it feels too runny once the ingredients are combined, do not be tempted to add more Graham Cracker crumbs. Put it into the fridge for 5 minutes, and it will begin to set very quickly into a consistency that's more workable.
Now press the butter crumb mixture firmly and evenly into the pan in an even layer. Start with the sides and work your way around to make sure they are even, and then continue with the bottom/base of the cheesecake crust.
Let this easy Graham Cracker cheesecake crust cool down fast in the freezer so that the butter can harden and set before filling it as per your chosen recipe.
Do I need to bake Graham cracker cheesecake crust?
It isn't strictly necessary. You do not need to bake the crust if you are making a no-bake cheesecake, but it does need time in the fridge (or freezer) to set before you add the filling.
To use this crust for a baked cheesecake, I recommend chilling it while preheating the oven to 350 °F (175 °C) and then baking it for 8-10 minutes. Chill it again before pouring in the cheesecake filling and baking the whole thing.
Here is one of my no-bake cheesecakes using the Graham cracker cheesecake crust:
Can I use the same recipe to make Graham cracker pie crust?
Yes, of course! However, the quantities for a standard pie crust with Graham crackers will differ. You will need around half the amount of butter and crackers listed in this recipe. Or, make two pie crusts. Here is one of my popular No-bake Apple pie recipe with Graham cracker crust.
Storage & Freezing
Store Graham cracker cheesecake crust covered tightly or in an airtight container in the fridge for up to three days before filling.
Alternatively, you can easily make ahead and freeze the cheesecake crust. Double wrap it in plastic wrap and then aluminum foil to prevent freezer burn and use within one month.

You will only need a few bits of useful equipment
Always weigh ingredients by the gram using a digital scale for best results. Use a rolling pin or food processor to crush the Graham Crackers.
I make all my cheesecakes in an 8-inch pan, and it is important to use the right pan. It will work in a 9-inch pan, too, but I prefer the 8-inch pan because the cheesecakes look taller and slightly more elegant, in my view. Nevertheless, it has to be a spring form, otherwise you can't get the cheesecake out!
I also use this pan for its straight sides, as it gives you a nice, clean, and strong corner with the base of the pan. This structure will better support a delicious, thick filling!
Expert tips
- Take your time pressing the mixture into the pan, ensuring it's evenly and compactly packed. It can take 10 minutes, but it's well worth it!
- Press, don't pound the crumb mixture into the pan!
- This is a two-ingredient recipe, but a nice pinch of salt is actually recommended. It balances the sweetness of the crust.
- Chilling time is necessary for the butter in the crust to set, resulting in a crunchy yet firm crust that holds the filling. Use the freezer if you are in a hurry!
- You can create a delicious barrier for especially wet fillings by brushing melted chocolate over the crust, freezing for 10 minutes, and then filling.
- Cut cheesecakes like a pro by running a sharp knife under the hot tap briefly before drying and using it to cut nice, clean slices.
How to use this Graham cracker cheesecake crust
You've made the crust; now it's time to make a Graham Cracker crust cheesecake or Graham Cracker crust pie! Use your delicious crust with one of these recipes:
Leave a Reply