This is the best moist and light chocolate sponge cake recipe you will ever make. It's perfect for home bakers, whether experienced or complete beginners. It's an easy baking basics recipe that everyone can comfortably try! Fill and frost it however you like, or store it in the freezer, ready for impromptu occasions (or cravings).
This recipe was first shared on the blog back in 2021. Since then, I've updated it with new photos, added helpful baking tips and a troubleshooting guide, and included several frosting, filling and ingredient substitution options based on your questions.
Read what others said about this recipe
"It was amazing! I took it to a restaurant, and the chef and staff ate some. They all asked for the recipe!"" Joanne
Best moist chocolate sponge cake recipe
Some recipes for chocolate sponge cake call for a boxed cake mix, but our goal is to level up your everyday baking. My recipes are always made from scratch with familiar ingredients and no fancy equipment. You can have this cake batter ready to bake in under 15 minutes! And the steps are all super simple to follow and never complicated. You get professional, consistent results with hardly any effort!
I also have a baking hack to get the best chocolate flavor in this chocolate sponge cake recipe. Unsweetened cocoa powder and freshly brewed coffee are the secret to an intense chocolatey taste. The coffee really heightens the chocolate taste without being noticeable, trust me! You can use decaf coffee, but this is a pro tip worth trying.
Katalin's Key Take on how to make chocolate sponge cake light and moist
The issue with chocolate cakes is often that cocoa powder tends to dry out the sponge. So this cake batter is very wet, with lots of moisture to compensate and give you a super soft, light cake.
I use an oil-based mixture with added milk in this easy chocolate sponge cake recipe for the best texture that won't harden in the fridge like a butter-based sponge will. Trust me, oil is the best substitute for butter in cake recipes when you want a stable yet soft, moist sponge straight from the fridge!
It is also very light and fluffy, even though the eggs are not whipped up in a complicated way. You just have to mix and bake! The combination of both baking powder and baking soda is what helps here. To get scientific, the acidic baking soda reacts with the coffee and cocoa powder (Dutch Process is best) to create air bubbles, which create lift as the batter bakes. And you are left with the softest, airiest chocolate sponge cake ever.
My best advice on the ingredients
I use specific ingredients in specific ways to get the best, professional results in this recipe.
All-purpose flour is fine for these chocolate sponge cakes; you do not need to use cake flour. Whole milk is always the best when making sponge cakes or other baked goods like muffins and cupcakes. A mixture of brown and white sugar gives you a tender bite and a hint of molasses for that deeper, richer flavor. And, as mentioned above, Dutch Process cocoa powder is superior in taste and how it reacts with other ingredients to give you the best results.
Make sure your milk and eggs are at room temperature before you begin for proper emulsification, and don't skip the salt! It enhances all the flavors and balances sweetness, so you definitely need to include it.
Last but not least, always weigh the ingredients using a digital scale for accuracy!
Whisk, fold, ready to go into the oven
Preheat the oven to 180°C / 356°F (without the fan).
Prepare three 15 cm (6 inch) round cake pans with parchment paper. Use this cake pan conversion article to make the sponges in different sizes or shapes.
Use an electric hand mixer (or a stand mixer or even a hand whisk) to mix the room-temperature wet ingredients (the oil, sugar, milk, vanilla extract, coffee, and eggs) together for a minute or two until combined.

Then, sift the dry ingredients (the flour, baking soda, baking powder, salt, and cocoa powder) into the wet ingredients and and fold them together with the help of a rubber spatula or hand whisk just until combined, for a few seconds. Avoid using a stand mixer or electric hand whisk at this stage, as you might overmix the batter.
That´s it! I told you it´s easy!

Bake and enjoy
Once the batter is mixed together, pour it into each prepared cake pan.
Place the cake pans in the oven, ideally on the center rack, and close the door. Avoid opening the oven door during baking, as this alters the baking environment.
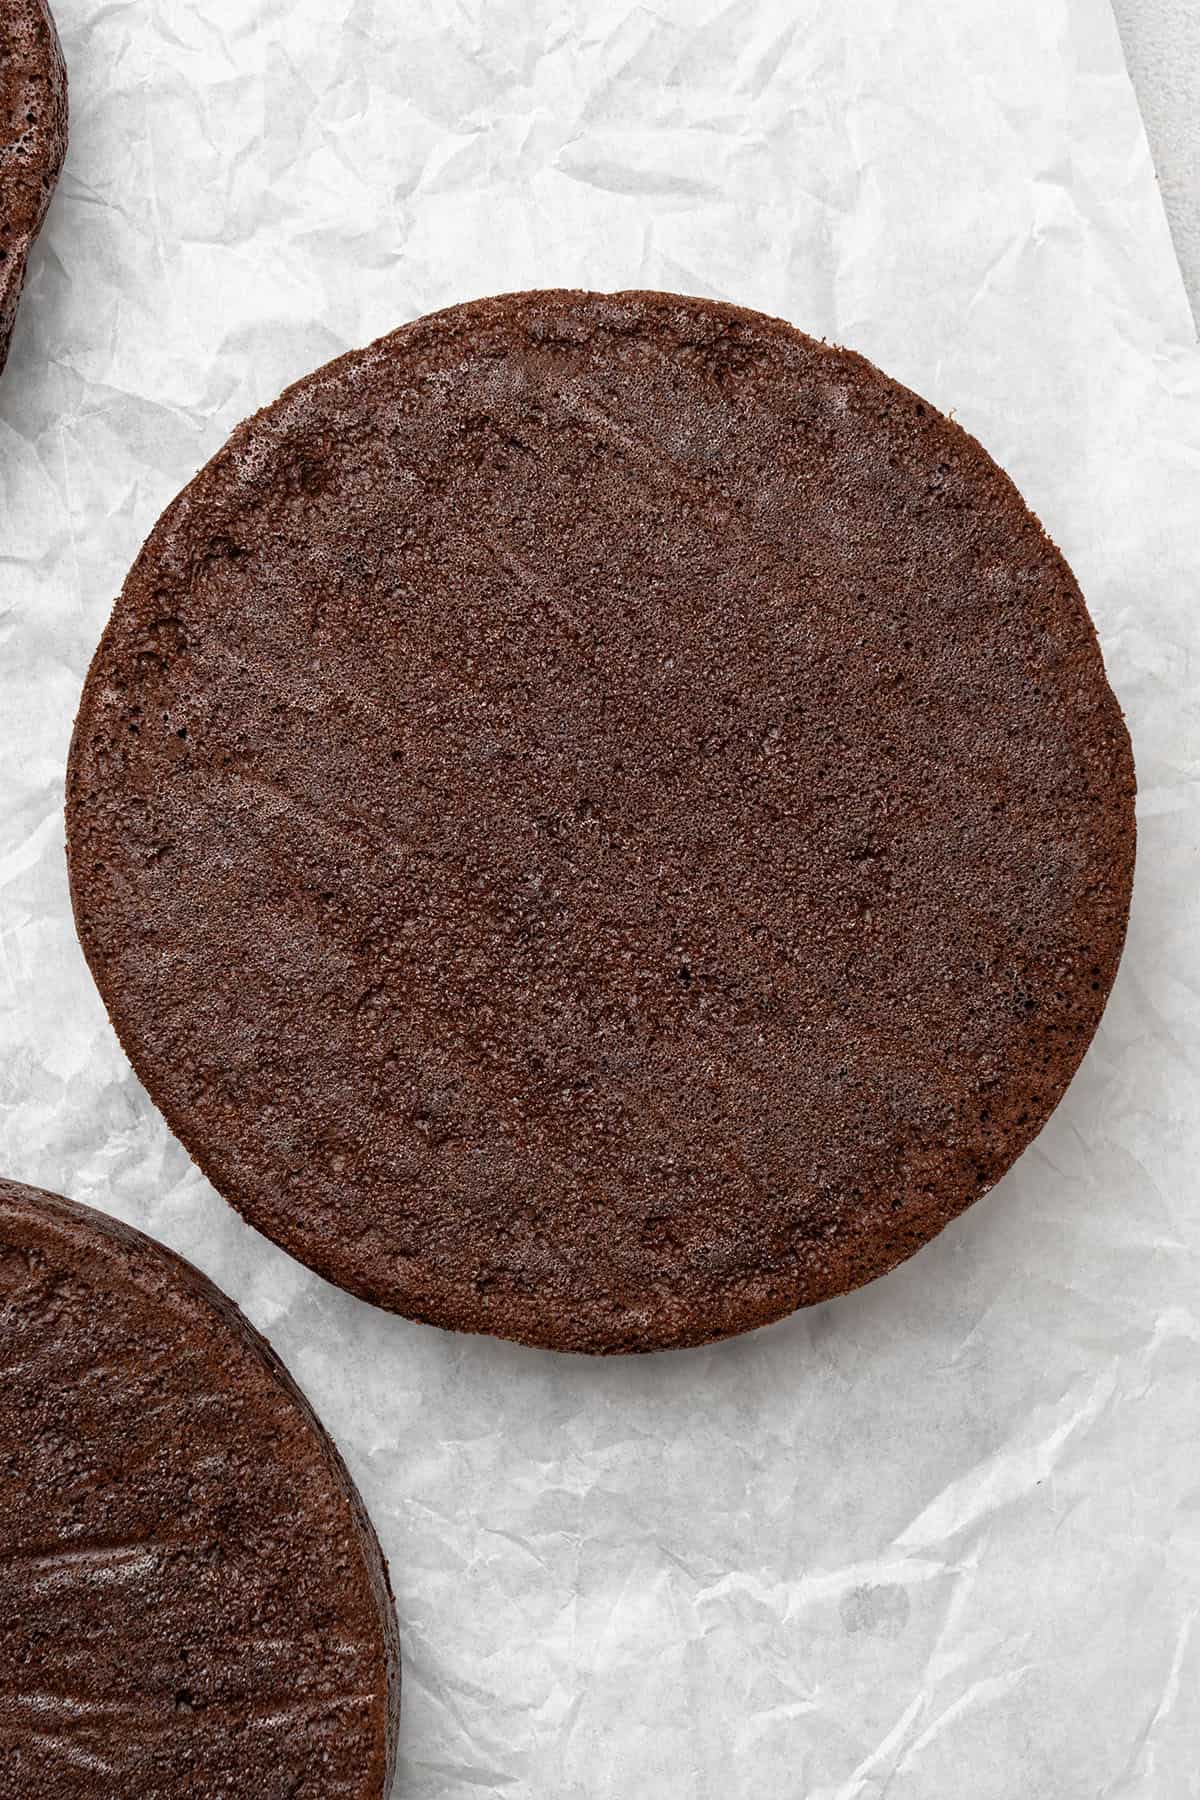
Bake chocolate sponge cake for 25-30 minutes at 180°C / 356°F (without the fan). To test if it is baked enough, insert a toothpick into the center of the sponge cake. If the toothpick comes out clean, your chocolate cakes are baked. The top of the sponge will feel bouncy to the touch, and the edges of the sponge cake will also be slightly pulled away from the edges of the pan.

Remove the baked chocolate sponge cakes from the oven and either let them cool in the pan or very carefully flip them over onto a cooling rack. Either way, don't try to cut them or frosting them while they are still hot.
Substitute the ingredients wisely (or possibly not at all)
This homemade chocolate cake is a very precise recipe, which can make substitutions difficult. Each ingredient plays a role, so removing one of them will have an impact. If you substitute ingredients, you will also need to reformulate the recipe somewhat and adjust the quantities and ratios of the other ingredients. Unfortunately, I cannot provide instructions to accommodate every diet!
Here is a helpful guide on how to substitute oil in cakes, if you need that.
To make this simple chocolate sponge recipe egg-free, you could try one of these egg substitutes. However, the sponge might have a different taste and texture. The same is true of using different flours. Read more about the best flour to use in cakes and baking.
Dutch-processed cocoa powder yields far superior results to sugary cocoa powder, so I do not recommend using it. You could partially replace the sugar in the recipe with honey, but again, it will impact the texture and taste.
However, you can replace the milk with any vegan substitute, such as oat milk. If you don't want to use the coffee, substitute it with the same amount of water or milk to replace the moisture.
Read my baking guides for in-depth information on ingredients, techniques, and substitutions to learn more about baking.
Need to bake ahead? Store and freeze like a pro
The best thing about this recipe (other than the taste) is how easy it is to store. I recommend removing each cake from its cake pan, wrapping them in plastic wrap, and then placing them into a ziplock bag. You can fit 2 of the 6-inch cakes into one large ziplock bag. Once all are wrapped up, they can be stored in the fridge for up to 5 days until you are ready to use them.
You can also freeze chocolate sponge cakes in this manner for up to three months. I recommend always wrapping each cake in plastic wrap first and then placing it into a sealable plastic bag to prevent freezer burn.

Try some flavor variations
A classic chocolate sponge cake is a super versatile recipe to have in your back pocket, and it can also be adapted in a few simple ways to add more layers of flavor.
Try replacing a small portion of the flour with ground nut flour for added richness and taste. You can see how I have added hazelnut flour to this Ferrero Rocher cake, which has always been so popular.
A sprinkle of ground chili powder or ground cinnamon can add a whole new level of flavor to your perfect sponge cake. Add these ground spices to the dry ingredients before you add the egg mixture to form the batter.
A tablespoon of freshly grated orange zest or even lime zest would add delicious citrus flavor to this cake.
You could also drop a handful of fresh strawberries into the cake batter just before baking. The possibilities are endless!
My final expert tips
- To quickly bring eggs to room temperature, put them in a sink of hot tap water for 5 minutes.
- For perfectly even, moist sponge cake layers, weigh the total batter on your digital scale and then divide it evenly among your cake pans.
- Bake the cake immediately after you have made the batter; don't wait.
- The oven temperature for chocolate sponge cake is vital. Consider using a digital oven thermometer to ensure you are baking at the correct temperature.
- I also like to preheat the oven to 29°C / 68°F and then turn it down to the correct temperature once the cake is inside. This compensates for the drop in temperature when you open the door.
Troubleshooting
If your cake is dry, it might not have the correct ratio of ingredients, so next time make sure to weigh the ingredients using a digital scale. As an example, sugar is a tenderizer, so reducing it can dry things out. The oven might also be too hot or you overbaked it, so check that you are baking at the right temperature!
If your chocolate sponge cake sunk, it might be underbaked. Check out my article on sinking cake and how to avoid it.
If your sponge domes, the pan might be too small! Using a cake pan strip can also help to ensure an even rise. Check my cake pan sizes conversion for larger or smaller cakes.
If your sponge cake sticks to the pan, it probably wasn't prepared properly. Brush it with oil using a silicon pastry brush before lining it with parchment paper.
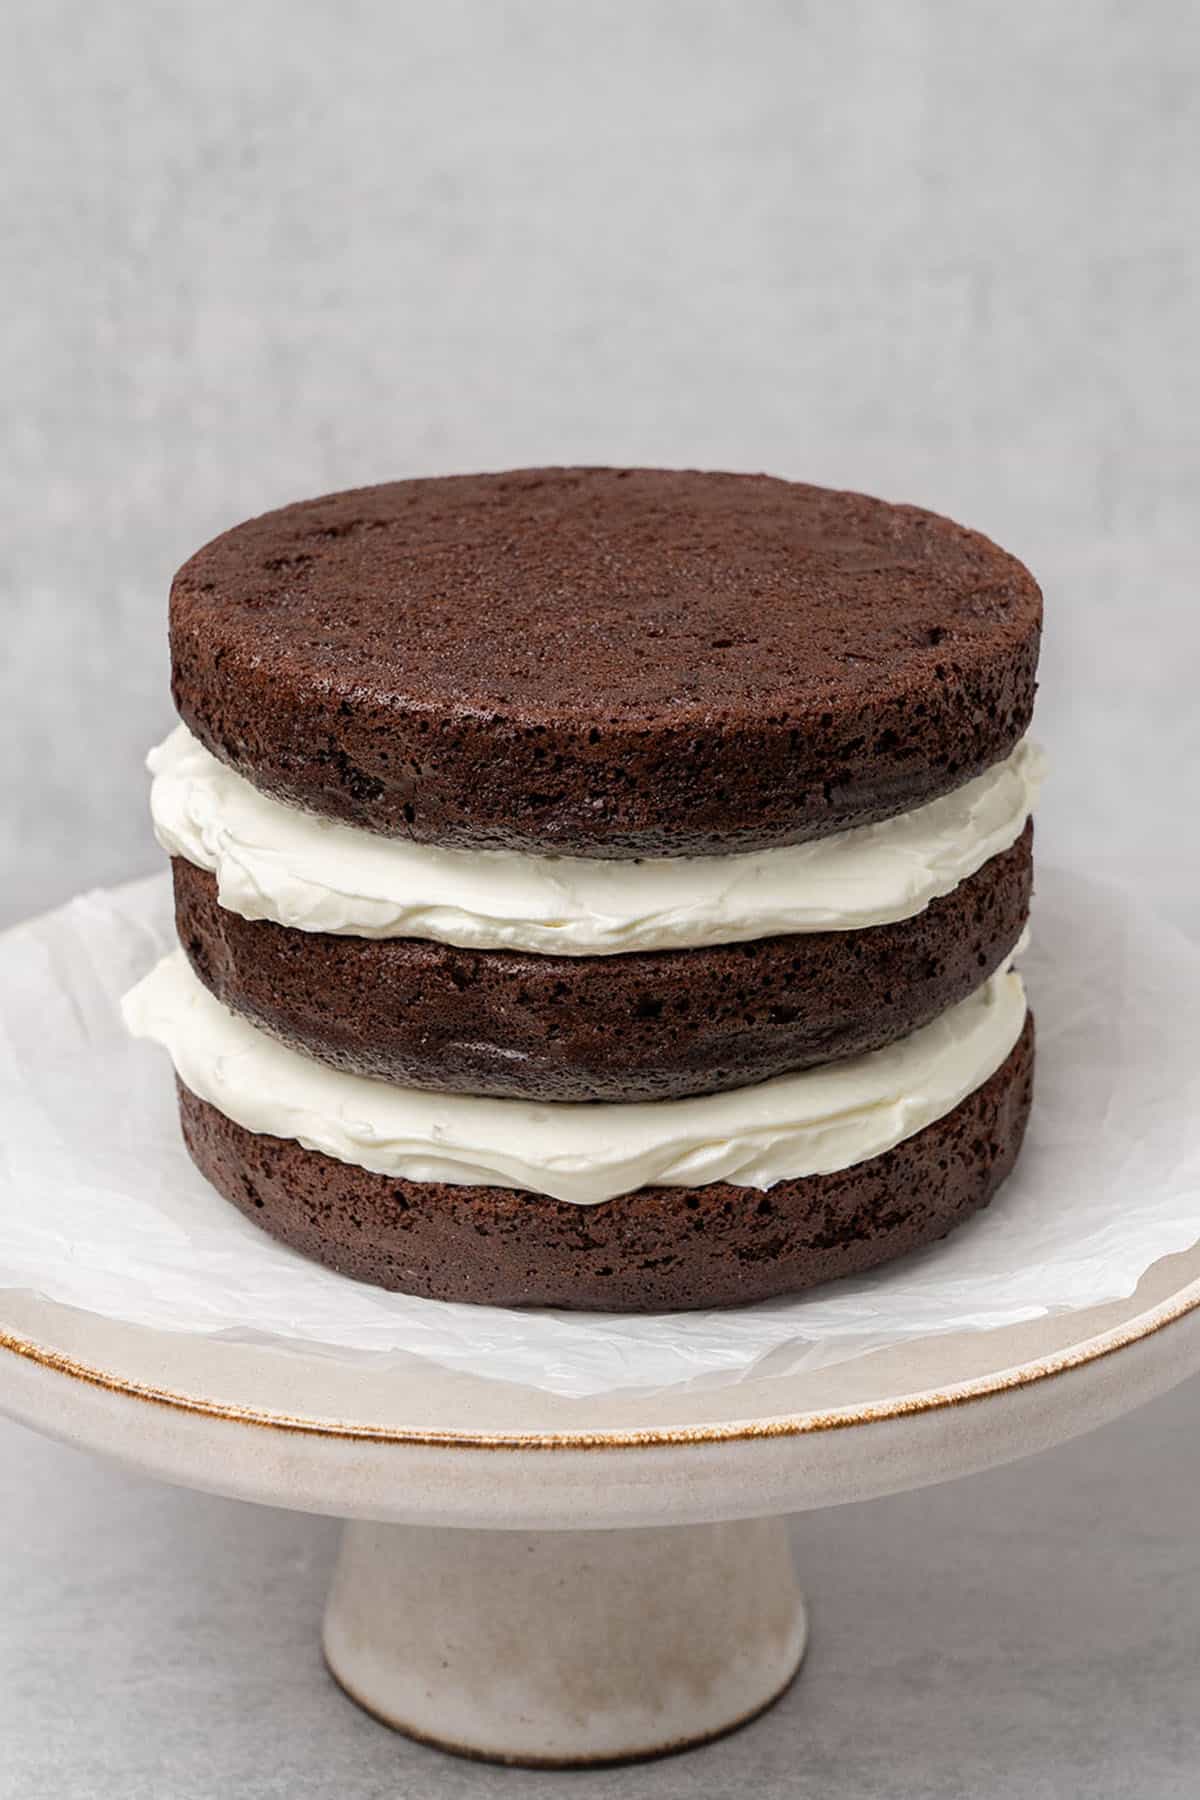
What fillings and frosting go well with chocolate sponge cake?
If you enjoyed baking this easy homemade chocolate sponge cake recipe, just wait until you try it with these fillings:
- Whipped chocolate ganache doubles down on the chocolate flavor and has the silkiest texture ever.
- Homemade caramel filling with an added pinch of salt makes the perfect sweet and salty flavor contrast.
- Chantilly cream is a classic French cake filling that is elegant and simple.
- A smooth layer of namelaka spread over the cake layers with some orange slices and fresh mint leaves will make anyone's day!
And I love to frost chocolate cake with one of these delicious recipes:
- Whipped mascarpone frosting is the perfect creamy contrast to the rich chocolate flavor and is stable enough to pipe.
- Oreo frosting will satisfy any chocolate lover and make this the ultimate birthday celebration cake for kids and adults alike.
- Raspberry buttercream frosting tastes amazing with the chocolate sponge cake and is even better if you garnish it with fresh raspberries, too.
- Peanut butter frosting is unbelievably delicious and everyone always loves it.
- Swiss meringue buttercream frosting is soft and silky and is best suited for this chocolate sponge cake for special occasions.
- Coconut frosting is definitely a winner for chocolate-coconut lovers.
Have you tried this recipe?
Please leave a 5-star ⭐️⭐️⭐️⭐️⭐️ rating on the recipe card and consider leaving a comment as well!

Easy Chocolate Sponge Cake (Light & Moist)
Equipment
- 15 cm (6 inch) round cake pan 3 pieces
Ingredients
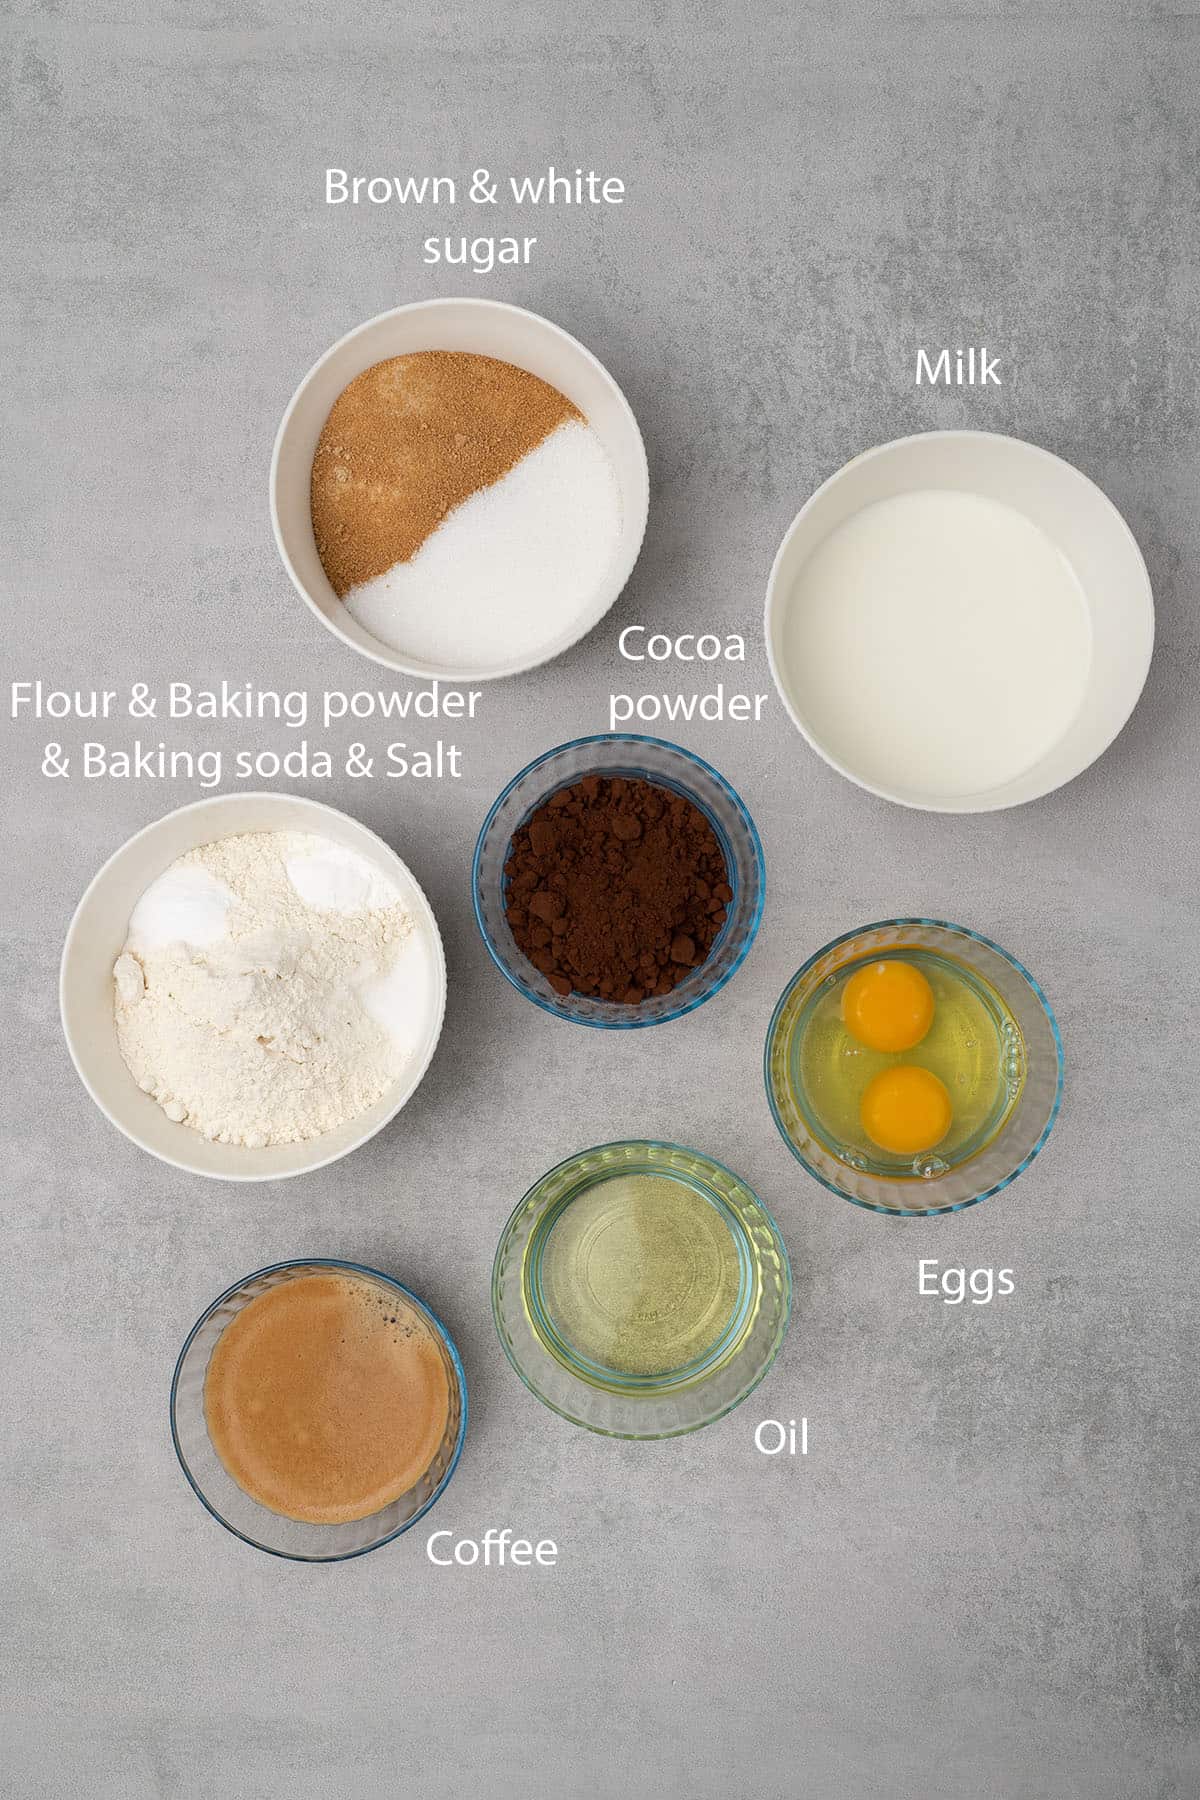
- 185 g (1½ cups) All purpose flour or any low protein content flour e.g. cake flour
- 50 g (½ cups) Cocoa powder unsweetened, Dutch processed
- 100 g (½ cups) Granulated sugar
- 100 g (½ cups) Brown sugar
- ½ teaspoon Vanilla extract
- 1 teaspoon Baking soda
- 1 teaspoon Baking powder
- ½ teaspoon Salt
- 70 g (⅓ cups) Vegetable oil
- 2 Eggs at room temperature
- 160 g (⅔ cups) Milk at room temperature
- 120 g (½ cups) Coffee freshly brewed strong coffee at room temperature
US customary cup measurement is an indicative figure only. Measure the ingredients with a digital scale by weight (gram). Baking is art but also science which requires precision and accuracy.
Instructions
- Preheat the oven to 180°C / 356°F (without the fan). Line three 15 cm (6-inch) round cake pans with parchment paper.
- Using an electric hand mixer, whip the wet ingredients—room temperature eggs, oil, sugar, coffee, milk, and vanilla extract—together for 1-2 minutes until well combined.
- Sift the dry ingredients—flour, baking powder, baking soda, cocoa powder, and salt—into the bowl and gently fold with a rubber spatula until just combined. You can also use a hand whisk, but be careful not to overmix.
- Place the pans in the oven and bake at 180°C / 356°F for 25-30 minutes or until a toothpick inserted into the center comes out clean.
- Flip the cakes onto a cooling rack or allow them to cool in the pan.
- Once the chocolate sponge is at room temperature, fill and frost according to your liking.
Notes
- Measure your ingredients with a Digital scale for accuracy.
- All ingredients for the chocolate cake must be at room temperature to properly emulsify.
- Do not skip the salt, it will balance the sweetness of this cake.
- Do not overmix the ingredients to ensure a light and fluffy texture.
- Do not overbake your chocolate sponge cake, as that will result in a dry texture. Use the toothpick test to check if your cake is ready.
- Use the below cake pan conversion chart for other pan sizes and bake times.
|
Quantity
|
Cake Pan Size (inches)
|
Cake Pan Size (cm)
|
How much batter
|
Bake Time
|
|
3 round pans
|
6-inches
|
15 cm
|
1x recipe
|
Approx. 25-30 minutes per cake
|
|
2 round pans
|
6-inches
|
15 cm
|
⅔x recipe
|
Approx. 25-30 minutes per cake
|
|
3 round pans
|
8-inches
|
20 cm
|
1.5x recipe
|
Approx. 35-40 minutes per cake
|
|
2 round pans
|
8-inches
|
20 cm
|
1x recipe
|
Approx. 35-40 minutes per cake
|
|
1 pan for a sheet cake
|
12 x 8 inches
|
30 x 20 cm
|
1x recipe
|
Approx. 25-30 minutes
|
Mahu
Thank you for the recipe. 🙂 I’m thinking on making this over the weekend. I have 2 questions:
1: if I want to add some orange zeat, when should I do it? Can I add some freshly pressed orange juice and if so, when or what would I replace?
2: I have only one 20cm pan. Can I bake the whole cake in one go? Or should I devide it into two batters takkng turns into baking? Also, how many layers would that give me? 🙂
Thank you so much! 😊
Katalin Nagy
Hey, regarding orange juice - you might want to replace some of the milk with orange juice, and also use a generous amount of orange zest massaged together with the sugar.
It is a wet batter, and I do not recommend baking all at once, then slicing. Better to make the layers separately. Here is how to adjust the ingredient quantities to different pan sizes: https://www.spatuladesserts.com/cake-pan-sizes-conversions/
Tracy
Wow will definitely try this recipe next week.
Sara
Hi! Going to try your recipe but had a few questions. Can you used dark chocolate cocoa powder? Is the milk whole milk? If I don’t want the coffee is it better to replace that ingredient with more milk or more water?
Thanks!
Katalin Nagy
Hey, I don't know what you mean by dark chocolate cocoa powder exactly. Please use dutched processed, unsweetened cocoa powder for baking (not the one you make hot cocoa with).
Milk is always whole milk.
If you don't want to use the coffee, water is the closest substitute, as coffee has zero fat (milk does).
Archjana Sivasuthan
Hi, can I freeze this cake ?
Katalin Nagy
Sure, I have storage and freezing instructions in the recipe.
C K
This really is a soft fluffy cake! I replaced the milk & coffee with the same amount of chocolate milk and came out super soft and delicious
Lari
I made this cake for my friend’s birthday and everyone was thrilled about it! Soooo moist and fluffy. Also it’s not too sweet and I love that! Just perfect.
Thank you for the recipe🙏❤️🤗
Melissa
This is truly the best MOIST chocolate sponge cake recipe, you are no joke! Chocolate and cocoa base sponges tend to dry out, not this one!
Lisa
THIS!! OMG seriously the best chocolate sponge cake recipe. I've tried as sheet cake, layered cake, and also as cupcake and it just WORKS!!
Chetna Sibal
Hello - What will be recipe for 9 inch cake pan? Also what does it mean by 1.5x recipe? Can you give a conversion of your recipe to 1.5x?
Katalin Nagy
Use this article to convert https://www.spatuladesserts.com/cake-pan-sizes-conversions/
I can't provide recipe for all sorts of cake pan sizes, pls make the calculation yourself. 1.5x means to increase all ingredients by 50%.
Aliya
coffee made with milk or water.. could you please help with exact measurements howto make this please
Katalin Nagy
Coffee is made with water. You need an Americano style coffee, no sugar. Measurements are in the recipe card in cups and grams as well.