This tiramisu cheesecake is the perfect blend of two iconic desserts. A creamy, rich cheesecake filling sits atop a buttery graham cracker crust, creating the ideal base for the coffee-soaked ladyfingers and silky mascarpone cream that make this dessert so irresistible.
Find out why this is one of my most requested desserts among my friends and family!

Best Tiramisu Cheesecake Recipe
This tiramisu-cheesecake dessert has been thoroughly tested many times, so even beginners can comfortably try making it. Combining two classic favorites - cheesecake and tiramisu- means that each layer and flavor needs to stand out on its own.
The cheesecake layer adds a creamy richness with a velvety smooth texture, and it pairs perfectly with the coffee-flavored tiramisu layer.
Don't forget the fluffy mascarpone topping that is always a crowd favorite! I'm also a big fan of the fact that none of the flavors overpower each other. You still get the classic Tiramisu taste, with a hint of that tangy cheesecake and graham cracker crust crunch.
When you can combine all those flavors and multiple desserts into one, it means that you don't have to pick and choose. You get the best of the dessert world by having all the flavors in one yummy bite.
Katalin's key take on whether a water bath is needed for making Tiramisu cheesecake?
People's number one issue with cheesecake is that the top cracks, puffs up, sinks, or the whole thing becomes too dry. The good news is that most of the problems can be easily avoided by not overmixing or overbaking the cheesecake.
When you overmix, you incorporate too much air, which causes the mixture to expand and crack during baking. Overbaking also dries out the cheesecake (causing cracks on top), so be sure to follow the recipe card below closely.
So, do you need a water bath to make this cheesecake? It isn't required, but it does help. The water bath creates a gentle baking environment that allows the cheesecake to bake evenly and also reduces cracking.
Adding toppings to the cheesecake can help cover any cracks or issues that may occur, but I recommend using a water bath for the best results.

Start with the Graham cracker crust
First, preheat the oven to 350°F (175°C) as you will need to pre-bake this Graham cracker cheesecake crust.
Melt the butter in the microwave or on the stovetop until it is fully liquid. Set it aside to cool to room temperature, but don't let it fully set. It has to be still liquid but not hot.
Use a food processor to crush the graham crackers into fine crumbs. You can also add the crackers to a sealable bag and crush them using a rolling pin. If you are using a zip bag, make sure that it's large and strong enough to withstand the crushing without tearing.
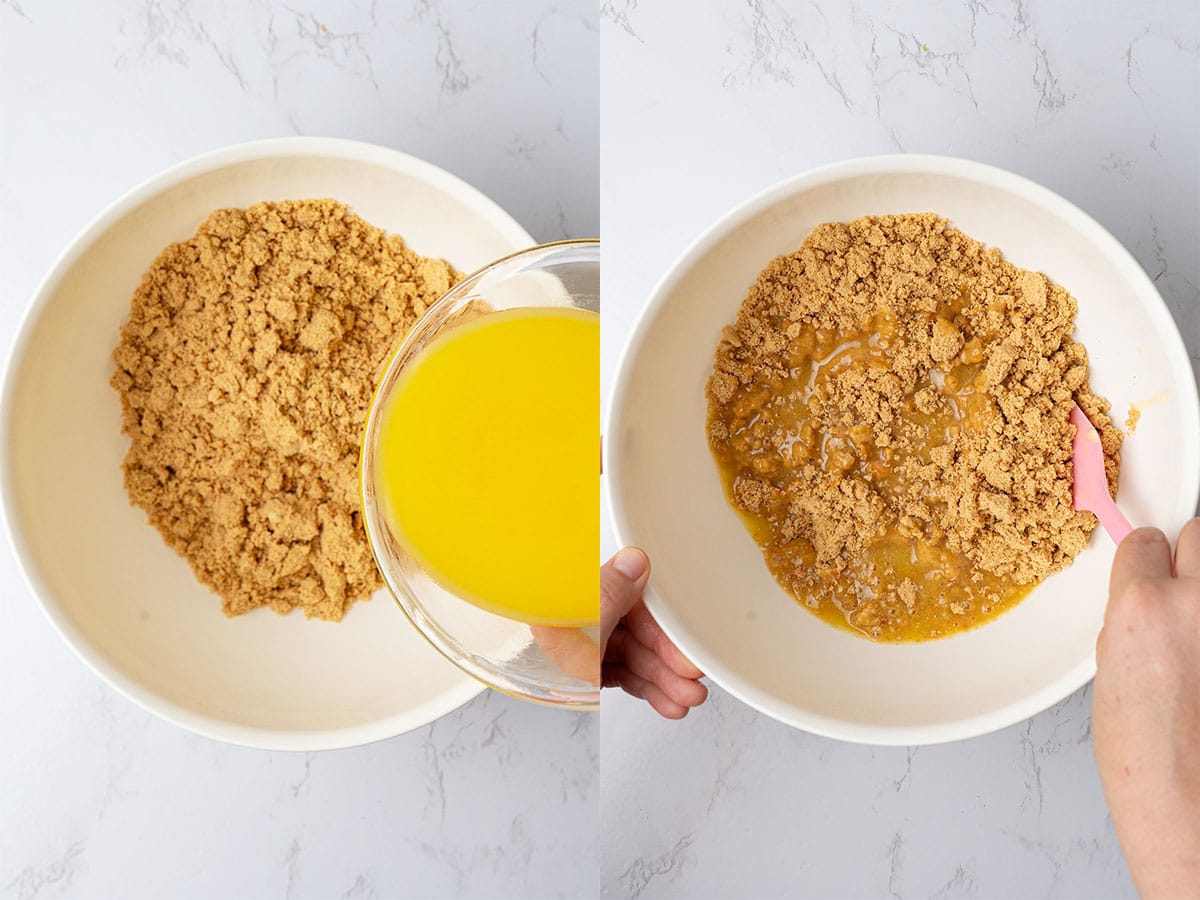
Mix in a little bit of salt with the crumbs, and then pour the melted butter over the top. Stir until it looks like wet sand. If the mixture seems a bit too runny after combining the ingredients, do not add more graham cracker crumbs. Just pop it in the fridge for about 5 minutes, and it will firm up quickly and become much easier to work with.
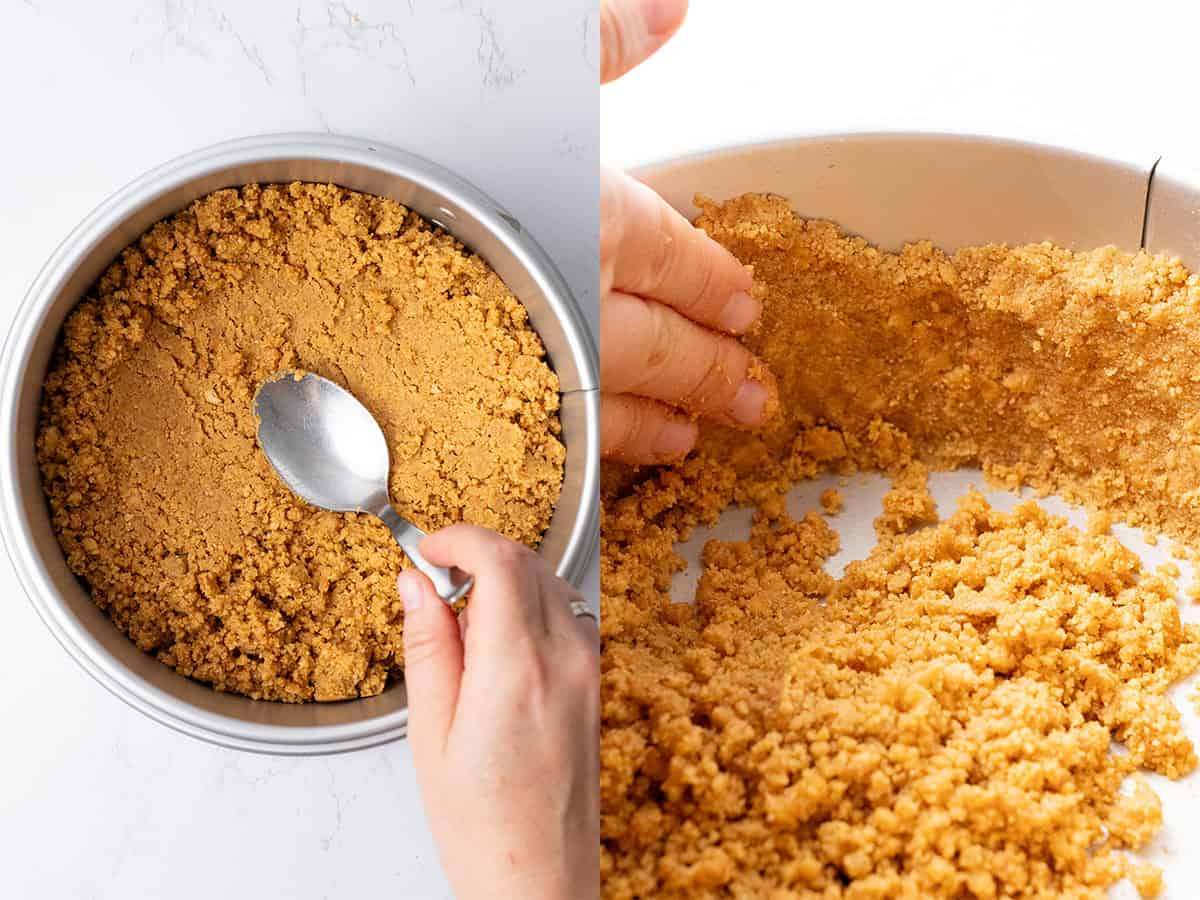
Pour the crumb mixture into an ungreased 8-inch or 9-inch springform pan. Start with the sides and work your way around until you achieve an even side crust; then, continue with the bottom. You can use a flat-bottom mug, a measuring cup, or even a drinking glass to press it down. Personally, I prefer using a metal spoon with a slightly bent handle as it provides great control and an even surface.
Once it's packed down, place the pan in the fridge or freeze it to firm up.
Once it's firm, bake the graham cracker crust in the oven at 350°F (175°C) for 8–10 minutes, until lightly golden and set. Remove and let the crust cool before adding the cheesecake mixture.
Water bath preparation
The water bath needs to be ready for use as soon as the cheesecake mixture is prepared, so ensure this section is ready to avoid any delay.
Preheat the oven to325°F (165°C). Don't use the fan setting. The hot air creates an uneven baking environment, resulting in an unevenly browned crust.
Grab a deep roasting pan. Make sure that it's big enough that the Springform pan can fit inside. I always use the one I cook my whole turkey in for Thanksgiving because I know it has plenty of space.
One of the most important parts of this entire section is to make sure that the springform pan is watertight. Wrap 5-6 layers of foil around it, ensuring the base and sides are fully covered. If there are any cracks or leaks at all, you'll end up with a soggy crust.
The cheesecake batter comes together quickly and easily
The key to perfection in this baked cheesecake recipe is going low heat and slow. Overmixing causes cracks, so keep the mixer on low speed, scrape down the sides of the mixing bowl often, and take your time through this step.
It's also super important that the cream cheese, eggs, and sour cream are all at room temperature, as cold ingredients will result in lumps in the batter. Here is a helpful guide on how to soften cream cheese.
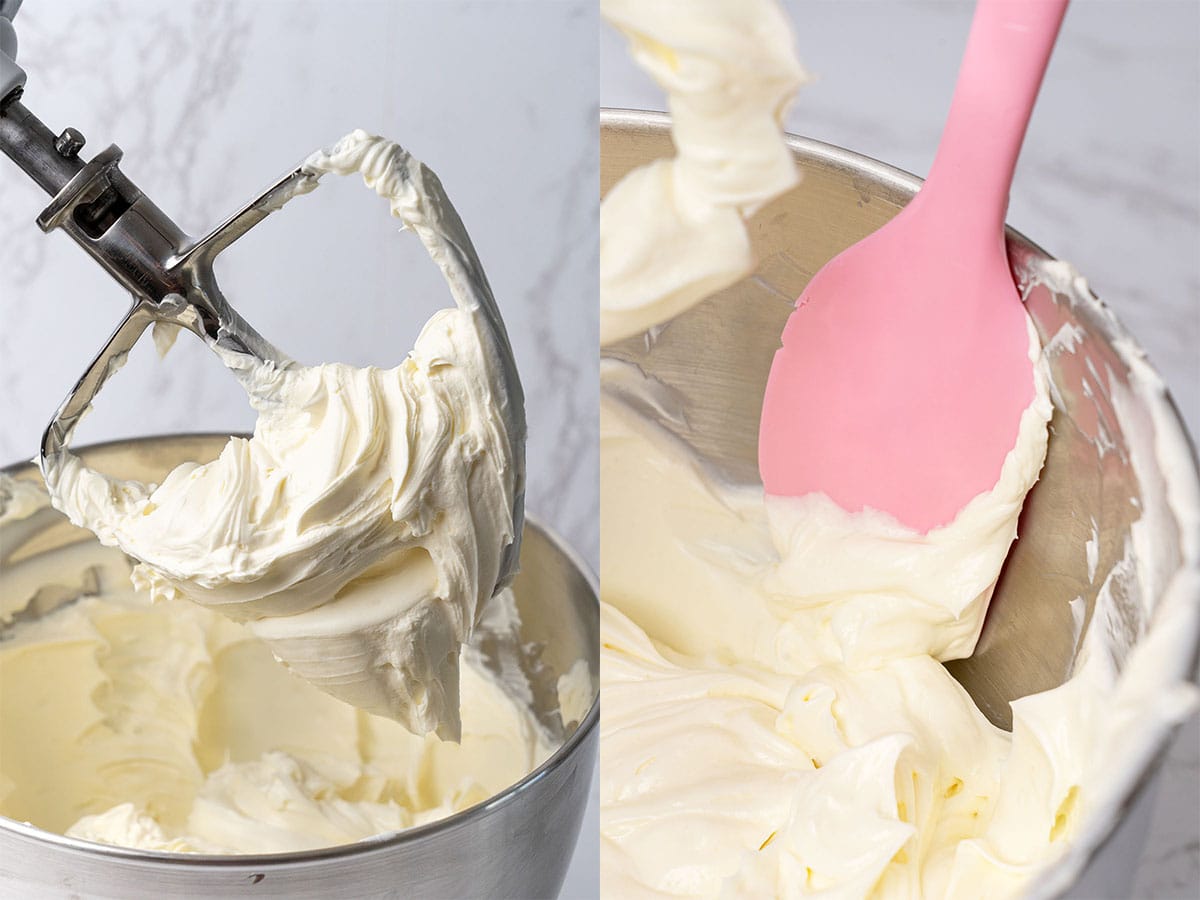
With the help of your stand mixer using your paddle attachment, mix the cream cheese for about 2 minutes, until it is lump-free. Scrape the sides of the bowl, add the sugar, and mix for an additional 2 minutes. Scrape the bowl again.
Add the lemon juice, vanilla extract, room temperature sour cream, and a pinch of salt. Mix on low til the ingredients are just combined. This will literally take about 10 seconds. You don't need to mix any longer than that.
In a smaller bowl, mix the room temperature eggs, then add them to the cheesecake batter while the mixer is running. Mix for about 30 seconds, then turn the mixer off. Again, you don't need or want to overmix here.

Now, assemble the tiramisu cheesecake
It's time to assemble the tiramisu cheesecake! Make a strong espresso-style coffee to dip the ladyfingers in.
Then, calculate upfront how many ladyfingers you need (depending on whether you use an 8- or 9-inch pan, you will need fewer or more), and do a quick test with the cookies to determine how you will arrange them into a circle.
Start by adding the layers in this pattern, from bottom to top:
- ½ of the cheesecake batter
- ½ of the coffee dipped ladyfingers in one layer
- ½ of the cheesecake batter
- ½ of the coffee dipped ladyfingers in one layer
If you prefer, you can divide the cheesecake batter evenly with a scale to achieve two neat, equal layers.
When dipping the ladyfingers into the coffee, moisten them gently, but avoid soaking them to the point where they fall apart. Not only is that too much, but they'll be super hard to grab and place on the dessert when they're mushy.

When adding the ladyfingers to the cheesecake, press them halfway into the batter so that they sit on the surface. They should still sit on top. Don’t press them “into” the mixture.

Once everything is layered, move the pan to the roasting pan and then pour hot water into the pan until it is about ⅓ of the way up the sides of the springform pan.
Move the pan with the water and cheesecake into the oven. Go slow here, as you don't want to make a mess by spilling any of the water.

Bake your cheesecake, but don't overbake it
Bake the cheesecake in the water bath at 325°F (165°C) for about 75-85 minutes. Once the time has passed, you'll know it's done and ready to remove from the oven when the edges are set and the center of the cheesecake has a slight jiggle. Don't open the oven door while baking, as this can cause the cheesecake to fall or crack!
Once the baking time has passed and you are satisfied with the result based on the visual clues above, turn off the oven. Leave the door closed and leave the cheesecake in the oven for another hour. After the hour has passed, remove the roasting pan from the oven and then carefully lift the cheesecake out of it.
Unwrap the foil and place the cheesecake pan on a wire rack to cool for 1 hour.
After the cheesecake has cooled, place it in the fridge to chill for at least 6 hours, or overnight.
Once it's done chilling, you can then remove the cheesecake from the springform pan to prep and serve.
Finally, apply the mascarpone topping just before serving
You're nearing the finish line with this yummy cheesecake dessert! The good news is that making the mascarpone topping only takes a few minutes.
Before getting started, make sure that the heavy cream is very cold. You also need to get rid of any water that is in the mascarpone package.
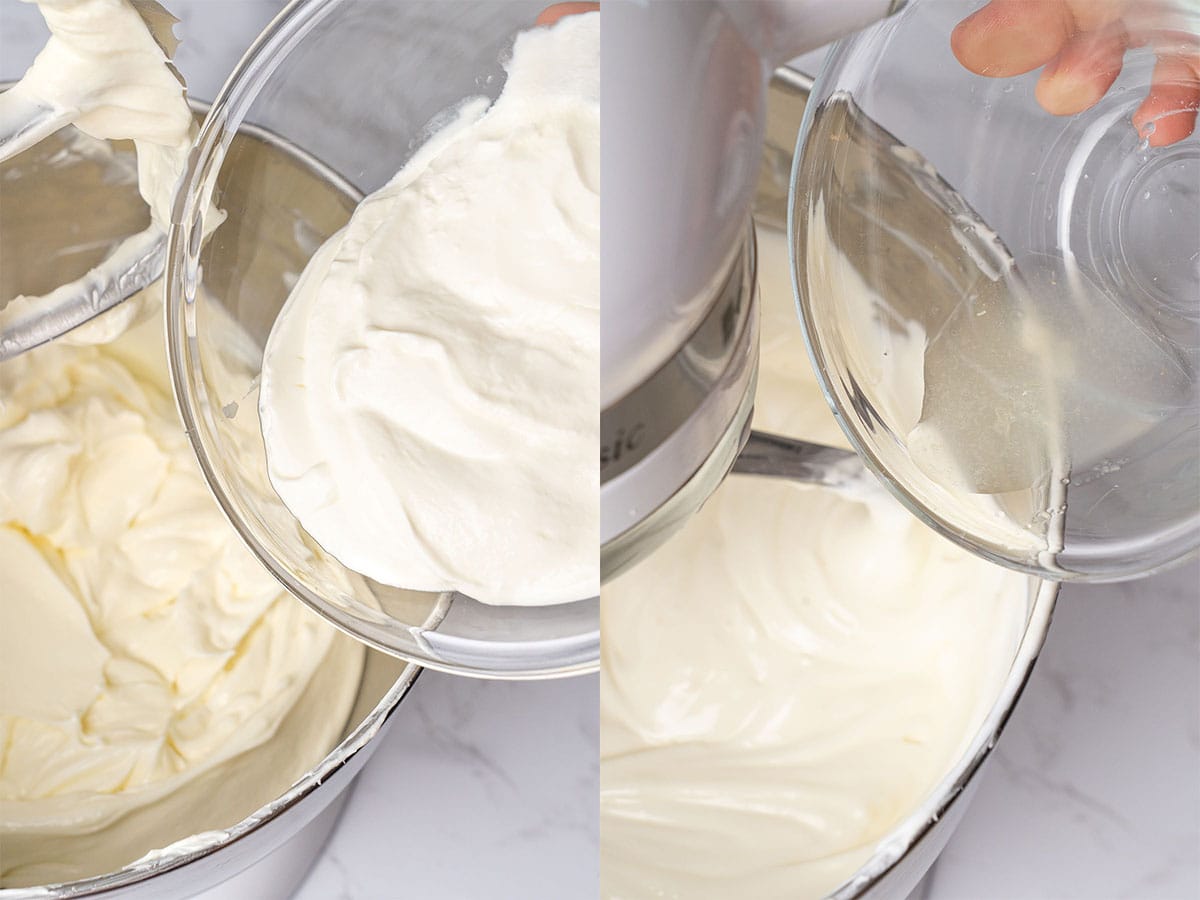
Add the mascarpone, heavy whipped cream, and sifted powdered sugar into a mixing bowl.
Whip everything together using an electric mixer. Add the vanilla bean paste.
Once you notice the mixture has a fluffy, pipeable consistency, stop mixing. You don't want to overmix, as this can cause the frosting to curdle.
Scoop it into a piping bag and decorate. You can pipe it around the edges for a pretty look, or do any designs that you want. And don't forget the cocoa dusting - it's the final piece that brings it all together!

Storing & freezing
Store leftovers in an airtight container and keep them refrigerated for 2-3 days.
Freezing cheesecake is also an option. You can freeze slices or the entire cheesecake. To freeze the entire cheesecake, keep it in the springform pan and wrap it tightly in plastic wrap. To freeze slices, double wrap the slices in aluminum foil or plastic wrap.
Either option will last in the freezer for 2-3 months. Move to the fridge to thaw overnight when you're ready to eat.
However, I recommend not freezing the mascarpone part, as it does not freeze very well and might alter the texture.

Flavor Variations
There's always room for flavor variations, and every layer of this baked tiramisu cheesecake could have a fun flavor addition or change.
Adding a few drops of vanilla extract to the crust is a delicious and simple change. Some crust nuts like pecans or walnuts could also work in the crust.
Flavor changes to the cheesecake batter can be as simple as adding different extracts. You have options like almond, lemon, vanilla, and even coconut flavors.
While the ladyfingers have a coffee flavoring, you could always use hot cocoa or hot chocolate instead.
Raspberry tiramisu and matcha tiramisu showcase how fun and simple optional flavors can be; both of them could work very well in this cheesecake.
Ingredient Substitutions
Gluten-free ladyfingers and a gluten-free graham cracker crust can make this recipe suitable for those with gluten intolerance.
You can substitute the Graham crackers with Digestive biscuits - both work just fine! Other cookies could also be used for the crust. Think chocolate Biscoff or Oreo.
I do not recommend substituting the high-fat cream cheese or the eggs unless you are an expert at entirely reformulating this recipe. However, you can replace the sour cream with heavy cream or Greek yogurt.

Expert tips to make Tiramisu Cheesecake
- Always use quality ingredients such as high-fat mascarpone, high-fat cream cheese, good-quality butter, and vanilla, and avoid substitutes if you are making the recipe for the first time.
- Be careful when using your food processor when making the crumbs for the crust. If you overprocess the Graham cracker crumbs, they'll turn into a paste, and you'll have to redo them.
- Never skip the salt in dessert recipes; it will balance the flavors.
- You should know this by now from reading the previous sections, but the most important part of the cheesecake batter is: do not overmix!
- Run a thin knife around the inside edge of the pan to prevent the cheesecake from sticking as it cools. Do this right when you take the pan out of the oven.
- Make sure that you're using a quality springform pan. Cheaper ones tend to warp and crack over time.
What Equipment To Use
You can use a digital scale for precise measurement of ingredients. Use a food processor or a rolling pin to make the crust.
A stand mixer is needed to mix and make the cheesecake filling.
I like to use an 8-inch springform, but a 9-inch works, too.
Use a rubber spatula to scrape down the sides of the mixing bowl.
A digital oven thermometer is a simple way to make sure that your cheesecake is just the right temperature.
The piping bag and Wilton 2A round nozzle tip are used to pipe the mascarpone.
Try Some Of My Other Cheesecakes
If you're a cheesecake fan like me, be sure to check out some of my other favorites:
- Japanese cheesecake
- Baklava cheesecake
- Basque Burnt cheesecake
- Pistachio cheesecake
- No-bake strawberry cheesecake
For even more recipes, check out my Italian desserts round-up!
Have You Tried This Recipe?
Please leave a 5-star ⭐️⭐️⭐️⭐️⭐️ rating on the recipe card and consider leaving a comment as well!

Equipment
Ingredients
Tiramisu Cheesecake
Crust
- 200 g (1⅔ cups) Graham Cracker Crumbs 200 g = 7 oz = approx. 13 sleeves
- 80 g (⅓ cups) Unsalted butter
- Pinch of salt
Cheesecake batter
- 680 g (3 cups) Cream cheese full fat Philadephia at room temperature
- 200 g (1 cups) Granulated sugar
- 170 g (¾ cups) Sour cream full-fat at room temperature
- 1 tablespoon Lemon juice freshly squeezed
- 2 teaspoon Vanilla extract
- Pinch of salt
- 3 Eggs lightly whisked at room temperature
Ladyfingers layer
- 16 Ladyfinger cookies Store-bought or make my homemade ladyfingers recipe. I could fit 8x2 layers into my 8-inch pan, you might need slightly more or less.
- 1 cup Coffee Mildly sweetened strong espresso to soak the ladyfingers in.
Mascarpone topping
- 150 g Mascarpone high fat, use it cold
- 120 g Heavy cream 36% fat content, use it cold
- 40 g Powdered sugar sifted
- 1-2 tablespoons Cocoa powder unsweetened Dutch processed to decorate the top
US customary cup measurement is an indicative figure only. Measure the ingredients with a digital scale by weight (gram). Baking is art but also science which requires precision and accuracy.
Instructions
Crust
- Gently melt the butter in the microwave or on the stovetop until completely liquid, then let it cool slightly. Process the graham crackers into fine crumbs using a food processor, or place them in a zip bag and crush them with a rolling pin.
- Stir a pinch of salt into the crumbs, then add the melted butter and mix until the texture resembles wet sand.
- Evenly press the mixture into the bottom and sides of an ungreased 8- or 9-inch springform pan using the back of a spoon or a measuring cup. Press down firmly and evenly without compacting it too much, then place it in the fridge or freezer to chill while you make the filling.
- Bake the crust in a 350°F (175°C) preheated oven for 8–10 minutes, until it turns lightly golden and is set. Take the crust out and allow it to cool completely in the pan before adding the cheesecake batter.
Water bath preparation
- Preheat the oven to 325°F (165°C), no fan, and prepare a roasting pan for the water bath that is bigger in size, than your springform pan. Set it aside.
- Wrap the outside of the springform pan containing the crust in a minimum of 4-5 layers of heavy-duty aluminum foil, covering the bottom and sides to prevent leaks. For extra protection, you can also place the foil-wrapped pan inside a large oven-safe bag.
Cheesecake batter
- Add the room-temperature full-fat cream cheese to the bowl of a stand mixer fitted with a paddle attachment. Mix on medium-low speed for 2 minutes until smooth and free of lumps, then scrape down the sides and bottom of the bowl.
- Add the granulated sugar and continue creaming on medium-low speed for 2 minutes until the mixture looks silky and no longer grainy. Scrape down the bowl again.
- Add the room-temperature sour cream, freshly squeezed lemon juice, vanilla, and a pinch of salt. Mix on low speed for about 10 seconds, just until blended, then scrape down the bowl again.
- In a small bowl, lightly whisk the room-temperature eggs until just combined. With the mixer on low speed, slowly pour in the eggs and mix for about 30 seconds, only until incorporated. Stop mixing as soon as the batter is smooth and even.
Assemble the cheesecake
- Layer the cheesecake in the prebaked crust in the following way from bottom to top:½ of the cheesecake batter½ of the coffee dipped ladyfingers in one layer½ of the cheesecake batter½ of the coffee dipped ladyfingers in one layer
- When arranging the ladyfingers on top of the cheesecake layer, gently press them about halfway into the batter, making sure they sit lightly on the surface.
- Then, move the pan onto the roasting pan. Carefully pour hot water into the roasting pan until it reaches about thirdway up the sides of the springform pan, then transfer it with the cheesecake and water into the oven.
- Bake the cheesecake in the water bath at 325°F (165°C) for 75-85 minutes, until the edges are set but the center is still slightly jiggly when gently shaken. Do not open the oven door during baking.
- After the baking time is over, turn off the oven but leave the cheesecake inside the closed oven for another 60 minutes. After 60 minutes, remove the roasting pan from the oven and carefully lift the cheesecake out of the water bath. Unwrap the foil and place the pan on a wire rack. Let it cool at room temperature for about 1 hour.
- Once the cheesecake has cooled to room temperature, place it in the refrigerator to chill for at least 6 hours, or overnight, until fully set. Only after chilling, release the springform pan and remove the cheesecake carefully.
Mascarpone topping
- Place the mascarpone in a mixing bowl, then add the cold heavy cream and sifted powdered sugar. Whip with an electric hand mixer. After 2–3 minutes, once the frosting is fluffy and pipeable, stop mixing immediately. Using a round nozzle tip, pipe the frosting on top of the cheesecake, and then finish with dusting cocoa powder on top, just before serving.
- StoringOnce the cheesecake has chilled and set, cover any leftovers with plastic wrap or aluminum foil, and store it in the refrigerator for up to 2-3 days to maintain freshness and prevent it from drying out.FreezingAfter the cheesecake has fully chilled - but before mascarpone frosting is added on top - wrap the whole cheesecake (still in the springform pan) or individual slices tightly in plastic wrap, then add a layer of aluminum foil for protection; freeze for up to 2–3 months, and when ready to serve, transfer to the refrigerator to thaw slowly overnight for the best texture.
Notes
- Measure your ingredients with a digital scale for accuracy.
- Do not skip the salt; it will balance the flavors.
- Feel free to substitute Graham crackers with Digestive biscuits.
- The crust is sweet enough, but for people with an extra sweet tooth, feel free to add 1-2 tablespoons of granulated sugar to this crust recipe.
- For the cheesecake batter, use full-fat ingredients at room temperature.
- Choose high-quality mascarpone, as cheaper brands can be grainy and affect the smoothness of the frosting.
- High-quality vanilla extract or paste makes a significant difference.
- Make sure you read my step-by-step instructions in the post above with all the details of how to make this cheesecake crust. A short recipe alone is not able to cover all the necessary details and science behind baking.
- When processing graham crackers in a food processor, stop as soon as you have fine, sandy crumbs. If you overprocess, the crackers can release too much fat and turn pasty, almost like cookie butter.
- While preparing the crust, ensure that you press the crumbs firmly and evenly into the sides and bottom of your springform.
- To avoid a crust that’s too hard, don’t over-pack the crumbs. Firm pressure is enough — pressing too tightly can make it difficult to cut clean slices later.
- Use the paddle attachment, not the whisk, to avoid whipping air into the cheesecake batter.
- Mix on low speed and scrape down the bowl frequently to achieve a smooth, lump-free texture.
- Do not overmix after adding eggs — this prevents excess air and cracks.
- When dipping ladyfingers into coffee, let them absorb just enough to moisten, but avoid soaking them until they become overly wet or fall apart. They should hold their shape while still carrying the coffee flavor.
- Since the top of the cheesecake will be covered with mascarpone frosting, you can optionally skip the water bath. However, the water bath not only helps avoid cracks on the top of cheesecake but also contributes to even baking throughout.
- Allow slow cooling in the oven before chilling to avoid sinking or splitting.
- Do not cut the cheesecake until it has fully set in the refrigerator.
- Use a sharp knife dipped in hot water and wiped clean between each cut for neat slices.
Nilay
Tiramisu