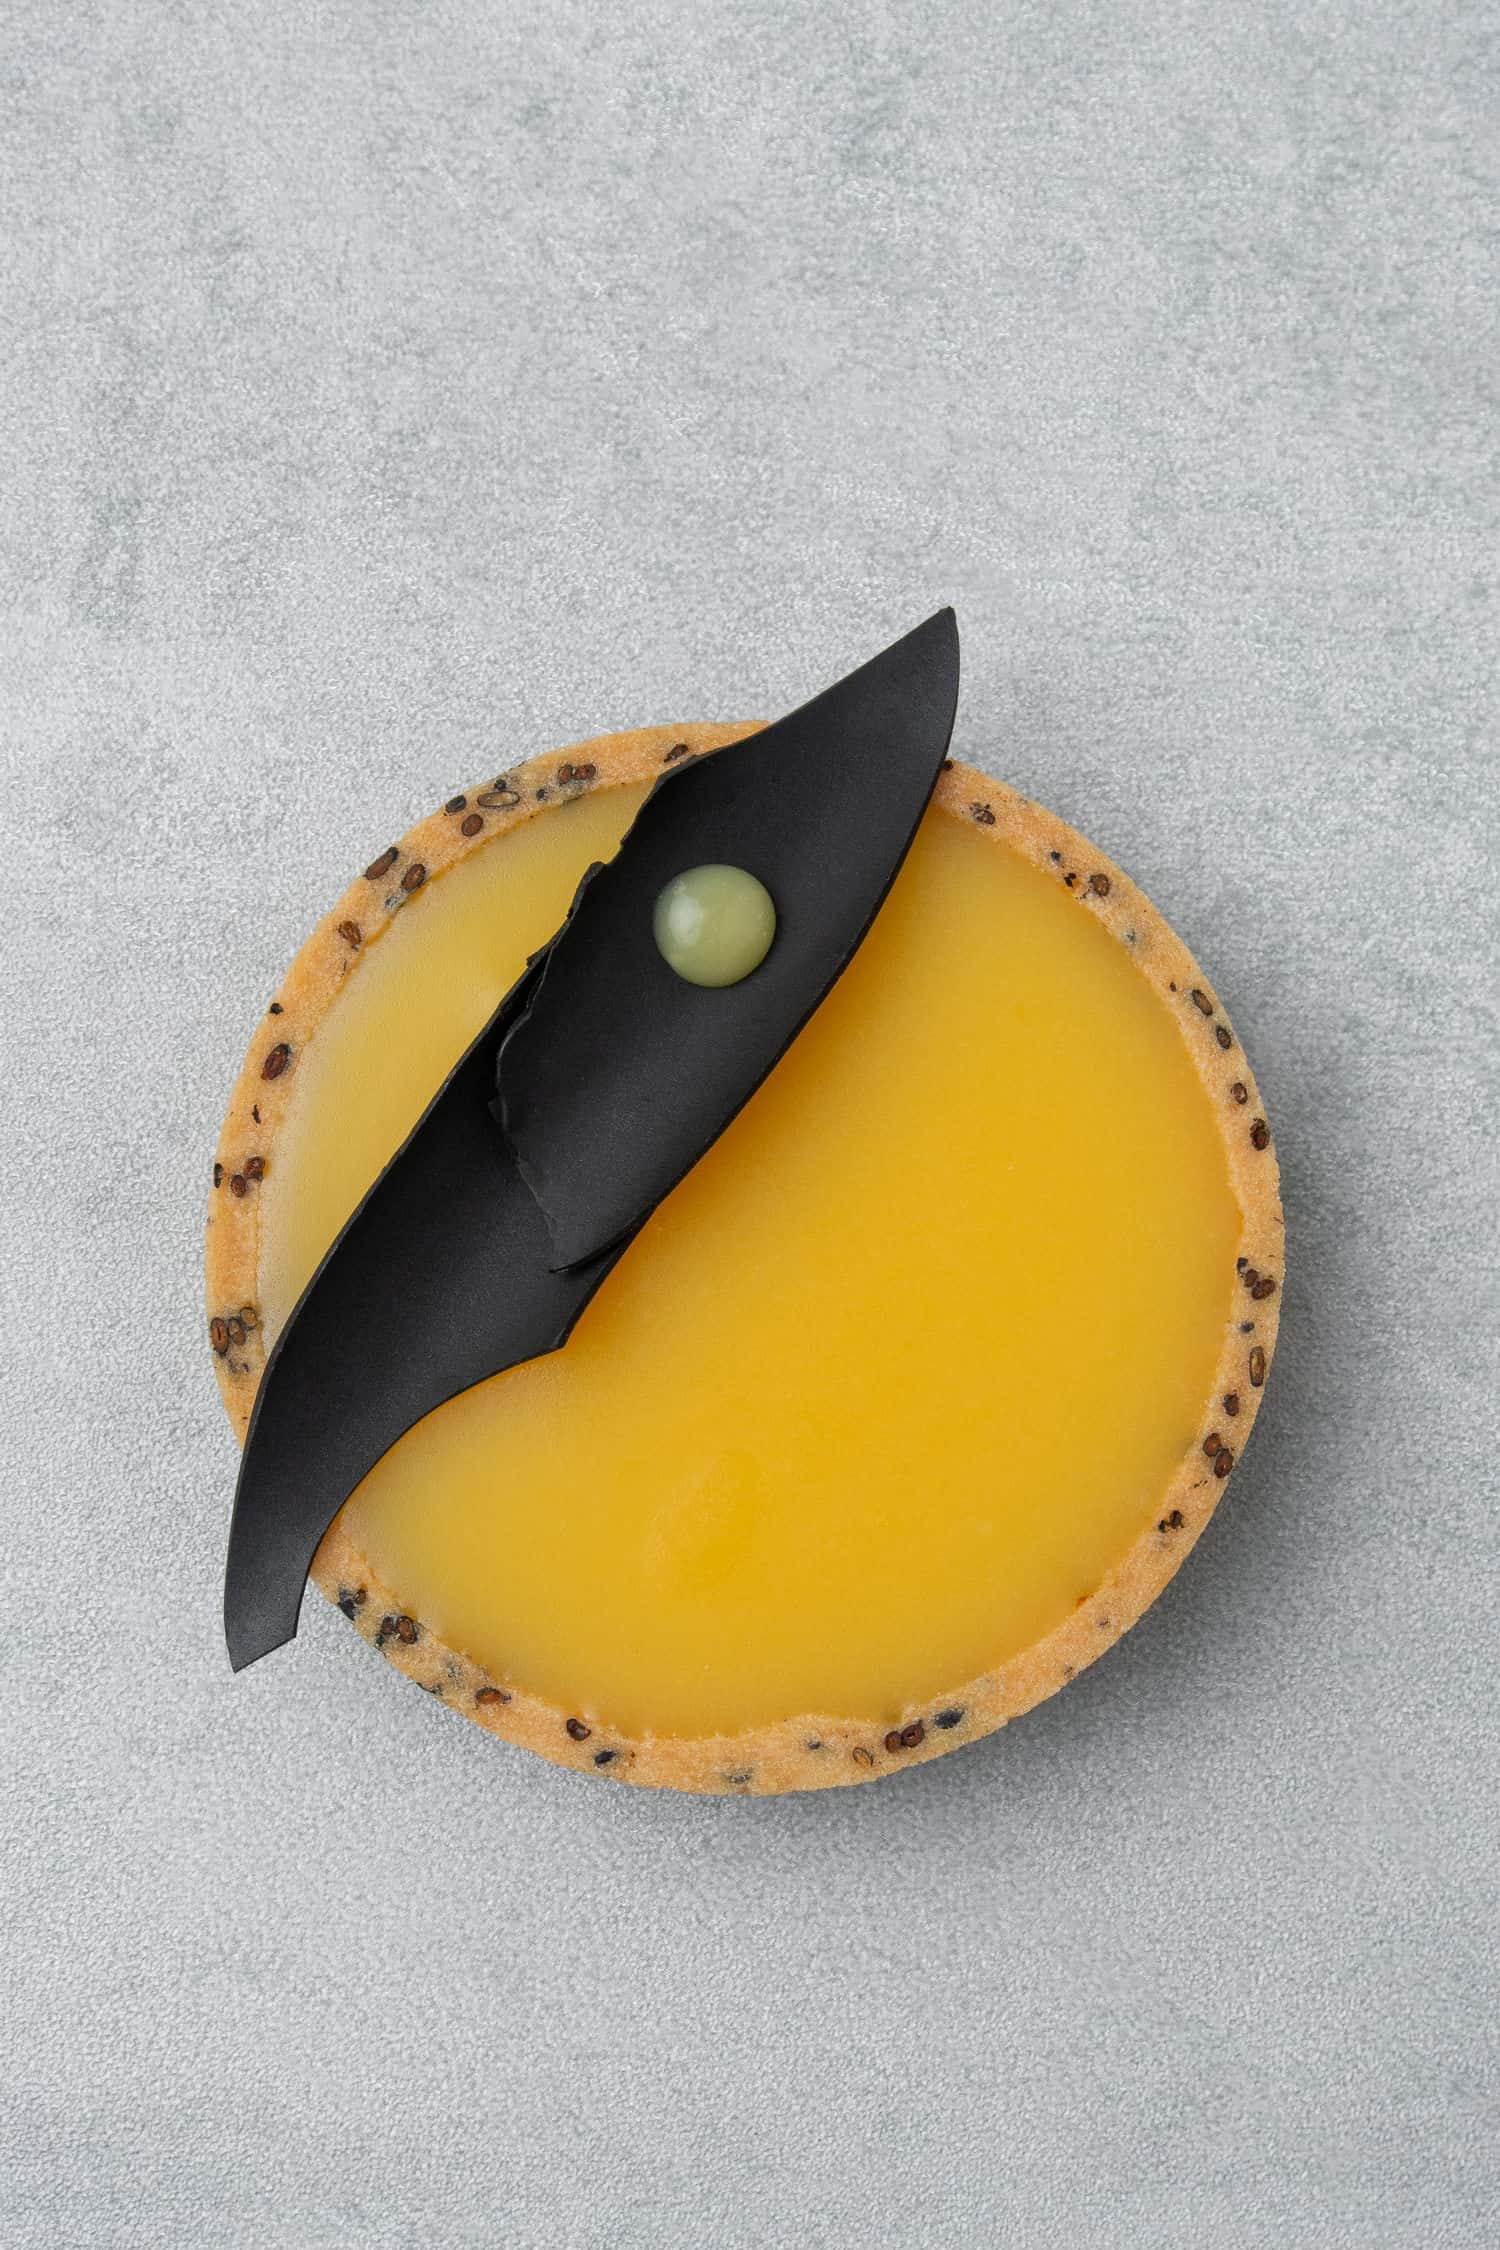
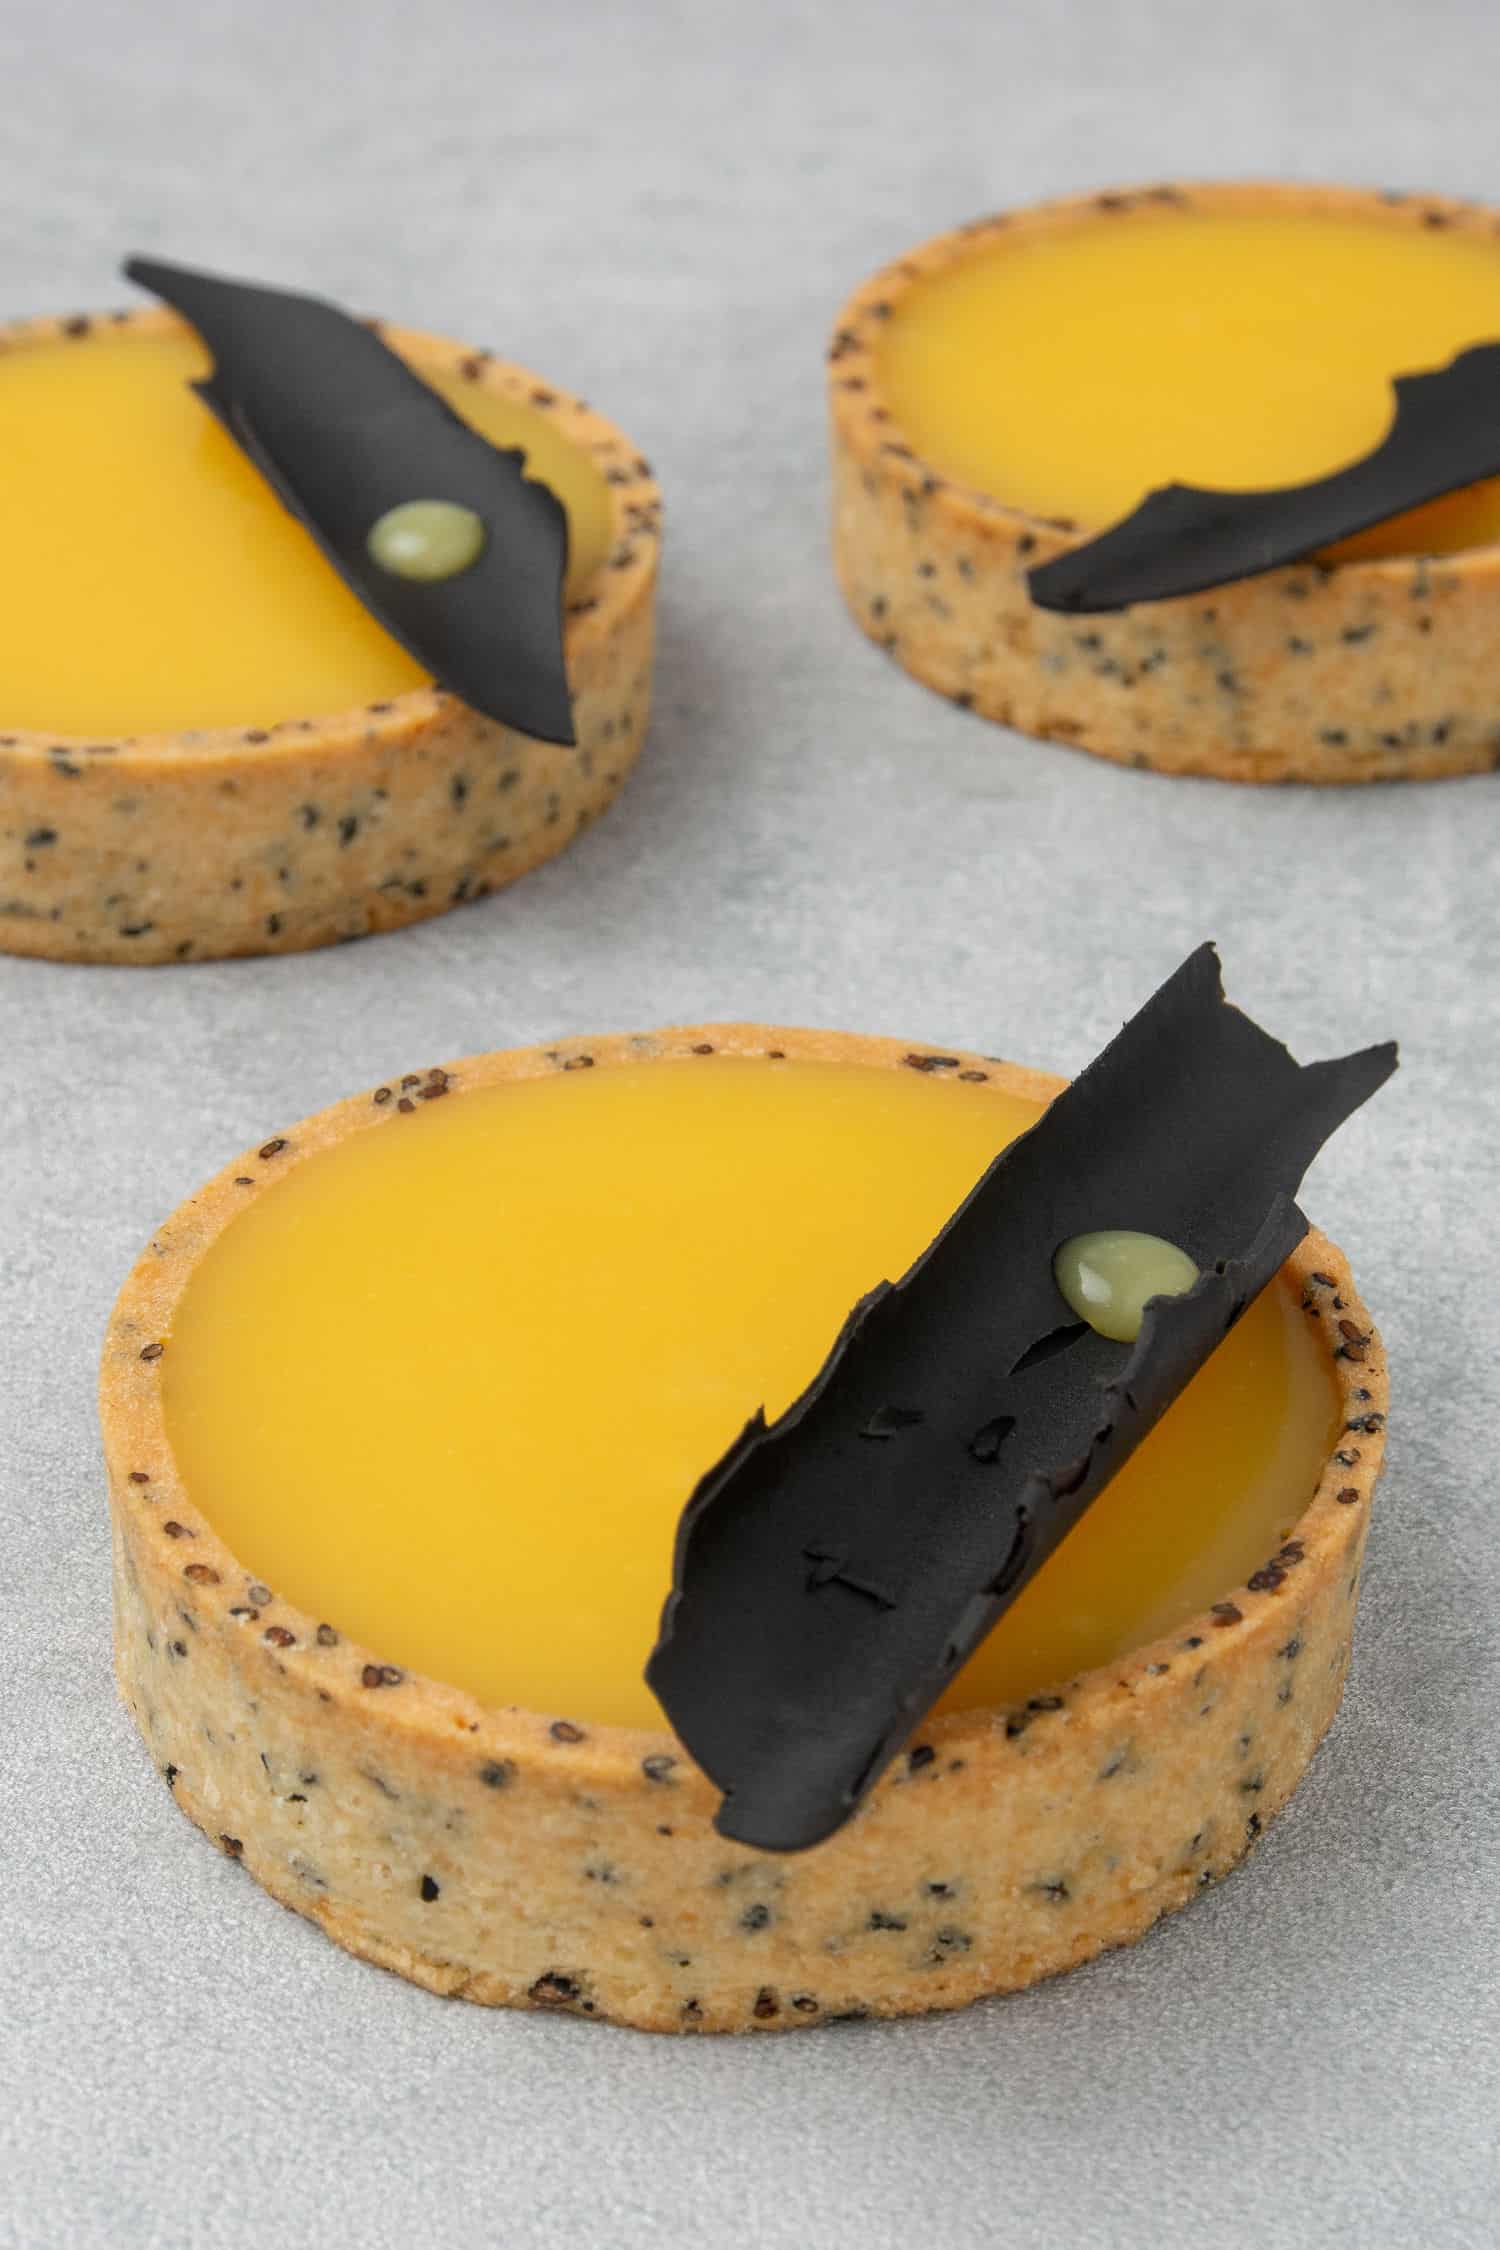
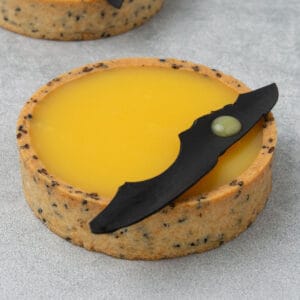
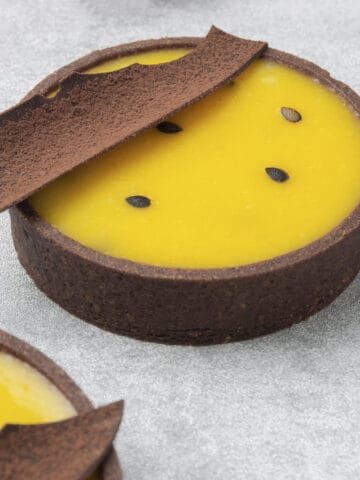
This Japanese-inspired Black sesame Tart with Yuzu curd is probably my favorite tartlet at the moment, a must-try if you are into citrusy desserts and/or anything Japanese! Pâte Sablée sweet shortcrust enriched with black sesame seeds and filled with tangy and creamy yuzu curd. A beautiful contrast of flavors and textures topped with a super easy yet decorative chocolate shard decoration.
If you want to try something new and that brings Japan to wherever you live in the world, this Yuzu dessert is the perfect easy tartlet recipe for you!
Jump to:
💡 What is a tart
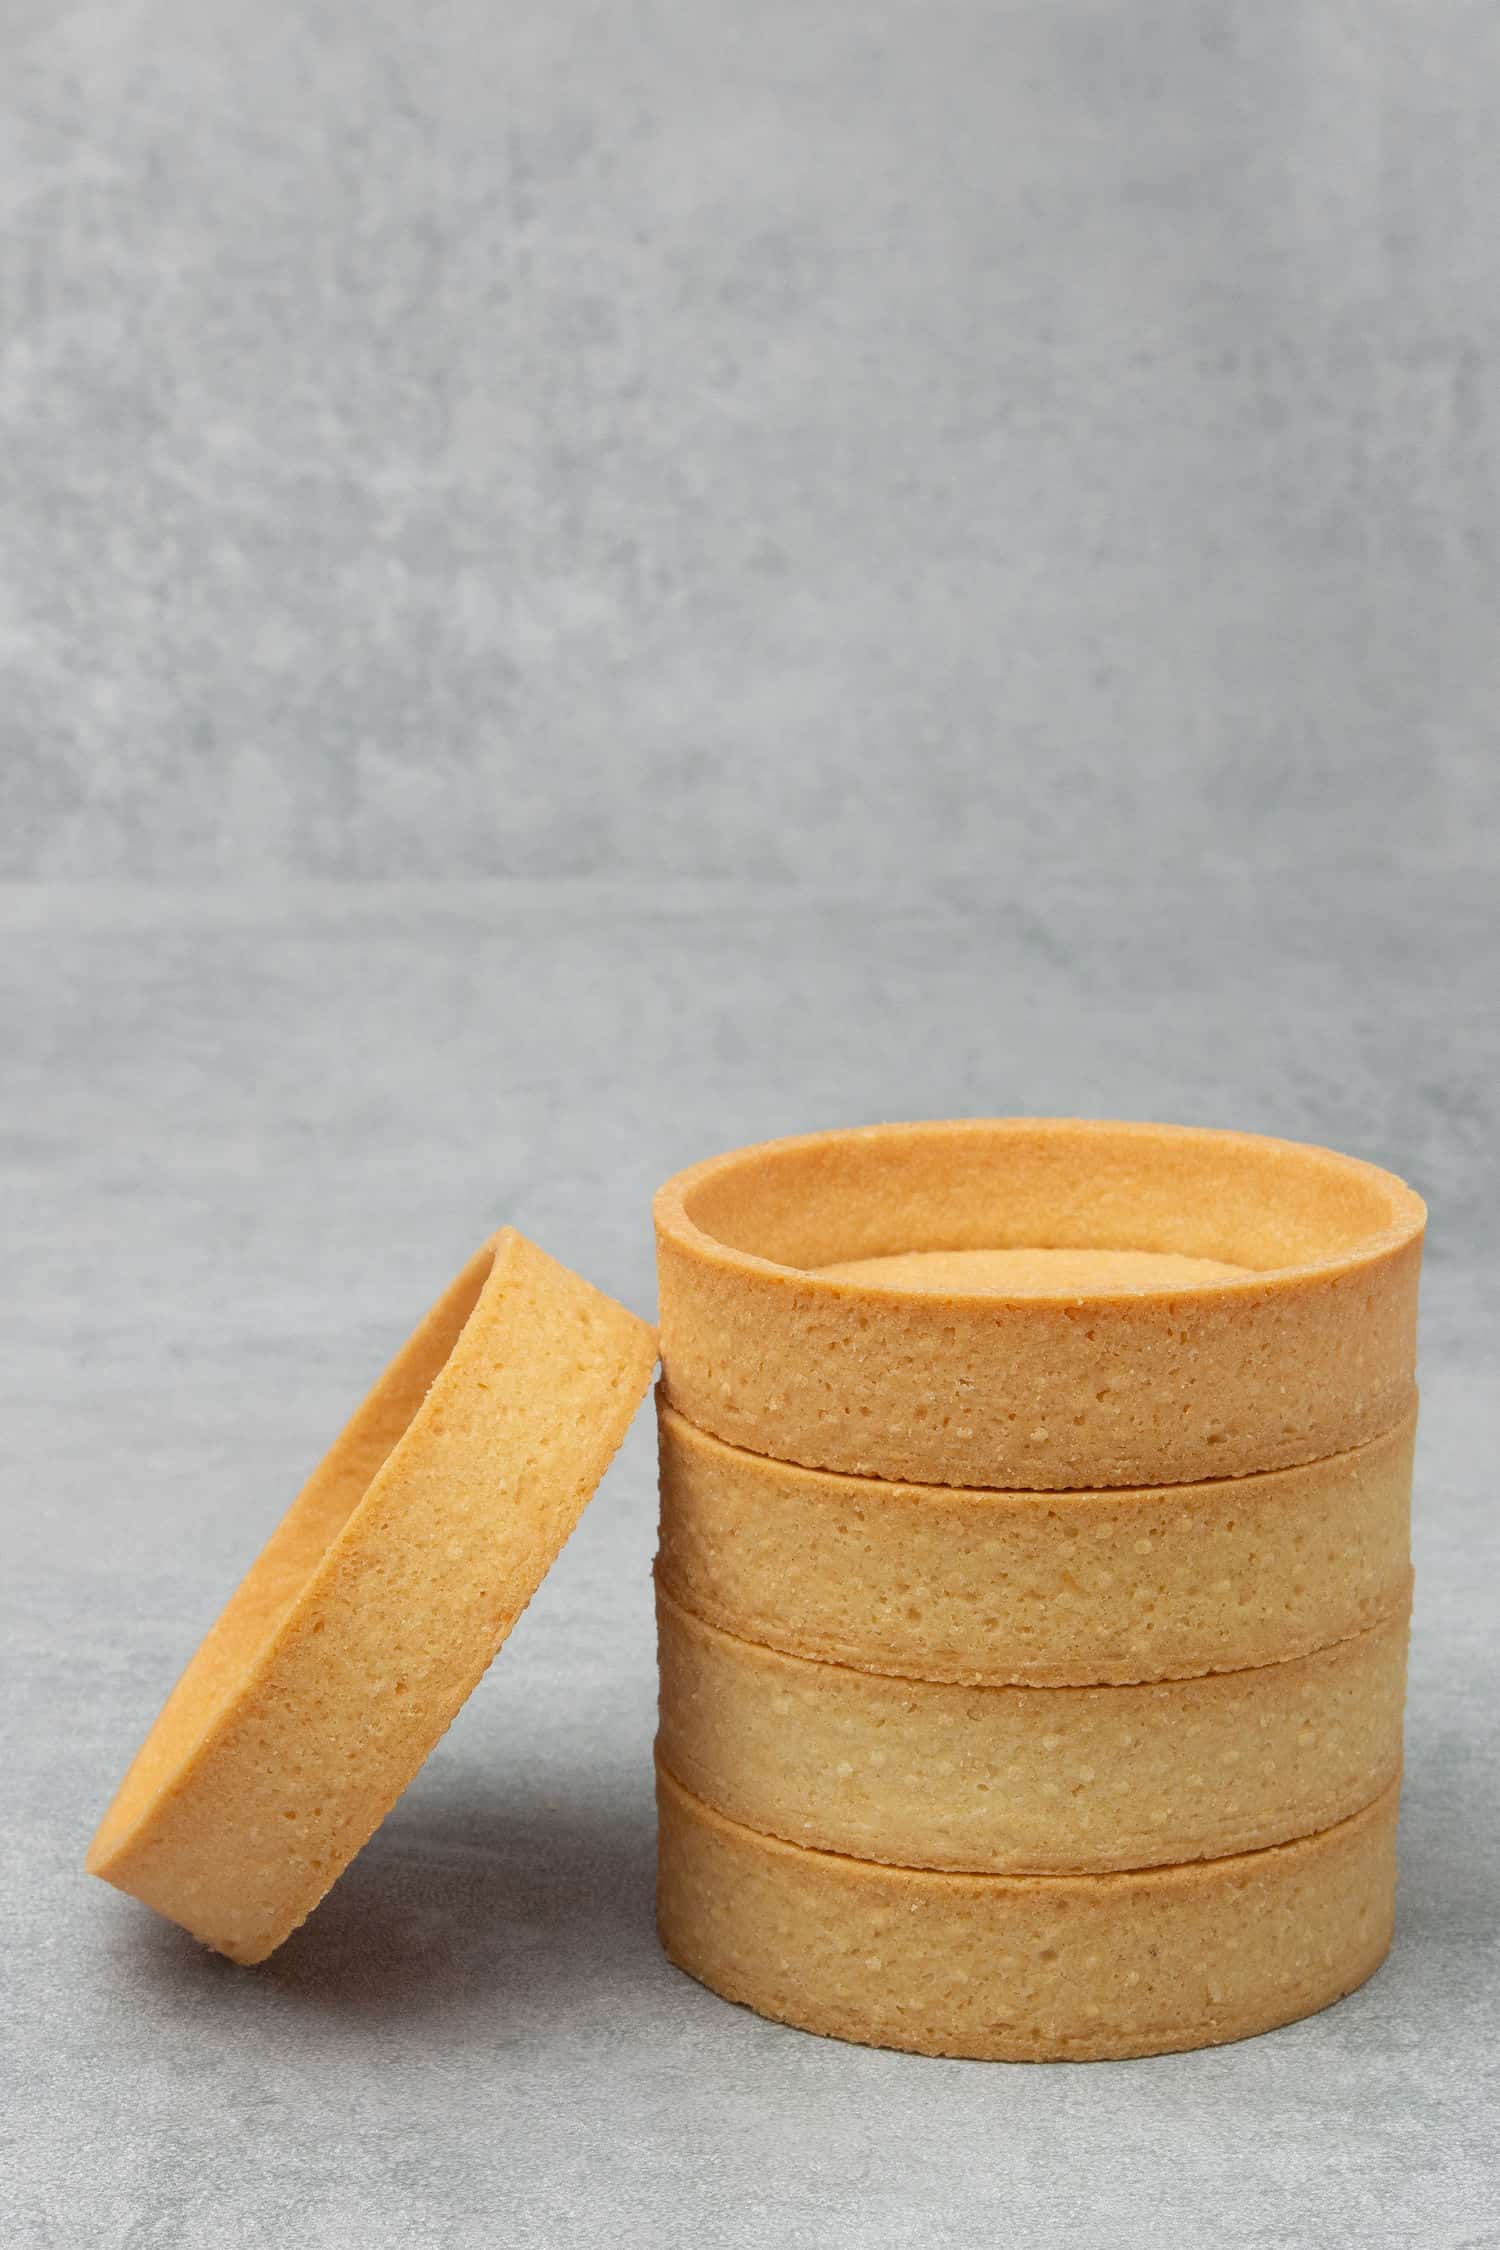
A tart is a freestanding, shallow, open-faced pastry consisting of a filling in a pastry case with an open-top, not covered with pastry. The pastry is usually a rich shortcrust pastry (Pate sable dough), while the filling can be both sweet or savory. A tart case is typically baked in a tart ring with fluted or straight sides. Smaller tarts are often referred to as tartlets. Lemon tart, fruit tart, chocolate tart, coffee tart, caramel tart...you name it!
Make sure you check out my Ultimate Pâte Sablée Guide (incl. video recipe) that explains everything about how to make sweet shortcrust including ingredients, technique, equipment, and even more.
💪 How hard it is to make this Yuzu dessert
Making this Yuzu tart is actually not that hard, neither too complex nor time-consuming.
Making the Yuzu curd is very easy, exactly the same process as making lemon curd, literally takes 4 ingredients and 10 minutes.
Preparing the Pâte Sablée with black sesame is also not very difficult once you learn about the basics of how to deal with sweet shortcrust dough.
Finally, making the chocolate decoration is one of the easiest most decorative ways to take your tartlet to the next level, I really think you should try making it!
Overall, this is an easy tartlet recipe that you can comfortably try after reading my tutorial even if you are a beginner!
💭 What does Black sesame taste like
Black sesame is the less known cousin of white sesame with a slightly stronger taste and more fun appearance in my view. Across Asia using black sesame is very common and appears in all sorts of food such as desserts or paste just like peanut butter, even in soup. After roasted, it has a lovely nutty flavor and smell and pairs wonderful with yuzu, raspberry, matcha, etc. One of the best ice creams I have ever had was a black sesame ice cream in Japan, I will never forget that taste!
If you like Japanese food, why not also try this onigiri recipe from Mitch?
💭 What is yuzu and how does it taste
Yuzu is a citrus fruit that is primarily grown in Japan, Korea, and China. Many would say that it has a taste similar to lemon, lime, or grapefruit but yuzu is much more special than those! While yuzu is citrus and certainly sour and even a bit bitter, it is incredibly fragrant, aromatic with super complex and delicious floral afternotes. In desserts it is used in a similar way as you would use lemon, eg. you can make curd out of it as I did. It is almost impossible to describe the taste of yuzu, but once you try it, you will get addicted to it, 100%!

📝 Ingredient notes
For the Black sesame Pâte Sablée
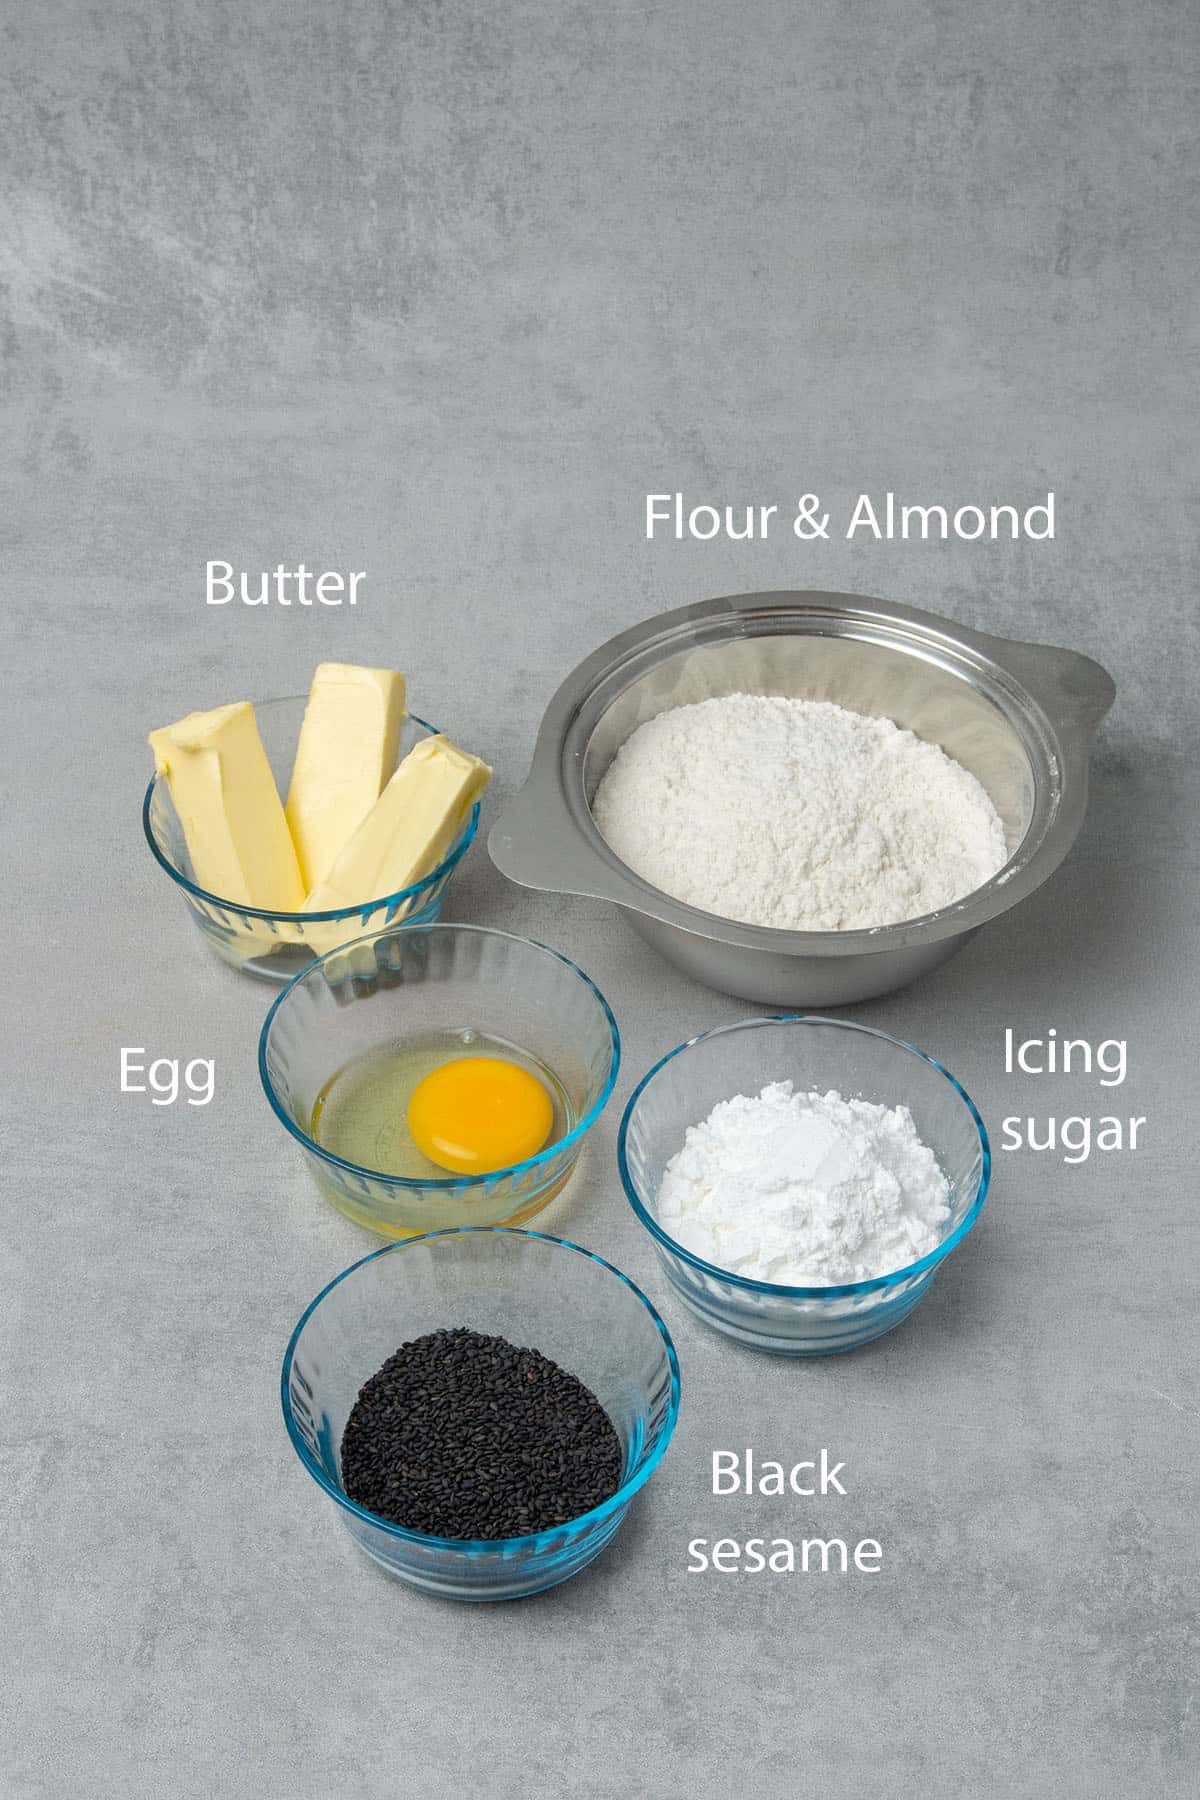
- Flour: I am using pastry flour (that is lower in protein content) for this French tart shell recipe, feel free to use All-purpose flour, if you can't find pastry flour in your local supermarket. If you want to be a pro when it comes to deciding what type of flour to use in your baking, please read my flour guide
- Almond: Some Pâte Sablée recipes contain almonds, some don't, I prefer mine with almond flour from a taste and texture point of view. Pâte Sablée with almond flour is slightly crispier with some marzipan taste. It is worth buying good quality ground almonds, without skin. Almond can be replaced with hazelnut, walnut, pistachio flour too, or alternatively, in case of nut allergy, replace it with an equal amount of pastry flour
- Sugar: This sweet shortcrust pastry is made with a small amount of icing sugar that makes the tart case sweet but not overly sweet. If you want to learn about the different types of sugar and how to use them in baking, please read my sugar guide
- Salt: An essential ingredient in most dessert recipes. Balances flavor and enhances other ingredients. This is a sweet-tart dough and I just love that extra very mild salty kick at the end
- Butter: Use always unsalted as you want to be in control of the quantity of the salt. I am using high-quality 82% fat content European-style butter in all my recipes. While in most of the recipes butter needs to be at room temperature, this is an exception and you have to take it very seriously. The butter needs to be chilled, which means take the butter out of the fridge, cut it into cubes then place it in the freezer for 10-15 minutes before using it
- Egg: Room temperature as always. Please note that this is not a Vegan pâte sablée recipe and the egg can´t be left out or replaced unless you have the knowledge to totally reformulate the recipe
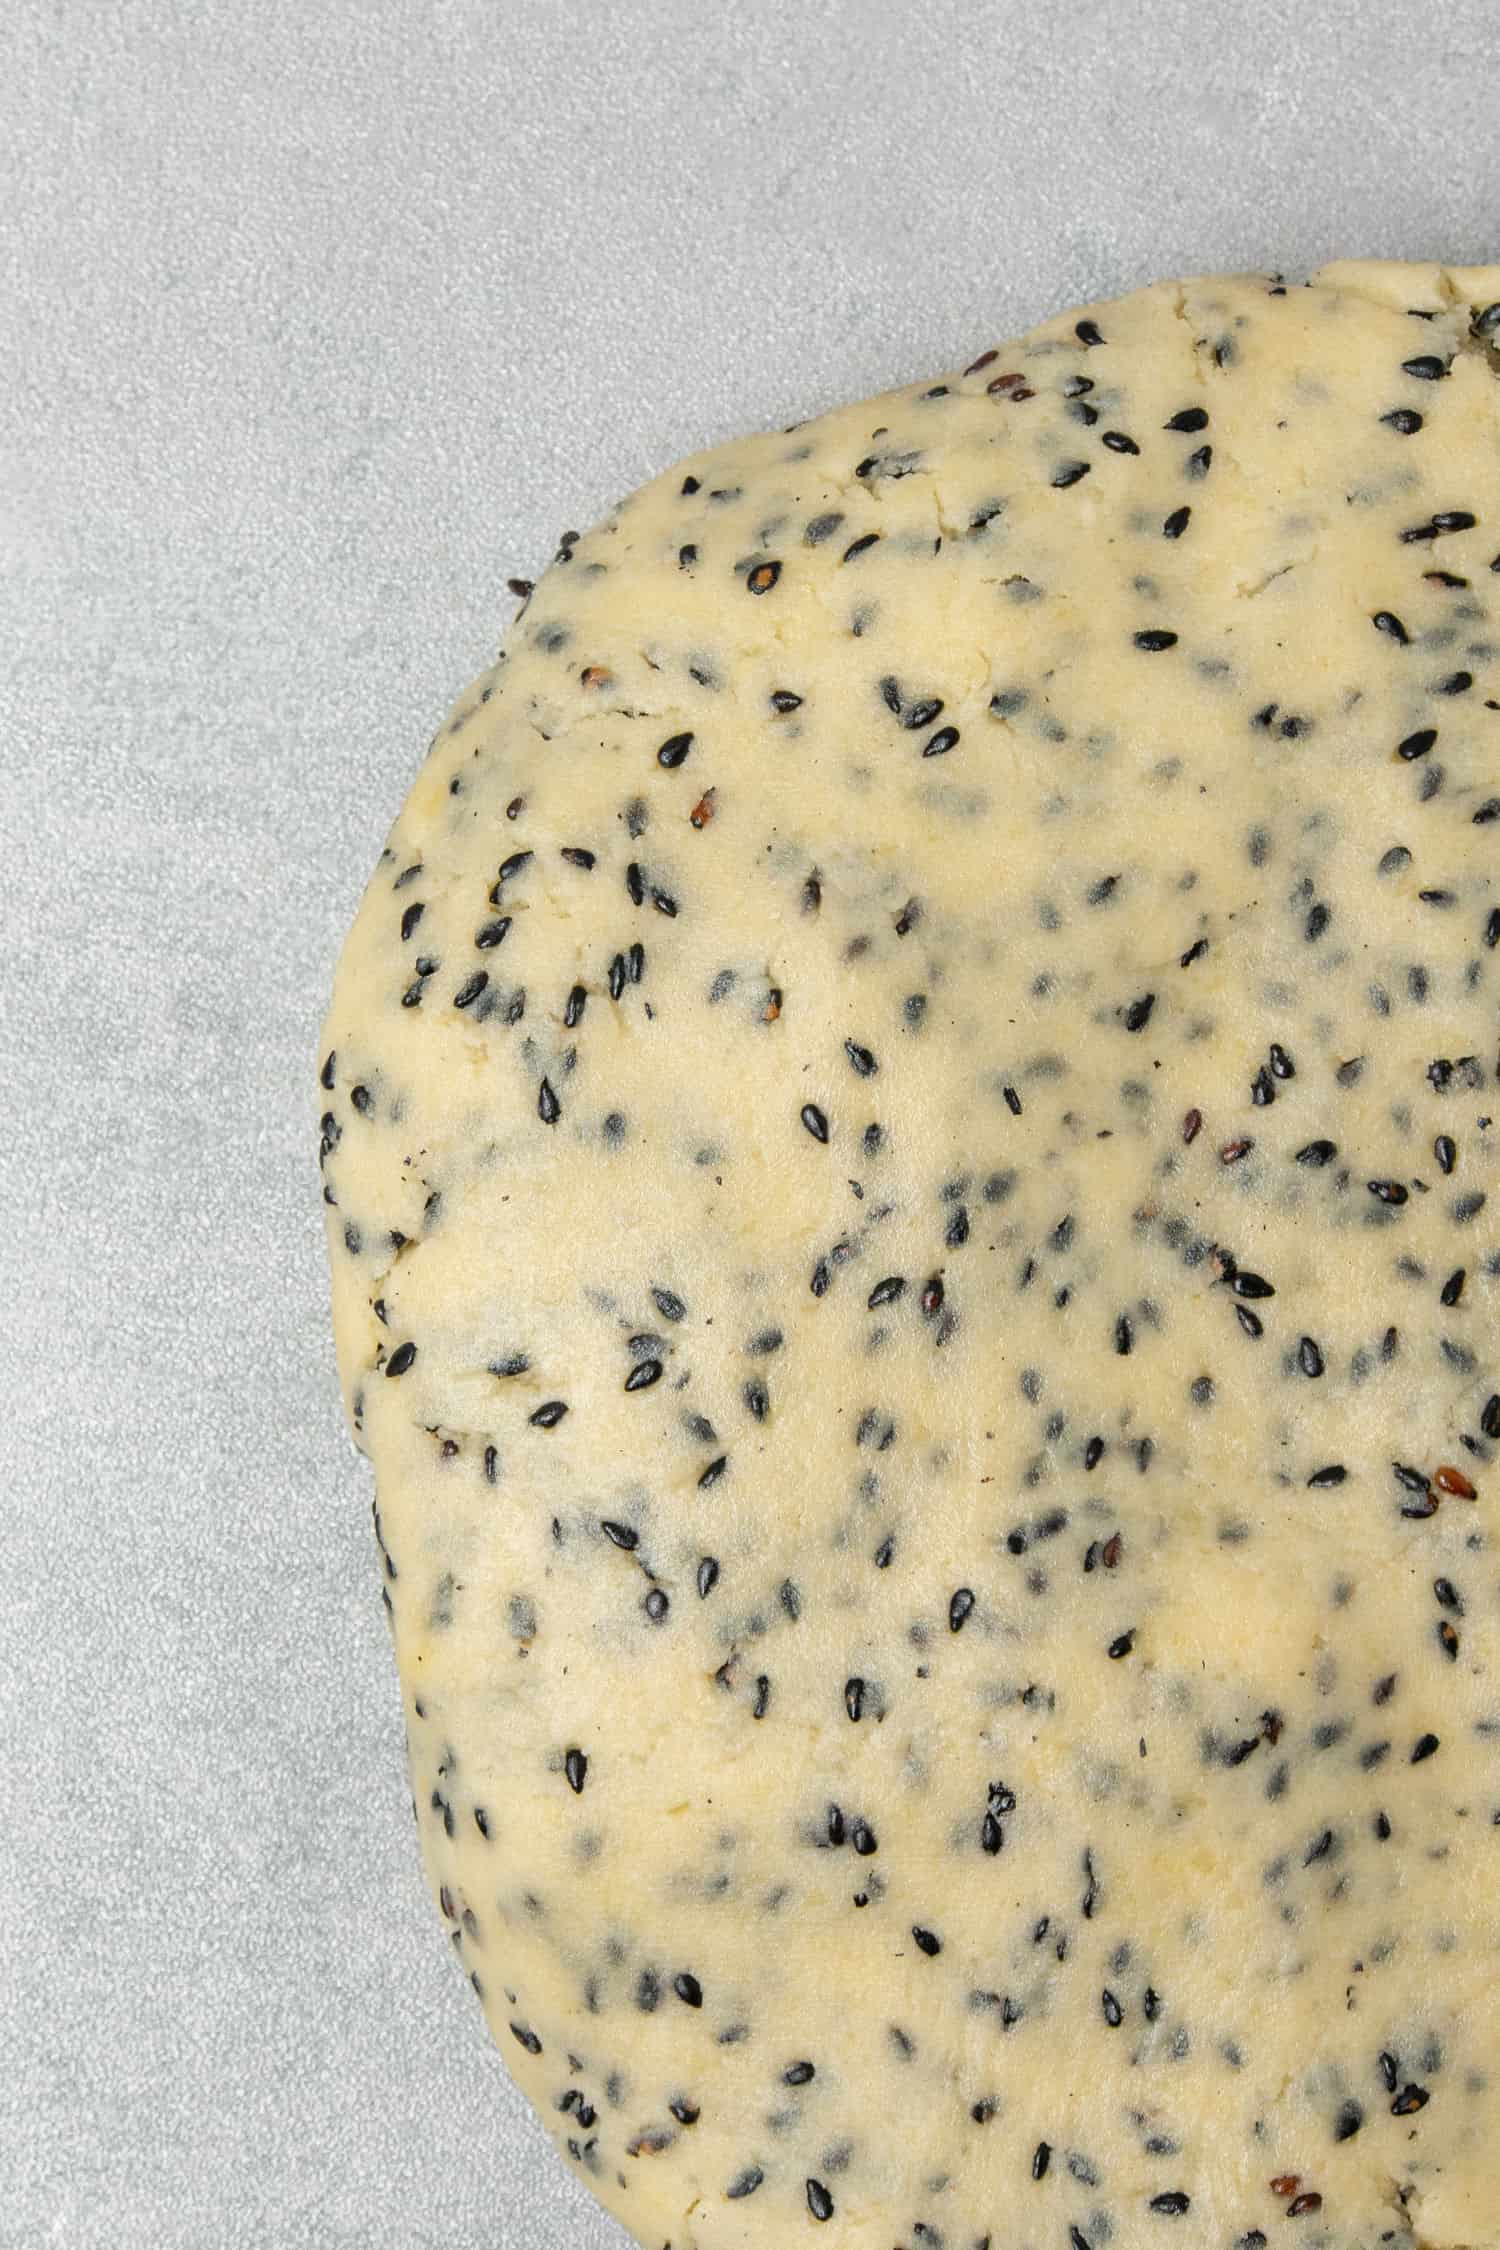
- Black sesame: I am using a generous amount of black sesame in this recipe which makes the tart shells super aromatic and fun in their look. For the maximum taste, experience make sure, you toast the sesame seeds for a few minutes on the stove until they start to smell nutty. If you can´t find black sesame, you can replace it with white sesame seeds however taste will be slightly different
🛒 You’ll find detailed measurements for all Ingredients in the printable version of the Recipe Card at the bottom of this post
For the yuzu curd filling
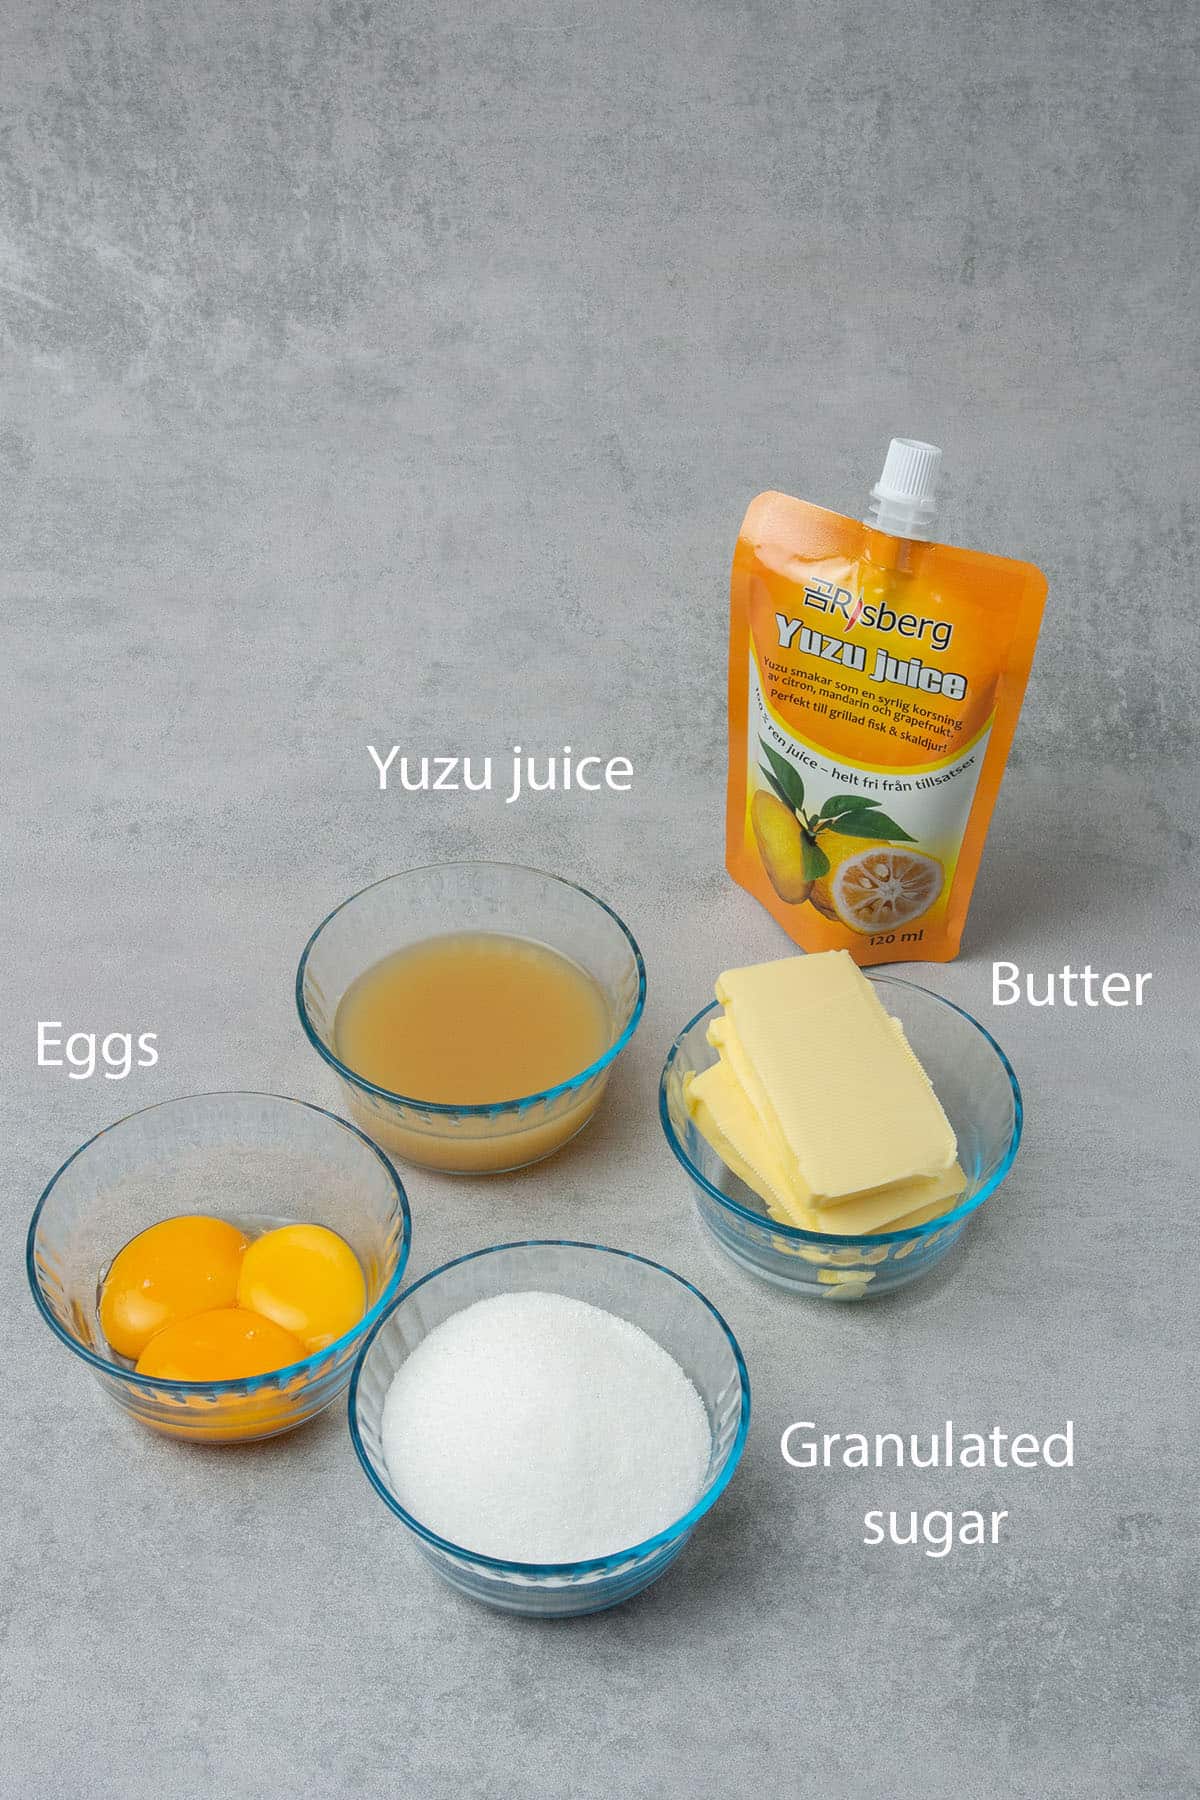
- Yuzu: This Black sesame tart will be filled with a simple yuzu curd, which is basically the Queen of curds, in my view. Think of lemon curd with a much more fragrant taste. For making this yuzu curd probably you will buy 100% yuzu juice as yuzu as a fruit is not broadly available. The recipe is given in grams as the amount of juice one can get out of 1 piece of fruit can greatly vary. If you can´t find yuzu juice, use lemon juice instead, however, the taste will be rather different
- Granulated sugar: Use normal white granulated sugar, nothing fancy or expensive. In this yuzu curd recipe, the curd will be tangy and not overly sweet, which is my preference for citrus desserts. Feel free to adjust the quantity of the sugar for your taste
- Egg: Room temperature as always and use only the yolk, which will thicken the curd. If you wonder what to do with the leftover egg white, try my pavlova recipe. Please note that some other recipes out there use whole egg for making lemon/yuzu curd, I prefer using yolk only for a few reasons: 1. Colour 2. Texture 3. Easier to cook and less likely to end up like scrambled egg
- Butter: Use always unsalted as you want to be in control of the quantity of the salt. I am using 82% fat content butter in all my recipes. In this yuzu curd recipe, the butter needs to be at room temperature so avoid last-minute microwaving. The butter makes the yuzu curd incredible rich and creamy also makes it more stable (thick) in texture.
🛒 You’ll find detailed measurements for all Ingredients in the printable version of the Recipe Card at the bottom of this post
For the chocolate shard decoration
- Chocolate: The chocolate decoration takes this Black sesame Yuzu tart to the next level. When making chocolate decoration, it is worth remembering that not all chocolate is created equal, in recipes that require chocolate decoration or chocolate work, and the quality of the chocolate goes way beyond taste. You will need couverture chocolate if you want to replicate those beautiful chocolate decorates you see on Instagram or in professional pastry shops! In this recipe I am using Callebaut Dark Chocolate (callets), this is high-quality chocolate (yet affordable) that contains a higher percentage of cocoa butter than the average supermarket chocolate.
👩🍳 How to make this recipe
1. The importance of temperature while making Pâte Sablée
When I started experimenting with baking, I had several disastrous attempts making Pate sablee. Now I understand that the one and the only reason I failed was being impatient and forcing the dough even when its temperature was inappropriate.
Baking is science and in general, the temperature is one of the most important factors to understand and utilize for our benefit. When I say temperature I don't purely mean baking temperature, but also the environment we work e.g kitchen temperature as well as the dough temperature.
While making the pate sable recipe, the temperature is everything! If the dough is too warm, it's sticky and can't be rolled out or shaped. If too cold, it will easily break. The entire pastry-making process is a balancing exercise between keeping the dough cold enough, but not too cold.
💡 Top Tip: To control the temperature of the dough don´t be shy to take it in and out of the freezer 10x or as many times it is required
2. Process of making black sesame tart
The process of making Tart dough is not difficult, but a step-by-step process.
- Make sure all ingredients are measured with Digital scale and prepare all the tools ahead: Rolling pin, Silicone baking mat, Perforated “air” baking mat, Perforated tart ring
- Place the measured butter chunks into the freezer for 5-10 minutes
- Sift together dry ingredients; flour, icing sugar, salt, mix so they are combined properly then add in toasted black sesame seeds
- Add very cold butter to dry ingredients and rub the mixture between your hands until it becomes a sand-like consistency. This will take about 3 minutes, make sure you do not spend too much time with this step as butter can easily warm-up and that is something we want to avoid
- Add egg into the mixture and mix with your hands just until the dough comes together. First, it might look crumbly but do not add more wet or dry ingredients to the recipe instead gently knead the dough with the palm of your hand for a minute or two (do not over-knead and do not use a mixer) just until the dough becomes smooth
- If the dough is too warm and sticky, place it in the fridge for 10-15 minutes first. Otherwise, continue with rolling the dough out into 2mm thickness between two Silicone baking mat. The recipe quantity is designed in a way that once you roll the dough out it will reach the silicone baking mat from edge to edge
- Place the dough into the freezer for 10-15 min in between the two Silicone baking mat. Do not remove the mat at this point as the dough might stick to the mat while it is warm and it would break the dough
- Prepare your oven rack with the Perforated “air” baking mat and Perforated tart rings on top
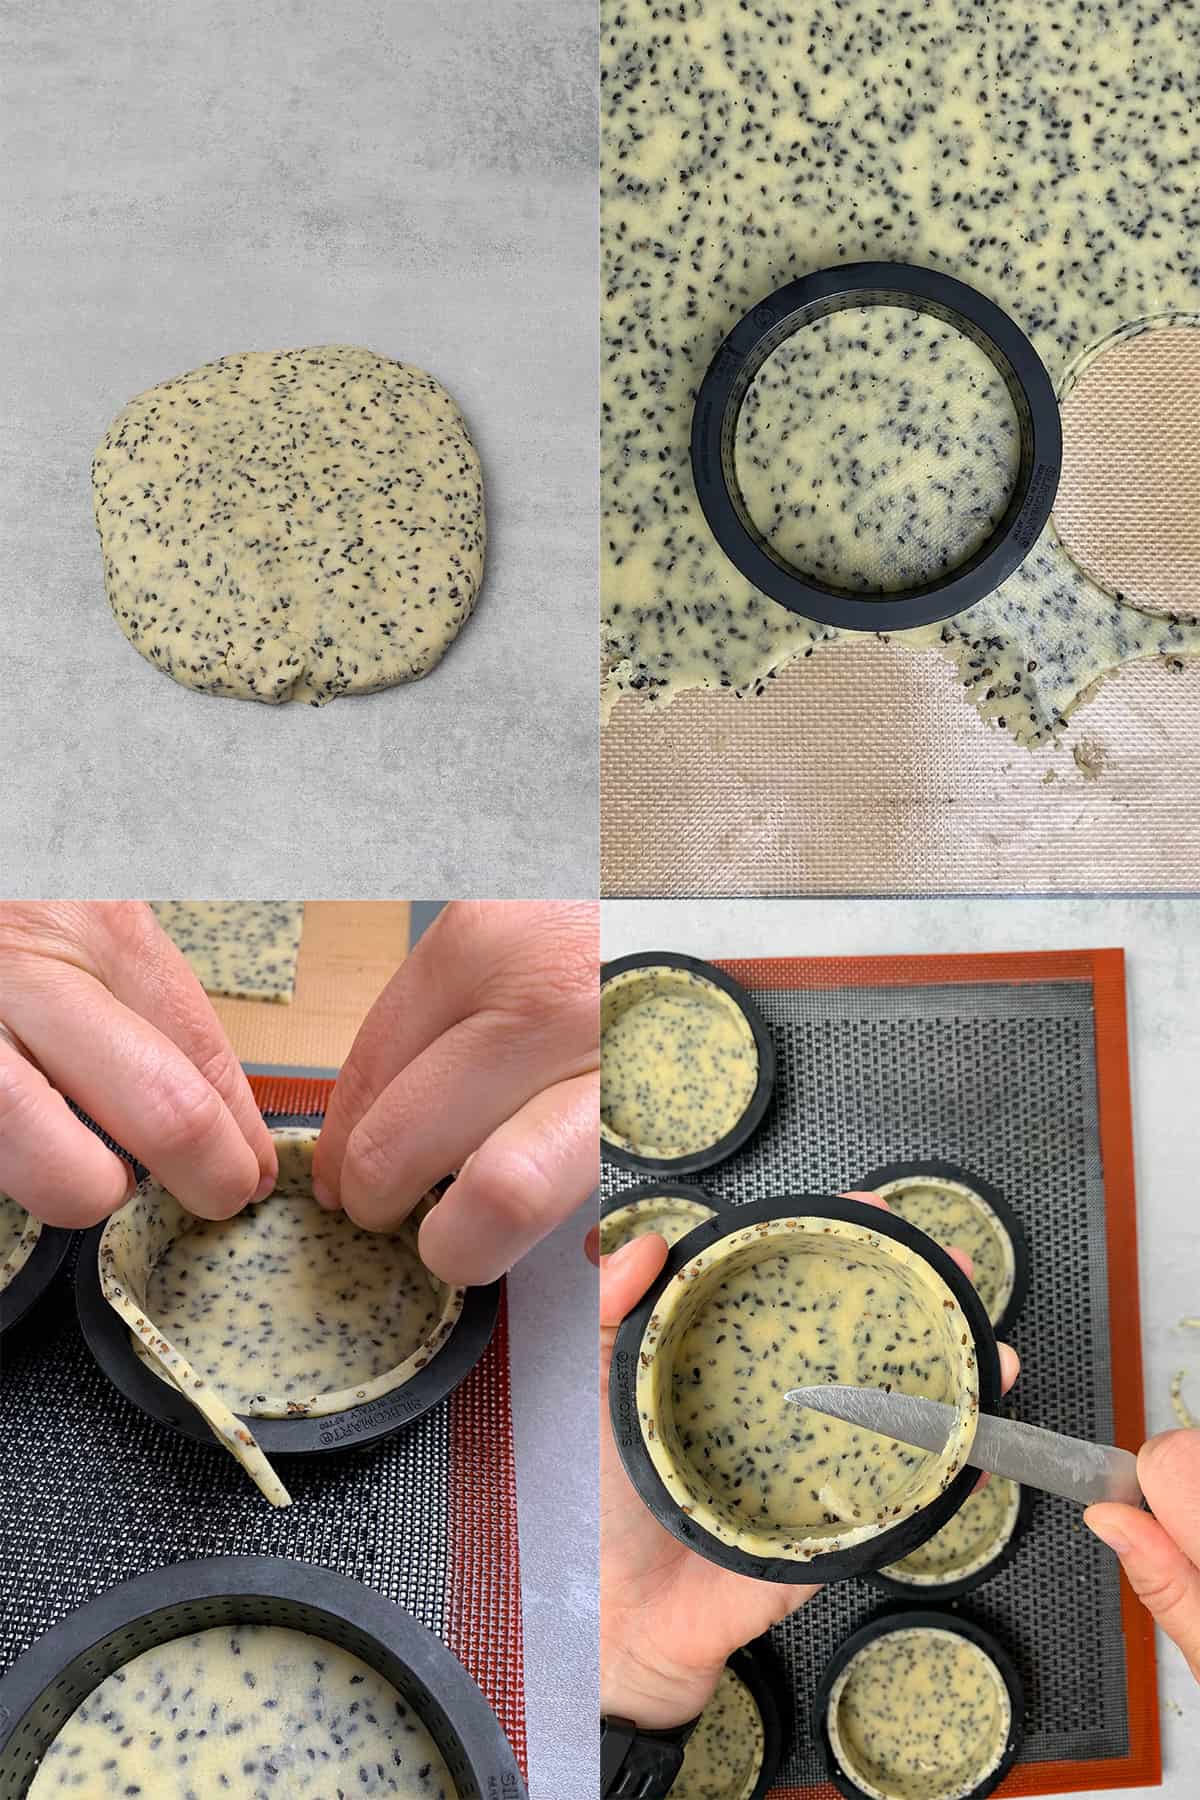
- Take the dough sheet out from the freezer, remove the top of the silicone mat, and using one of the Perforated tart rings, cut out 8 circles – this will be the bottom of your tart crust. Carefully move the dough circles with the help of an Offset spatula and place them into the rings one by one
- If at any point the dough gets too warm to work with, pop it back into the freezer for 5 minutes. You might need to make the dough in and out of the freezer a lot of times but that is fine, don´t try to force the dough while it is warm. It is extremely important to work with a dough that is cold enough to be able to handle (so not sticky) but not too cold which would result in breaking it
- Cut 8 long strips out of the dough, this will be the side of the tart
- Carefully place the strips into the ring one by one. Press each strip onto the side of the rings so it sticks to them. Again make sure you work with a dough that is cold enough but not frozen as that would make it impossible to place it into the tart ring without breaking it
- Place the Perforated tart ring with the pastry dough in them into the freezer for 1 hour
- Pre-heat oven to 160C / 320F
- After 1 hour take the pastry dough with the rings on them out and trim them with a sharp knife
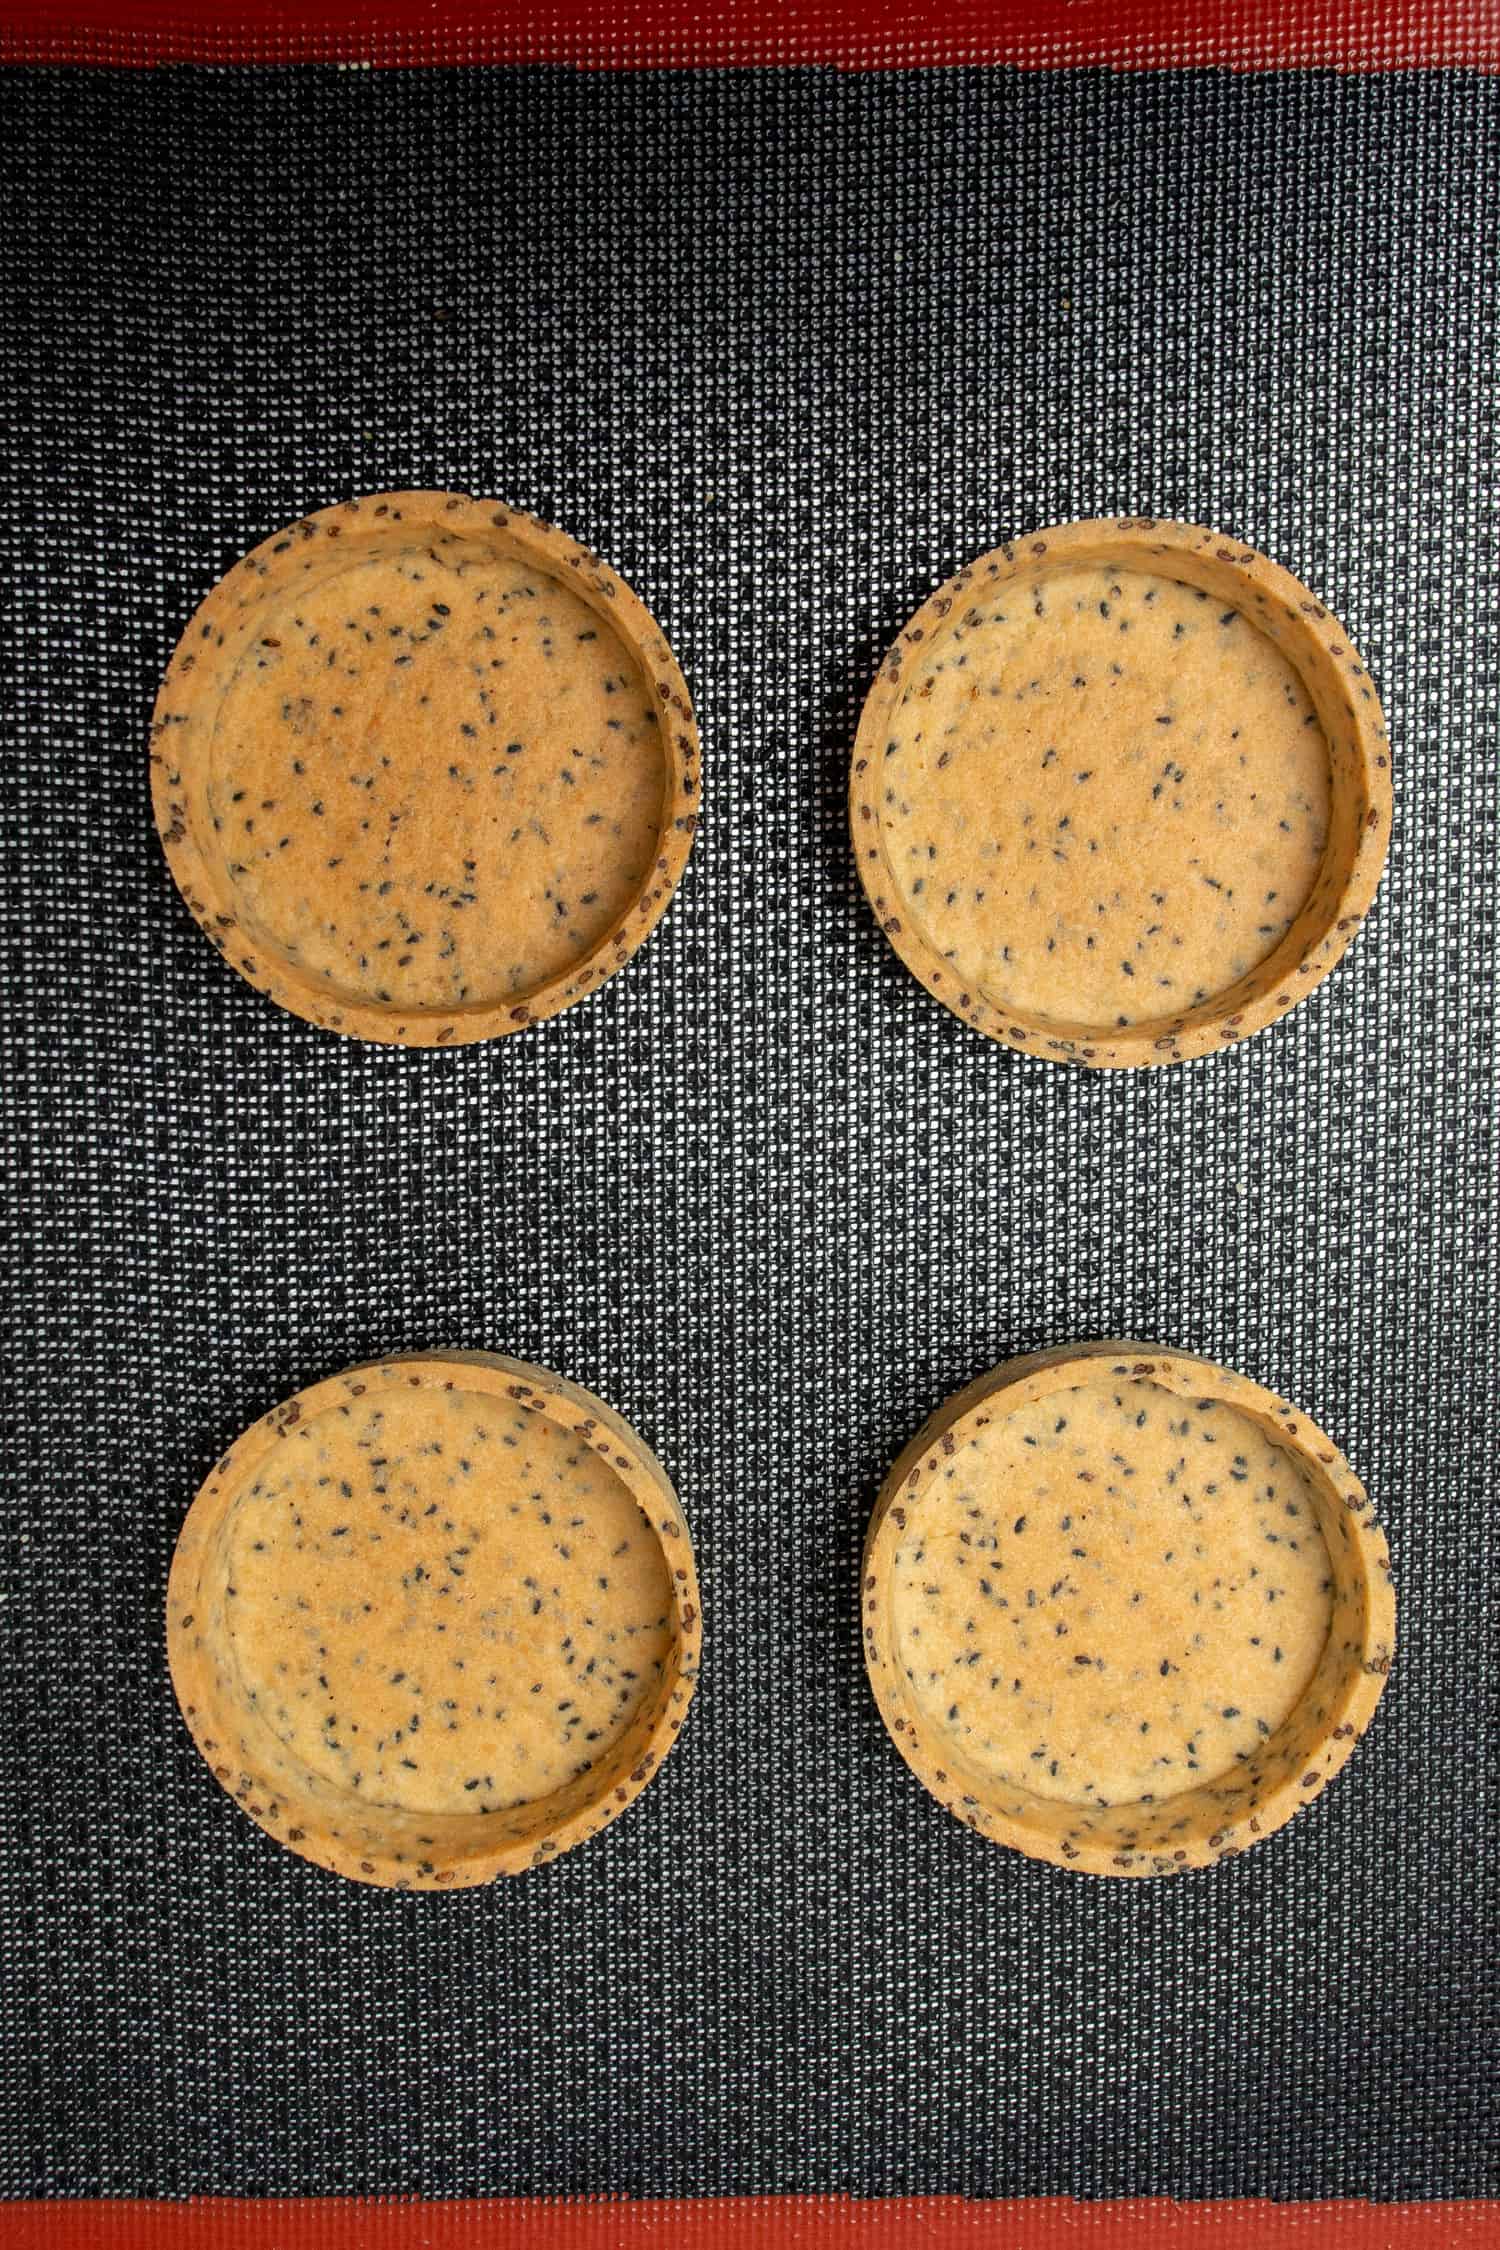
- Bake for 20 min then carefully remove the rings. Once you take the tarts out of the oven wait for a minute or two for the pastry to somewhat contract within the ring then you will be able to easily remove the rings. If the ring seems to be stuck onto your pastry it means probably you will need to bake it for a few more minutes
- Once tart rings are removed, bake the tart cases for another few minutes. The tarts will be ready baked already after a few minutes however if you wish to bake it until golden brown then bake it for another 10 minutes. Rotate the baking sheet if necessary
Make sure you read my Pate sablee tutorial for any further details and Troubleshooting.
💡 Top Tip: Once you take the tarts out of the oven wait for a minute or two for the pastry to somewhat contract within the ring then you will be able to easily remove the rings. If the pastry seems to be stuck onto the ring, it means that you will need to bake it for a few more minutes. Do not force it as you can easily break it
3. How to make Yuzu curd filling
Making the yuzu curd filling for this Black sesame tart is extremely easy and quick! It also tastes amazing... and you will need only 4 ingredients.
- Place yuzu juice, egg yolk, and sugar in a heatproof bowl over a pan of simmering water (double boiler) and cook the curd over medium-high heat whisking constantly. Whisking is important to avoid egg yolks from curdling
- After about 8-10 minutes the mixture will start to thicken. I find the temperature at this stage is around 80C/176C
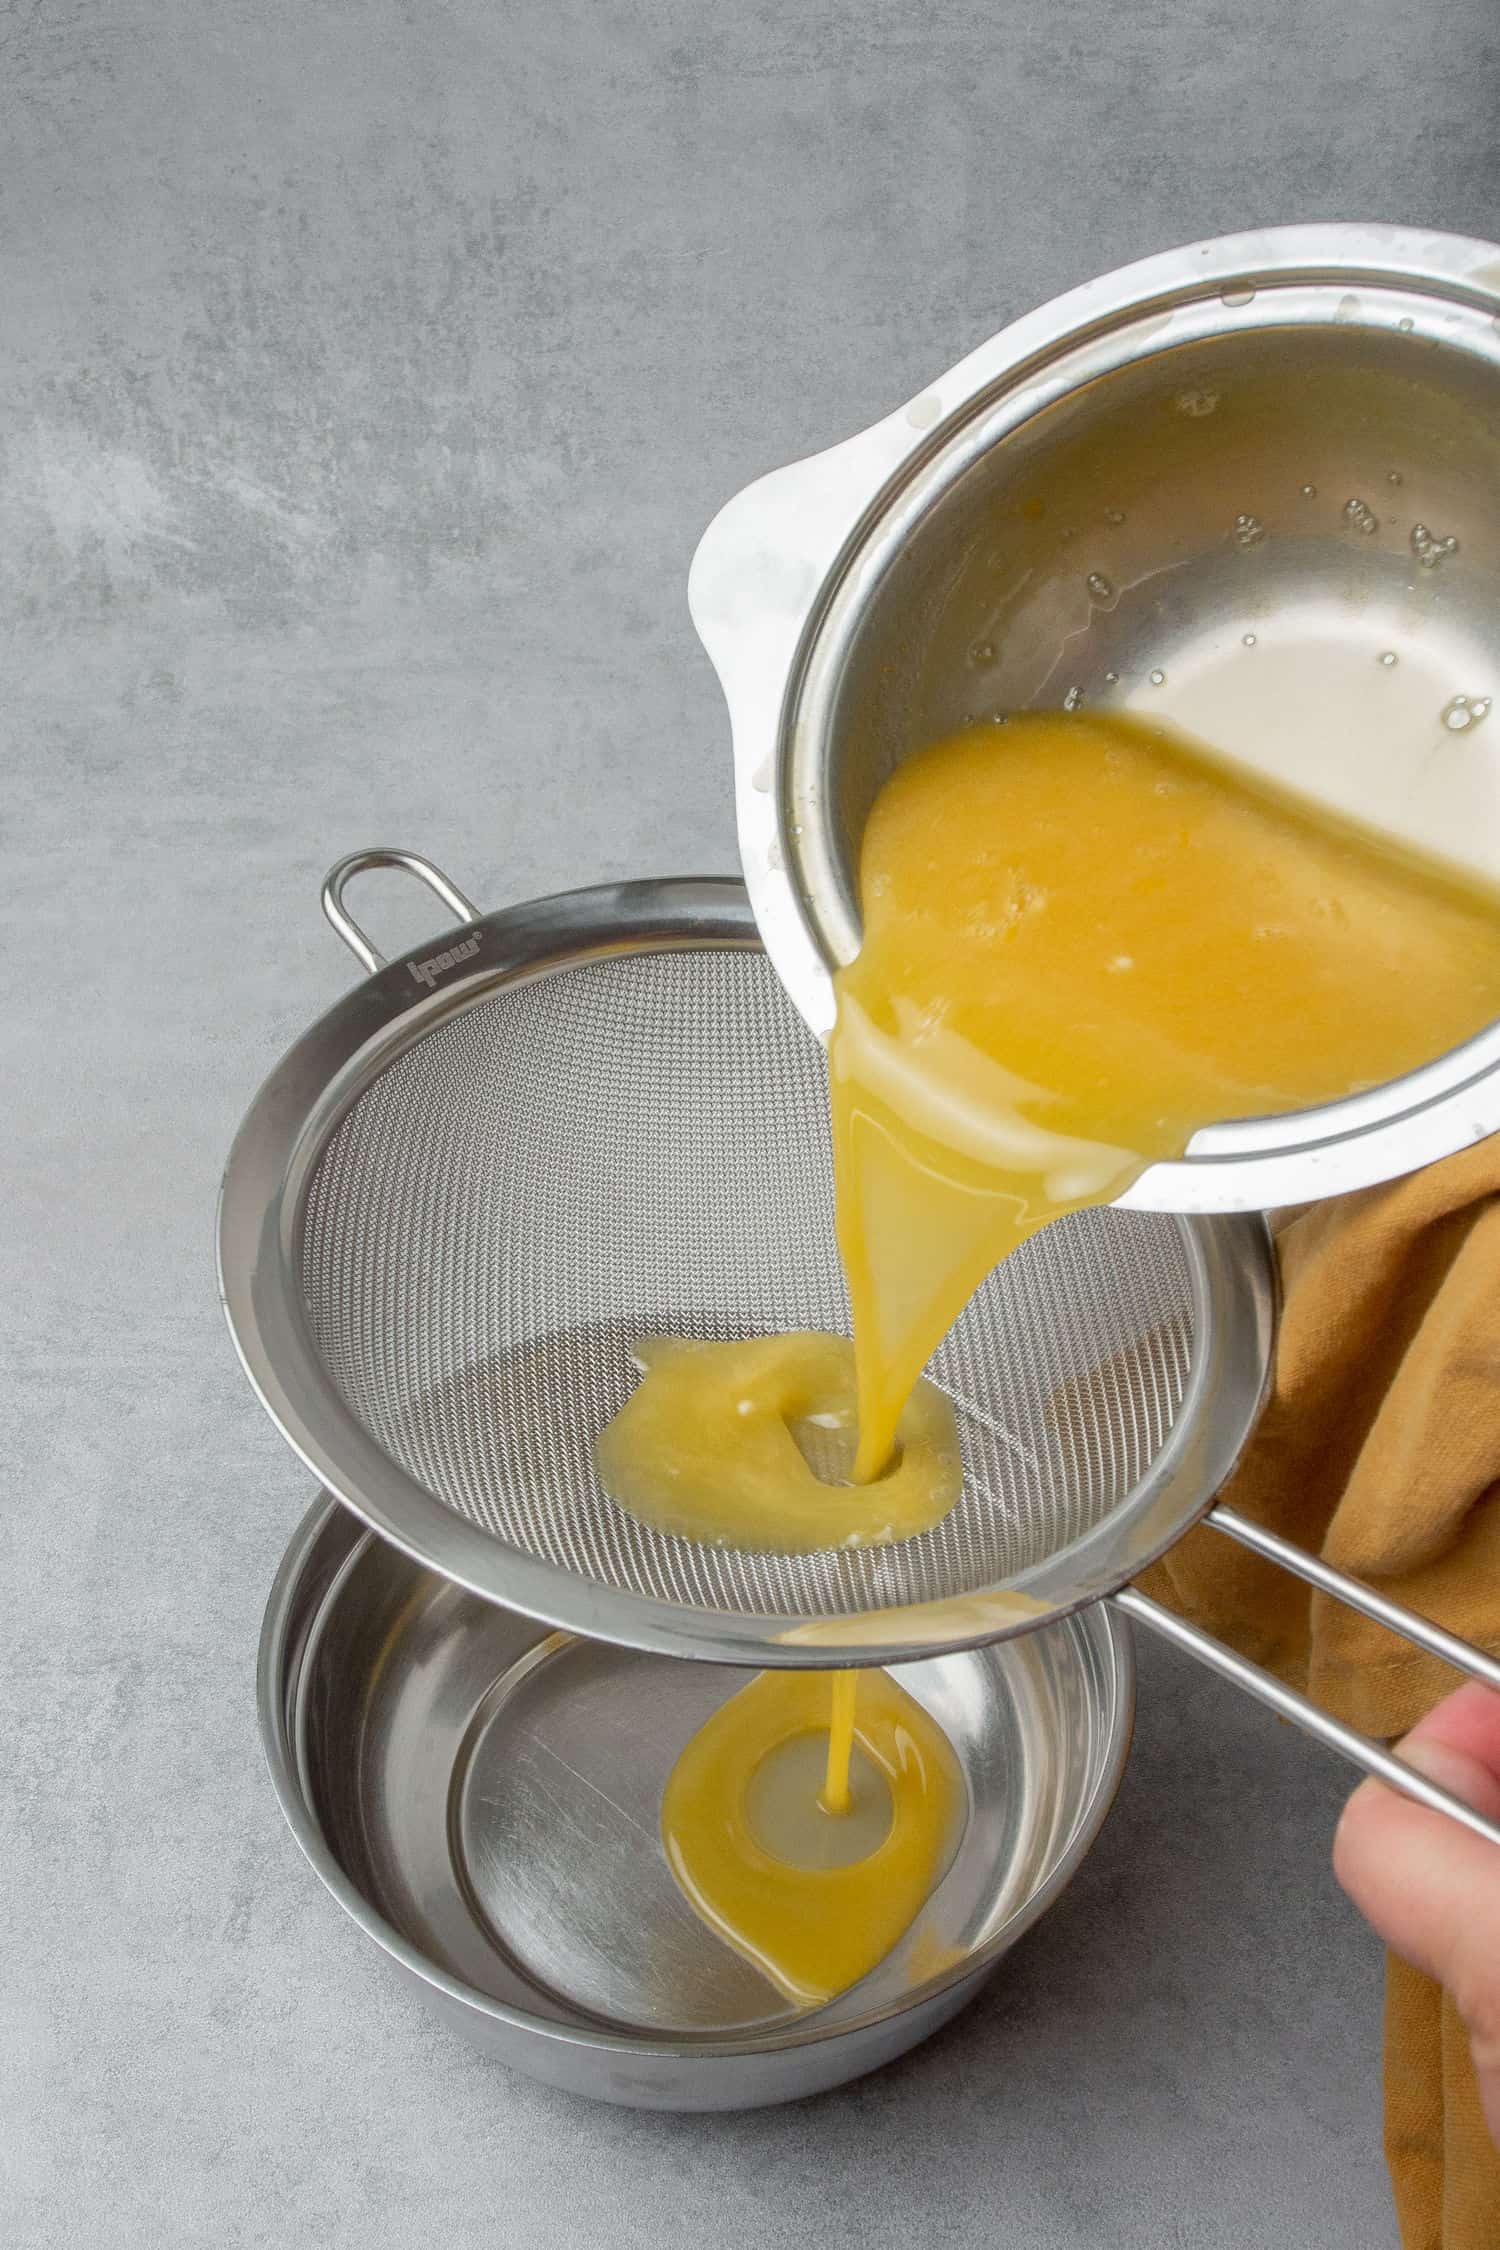
- Remove yuzu curd from the heat, and to be on the safe side, pour the cooked curd through a sieve so you will get rid of any potential egg bits in there
- Mix in room temperature butter in small chunks one by one. Make sure that butter is fully incorporated before adding more. If you have a blender, blend butter into the curd, if not, make sure you fully incorporate it with your spatula
- Pour curd into a shallow container (so it will cool quicker) and place plastic wrap directly on top so it is touching the top of the curd. (This prevents a skin from forming on top.) The curd will continue to thicken as it cools in the fridge
Make sure you read my Ultimate Lemon curd recipe for any further details and Troubleshooting.
💡 Top Tip: Use the curd to fill your tart cases once room temp or slightly cooled. No need to wait until it fully sets but it should not be warm
4. How to make chocolate shard decoration
The chocolate shard decoration really takes this tartlet to the next level. It will require chocolate tempering, but it is so easy, give it a go!
- The seeding method is effectively tempering the chocolate with the chocolate itself. In detail, I explain the seeding method in this post
- With the cocoa butter powder method, I am using Callebaut Mycryo, here I explain in detail how to temper chocolate with cocoa butter powder
So once you have your tempered chocolate ready, color it with fat-soluble black food coloring.
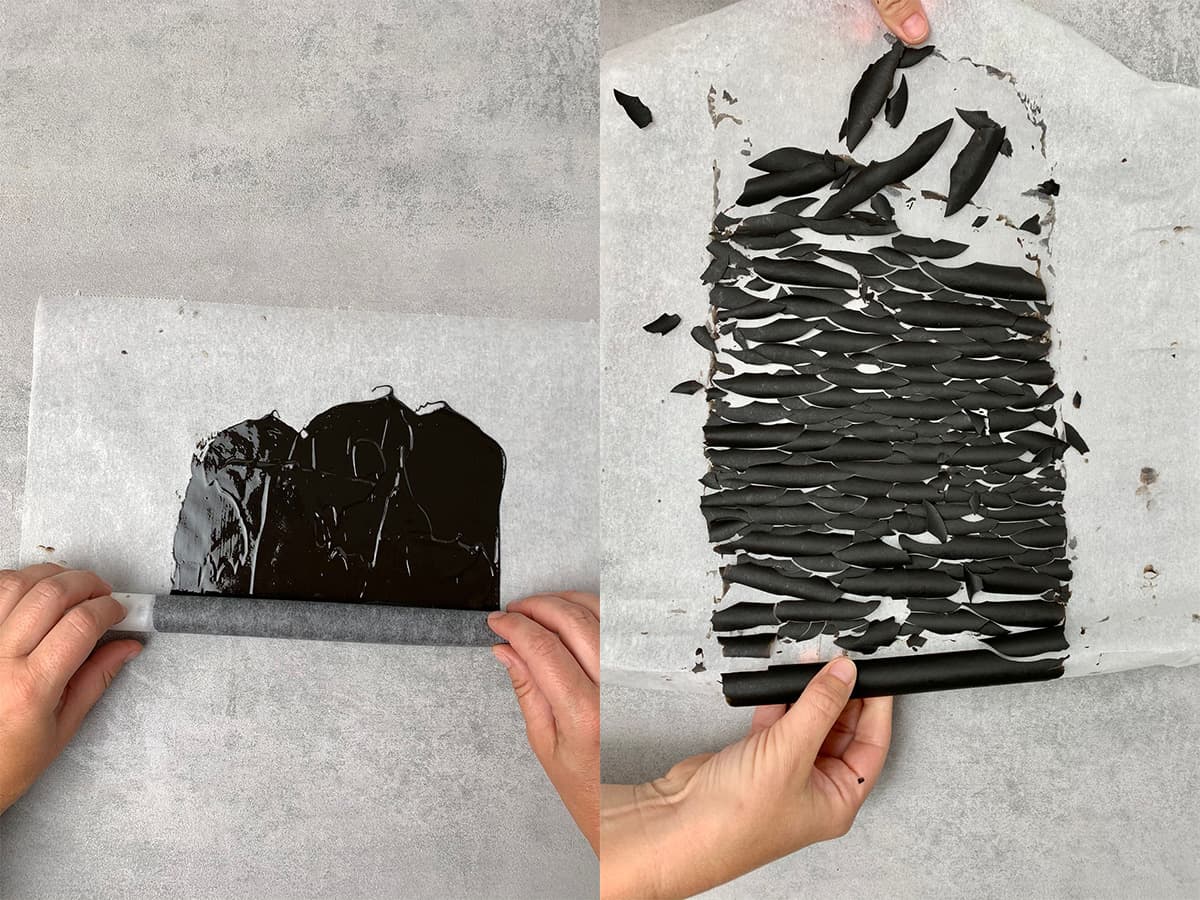
Once you are happy with the color of your chocolate, spread it over parchment paper in an even, thin layer with the help of a large Offset spatula, and roll up the parchment carefully. Place the rolled-up chocolate into the fridge for 1 hour. If you tempered the chocolate correctly, it should be set in the fridge and once you unroll the parchment, the chocolate “sheet” should break up naturally into shards. How genius?! Love how easy and visually appealing this decoration is, try it!
💡 Top Tip: Please note that you can only use fat-soluble colorings, normal water-soluble that you would use to color frosting might break the chocolate
5. How to assemble Yuzu tart
First, you will make the black sesame tart shells then you have to let them cool before filling. Next, make the yuzu curd filling and let it slightly set before using (no need to fully chill).
The assembling process is rather simple
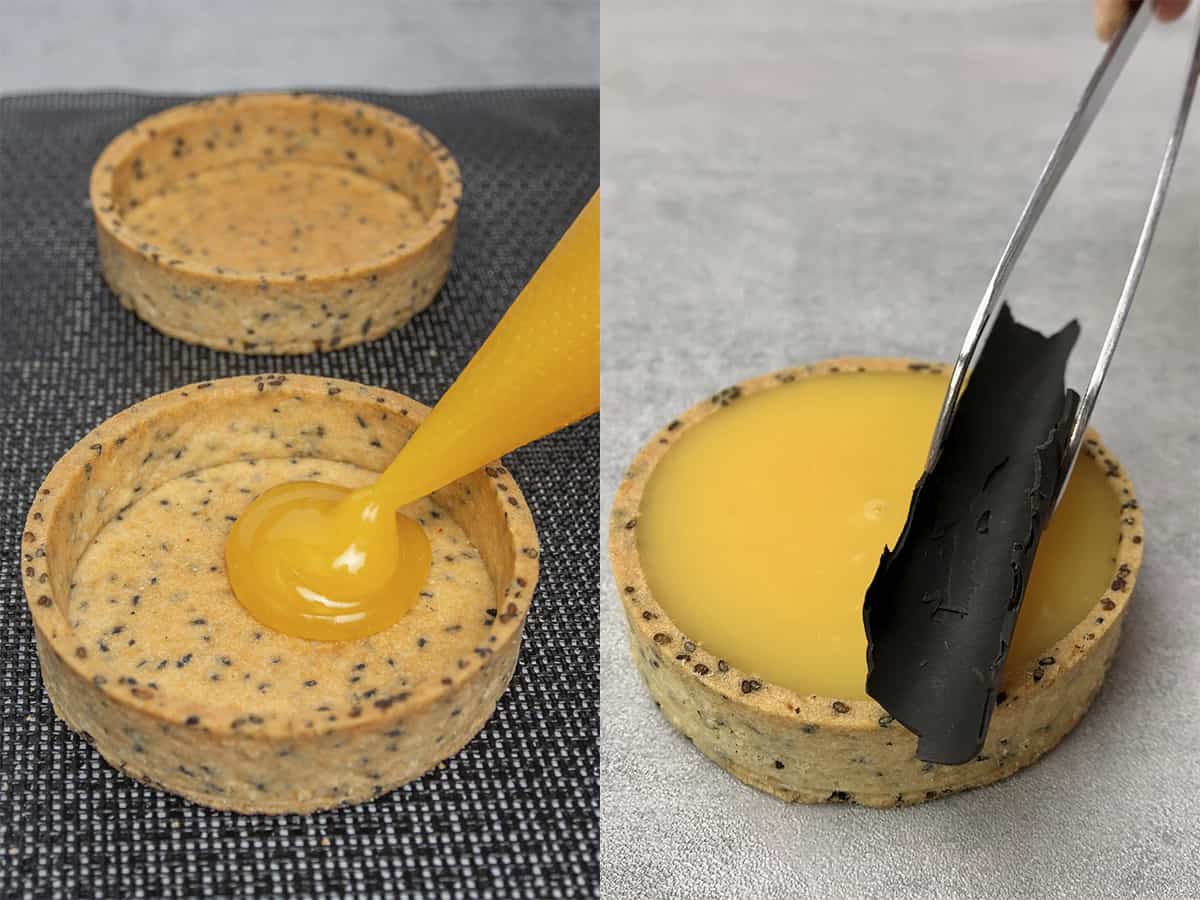
- Fill each tart case with yuzu curd up to the edge
- Let the tarts set in the fridge for min 4 hours
- Place one chocolate decoration on each and pipe a tiny bit of yuzu curd on them
Voila, your Black sesame tart with Yuzu curd is ready! Enjoy and store it in the fridge!
🥣 Equipment notes
You can achieve a neat, visually appealing, professional-looking tart crust by using professional baking equipment. Luckily these are available to purchase on Amazon not just for professionals, but also for home bakers.
Silicone baking mat
I recommend using 2 Silicone baking mat for rolling the pastry dough out in between them. The recipe is designed in a way that you do not need to add extra flour while rolling the dough however it might stick to your kitchen counter so use a silicone baking mat. It’s also possible to use 2 sheets of parchment paper however the silicone mat provides a much neater, smooth surface. It can be washed and re-used all the time so overall worth the investment. I am using the “Amazon basics” cheapest version, no need to buy anything expensive.
While rolling, start from the center of the disc and work your way out in all directions. Again remember, the temperature is very important. If the dough is too cold, you won´t be able to roll it out. If too warm, it will be difficult to handle and will even stick to the silicone baking mat. Use your fridge or freezer to control the temperature of the pastry dough at all times.
Perforated Baking Mat
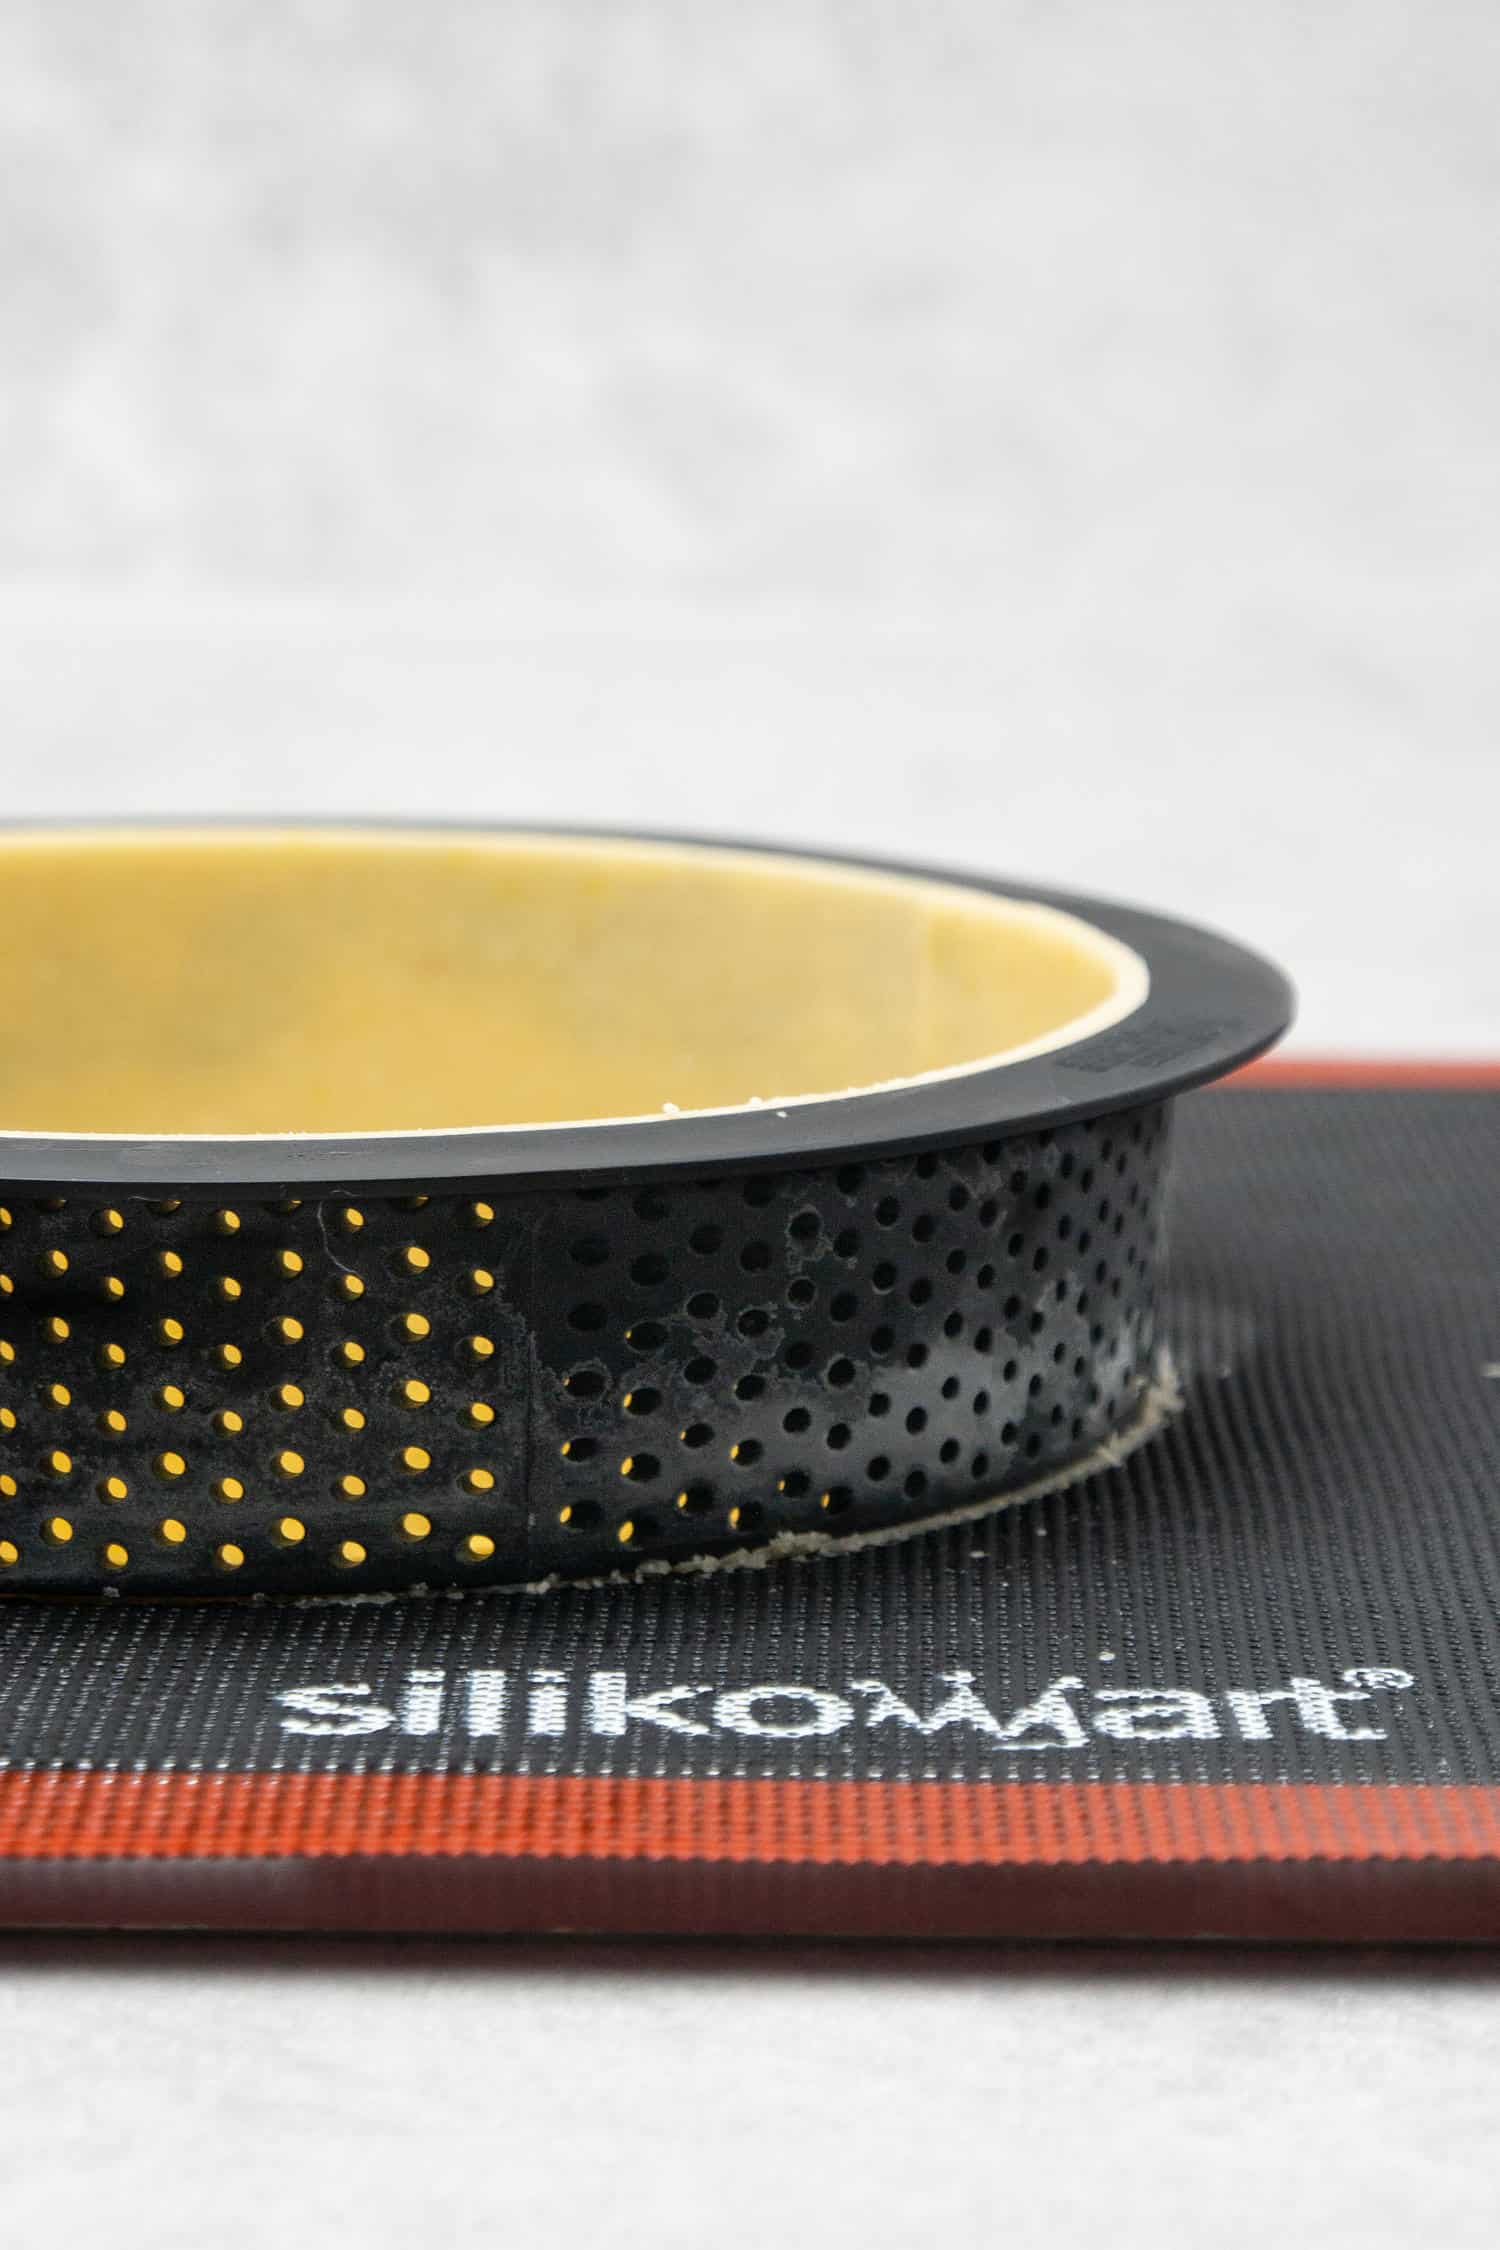
The Perforated “air” baking mat is perfect for making the tart crust, éclairs, or even cookies. Thanks to the holes in the mat, the heat spreads evenly throughout mats’ surface guaranteeing a perfect and even baking without blind baking. The dough won´t puff up while baking the tarts and will be baked super neat.
While baking the tart shells, use the Perforated “air” baking mat straight on top of the oven rack (so not in a baking pan) so that the air can circulate properly. I have been using Perforated “air” baking mat for years from a brand called Silikomart and love it!
Perforated Tart rings
The Perforated tart rings are non-stick and stainless, they allow homogeneous baking due to the even air circulation. Silikomart offers rings in various shapes and sizes, I am using an 8cm (3,14inch) diameter round version in this case, however, the recipe can be made in larger rings as well just like this Raspberry Frangipane tart. As far as I can see there are several cheap copies of the initial Silikomart product, I am not sure though whether they are made of the same material and whether they work or not.
Absolutely no need to grease the tart rings when making Pâte Sablée, the dough will stick to its perforated side while baking, and will contract after baked - so the ring can be removed easily. These Perforated tart rings are the best investment I have ever made!
🇯🇵 More Japanese dessert recipes
✨ More Tart recipes
Black sesame tart with yuzu curd
Equipment
- Digital scale
Ingredients
Yuzu curd
- 200 g (1 cups) Yuzu juice 100% juice of fresh yuzu or store bought 100% yuzu juice
- 6 Egg yolks
- 240 g (1¼ cups) Granulated sugar
- 200 g (1 cups) Unsalted butter room temperature soft
Sweet tart crust
- 230 g (2 cups) Pastry flour AP works too
- 90 g (¾ cups) Icing sugar
- 40 g (⅓ cups) Black sesame seeds roast it first for a few minutes until nutty smell
- Pinch of salt
- 110 g (½ cups) Unsalted butter very cold
- 50 g Egg approx. 1 egg
Decoration (optional)
- 50 g (⅓ cups) Callebaut Dark Chocolate (callets)
- Black fat soluble chocolate food coloring
US customary cup measurement is an indicative figure only. Measure the ingredients with a digital scale by weight (gram). Baking is art but also science which requires precision and accuracy.
Instructions
Yuzu curd
- Place yuzu juice, egg yolk and sugar in a heatproof bowl over a pan of simmering water (double boiler) and cook the curd over medium-high heat whisking constantly. Whisking is important to avoid egg yolks from curdling
- After about 8-10 minutes the mixture starts to thicken (mixture will reach around 80C /176F)
- Remove from heat, pour the cooked curd through a sieve
- With a rubber spatula mix in room temperature butter in small chunks one by one, makes sure each chunk is fully incorporated before adding the next. Hand blend
- Let the curd cool before using it as a filling, no need to wait until it fully sets
Tart cases
- Sift dry ingredients; flour, icing sugar, salt then add in toasted black sesame seeds
- Add very cold butter chunks and rub the mixture between your hands until it becomes a sand like consistency
- Add egg into the mixture and mix with your hands just until the dough comes together
- Knead with the palm of your hand for a minute or two (do not over knead and do not use mixer) just until the dough becomes smooth
- Cut 8 long strips out of the dough, this will be the side of the tart
- Carefully place the strips into the ring one by one. Press each strip onto the ring so it sticks to it
- Pre-heat oven to 160C / 320F
- After 1 hour take the pastry dough with the rings on them out and trim them with a sharp knife
- Bake for 20 min then carefully remove the rings and bake for another 5 -10 min until golden brown. Let them cool on the Perforated "air" baking mat before filling
- Let tart cases fully cool before filling them
Assemble
- Fill each tart case with the yuzu curd up to the edge
- Let the tarts set in the fridge for min 4 hours
Decoration (optional)
- To make the chocolate shard: Melt and temper chocolate then color it to black
- Spread chocolate over a sheet of parchment paper in a thin and even layer then roll it up
- Let it set in the fridge for 60 minutes then carefully start rolling the parchment out. The chocolate should naturally break into shards as you are rolling it out
- Store the tartlets in in the fridge





Emily
Hi there! I’d like to make mini-tarts. Any tips on the baking process? I have 2 in molds.
Katalin Nagy
All my tips to make mini tarts are in this article already:)
Elle
Hi!
What would be the best way to split up the baking process if I don't have enough time in one day? Would it be okay for me to bake the tart crusts the night before and make the curd and assemble it the next afternoon?
Kata
You can easily split the tart over two days and either freeze the unbaked tart shells then bake them on the 2nd day, or bake them on the 1st day and fill them on the 2nd day. Please note that the curd needs to be set as well.
Blue
I generally find it useless for one to leave a comment without having prepared the dish. However, I just wanted to say that I have just discovered your site today and I am hugely impressed with your attention to detail! I will definitely be returning to learn more from you. Thank you.
Kata
Look forward to hearing from you later as well when you try my recipes 🙂
Sally
This is the most incredible tartlet ever! Thanks for the detailed instructions, finally I can bake like a Pro!