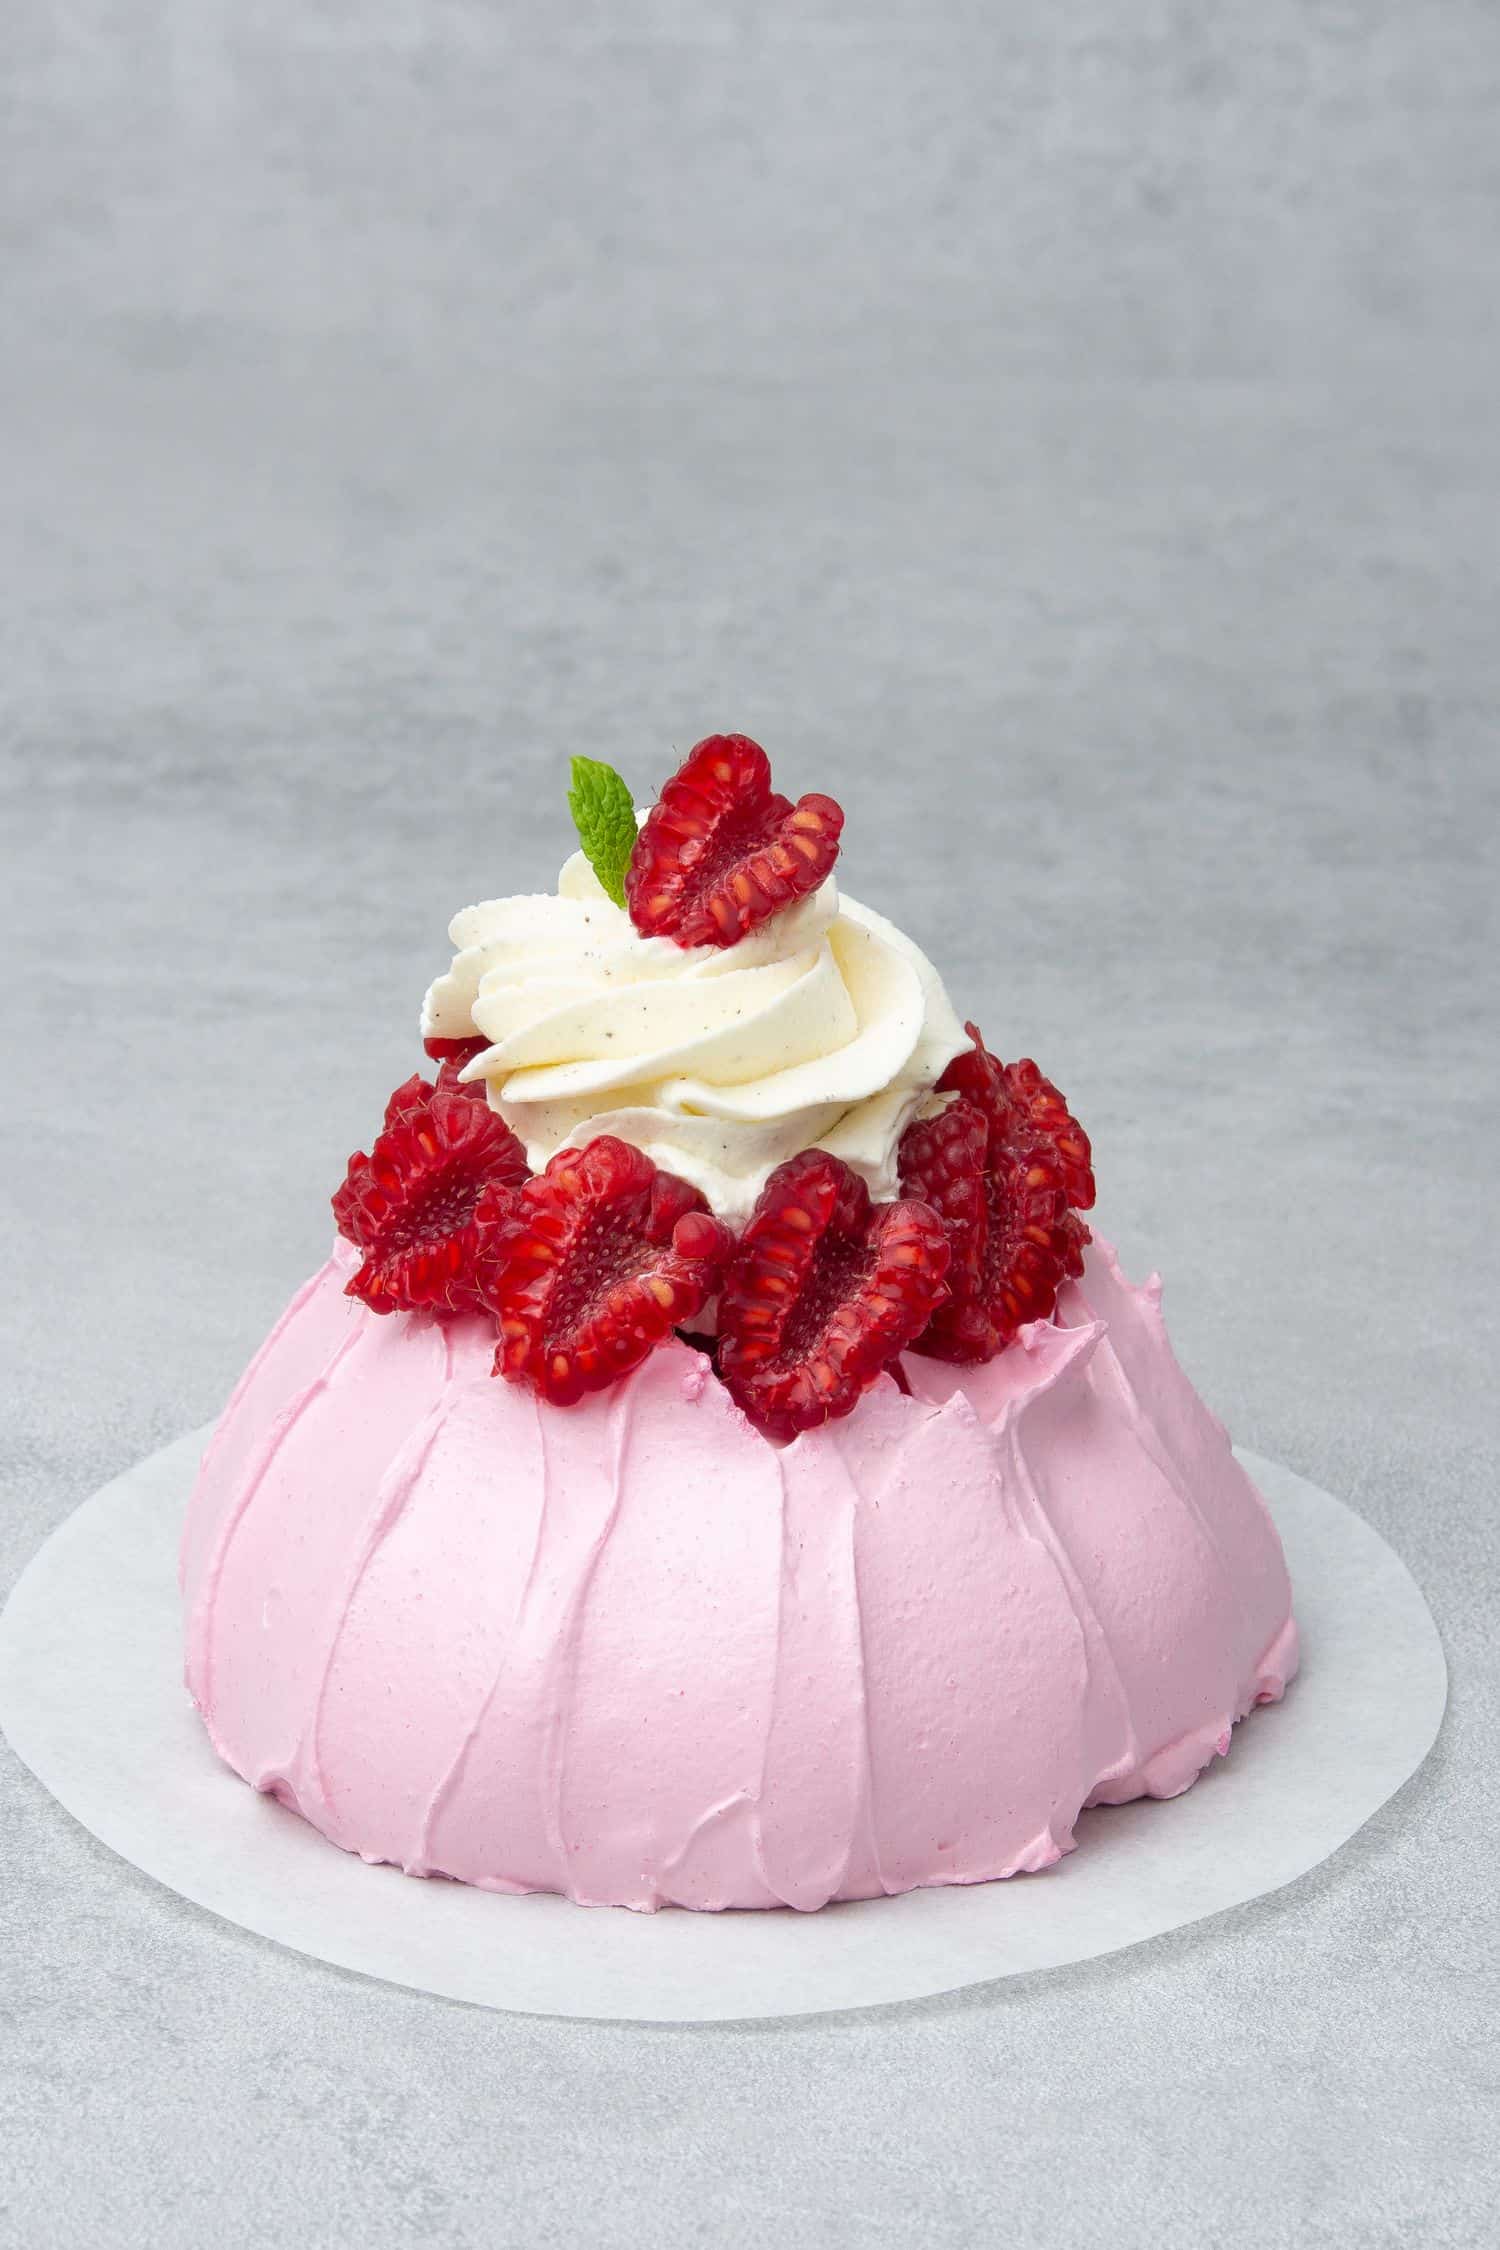
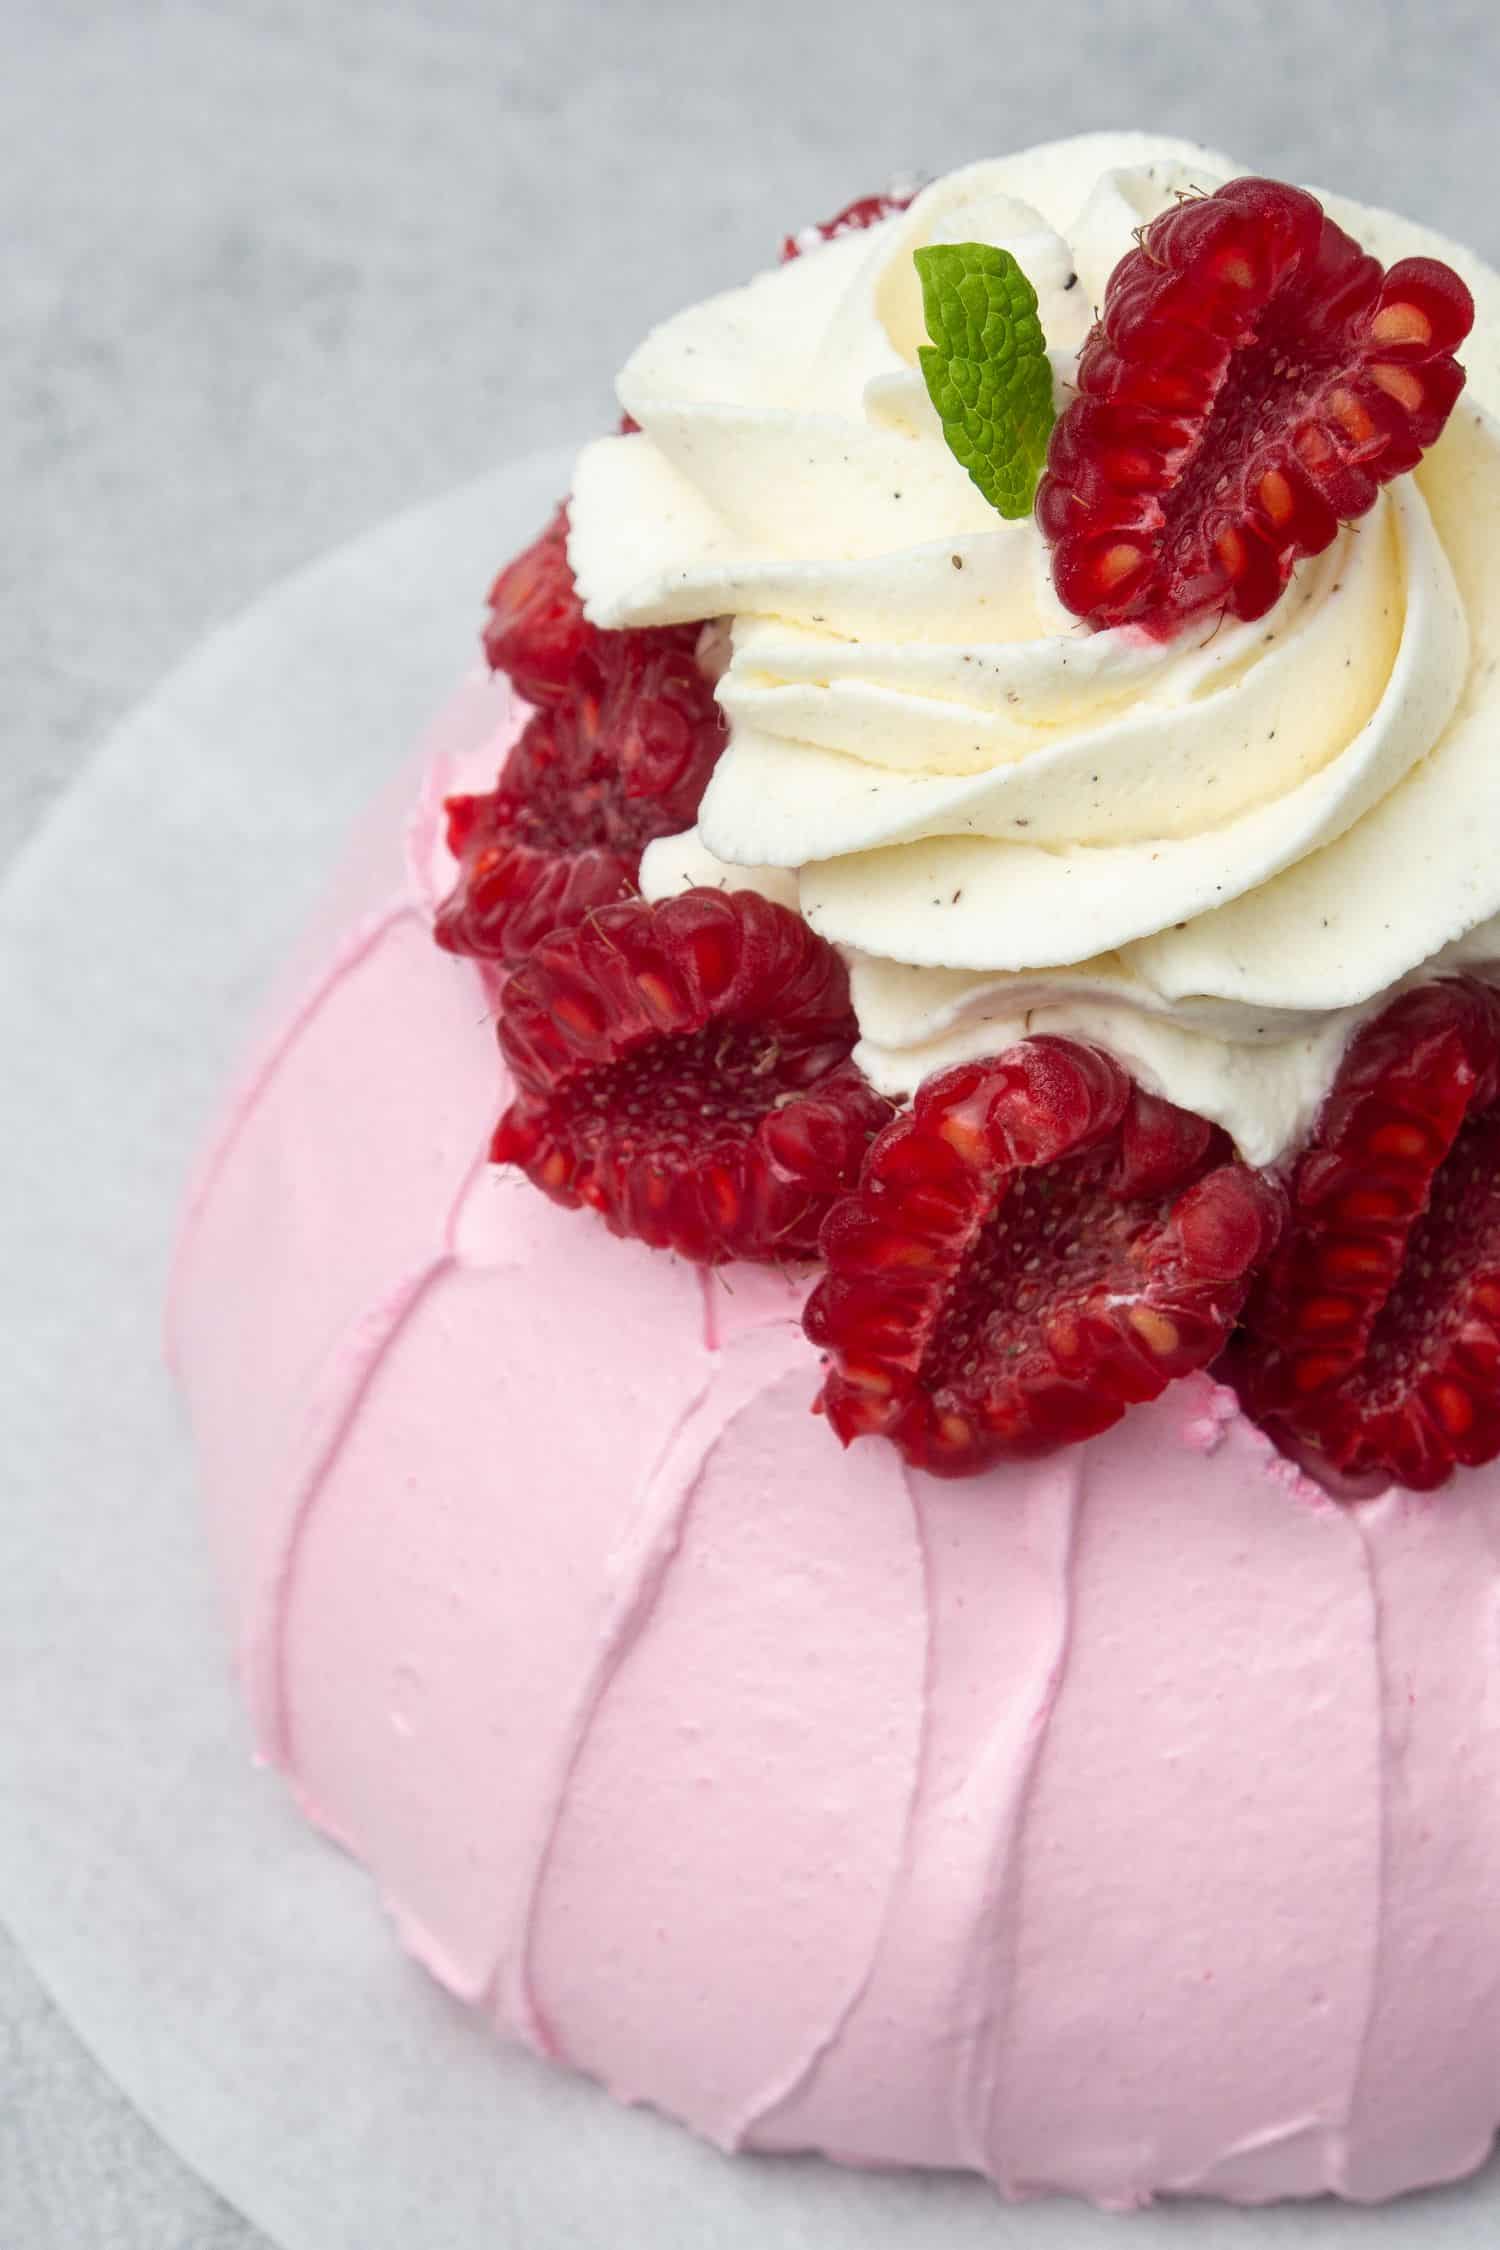
My signature Pink Mini Pavlova dessert with raspberries has the most perfect crunchy texture on the outside and marshmallow texture inside! Pavlova is naturally gluten-free, in fact, the recipe uses only a few ingredients you probably already have at home. Making this mini pavlova recipe is not difficult, does not take much time, however similarly to most meringue-based recipes, it needs attention, accuracy, and a bit of practice.
This is a foolproof meringue tutorial that will help you step-by-step how to make this amazing dessert, which is effectively a mini pavlova nest. Looking for a decorative, individual pavlova dessert recipe for Valentine's day? You found it!
Jump to:
2 typical visual mistakes to avoid when baking pavlova
- Pavlova is cracked - so many people claim to have the perfect pavlova recipe and many of these pavlovas are full of cracks, some even broken into half. It's a big NO! I will take you through below on all the necessary details you have to know to avoid cracks on your pavlova
- Pavlova is browning - another typical mistake caused by quite obviously too high oven temperature. Still, so many recipes out there state high oven temperate, well not this one!
Ingredient notes
For the pavlova
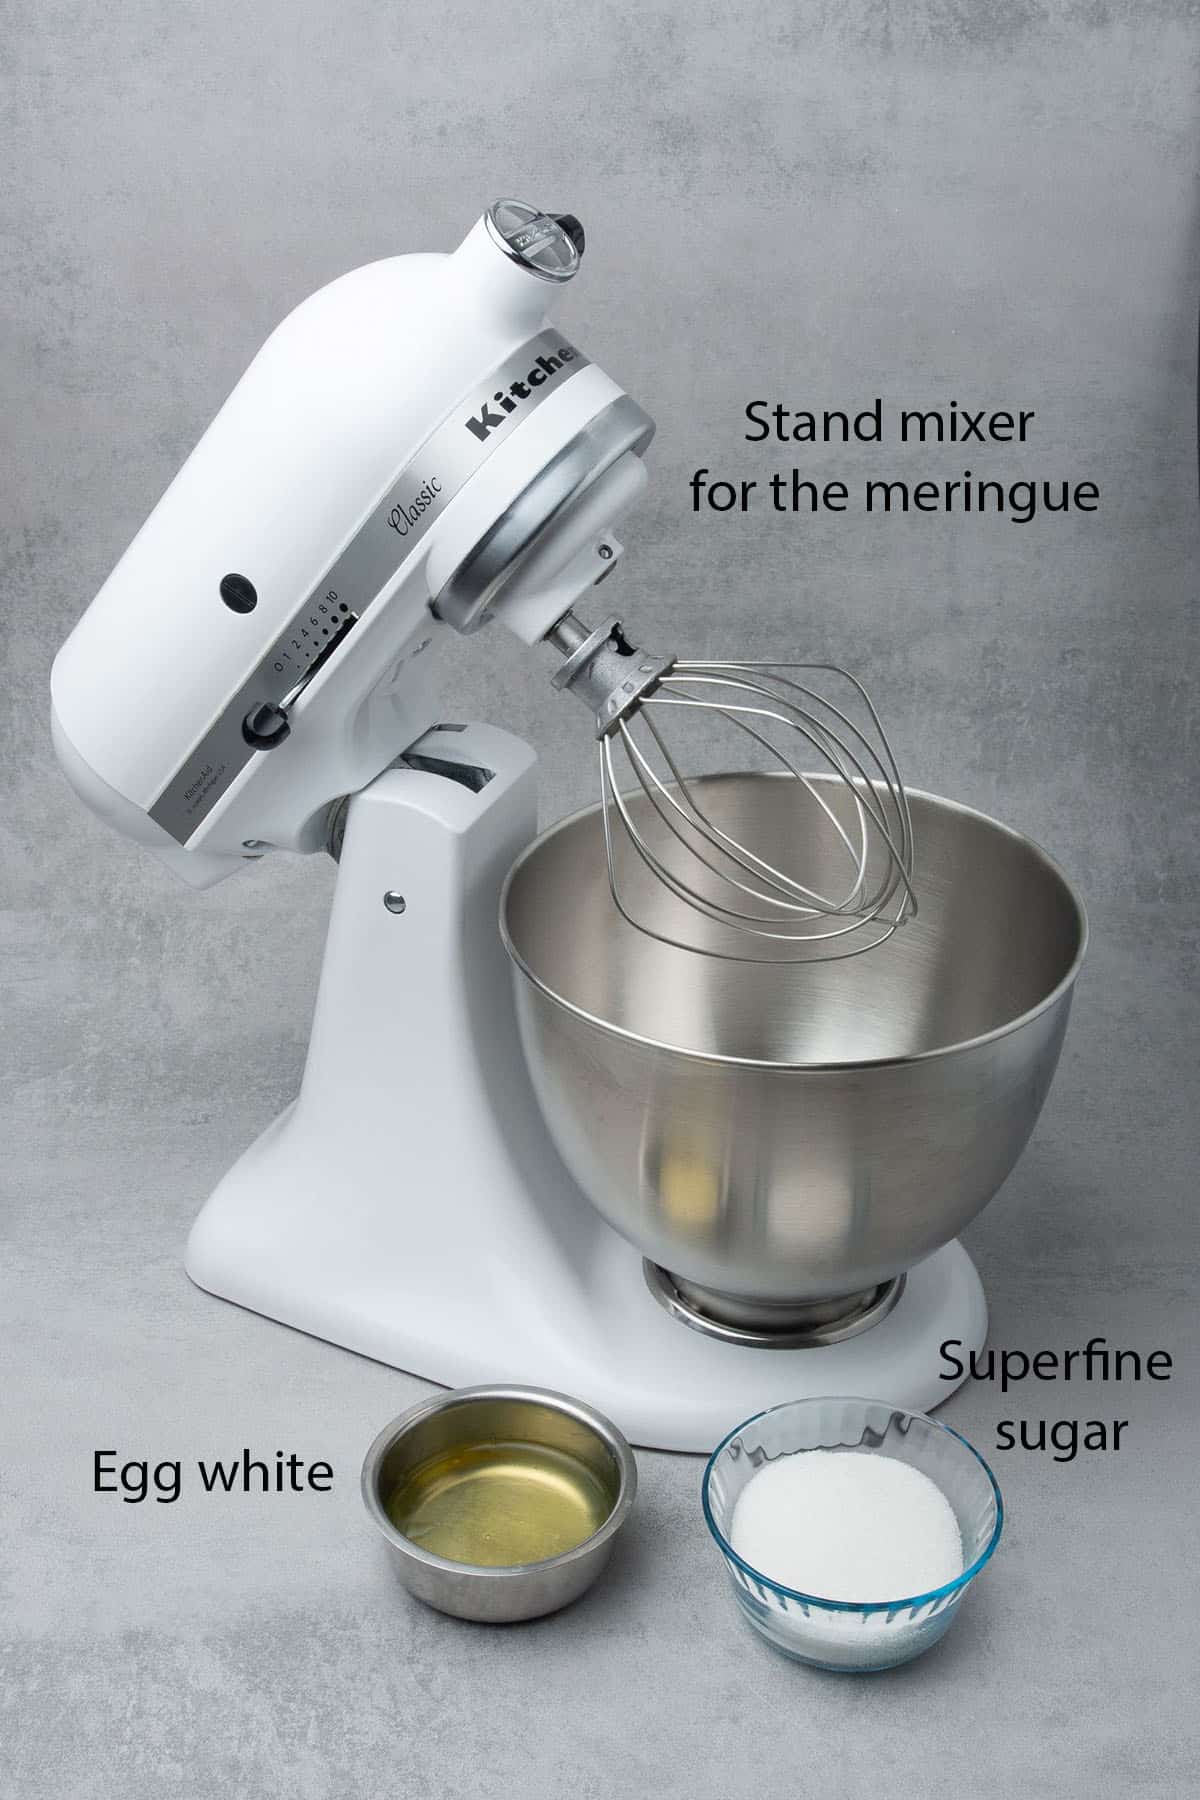
- Egg white: Room temperature fresh egg white is the heart of the pavlova. Make sure you use egg whites that are absolutely free from any sort of fat (e.g. egg yolk). If you get some egg yolk into the egg white, start again. Believe me, you can't make a successful meringue and pavlova with that batch, unfortunately. Not sure what to do with leftover egg yolks? You must try my ultimate Crème brûlée recipe
- Superfine sugar: There are a couple of important notes regarding the sugar.
- No.1. If you have tried any of my recipes before you must have realized that I am not using an excessive amount of sugar. However, in the case of pavlova, we need a lot of sugar to keep the structure of the meringue. Sugar in this case is not really a sweetener but more like a glue
- No.2. You must use superfine sugar which has smaller crystals than regular granulated sugar, therefore, dissolves quickly while beating up the egg white into the meringue. If you can't find superfine sugar in your local supermarket, pulse blend regular white sugar in a food processor until the sugar crystals get smaller, however, make sure you don't make powder sugar out of it.
- No. 3. Sugar needs to be added to the egg white very slowly, one tablespoon at a time while the mixer is on otherwise it might get crystallized and you have to start the whole process all over again! If want to learn about the different types of sugar and how to use them in baking, please read my article in here
- Cream of tartar (optional): It helps stabilize whipped egg whites and prevents sugar from crystallizing. If you are an experienced baker and perfectly know how to make meringue perhaps you can leave it out. I hardly ever use it
- Food coloring (optional): It is not absolutely necessary but I love playing with colors and this Pink mini pavlova contains a small amount of food coloring. As a general rule, you add as little "extra things" to the meringue as possible to avoid breaking it. This is especially important when it comes to liquid ingredients (I don't even add vanilla extract for the same reason). Gel food coloring can work if you don't use an extensive amount however powder food coloring is the most risk-free
- White Vinegar (optional): Similar function as cream of tartar, it's all about the perfect meringue! The pavlova won't taste vinegar, I promise!
- Lemon juice (optional): Same funtion as white vinegar
- Cornstarch (optional): It helps to achieve the marshmallow center and again, stabilize the meringue
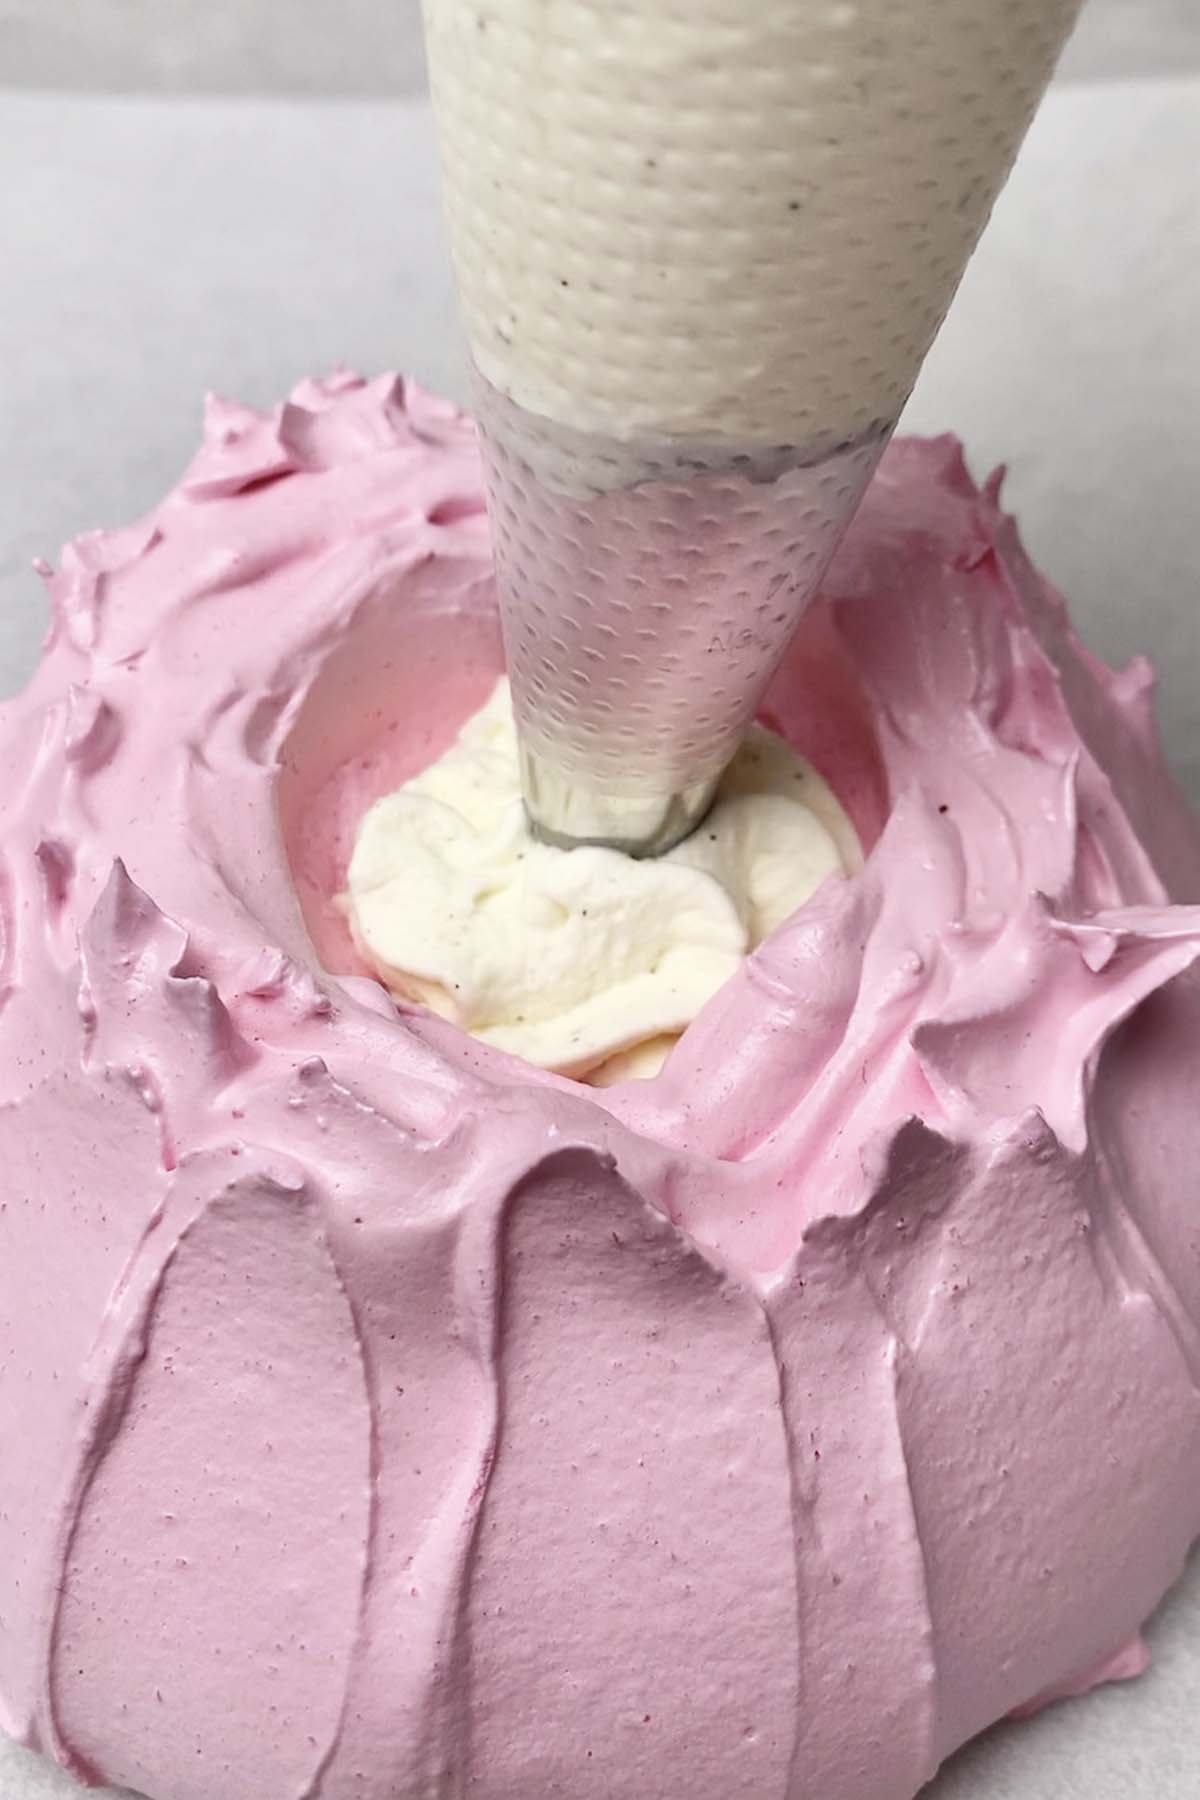
How to fill the mini pavlova desserts
Filling the pavlova is really up to your taste! After nailing the pavlova technique, you can make both the pavlova and also the filling in as many variations as you wish. However, bear in mind that pavlova is effectively egg white and has a lot of sugar. Therefore, from a taste point of I suggest something refreshing eg. fresh fruits, fruit compote, lemon curd, or even sugar-free homemade whipped cream.
Try to play with the colors, textures, and decorate it with mint, lemon slice, berries, etc. For Valentine´s day, you can even decorate it with fresh organic rose petals. Since you will be able to make 2 individual pavlova desserts with this recipe, you can even fill them differently.
5 Expert tips
1. What is the difference between French, Italian and Swiss meringue
Generally, there are 3 ways of making meringue, French, Italian, and Swiss. There is no such thing as one is easier or better than the other. Deciding which one to make comes down to personal preference and final usage of the meringue.
In the French method, egg white is whipped while fine sugar is added to it gradually until stiff peaks form. This Pink Mini Pavlova dessert with raspberries is made using the French method.
The Italian method involves whisking the egg whites with a hot sugar syrup (at a set temperature) to form the meringue. If you want to learn more about it check my ultimate macaron tutorial
The Swiss method involves heating sugar and egg white over a double boiler until sugar fully dissolves then whipping the mixture into the meringue. I am using the Swiss method to make spooky Ghost meringues and also for making Lemon Pound cake with meringue decoration
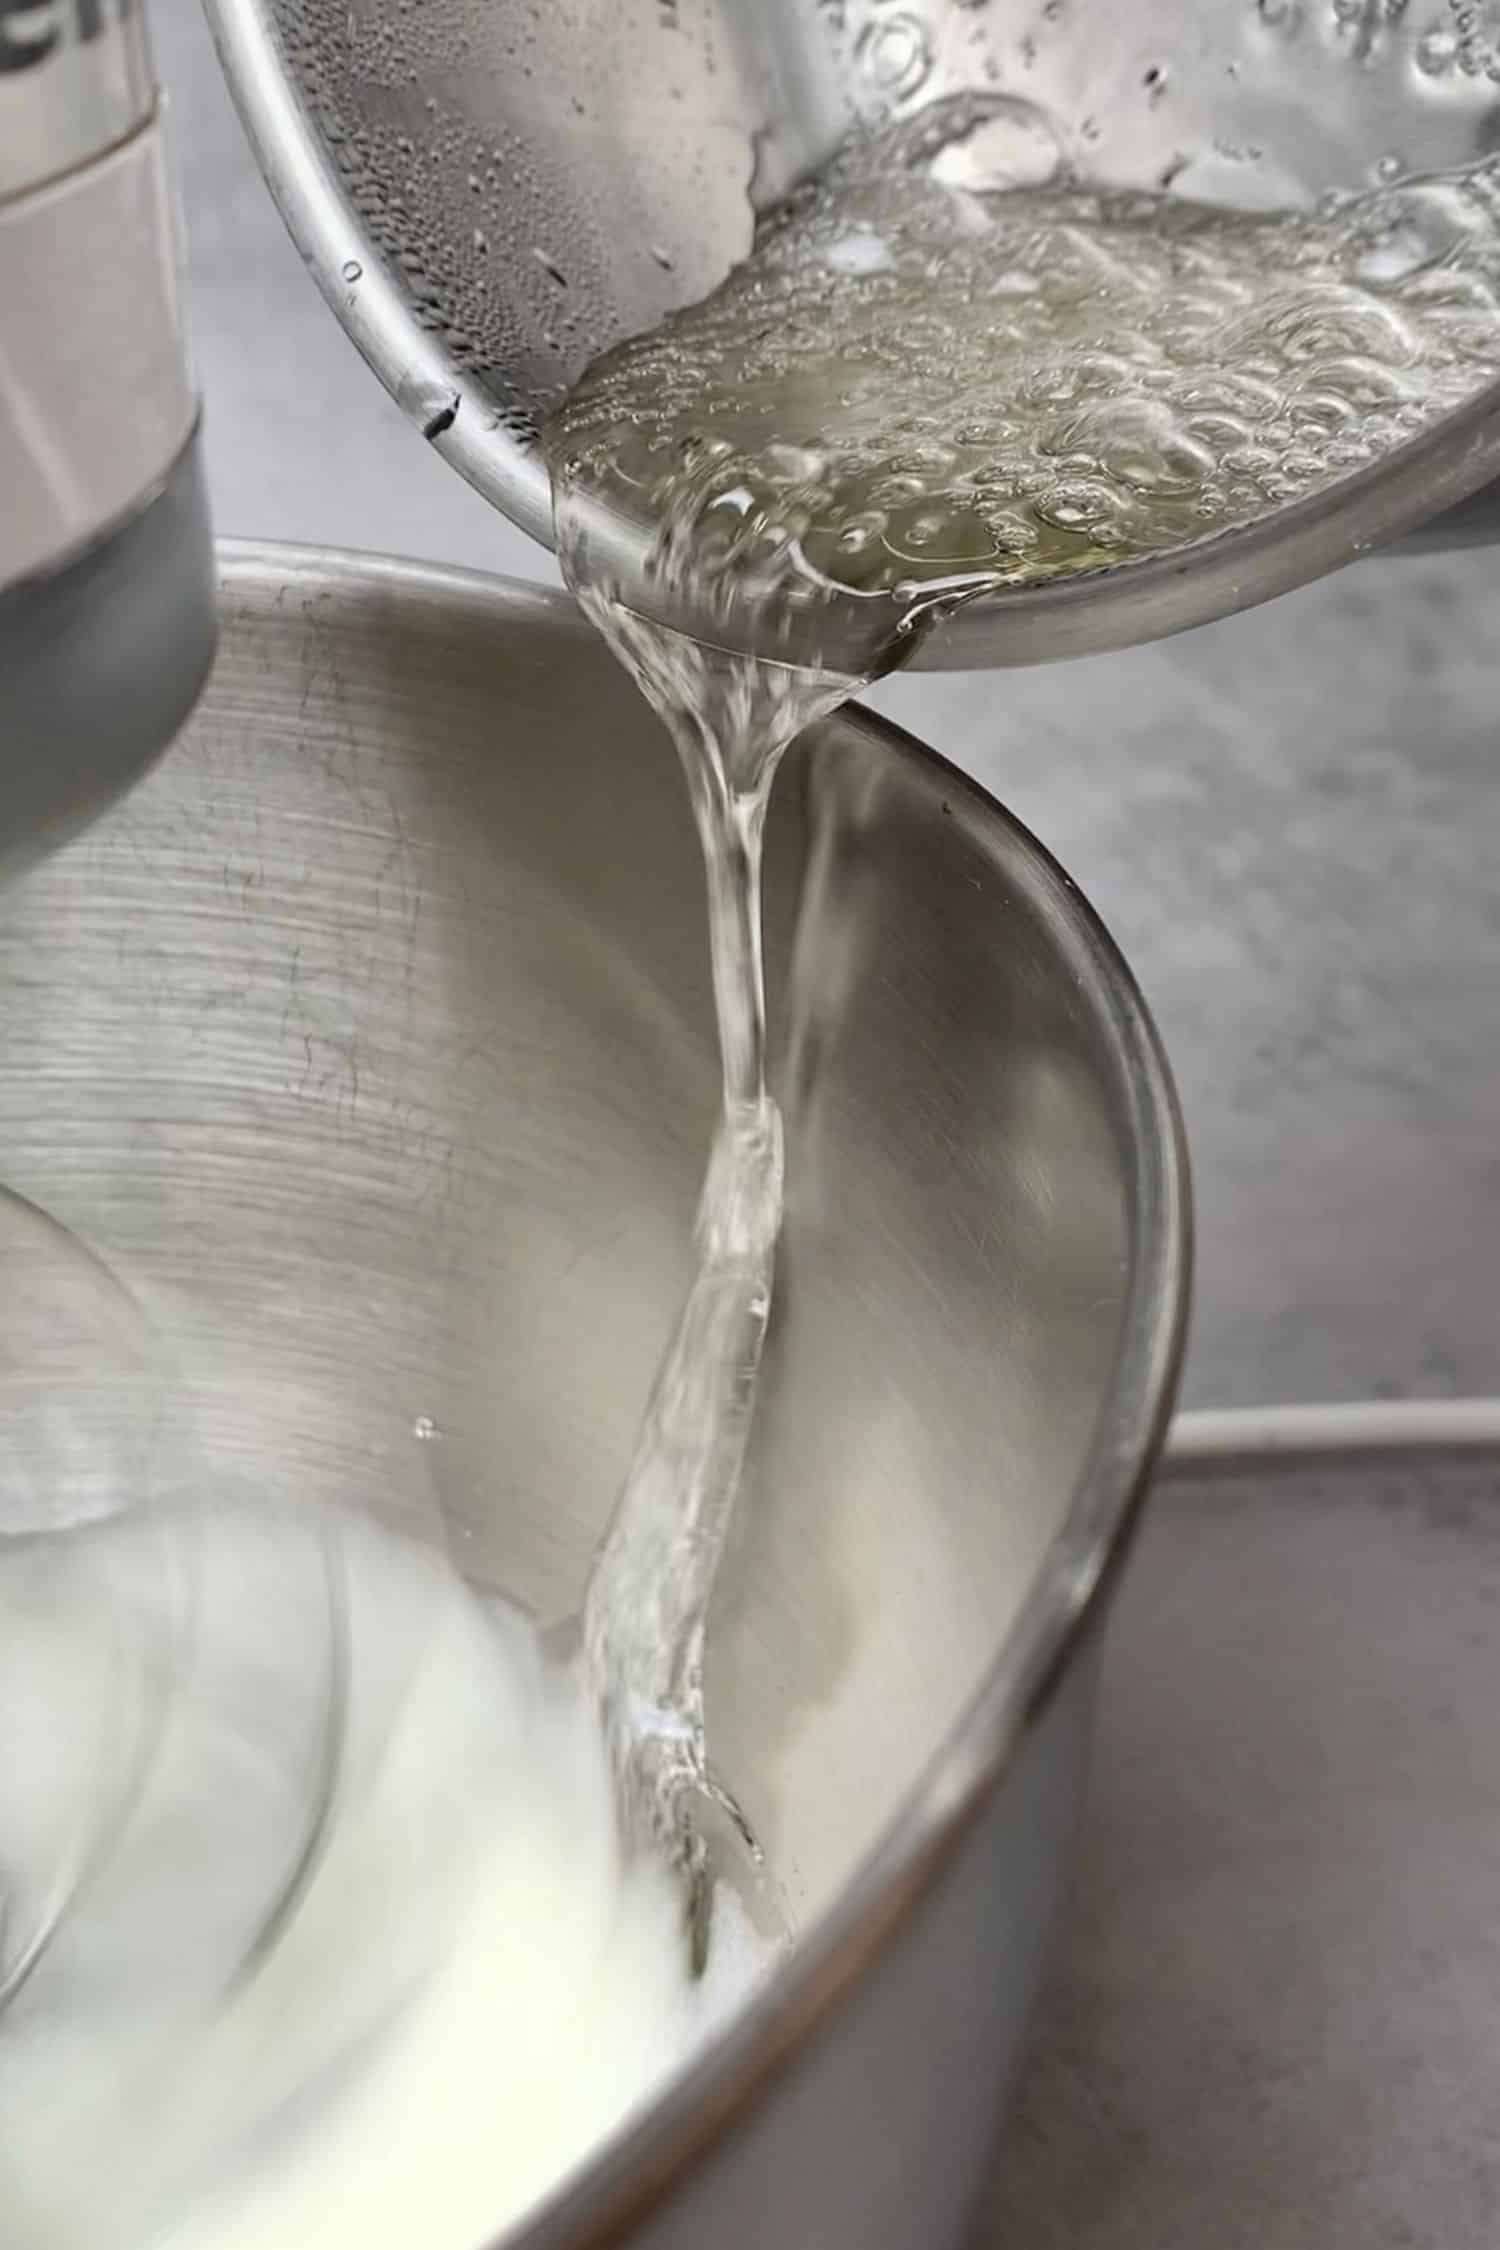
2. How to make French meringue for this Mini pavlova dessert
Whipping egg white is probably the most important step of making the pavlova recipe. Make sure you use fresh, room temp egg white that is absolutely free from any sort of fat (e.g. egg yolk). If you get some egg yolk into the egg white in the process of separating, start again.
Worth being well organized before you start the meringue-making process. Prepare your Piping bag, a baking tray with parchment paper or a Silicone baking mat, an Offset spatula or some sort of spoon to shape the meringue, a Rubber spatula to be able to fold the meringue without damaging. Also, start pre-heating your oven and ideally use a Digital oven thermometer to be on the safe side.
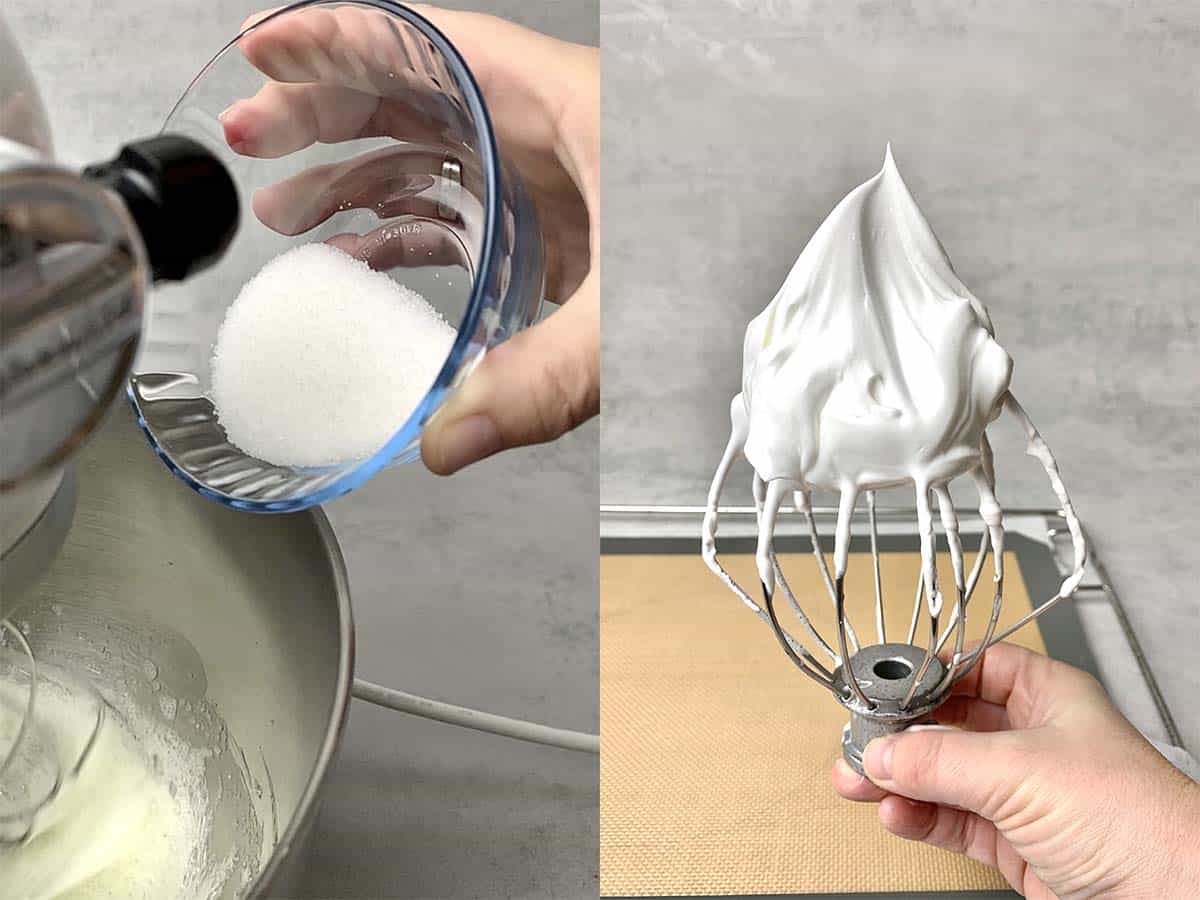
While whipping the egg white start your Stand mixer on low speed, then increase gradually. If you are using cream of tartar, vinegar, or lemon juice, you should use it at this point. Once texture looks bubble, add in vinegar, then increase the speed to medium/high and start adding superfine sugar very slowly, a small amount at a time. Scrape the sugar from the side of the mixer bowl every now and then, if needed.
It is very important that you whip egg white until shiny, stiff peaks form since you will need to pipe and shape the meringue and that requires stable consistency. But, avoid over-whipping the meringue as it can form lumps.
If you are using food coloring, the safest option is to stick to powder. Add food coloring for the last 10-20seconds of whipping the egg white.
If you are using cornstarch, you must quickly fold that in after whipping egg white and before piping.
It is very handy to use a Stand mixer for this mini pavlova recipe, as with a hand mixer it can take way too long to reach the desired consistency. Whipping meringue in Stand mixer takes about 5-10 minutes.
3. How to shape the mini pavlovas
First and foremost it is important that you have your baking tray with parchment paper or a Silicone baking mat prepared ahead. After your stiff, steady meringue is ready there is no time to wander around.
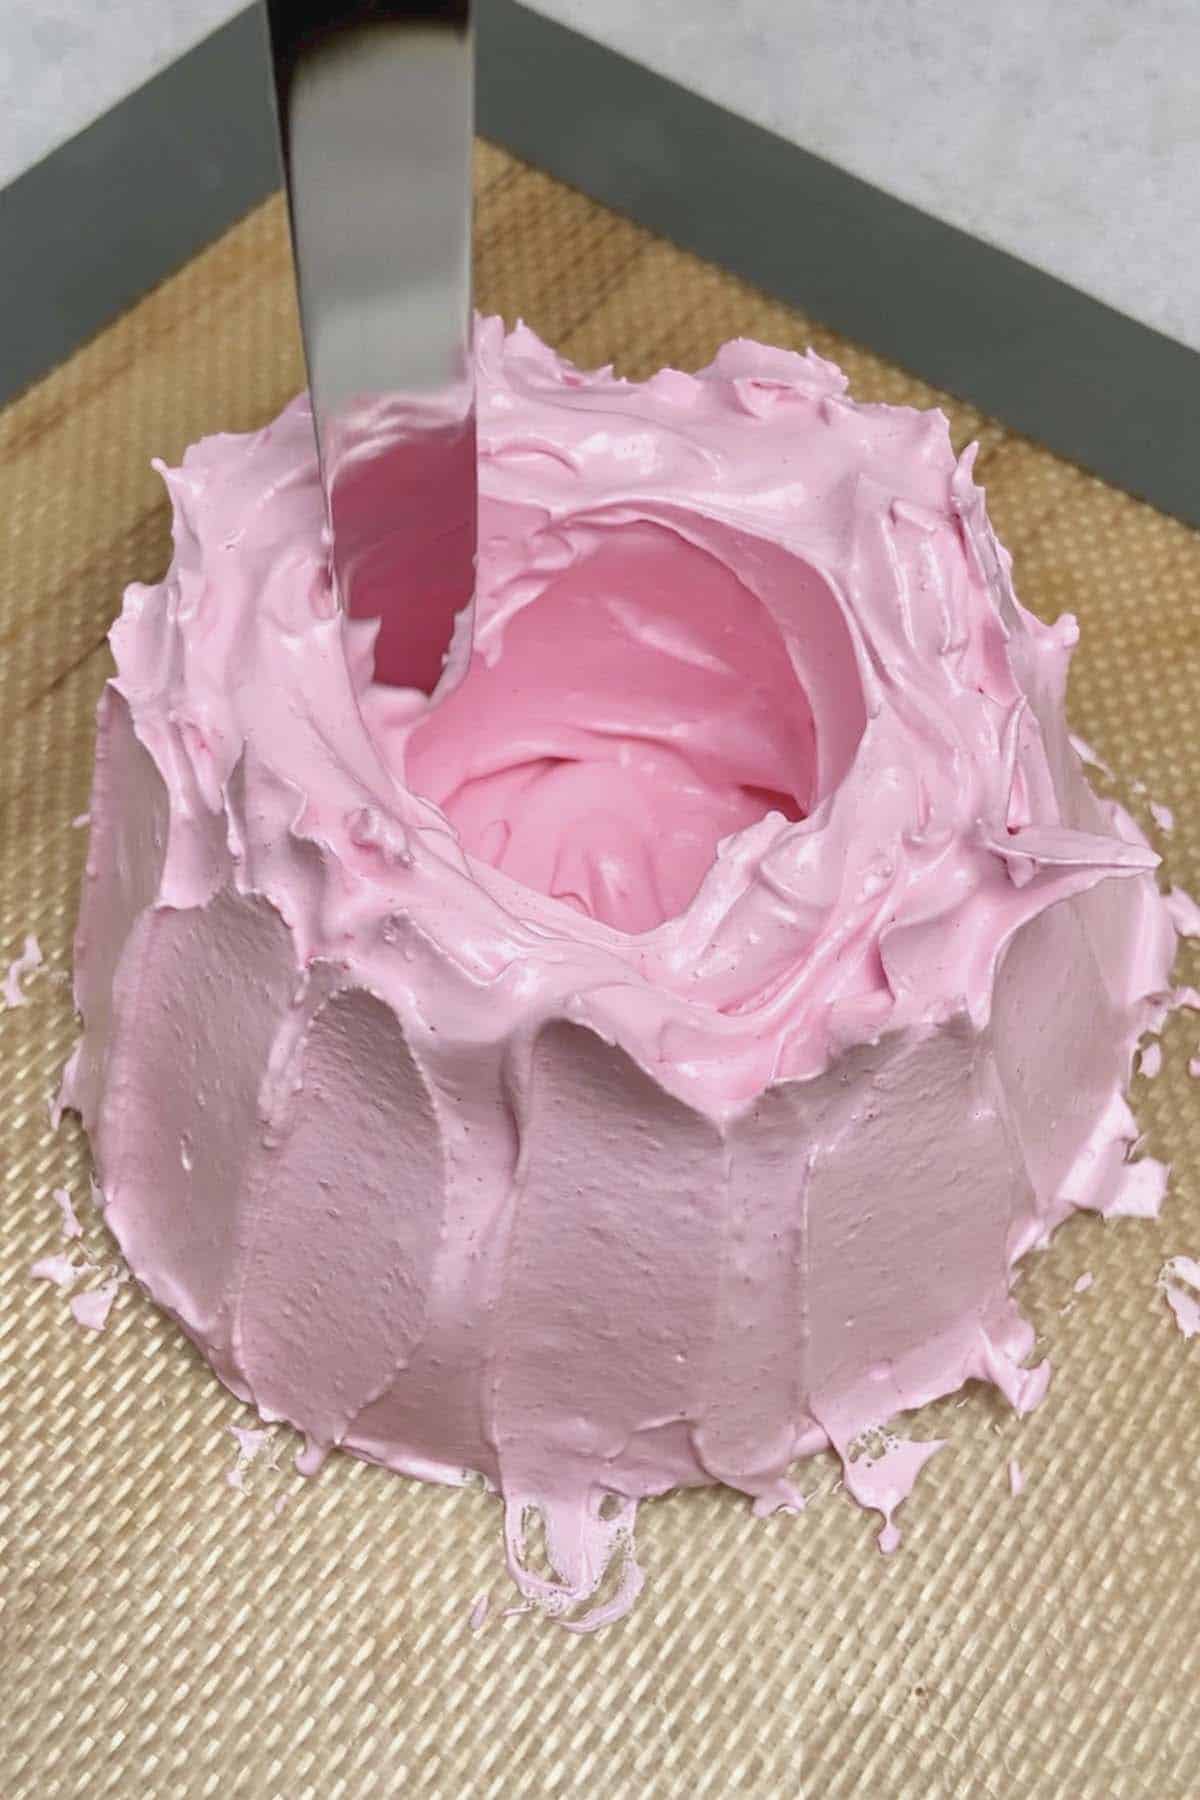
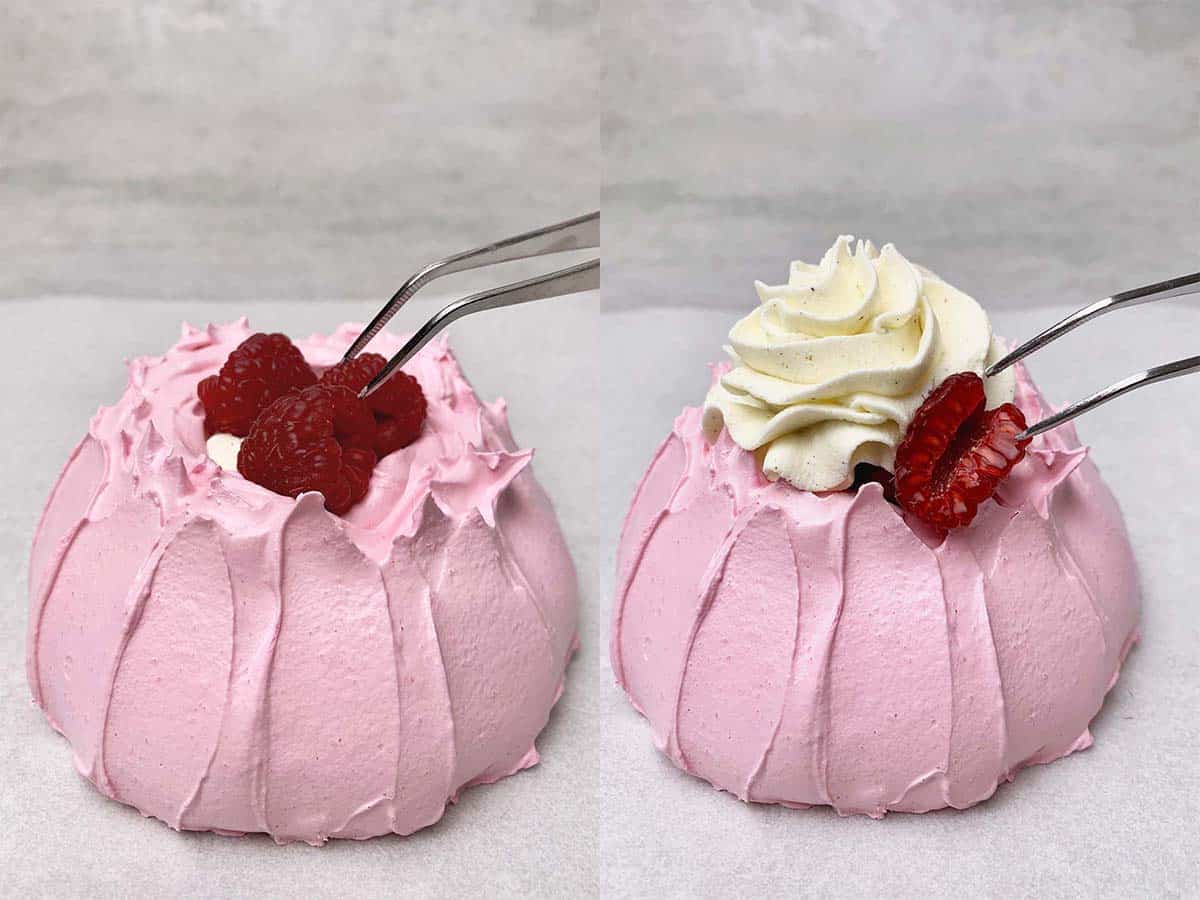
This quantity will make 2 x 10cm / 4inches mini pavlovas. Start by piping the bottom of the pavlova, then 3-4 few more layers just around the side, aim to have a hole in the middle for the filling. It does not have to be perfect as once finished with piping, you will grab your Offset spatula and continue with shaping the pavlova as per the pictures below. Focus on the side while keeping a hole in the middle.
Remember, you will only be able to shape the meringue if it has the right consistency, that is fluffy, stable, and stiff. Make sure your kitchen is cold enough and not too humid.
4. What is the right baking temperature
How to bake?
Apart from the inappropriate meringue techniques, the most common mistake with meringue is baking it at too high a temperature which results in a brown, cracked surface. While baking meringue basically we have to think more like drying than baking. Pre-heat your oven, then I recommend baking the meringue on 85C-90C / 185-194 F so it won´t be browning. Dry them at this low temperature for 90 minutes then leave the door open very slightly, and let them rest and cool down in the oven. This will ensure the beautiful light color and crack-free shell!
Please note, that on a warm or humid day meringue loses its structure at room temperature and might get sticky. Keep it fresh in an air-tight container in the fridge, if you have a warm house.
How about your REAL oven temperature?
What do I mean by that? Check my oven for example:
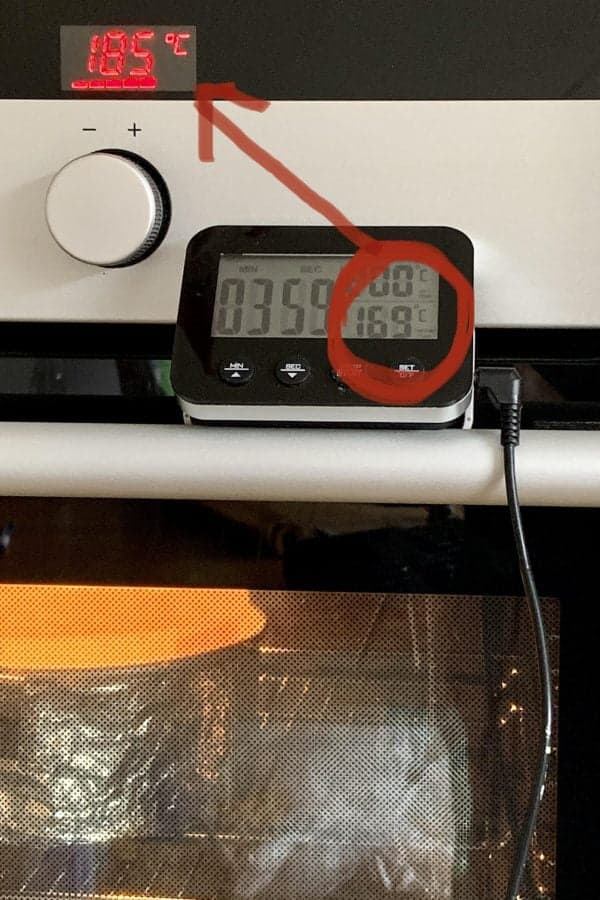
16C / 60F difference is huge (and not unusual). For meringue, which is baked at a really low temperature, the inappropriate baking temperature can cause a real disaster. I can not highlight enough how important it is to get to know your own oven and purchase an inexpensive Digital oven thermometer
5. How to fill and decorate
Pavlova is effectively egg white and sugar so in my view the filling and decoration are what make a pavlova into a truly celebrational dessert. As mentioned above I definitely recommend keeping it low in terms of the sugar level, I would avoid fillings like chocolate, caramel, etc.
You can try other fresh fruits like kiwi, some herbs like mint or rosemary, a tangy lemon curd, or other fresh berries. Try to make it colorful, perhaps use your favorite piping nozzle, or decorate with edible flours!
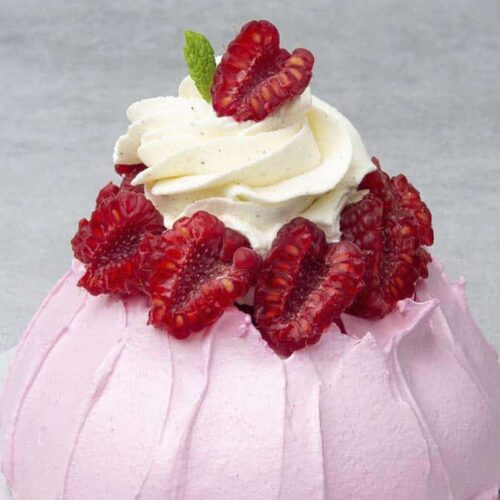
This Pink Mini Pavlova is filled with sugar-free vanilla homemade whipped cream and raspberries. Simple yet amazing flavors! Please note that it is recommended to fill the pavlova straight before serving to avoid the meringue getting soggy from the filling.
How to store the mini pavlovas?
Store them before filling in an air-tight container.
Equipment notes
Not much equipment is needed it make this Pink Mini Pavlova dessert with raspberries, however, there are a few basics.
As mentioned above a Stand mixer will make your life easier, so I definitely recommend using that for preparing meringue. With a hand mixer, simply it would take way too long.
Rubber spatula is really a must for a Home Baker at any level. Whenever a recipe states “folding” , we mean “with a rubber spatula” to avoid breaking the batter. This method is extra important while handling meringue so you definitely need one.
For piping the mini pavlovas I used Piping bag without a nozzle, perhaps you can make it with a spoon too.
Did I mention Digital oven thermometer? Yes, I did and you know why:)
Other pavlova recipe
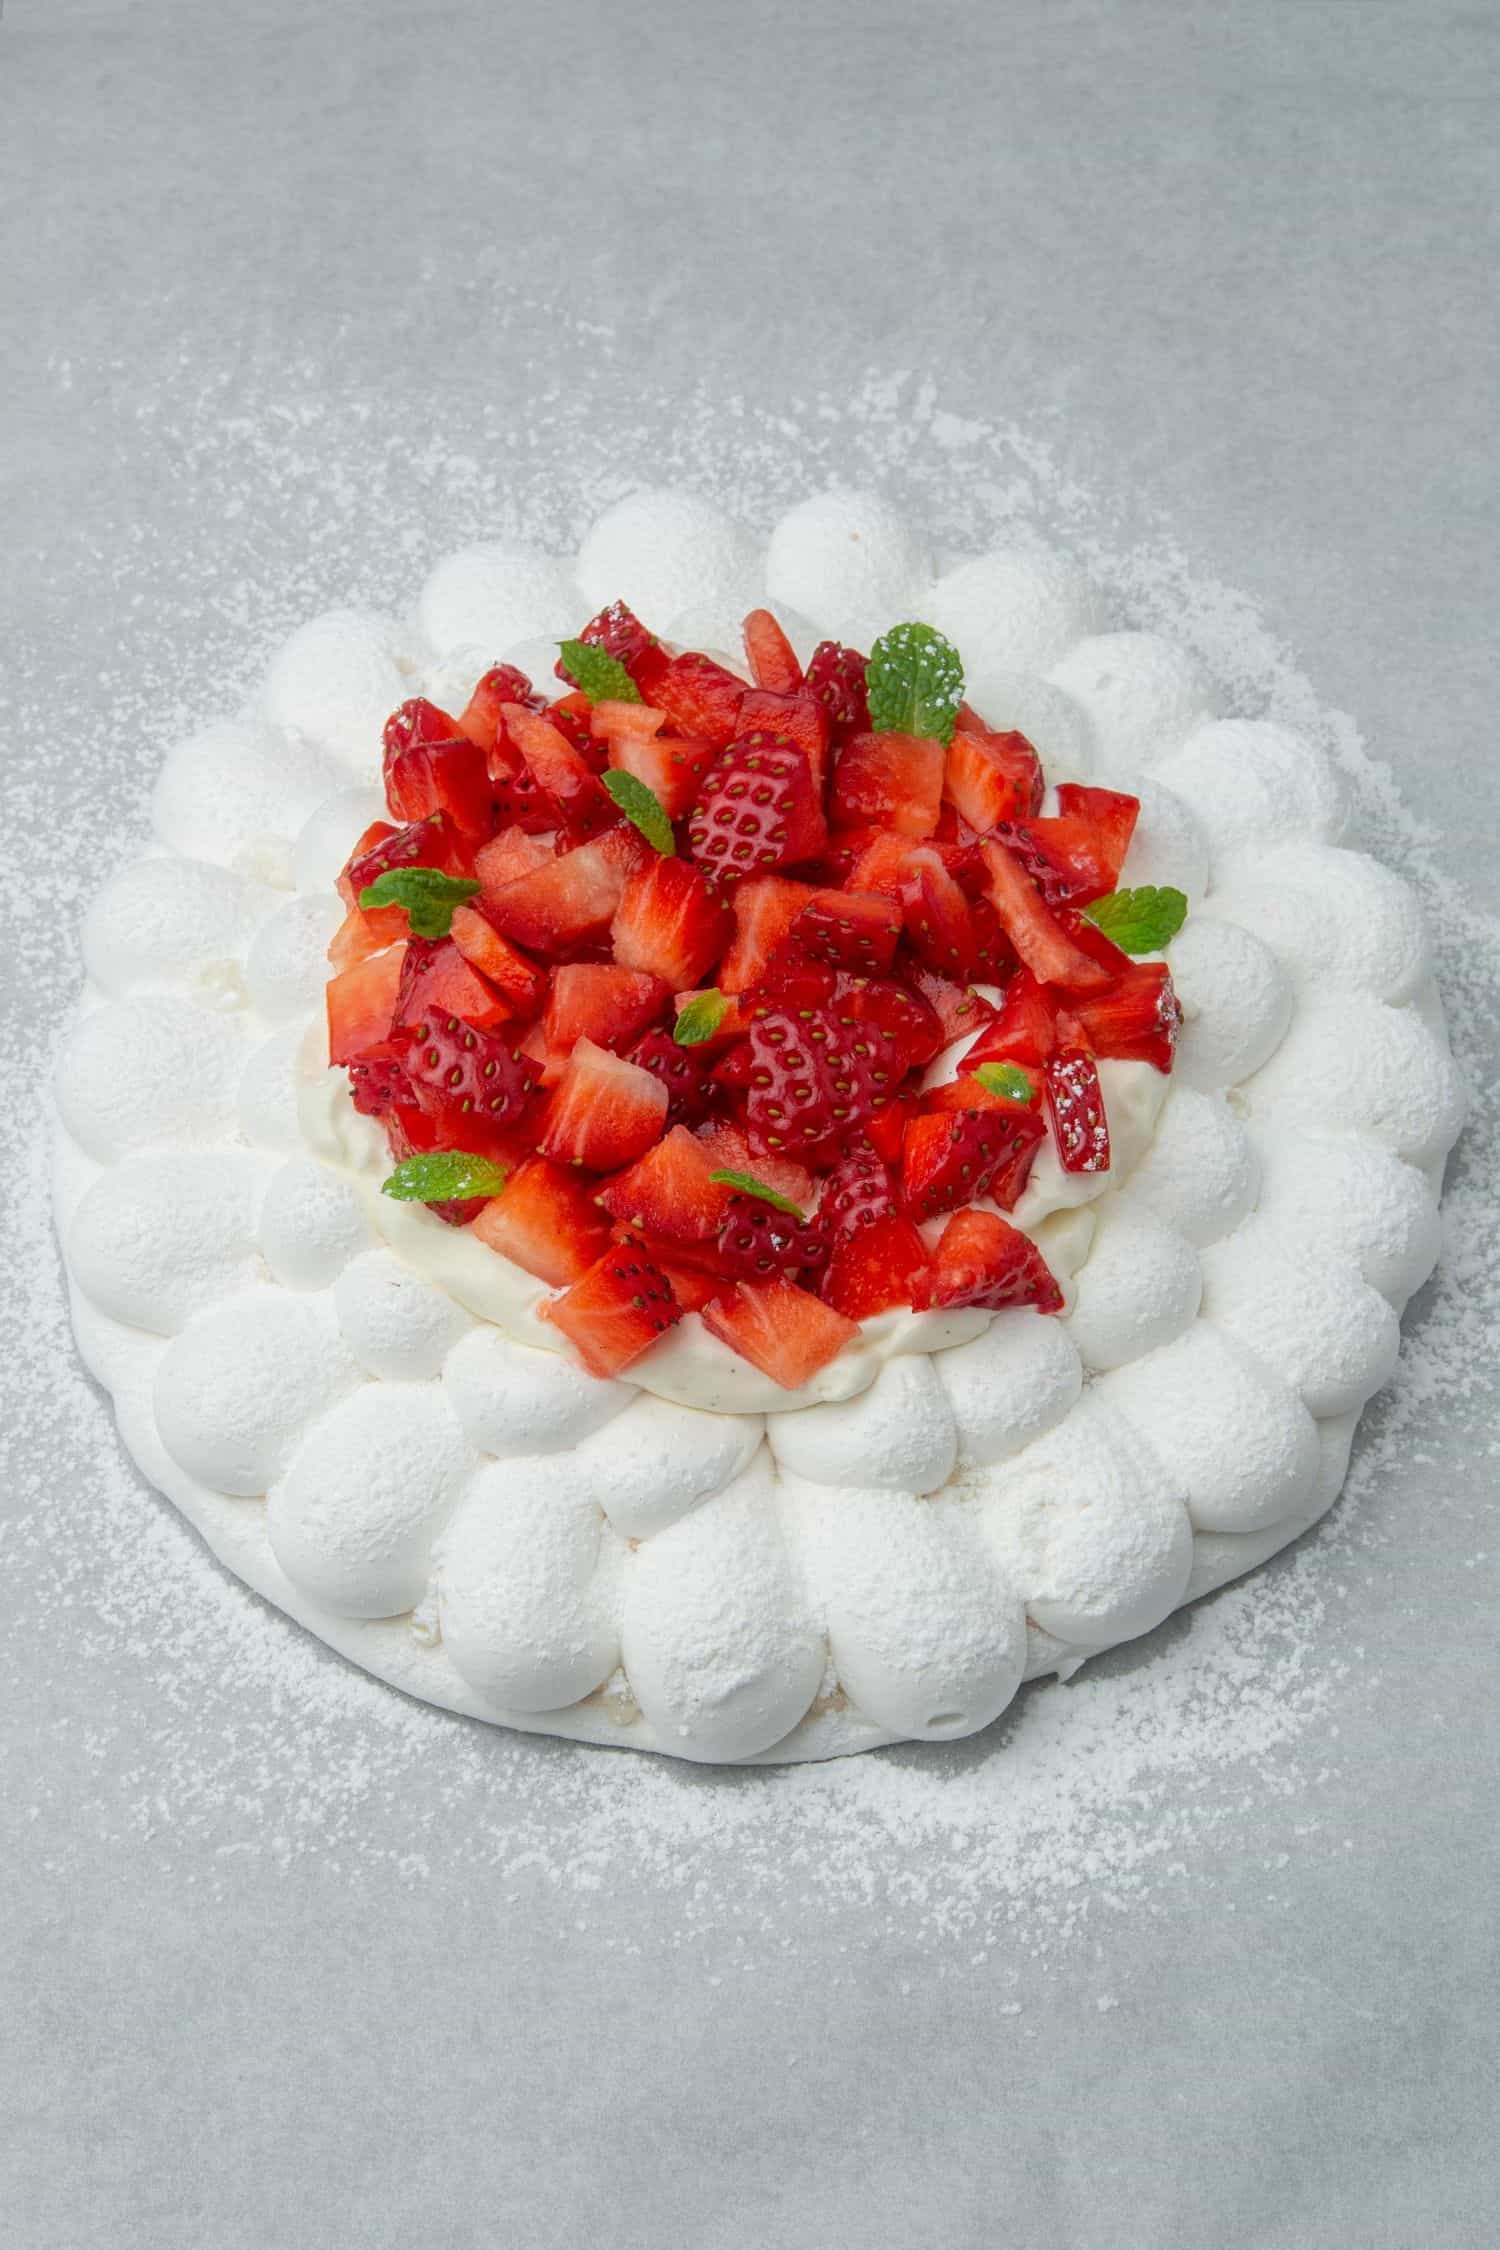
The beauty of learning how to make Pavlovas is that you can literally make it in any shape, format, color with any fillings of your choice! Try also my Strawberry Pavlova cake!
Pink Mini Pavlova dessert with raspberries
Ingredients
- 60 g (¼ cups) Egg whites whites of 2 eggs (approx.)
- 120 g (⅔ cups) Super fine sugar
- ½ teaspoon Cream of tartar optional
- 1 teaspoon Corn starch optional
- Powdered food coloring optional
- ½ teaspoon White vinegar optional
- Decorate with sugarfree whipped cream and fresh raspberries
US customary cup measurement is an indicative figure only. Measure the ingredients with a digital scale by weight (gram). Baking is art but also science which requires precision and accuracy.
Instructions
- Make sure all the equipment are absolutely clean and dry, any small fat or even a tiny bit of egg yolk can ruin the meringue. Arrange the equipment ahead around you
- If don't have super fine sugar at hand, pulse bland granulated sugar for a few seconds in food processor
- Pre-heat oven to 100 C / 212°F, line baking tray with parchment paper or use Silicone baking mat. Make sure about your REAL oven temperature and use a Digital oven thermometer if you can
- Add in vinegar or lemon juice (if using) now
- Then ,very slowly, one table spoon at a time, start adding the superfine sugar while mixer on medium / high speed
- Once all the sugar is added, start whisking the meringue at a higher speed until it becomes glossy and achieves stiff peaks. The meringue is ready when the sugar is completely dissolved. Take a small amount between your fingers, if it is grainy, keep whisking. If ready, add in food coloring (ideally powder) at this point and whisk ther 15 seconds
- Once the mixture is colored, immediately but gently fold in corn starch with the help of a Rubber spatula, be careful not to deflate the meringue
- Pipe 2 x 10 cm diameter disk, then pipe more meringue around the side then shape with an Offset spatula. Focus on the side and make sure you leave a hole in the middle for the filling
- Bake for 90 min in 85C-90C / 185-194 F, do not open the oven door
- When the pavlova is baked, open the door slightly, and let the pavlova cool in the oven for a few hours
- Since pavlova contains a fair amount of sugar, fill with something less sugary, e.g. suagr free whipped cream and fresh raspberries

Joy
After the initial baking and you open the oven to cool down, do you turn off the oven during the cooling of the pavlova? If not at what point do you know it is ready to take out of the oven?
Thanks,
Joy
Katalin Nagy
yes of course you have to turn the oven off when the pavlova is baked then let it cool in the oven with the door slightly open.
GUADALUPE FIGUEROA
Hi, your recipe looks wonderful, I will try it in Valentines Day, it is what I was looking for.
I just have a question, a what exact temperature did you bake it? I am a little confused where you say bake at 185-194F .
Thank you so much for sharing,
Kata
As the recipe instruction say Bake for 90 min in 85C-90C / 185-194 F. It means bake it around 85-90C which is 185-194F.
Mari
Looks great. I will try it today. Thanks for the detailed instructions 🙂👌❣️
mihaiela
buna, multumesc pentru toate detaliile oferite. Este o reteta minunata, inainte evitam sa fac Pavlova. A iesit perfect!
Simra
Really really yummy! I made mine with kiwis and it tasted sooo good
Tatyana
Thank you for the detailed and beautiful recipe! I need to make a Pavlova BD cake for 10-13 people. Could you share any tips/caution on tripling/quadroupling it? Thank you!
admin
Hey it’s possible to bake a larger meringue cake but you will have to bake it for hours on low temp
Larisa Albulescu
It was the challenge of my life to do pavlova😂
I think I failed it 50 times, but I discovered this recipe and it was PERFECT! Thank you so much❤️
Whisk Twist
Best Pavlova recipe EVER! Follow the instructions carefully and i guarantee you will get the perfect results. The sweetness is just nice. I paired it with fruits and they gave an amazing fresh flavor. Will be the only pavlova recipe i'll be following from now on. Thanks so much.❤
admin
Thanks so much for your feedback, I am so happy for your success:)!
Maria
Is the oven temperature fan assisted or top and bottom heat, no fan. Thanks
Kata
Hey, I never use the fan as most home oven fans are rather unreliable and make more issues than good on desserts like pavlova, eclair, macaron, etc. Always use top and bottom heat.