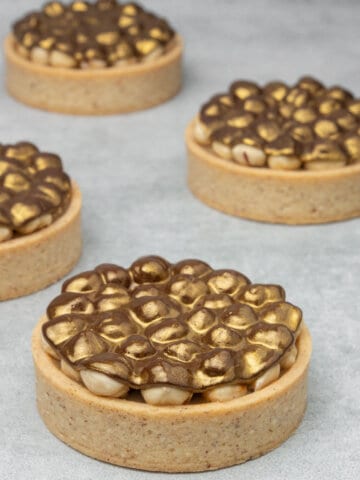
These mini Salted Caramel Chocolate tarts are one of my favorite desserts ever! It just tastes phenomenal as the buttery caramel with a slightly salty kick meets the silky chocolate ganache in a buttery chocolate sweet shortcrust pastry! These Salted caramel chocolate ganache tarts can be the perfect dessert for the holidays and beyond.

Jump to:
📝 Ingredient notes
For the mini Chocolate tart shells
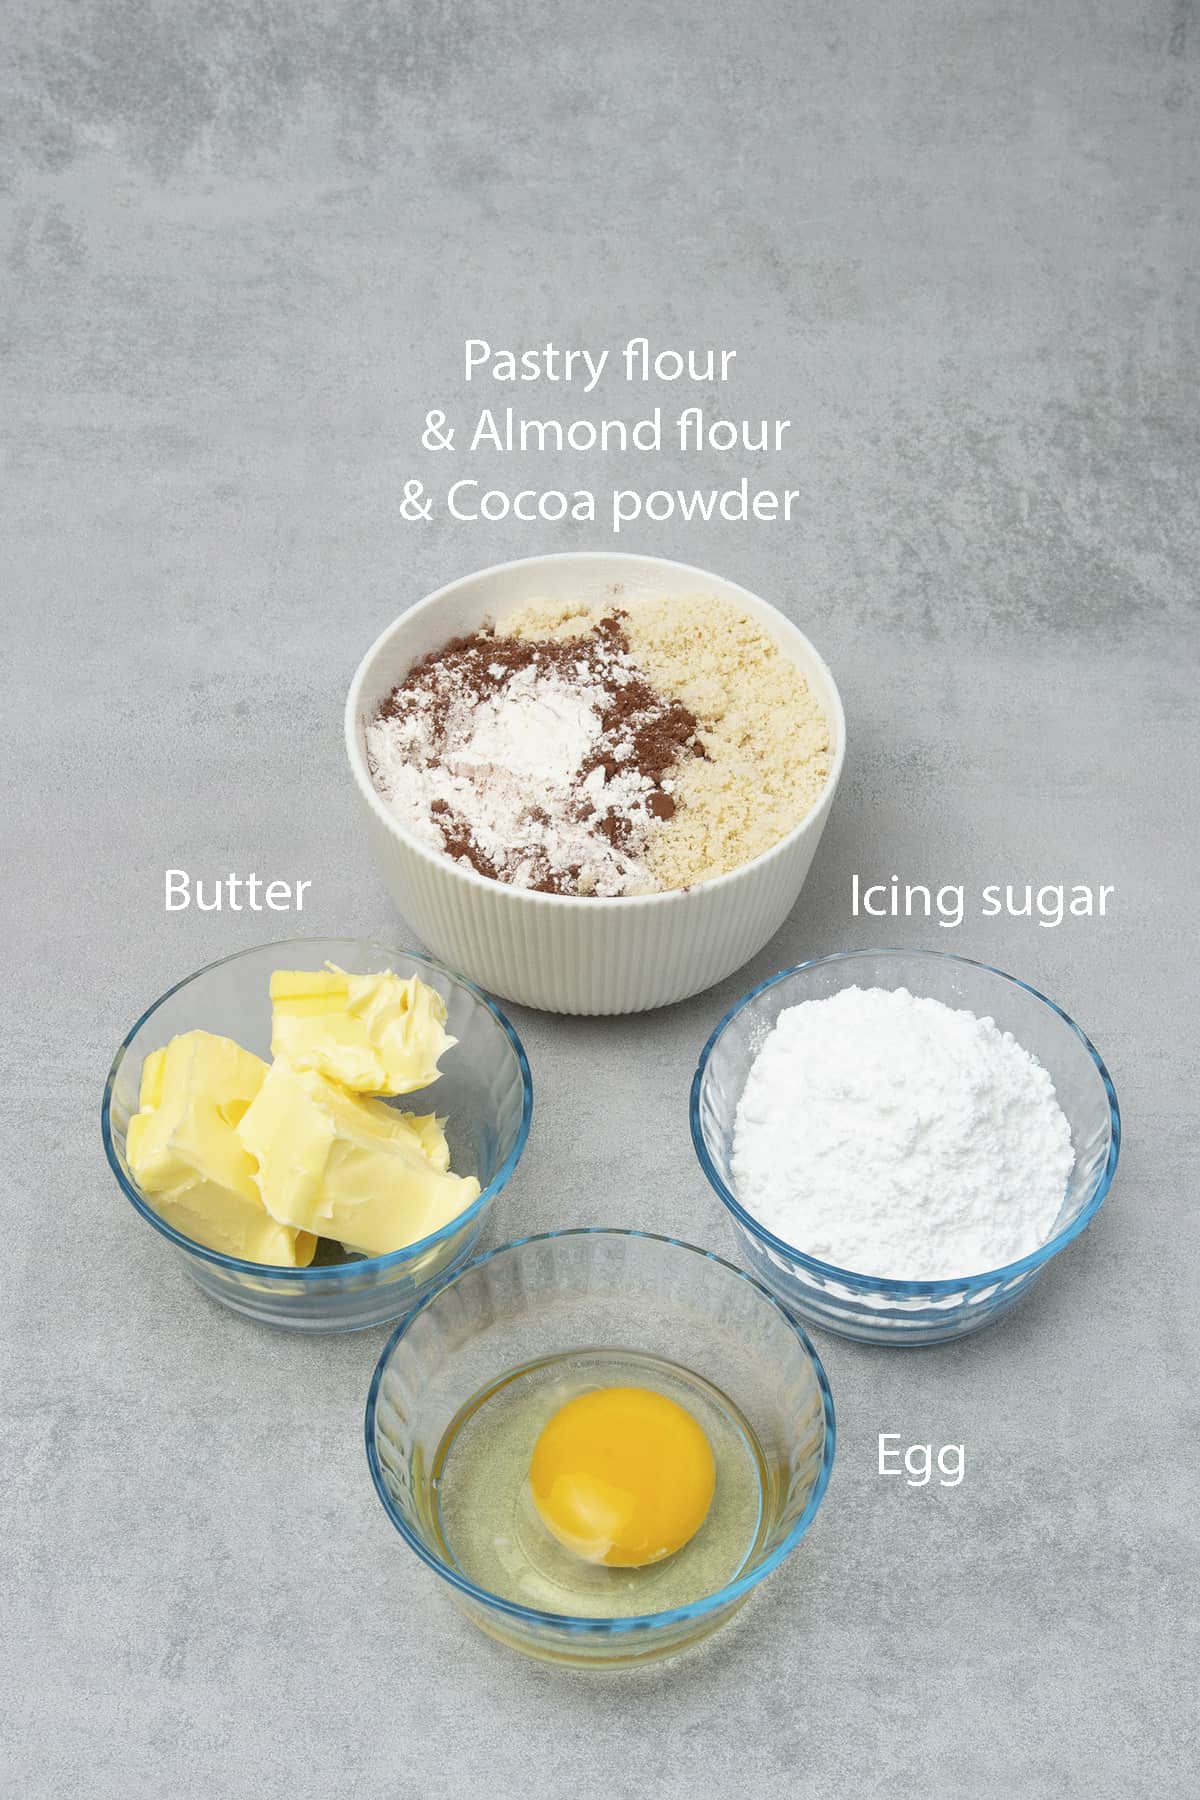
- Flour: I am using pastry flour for this mini Salted Caramel Chocolate tart recipe, feel free to use AP if can’t find pastry flour in your supermarket. For more details on flour, please read my flour guide
- Almond: Some Pâte Sablée recipes contain almonds, while some don’t, I prefer mine with some almond flour in it from the taste and texture point of view. You can replace it with an equal amount of flour
- Cocoa powder: Cocoa powder will make this into a wonderful Chocolate Pâte Sablée! Always use unsweetened, 100% cocoa powder in baking. I use dutch-process cocoa powder, it has a lovely dark color and it is lower in acidity
- Sugar: Use powdered sugar, sifted
- Salt: An essential ingredient in most dessert recipes. It balances the flavor and enhances other ingredients.
- Butter: Use always unsalted butter as you want to be in control of the quantity of the salt. I am using 82% fat-content butter in all my recipes, including this Chocolate Tart with salted caramel sauce. The butter needs to be properly chilled, which means take the butter out of the fridge, cut it into chunks then place it into the freezer for 10-15 minutes before using it
- Egg: Use at room temperature as almost always in baking
🛒 You’ll find detailed measurements for all Ingredients in the printable version of the Recipe Card at the bottom of this post
For the Salted caramel sauce
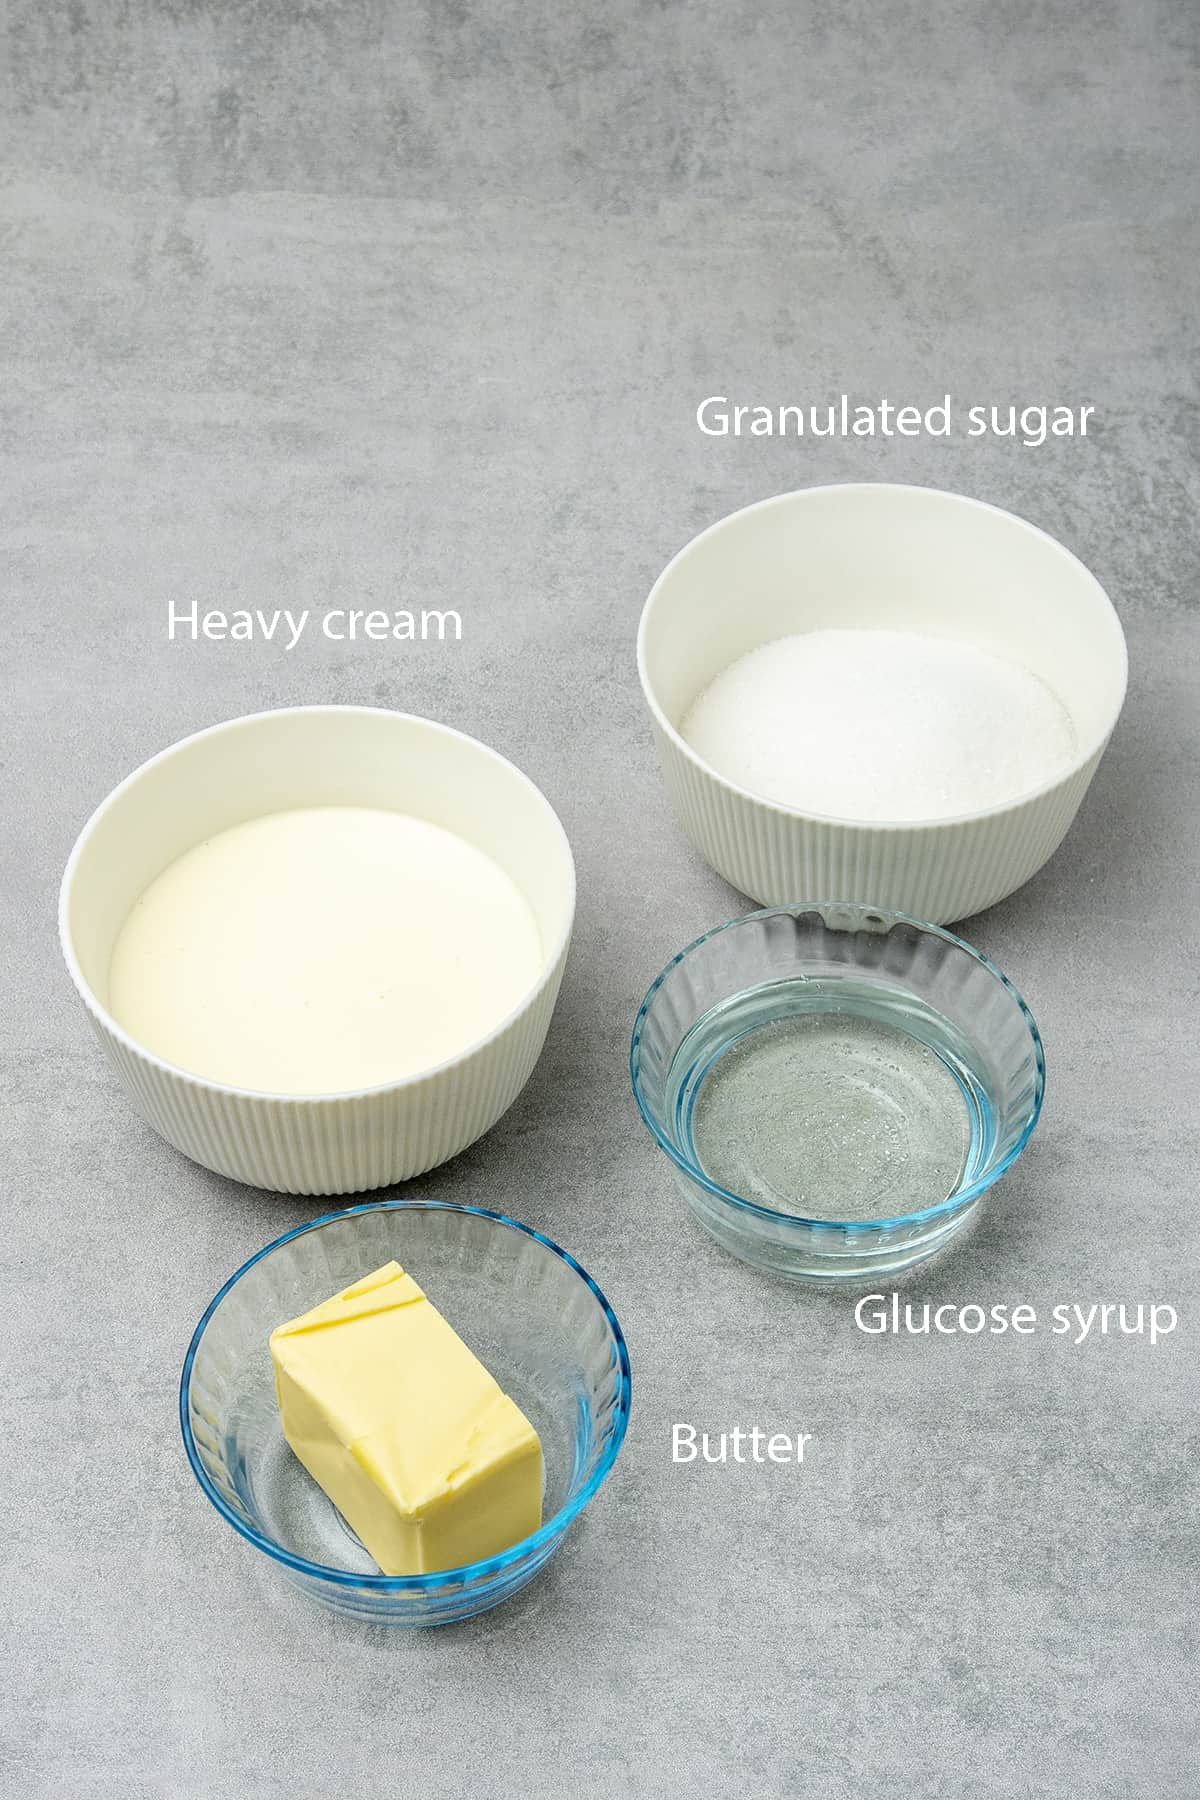
- Granulated sugar: Use white granulated sugar, nothing fancy
- Butter: As above, use unsalted even though you are making salted caramel, you want to be in control of the quantity of the salt. I am using 82% fat-content butter in all my recipes. It is very important that butter needs to be at room temperature. If the butter is too cold, it won’t incorporate properly into the caramelized sugar
- Heavy cream: Also known as whipping cream, has a fat content between 36% and 40%. Use it at room temperature and avoid substitutes like vegetable based “whipping cream”
- Salt: Preferably use salt flakes
🛒 You’ll find detailed measurements for all Ingredients in the printable version of the Recipe Card at the bottom of this post
For the Chocolate ganache
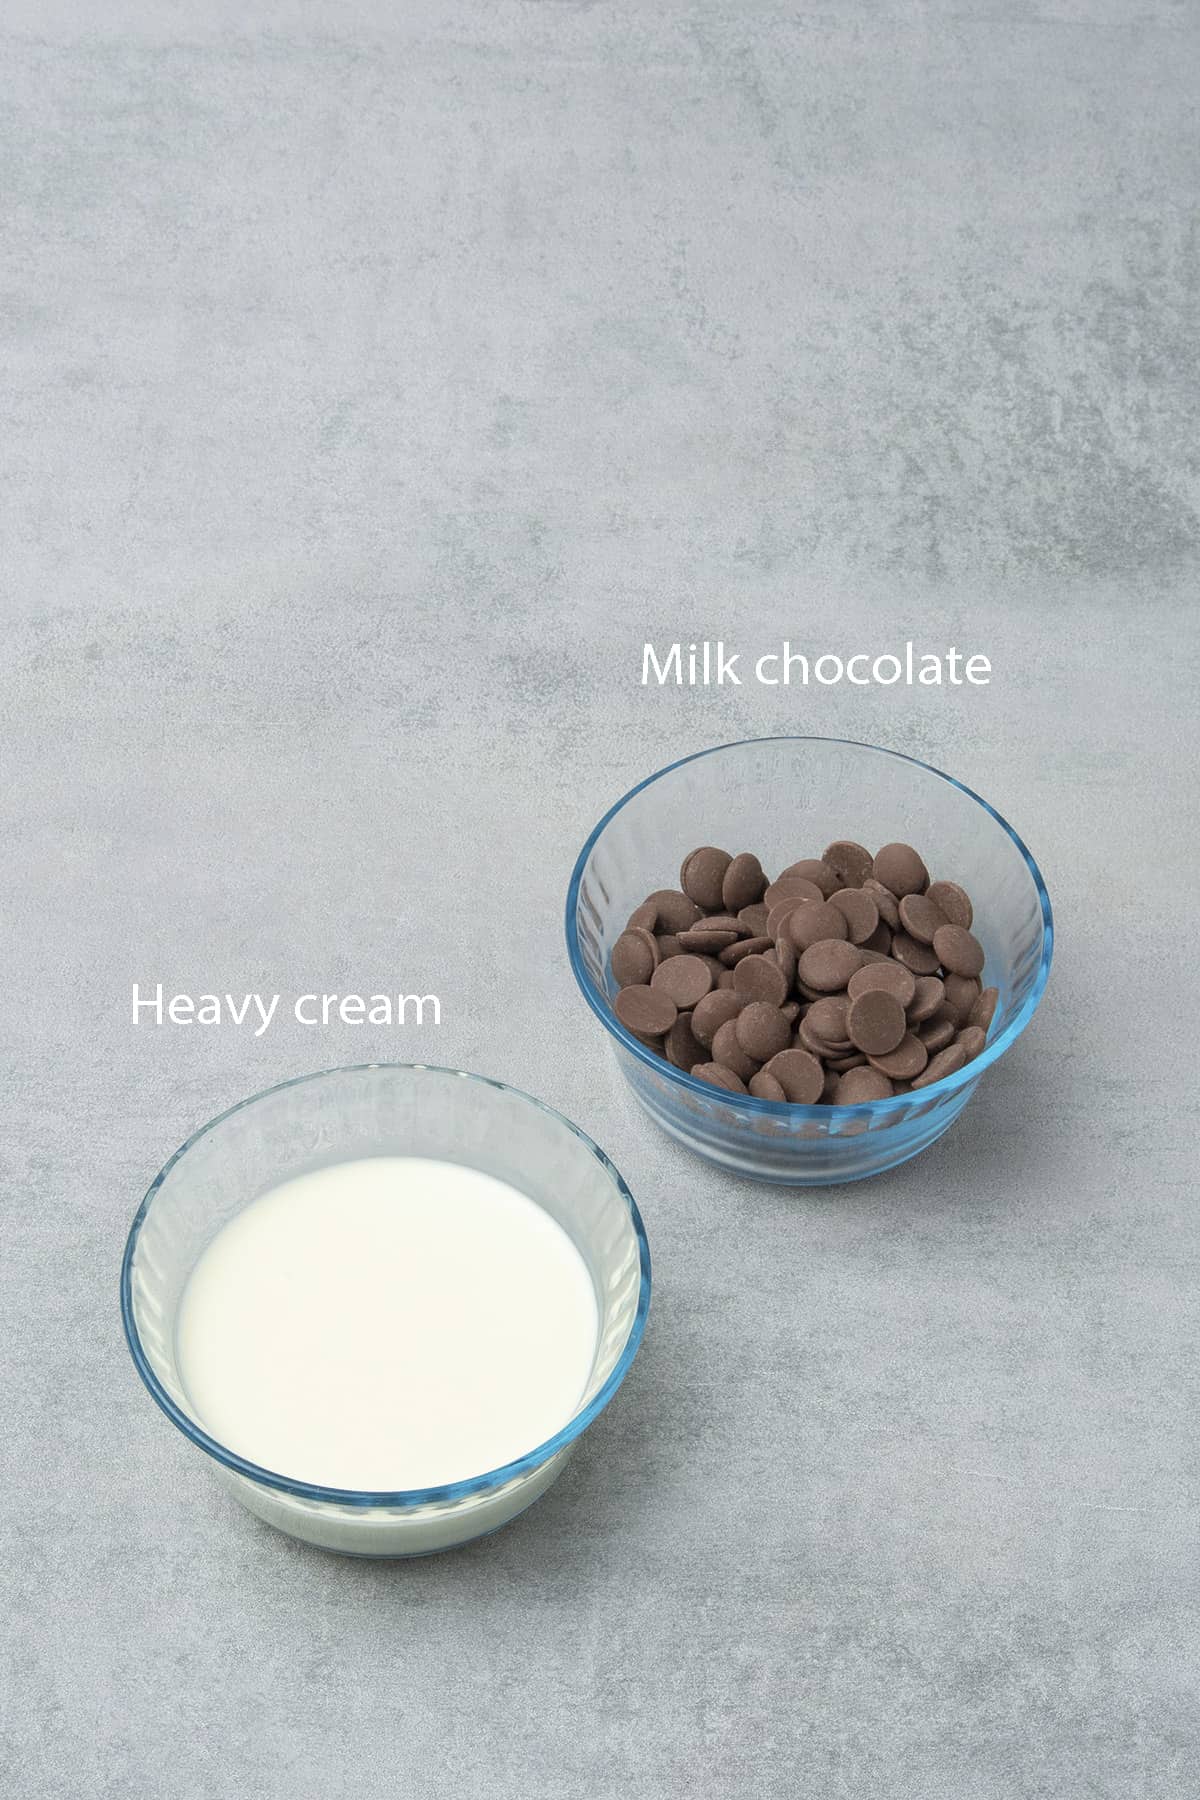
- Chocolate: The Chocolate caramel tart recipe will turn out as delicious as the quality of the chocolate you are using. Please use high cocoa content chocolate which you would anyway enjoy eating on its own and avoid using “baking chocolate”. I am using Valrhona Jivara 40% chocolate that tastes amazing and works wonderfully silky while making ganache
- Heavy cream: As per above, use high fat (36%) heavy cream
🛒 You’ll find detailed measurements for all Ingredients in the printable version of the Recipe Card at the bottom of this post
👩🍳 How to make this recipe
1. The process of making mini Chocolate tart shells
I have a detailed Chocolate pate sablee recipe, please check that out for more details, a troubleshooting guide, etc.
- Measure all ingredients with a Digital scale and prepare all the equipment ahead: Rolling pin, Silicone baking mat, Perforated “air” baking mat, Perforated tart ring
- Place the measured butter chunks into the freezer for 5-10 minutes
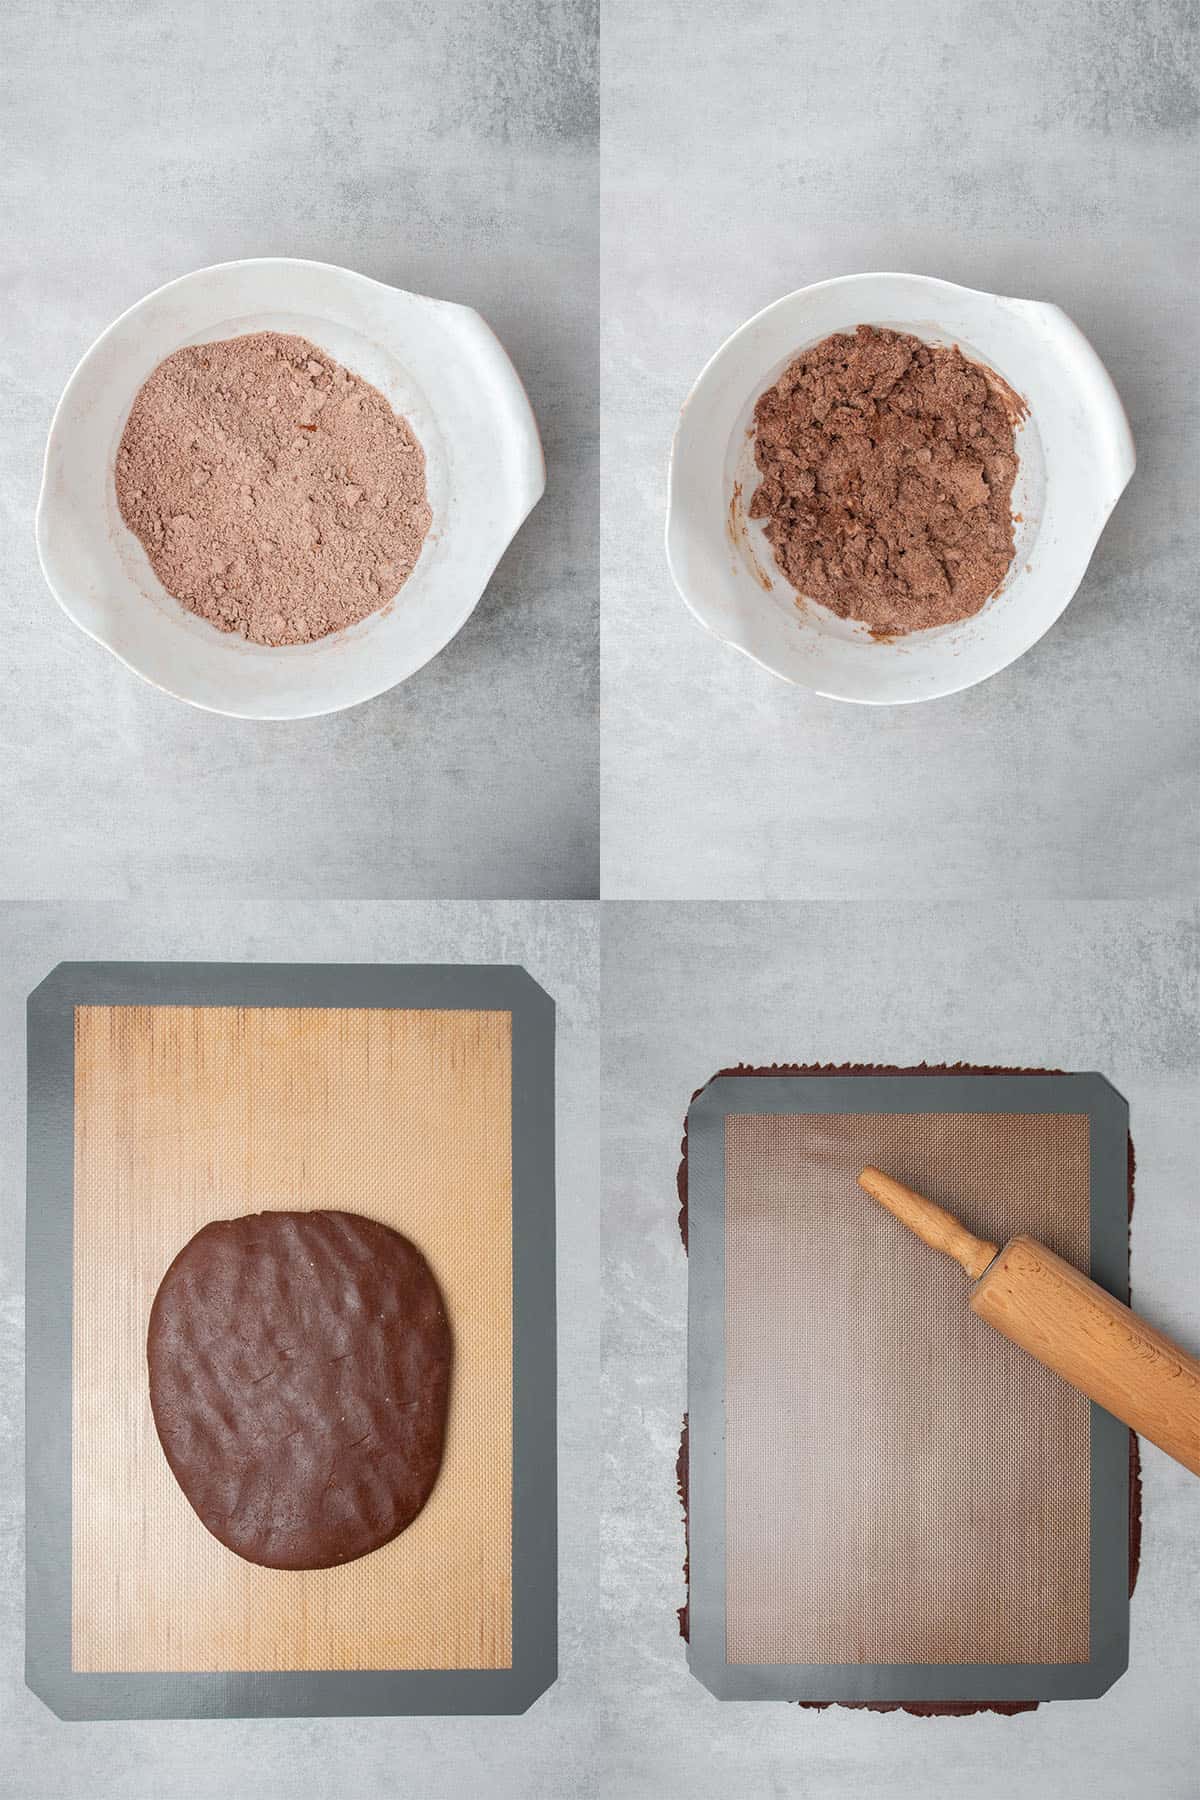
- Sift together the dry ingredients; flour, icing sugar, cocoa powder, almond, salt, and mix so they are combined properly
- Add very cold butter chunks to dry ingredients and rub the mixture between your hands until it becomes a sand-like consistency. This will take about 2 minutes, make sure you do not spend too much time with this step as butter can easily warm up, and that is something we want to avoid. Please note that there is no need to use a food processor!
- Add egg into the mixture and mix with your hands just until the dough comes together. First, it might look crumbly but do not add more wet or dry ingredients to the recipe instead gently knead the dough with the palm of your hand for a minute or two (do not over-knead, and do not use a mixer) just until the dough becomes smooth
- If the dough is too warm and sticky, place it into the fridge for 10-15 minutes first. Otherwise, continue rolling the dough out into 2mm thickness between two Silicone baking mat. The recipe quantity is designed in a way that once you roll the dough out, it will reach the silicone baking mat from edge to edge (11.6 inches / 30 cm x 16.5 inches / 42cm)
- Place the chocolate tart dough into the freezer for 10-15 min in between the two Silicone baking mat. Do not remove the mat at this point as the dough might stick to the mat while it is warm
- Prepare your oven rack with the Perforated "air" baking mat and Perforated tart rings on top
- Take the dough sheet out from the freezer, remove the top of the silicone mat, and using one of the Perforated tart rings, cut out 8 circles – this will be the bottom of your tart crust. Carefully move the dough circles with the help of an Offset spatula and place them into the rings one by one
- If at any point the chocolate pastry dough gets too warm to work with, pop it back into the freezer for 5 minutes. You might need to take the dough in and out of the freezer a lot of times but that is fine, don´t try to force the dough while it is warm. It is extremely important to work with a dough that is cold enough to be able to handle (so not sticky) but not too cold which would result in breaking it
- Cut 8 long stripes out of the dough, this will be the side of the tart
- Carefully place the stripes into the ring one by one. Press each strip onto the side of the ring so it sticks to it. Again, make sure you work with a dough that is cold enough but not frozen as that would make it impossible to place it into the tart pan without breaking it
- Place the Perforated tart rings with the chocolate pastry dough in them into the freezer for 1 hour
- Pre-heat oven to 160C / 320F (no fan)
- After 1 hour, take the sweet shortcrust pastry dough with the rings on them out and trim the top with a sharp knife
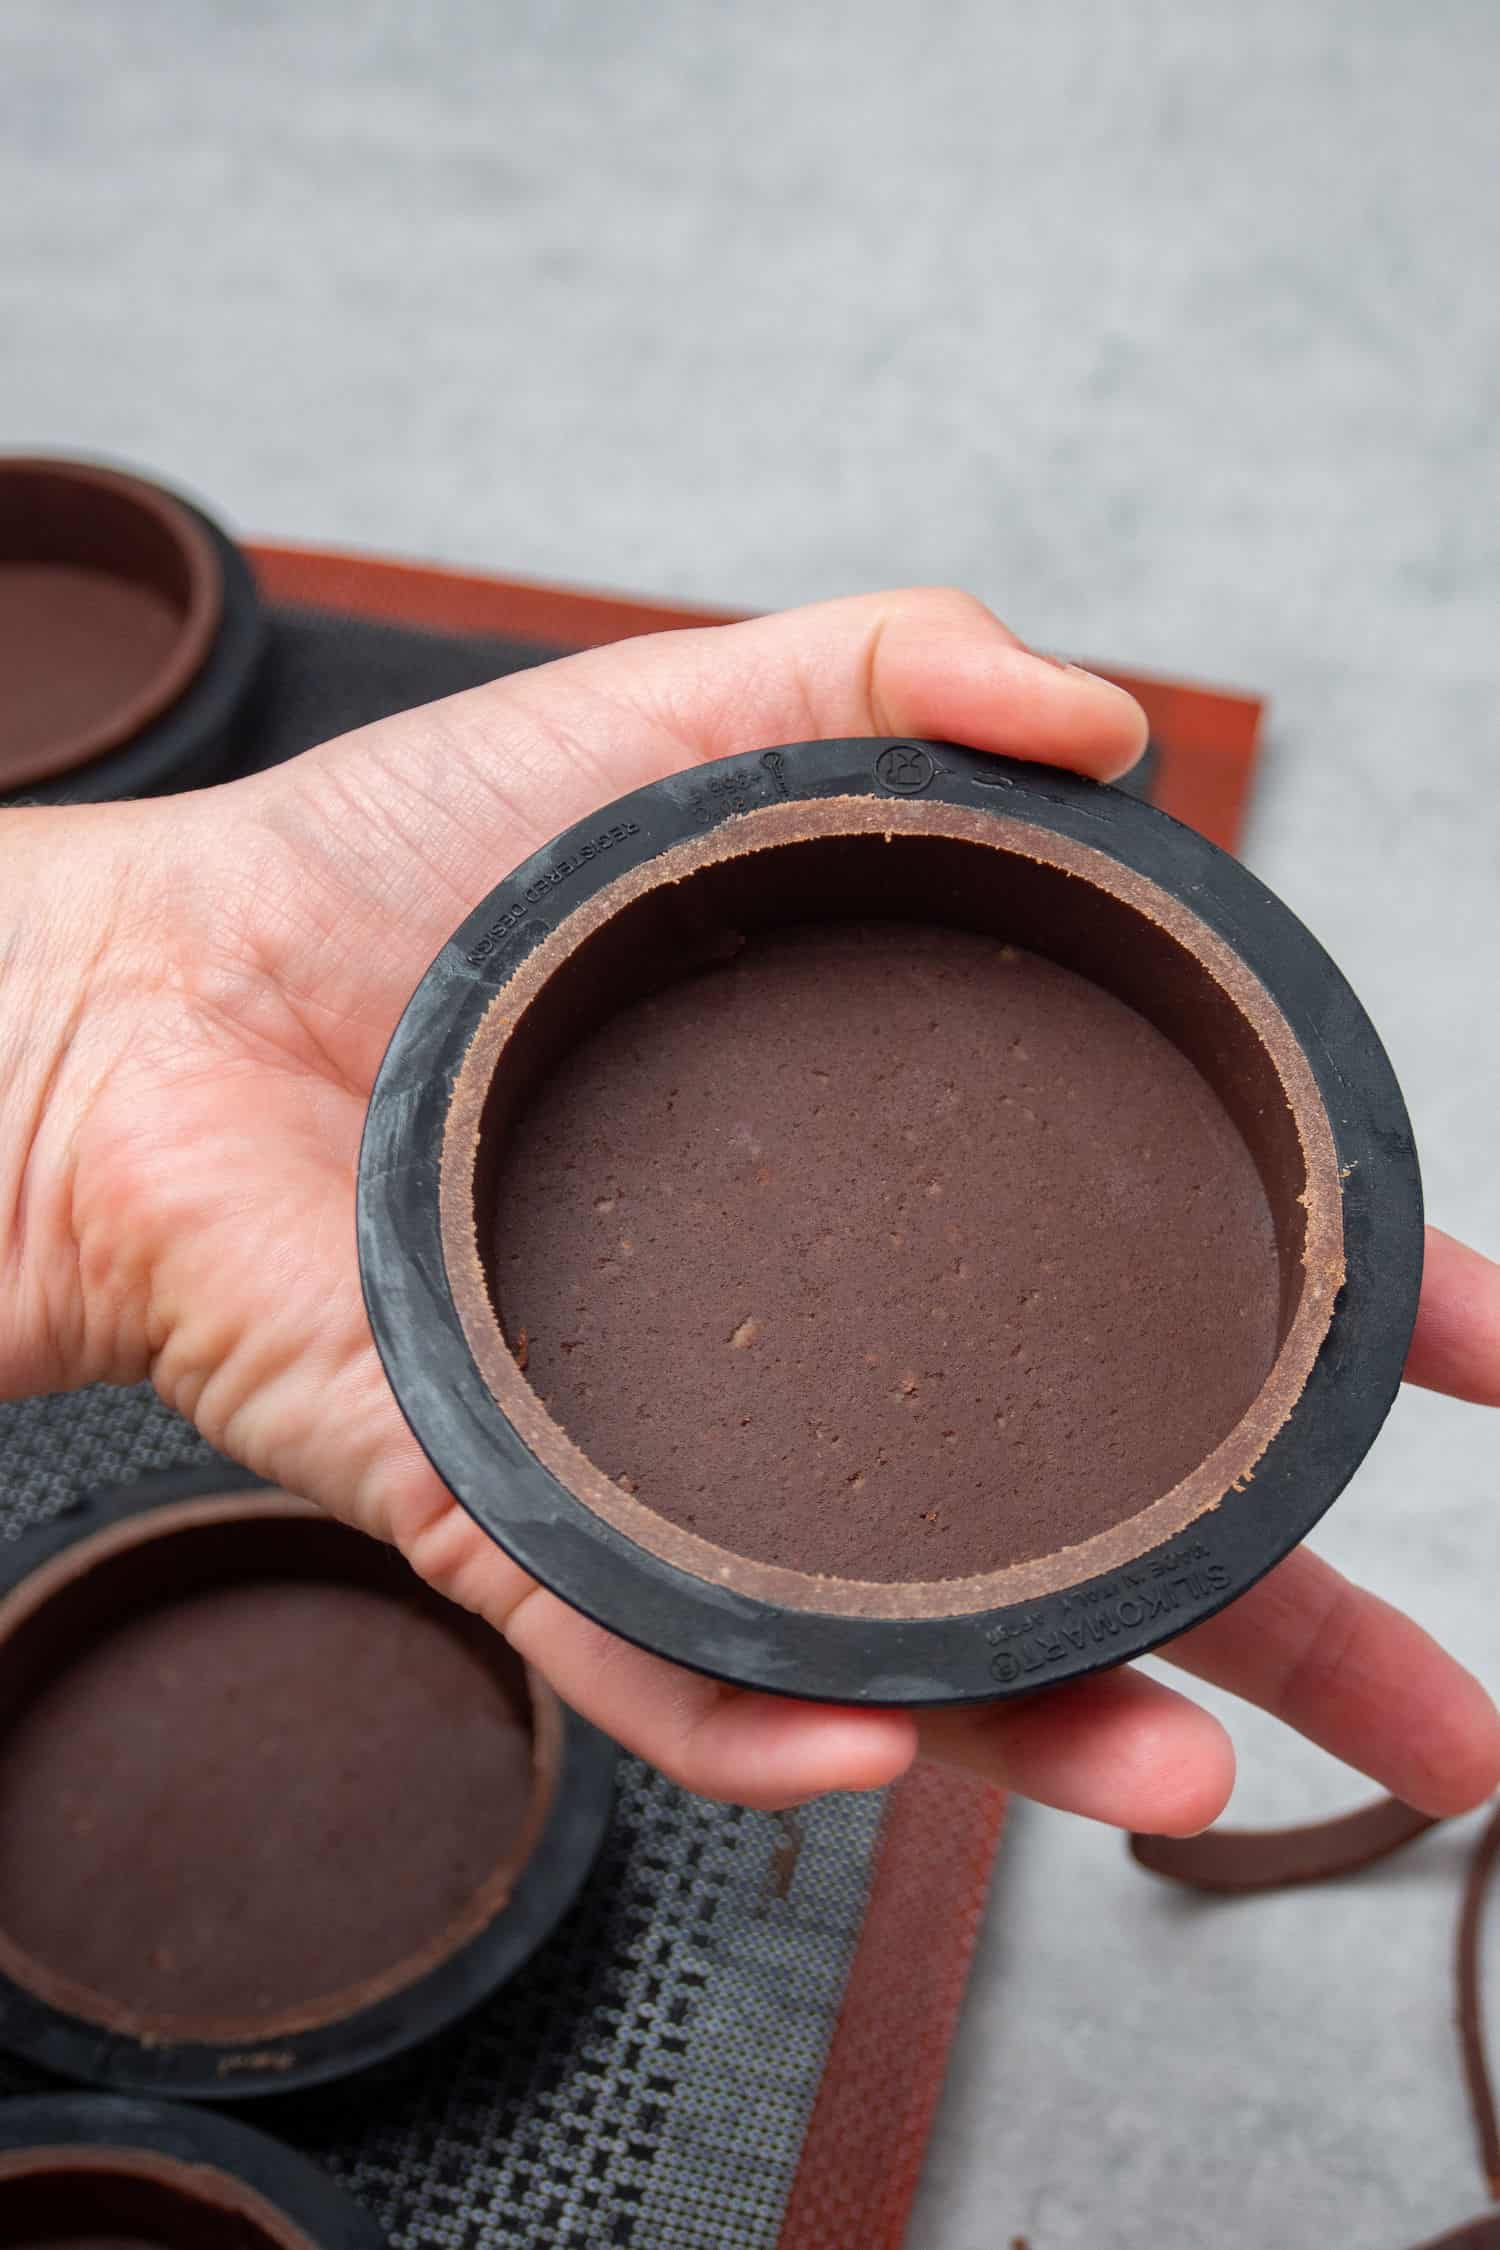
- Bake them for 20 min then carefully remove the rings. Once you take the chocolate tarts out of the oven wait for a minute or two for the pastry to somewhat contract within the ring then you will be able to easily remove the rings. If the pastry seems to be stuck onto the ring, it means probably you will need to bake it for a few more minutes. Do not force it as you can easily break it
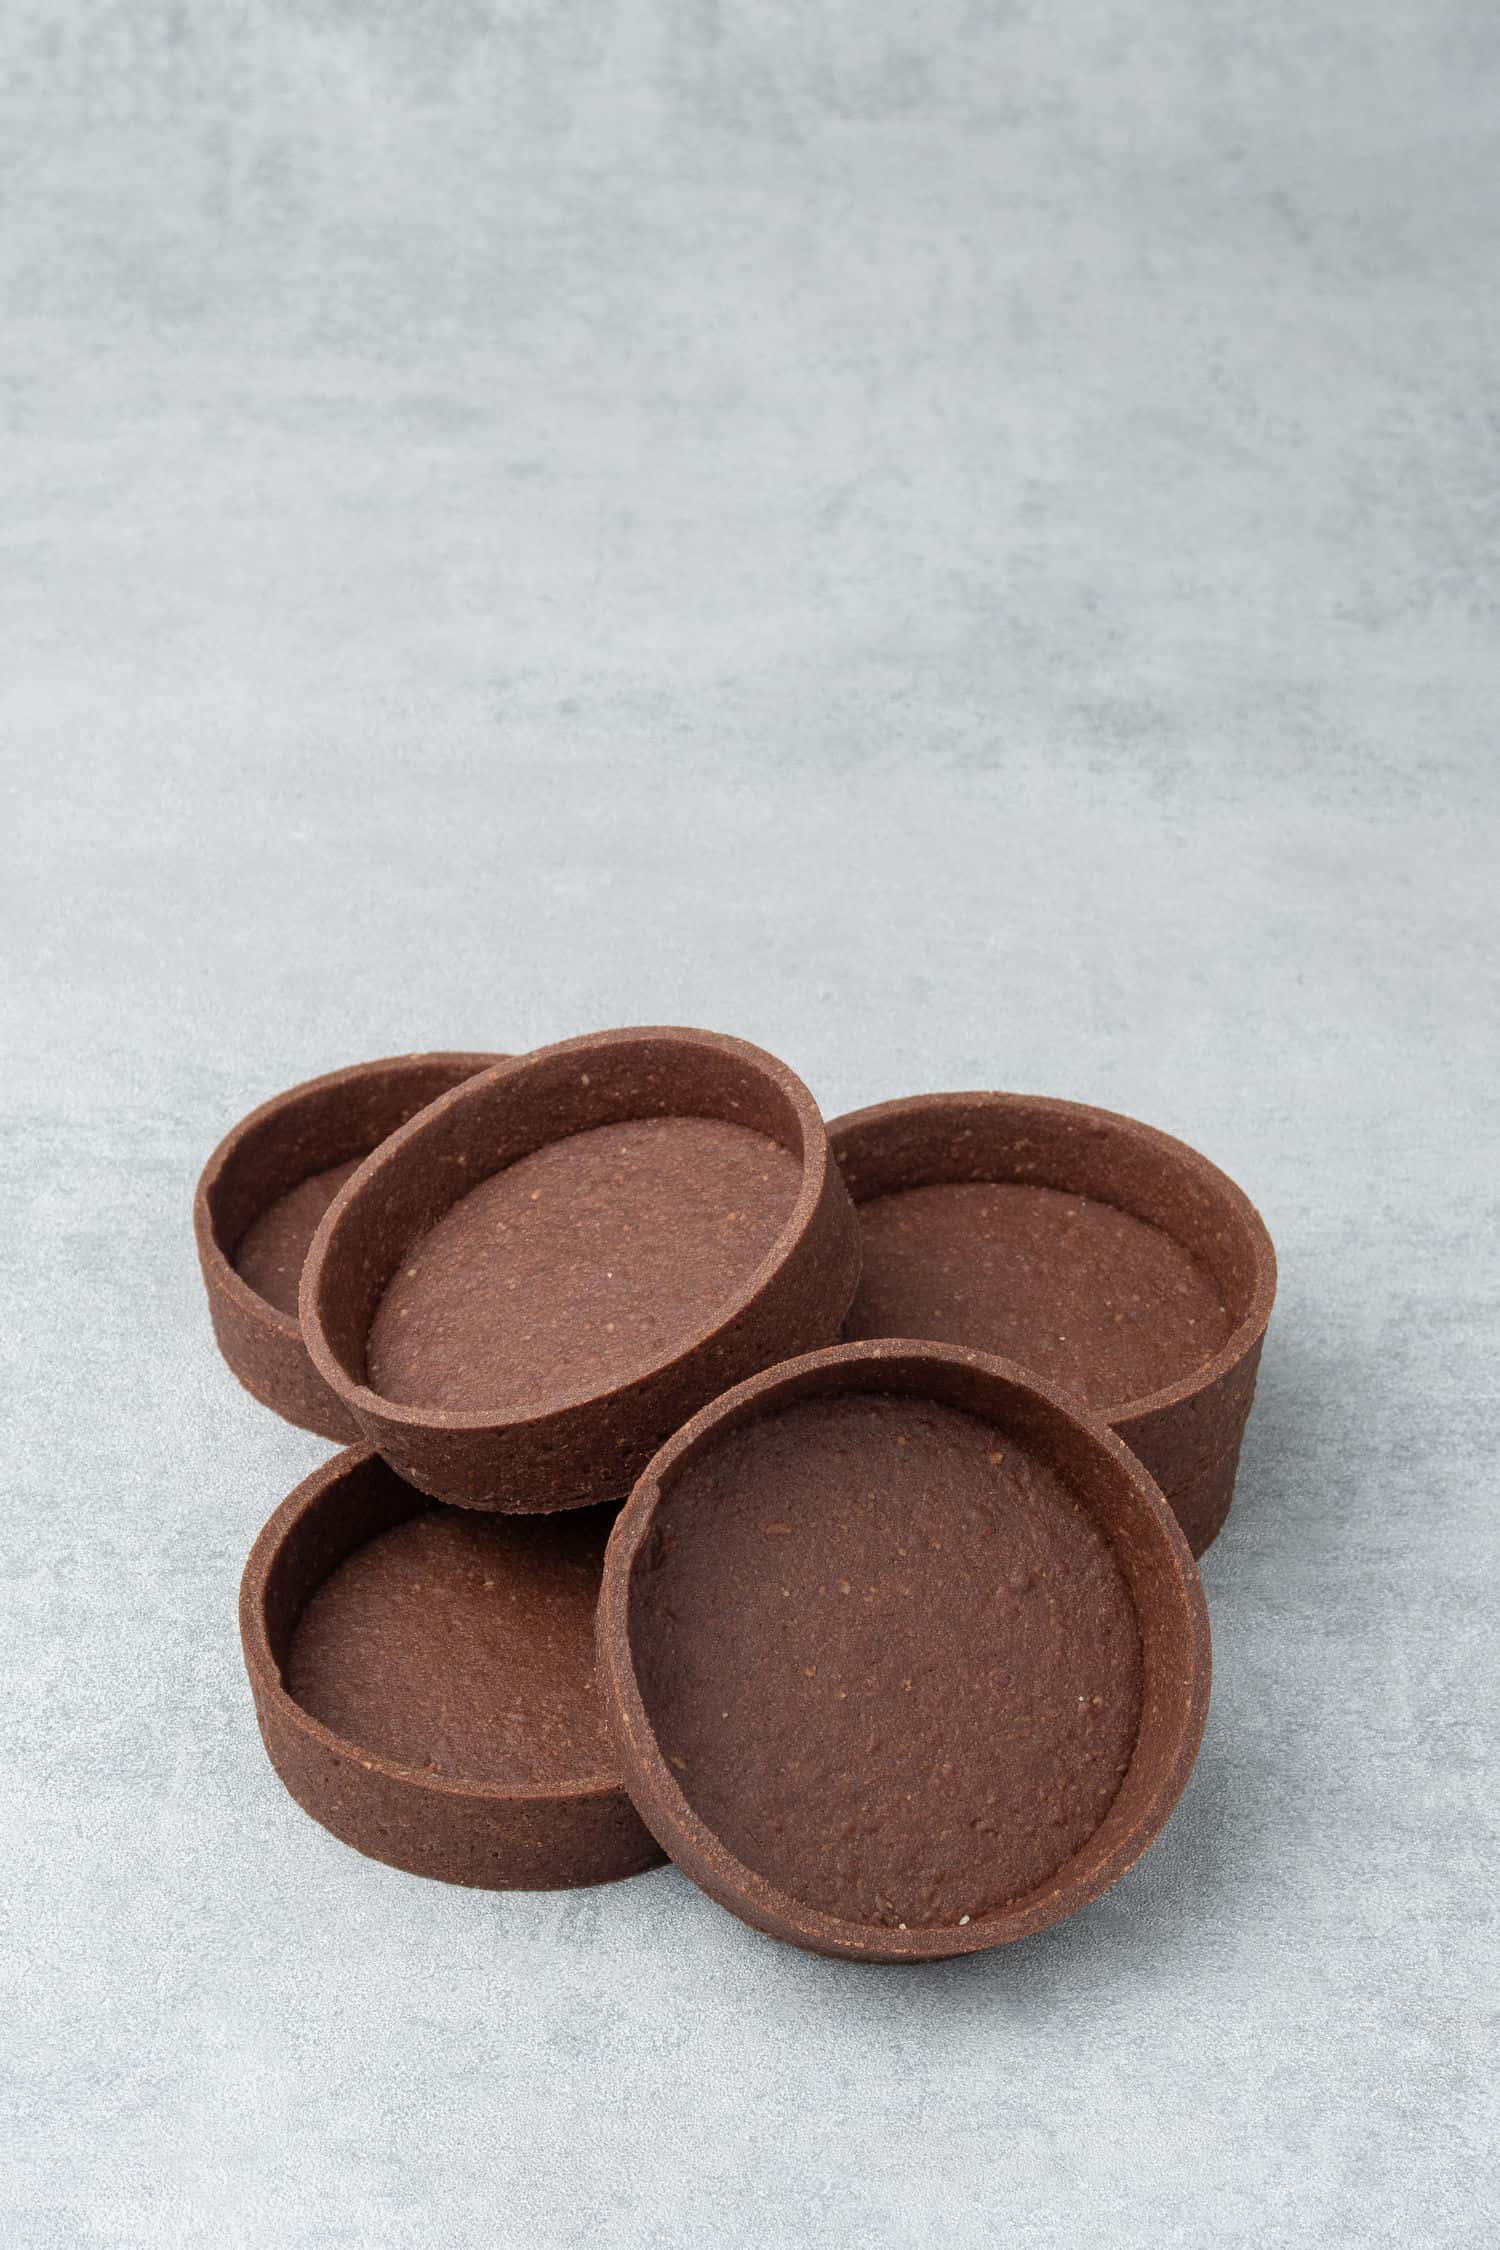
- Once the tart rings are removed, you will need to place the tart cases back to the oven. Bake them for another approx. 10 minutes, adjust the baking time if needed. Rotate the baking sheet, if necessary. Let them cool completely on the Perforated "air" baking mat before filling them
💡 Top Tip: The recipe can be made with traditional (non-perforated) equipment, however, in that case, you will need to apply the blind baking method.
2. How to make salted caramel filling
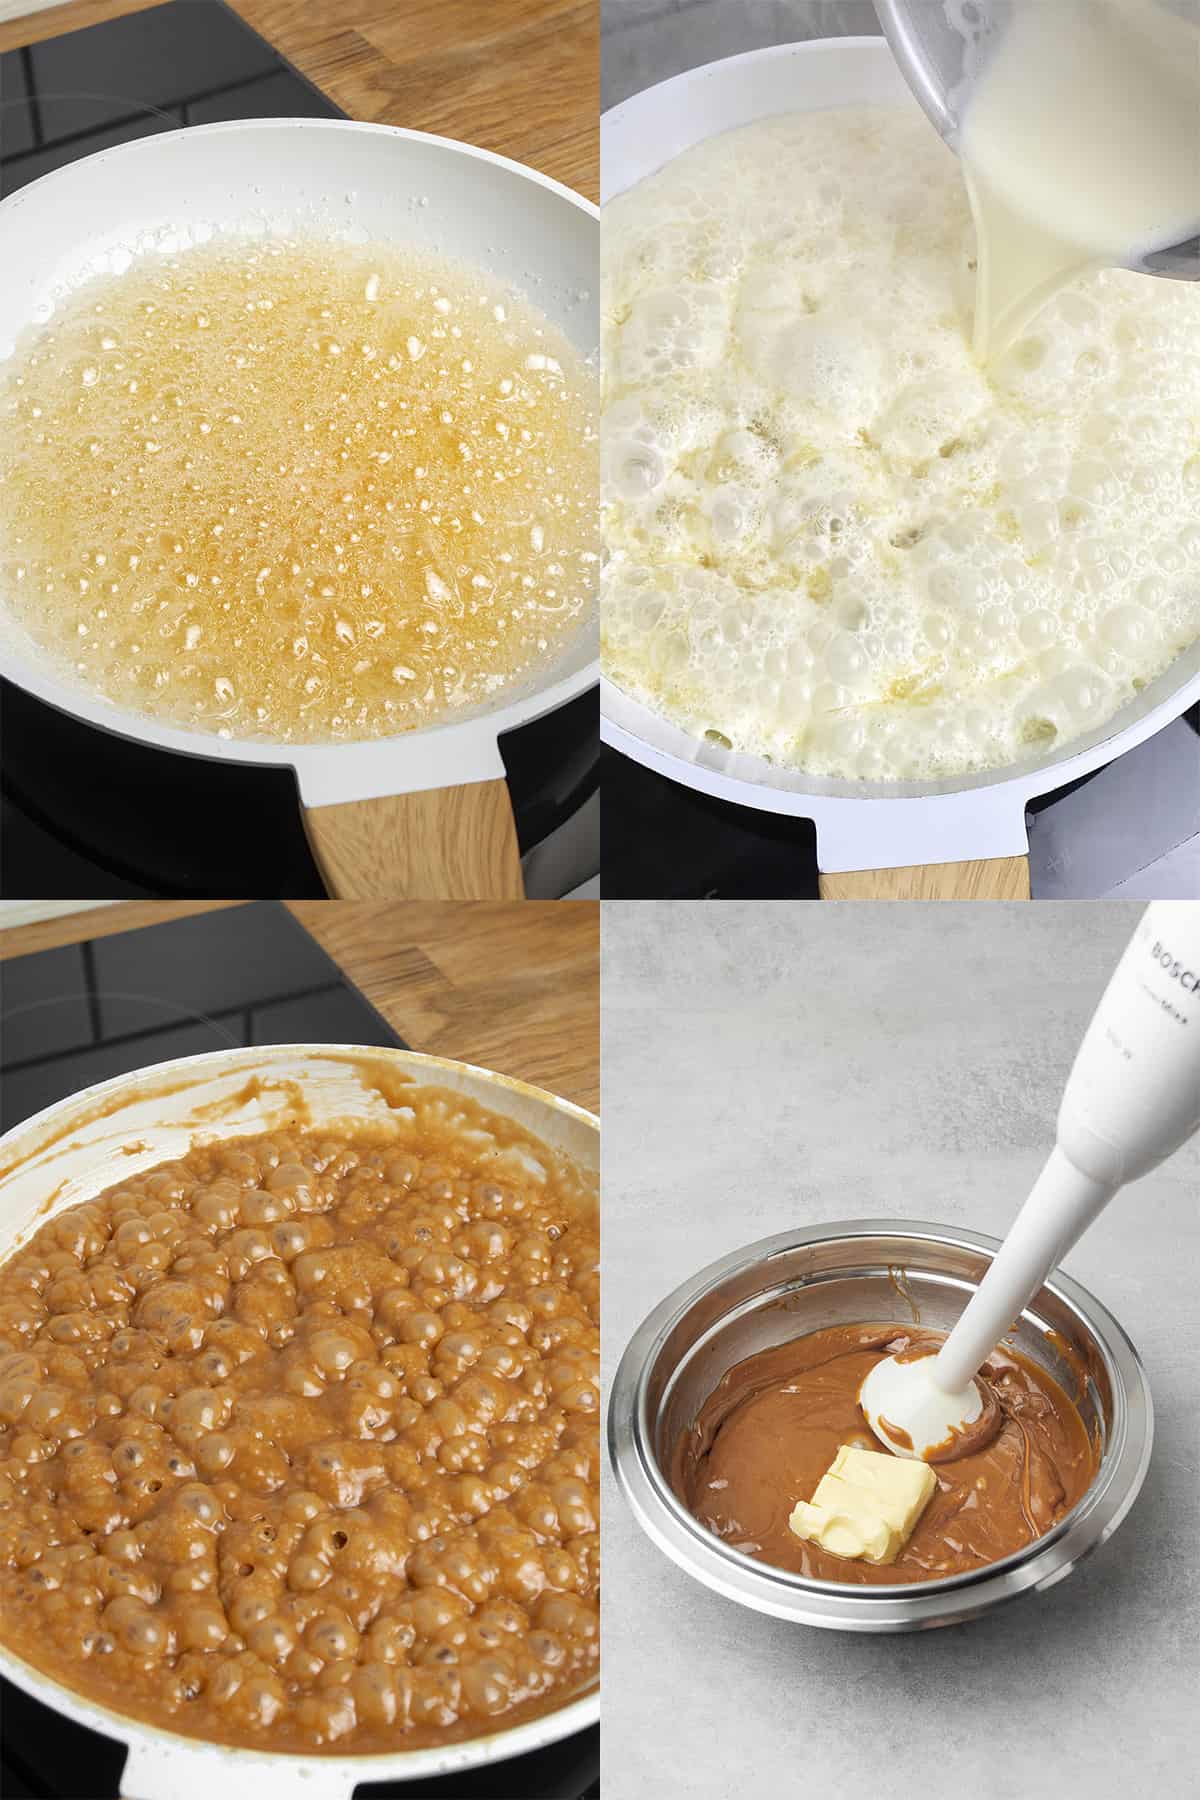
I have a detailed step-by-step tutorial about making caramel sauce, make sure you read it! In a nutshell, you will have to make dry caramel by melting sugar and then cooking it with butter and cream in a saucepan over medium heat.
I just love making caramel sauce, and this has been my go-to recipe for years! Try it and use it on literally anything; cupcake, cheesecake, apple pie, brownie, or even your morning coffee! This homemade caramel is sticky, buttery, and balanced in sweetness, perfect for this Chocolate caramel tart! Once you taste it, I can guarantee that you will be making it over and over again!
💡 Top Tip: Room temperature ingredients are key for making caramel, if butter or cream is too cold, the mixture will certainly break or crystalize.
3. How to make chocolate ganache filling
Chocolate ganache is a chocolate and cream mixture with endless uses; cakes, cupcakes, tarts, etc. As usual, the quality of the ingredients will highly impact the end result. I recommend to chose a high-quality brand with high cocoa content chocolate to avoid disappointment. I am using Valrhona Jivara 40% chocolate that tastes amazing and works wonderfully silky while making ganache.
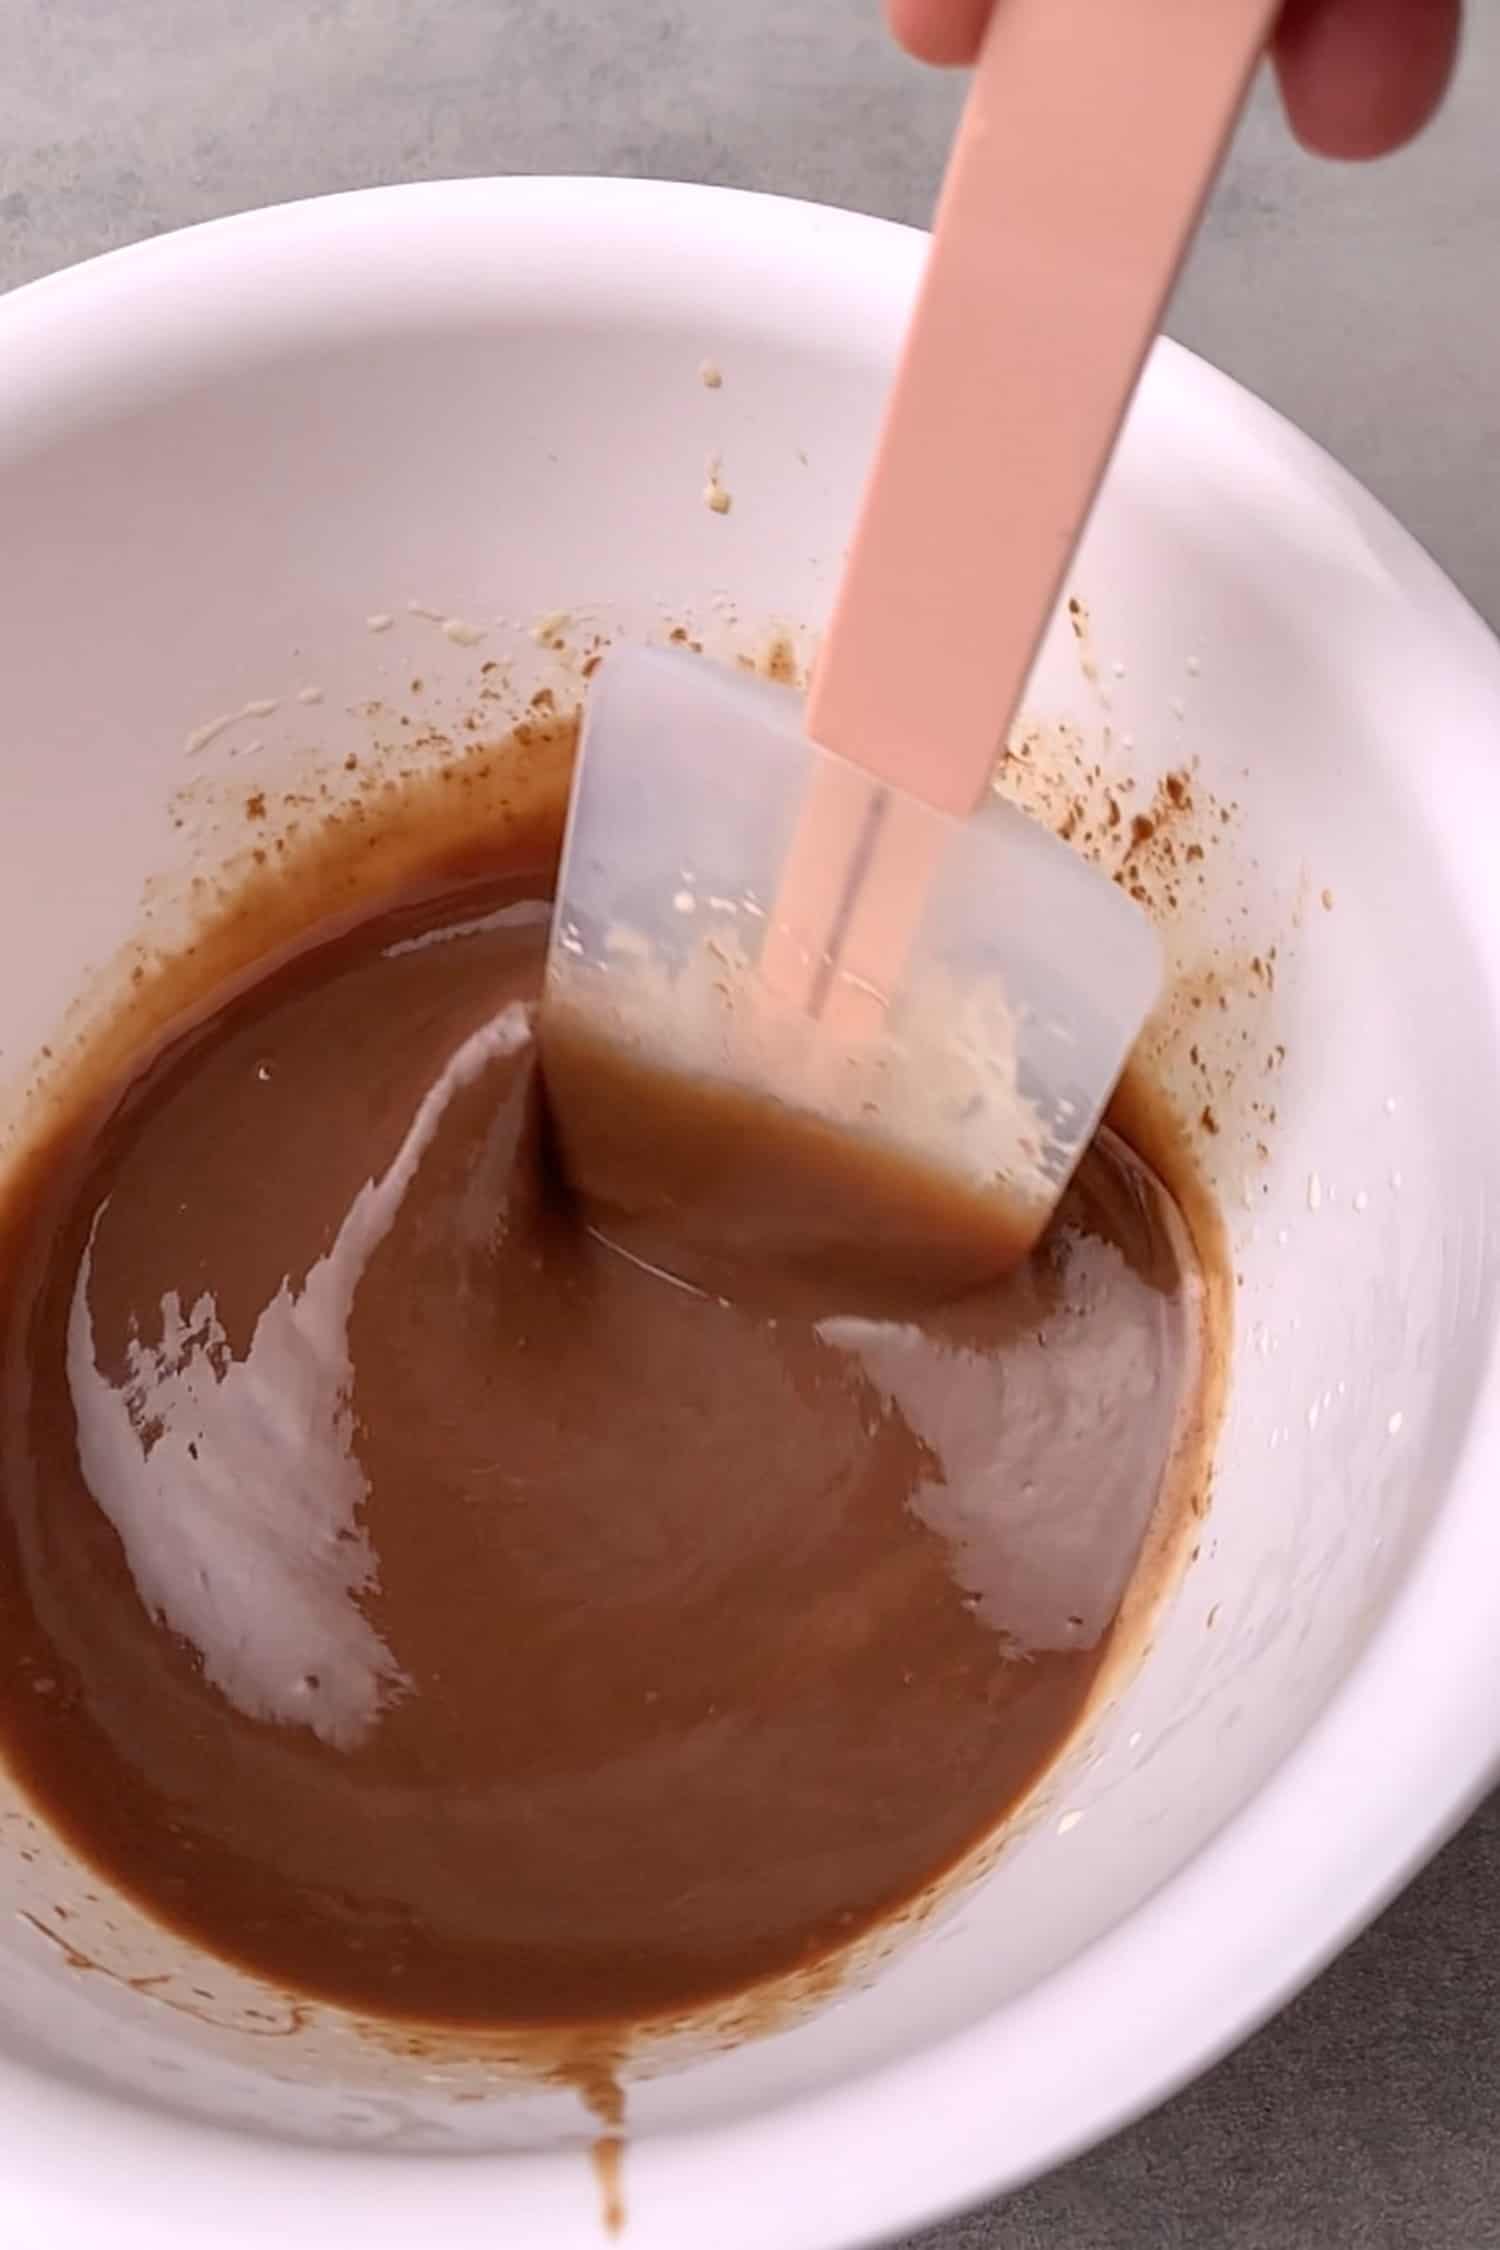
Chocolate ganache is a 1:1 mixture of chocolate and warm cream
- Place finely chopped chocolate into a bowl
- Heat cream until just simmering. If it’s boiling, the cream is too hot and could burn the chocolate. If the cream is not warm enough, it won´t melt the chocolate properly
- Pour warm cream over the chopped chocolate
- Let the two sit for a minute then stir them together
💡 Top Tip: While taste is obviously very important, in the case of chocolate the quality goes way beyond taste, good vs poor quality chocolate can make or break any recipe.
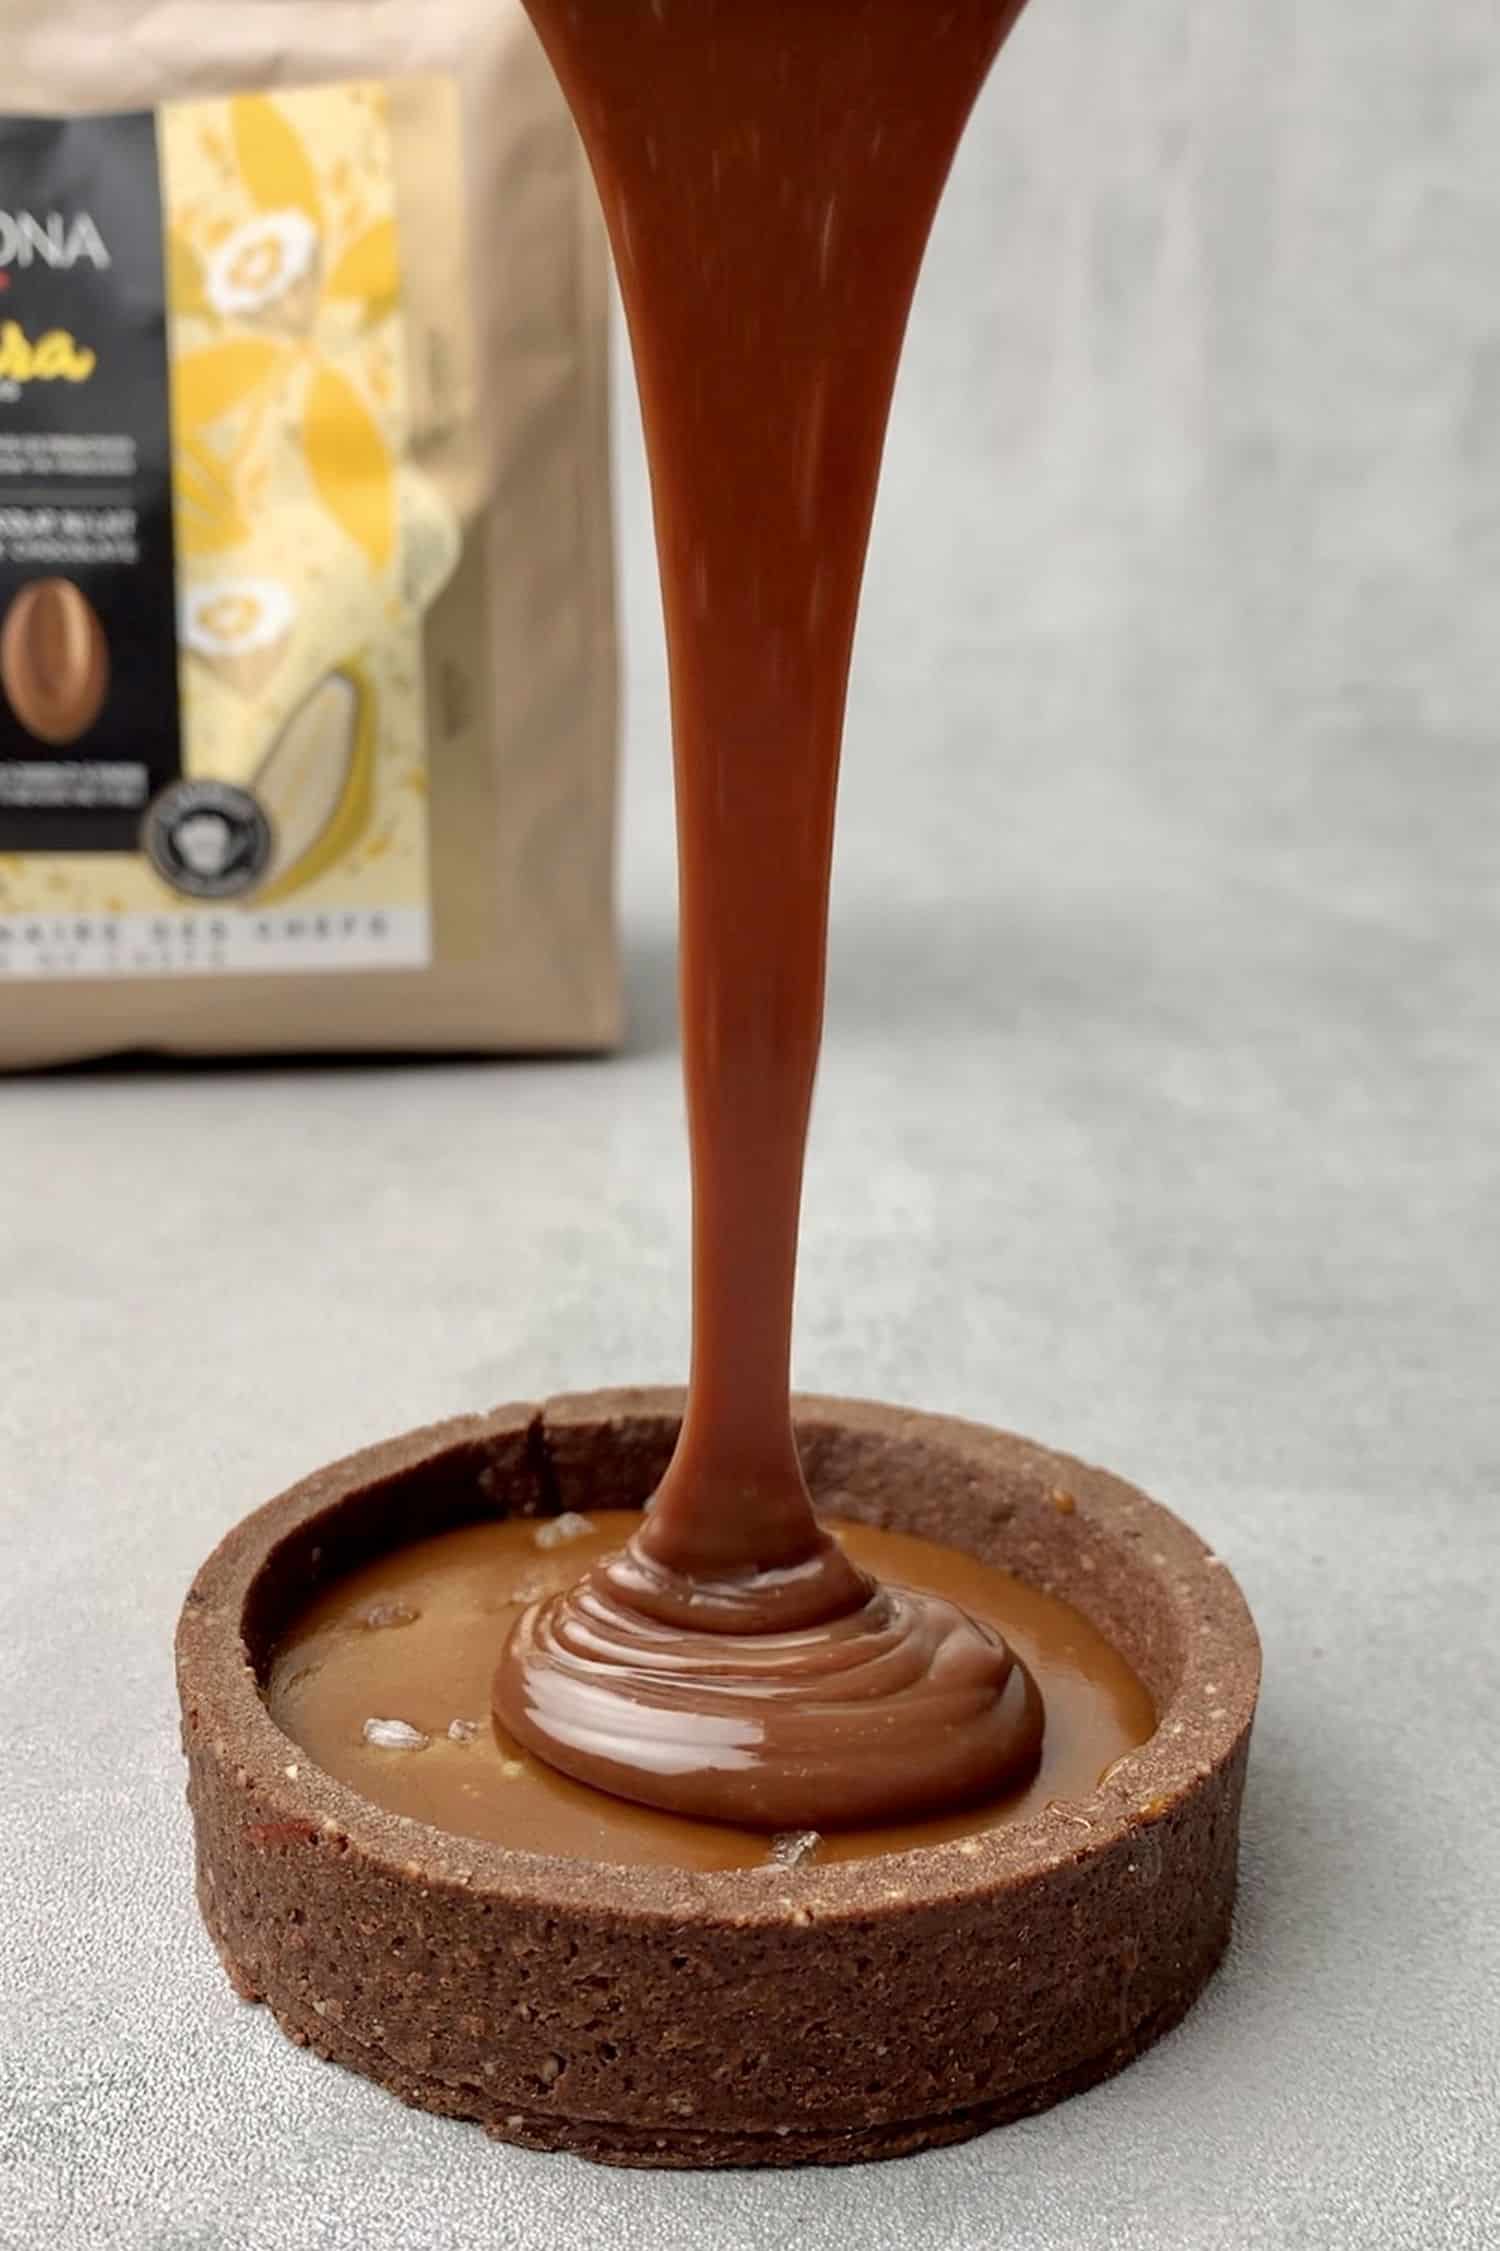
4. How to assemble the mini Salted Caramel Chocolate Tarts
First, you will make the tart shells and you have to let them cool before filling. Next, prepare caramel sauce according to the recipe and pour warm but not hot caramel into the tart shells to fill ½ of them. Sprinkle with salt flakes.
Pop the tarts into the fridge for the caramel to set. Make sure that you pour the second, chocolate layer on top only after the caramel layer is set. Then lastly, prepare the chocolate ganache according to the recipe and pour warm chocolate ganache on top of the already set caramel layer.
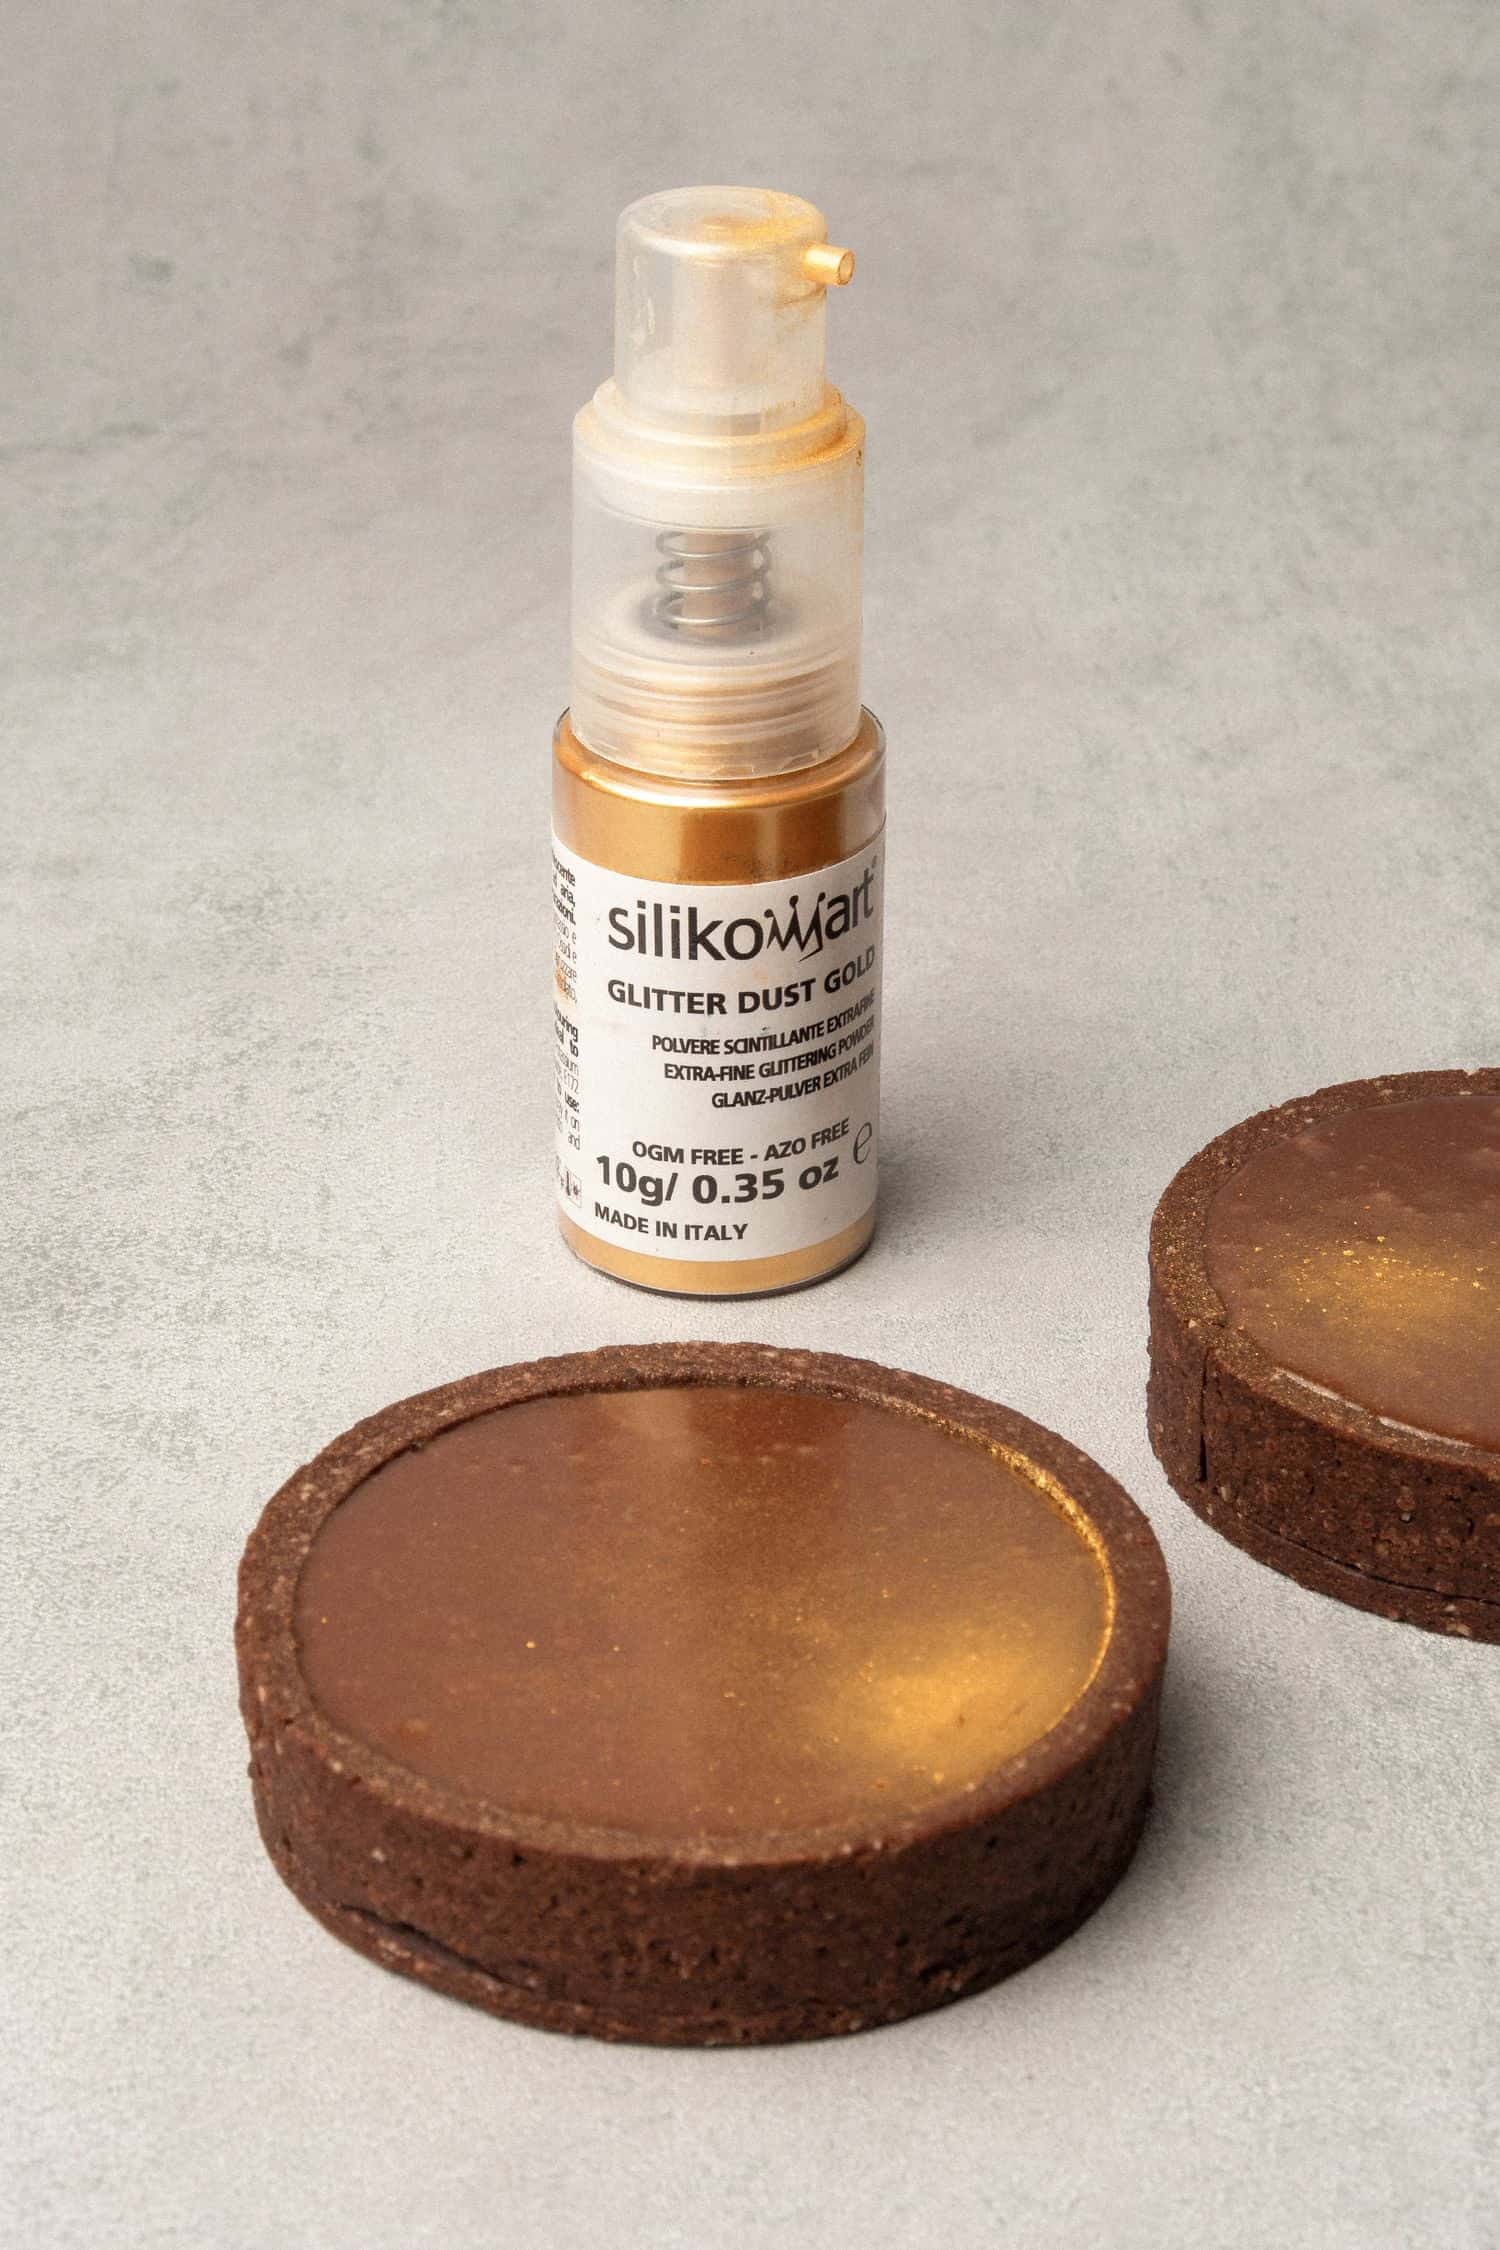
As a final touch, decorate your Chocolate caramel tarts with golden dust spray!
💡 Top Tip: The tarts will need to be set in the fridge for about an hour before serving.
🥣 Equipment notes
Silicone baking mat
I recommend using 2 Silicone baking mat for rolling the pastry dough out in between them.
While rolling, start from the center of the disc and work your way out in all directions.

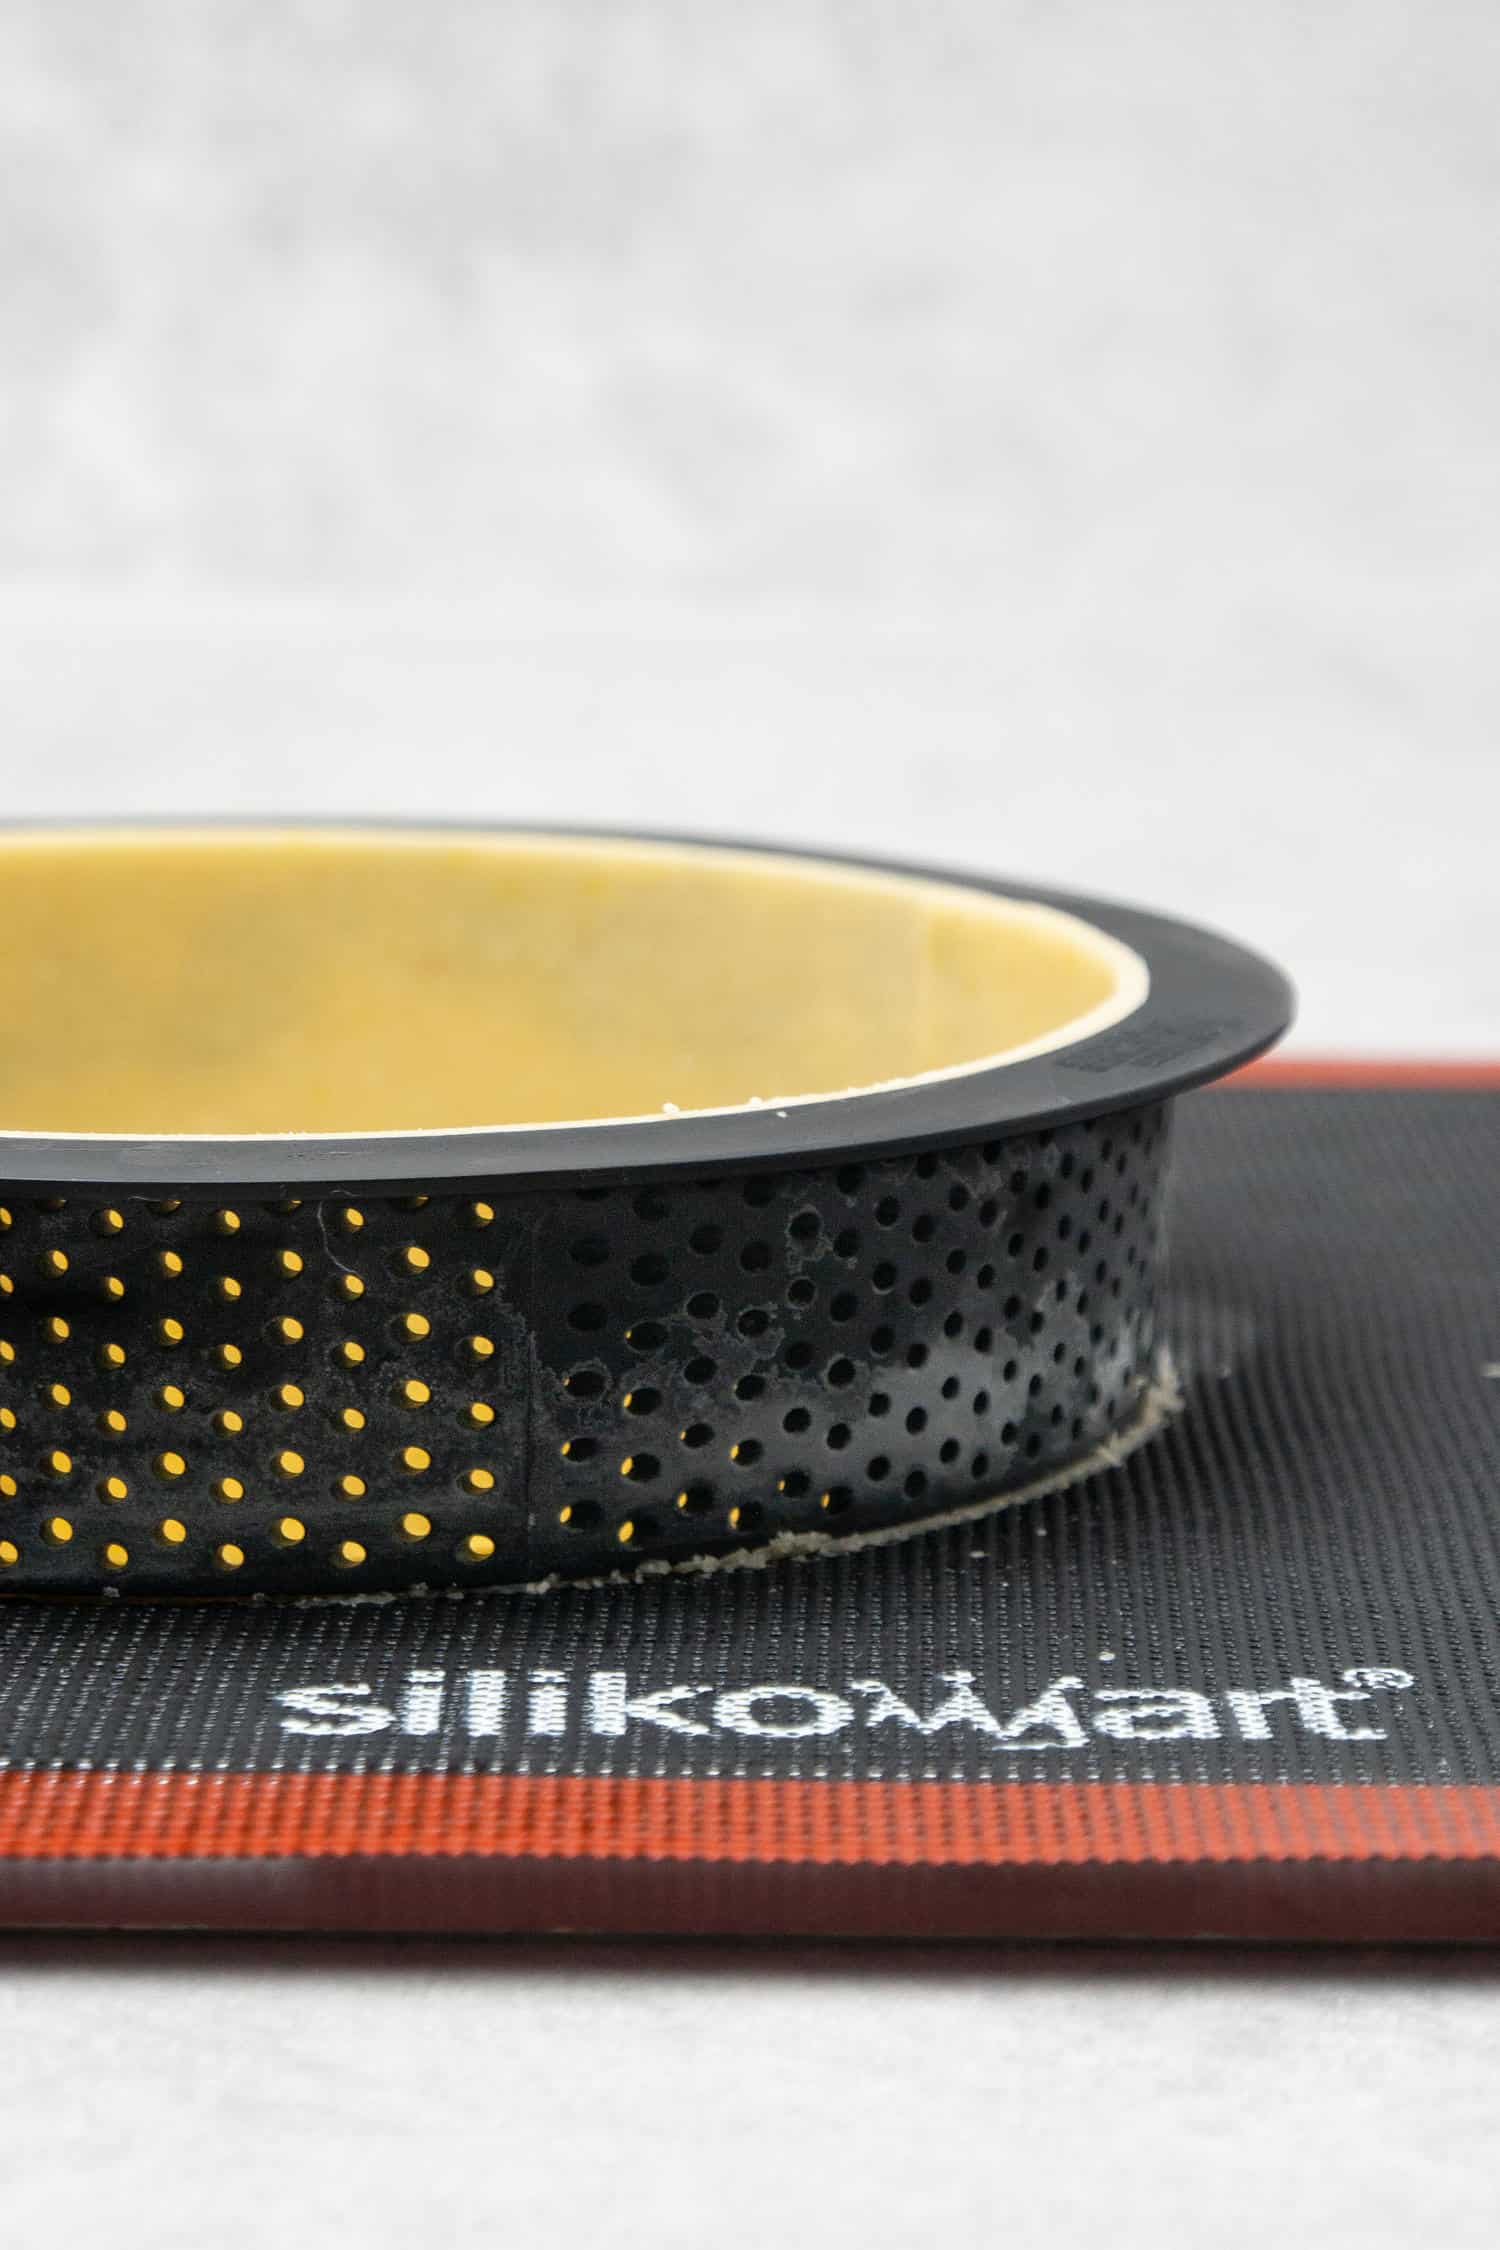
Perforated baking “air” mat
The Perforated “air” baking mat is perfect for making tart crust, éclairs, or even cookies. Thanks to the holes in the mat, the heat spreads evenly throughout mats’ surface guaranteeing perfect and even baking without blind baking.
While baking the mini chocolate tart shells, use the Perforated “air” baking mat straight on top of the oven rack (so not in a baking pan) so that the air can circulate properly.
Perforated tart ring
The Perforated tart rings are non-stick and stainless, they allow homogeneous baking due to the even air circulation. Silikomart offers rings in various shapes and sizes, I am using an 8cm (3,14inch) diameter round version in this case, however, the recipe can be made in larger rings as well just like this Raspberry Frangipane tart.
❓Recipe FAQs
Yes, you can use traditional equipment (eg. tart pan) and technique (eg. bling baking), however, for the best results I can warmly recommend investing in a couple of tart rings and a perforated baking mat
Yes of course you can, this recipe works no matter what size or shape of tarts you want to bake, however, you will need to adjust the baking time accordingly, as well as maybe double the recipe ingredients depending on how many you want to bake.
Before you fill the chocolate tart cases, you can store them easily on top of each other in an air-tight container. Once you fill them, they should be served the same day. Any leftover dessert can be stored in the fridge for 1-2 days.
You can easily freeze the tart cases before baking, and bake them fresh when needed. Once they are baked, you can still freeze them, however, they might lose their crispiness a bit. Once filled with cream, I do not recommend freezing them but serving them shortly after.
🌟 More tart recipes

Have you tried this recipe?
Please leave a 5-star ⭐️⭐️⭐️⭐️⭐️ rating on the recipe card and consider leaving a comment as well! I would love to hear about how your dessert turned out and your feedback also helps other Readers!

Salted caramel Chocolate Tarts
Equipment
Ingredients
For the Chocolate Pâte Sablée
- 90 g (¾ cups) Powdered sugar
- 200 g (1⅔ cups) Pastry flour
- 30 g (⅓ cups) Almond flour
- 30 g (⅓ cups) Unsweetened cocoa powder
- Pinch of salt
- 110 g (½ cups) Unsalted butter very cold
- 50 g (⅕ cups) Egg approx. 1 egg
For the Caramel
- 107 g (½ cups) Granulated sugar
- 42 g (¼ cups) Unsalted butter room temperature
- 62 g (¼ cups) Heavy Cream lukewarm
- Large pinch of salt
For the Chocolate ganache
- 100 g Chocolate good quality, eg. Valrhona
- 100 g Heavy Cream
US customary cup measurement is an indicative figure only. Measure the ingredients with a digital scale by weight (gram). Baking is art but also science which requires precision and accuracy.
Instructions
For the Chocolate Pâte Sablée
- Sift together dry ingredients; flour, cocoa powder, icing sugar, almond, salt
- Add very cold butter cubes and rub the mixture between your hands until it becomes a sand like consistency. This will take around a minute or two
- Add egg into the mixture and mix with your hands just until the dough comes together, few seconds
- Knead with the palm of your hand for a minute or two (do not over knead and do not use mixer) just until the dough becomes smooth. Form a disk and cover the dough in plastic wrap. Let it rest in the fridge for min 2 hours. You can leave it resting in the fridge over night or you can even freeze the dough
- After the dough rested roll it out into 2mm thickness between two Silicone baking mat. Do not use extra flour for rolling
- Place the dough into the freezer for 15 min in between two Silicone baking mat. Do not remove the mat at this point
- Prepare your oven rack with the Perforated "air" baking mat and Perforated tart rings on top
- Take the dough out from the freezer and using one of the Perforated tart rings, cut out 8 circles - this will be the bottom of your tart crust. Carefully move the dough circles with the help of an Offset spatula and place them into the rings one by one
- If at any point the dough gets too warm to work with, pop it back into the freezer for 5 minutes. You might need take the dough in and out of the freezer 10-15 times. It is extremely important to work with a dough that is cold enough to be able to handle (so not sticky) but not too cold which would result in breaking it
- Cut 8 long stripes out of the dough, this will be the side of the tart
- Carefully place the stripes into the ring one by one. Press each stripe onto the ring so it sticks to it
- Place the Perforated tart rings with the pastry dough in them into the freezer for 2 hours
- Pre-heat oven to 160C / 320F
- After 2 hours take the pastry dough with the rings on them out and trim the top to the level of the tart ring with a sharp knife
- Bake for 18 min then carefully remove the rings and bake for another 5 min. Let them cool on the Perforated "air" baking mat
For the caramel
- First and foremost be careful throughout the process not to burn yourself with sugar. Melt and caramelize sugar in a saucepan over medium-high heat, do not stir until it starts to turn golden brown. Watch the pan carefully as once it starts caramelizing, it can burn quickly
- When sugar fully dissolved and turns golden brown in color, add in butter in 3 steps while whisking vigorously. It will bubble and it´s normal, be careful. If butter starts to separate just keep whisking
- Once butter fully incorporated slowly pour lukewarm heavy cream into the mixture and boil for a minute. It will bubble and rise slightly but keep whisking. After about a minute your caramel is done, add the salt now. Use it in a few minutes as later it will start to set. If you need the caramel to be more runny feel free to re-heat it in microwave
For the chocolate ganache
- Chop chocolate into small pieces and place them into a bowl
- Heat cream in a saucepan over medium heat just until simmering
- Pour warm cream over chocolate, let it set for a minute until chocolate gently melts then stir together
Assemble
- Once tart tart shells cooled down to room temperature, prepare caramel sauce and pour warm but not hot caramel into the tart shells to fill ½ of them. Pop the tarts into the fridge for the caramel to set
- Prepare chocolate ganache and pour warm chocolate ganache on top of the caramel layer
- The tart will need to set in the fridge for about an hour before serving. Decorate with golden dust spray
- Store refrigereated for a few days
Lily Wong
My sincere apology. in my earlier comment I asked abt salt in the caramel?. I don't know why I can miss it totally. Ofc salt is mentioned in your
salted caramel recipe.
Rebecaa
i tried the caramel few times never have any success, it never really got so bubbly as your picture when i am melting the sugar. It usually burn or crystallize too much and after adding the butter then whipping cream, there's away hard caramel at the bottom. Please advise. Thanks.
Kata
Hey, I imagine the temp is too high, pls consider using a thermometer if you are struggling with making caramel.
Tiffany
How long will these last after fully assembling and how to store?
admin
While I have not done a proper shelf life test, they should last for a few days, after the tart case might soften from the filling.
I store them in fridge however you might want to bring them to room temp before serving so both chocolate ganache as well as caramel soften a bit.
Jel
Can i bake the pastry tart in batches and put it in the freezer?
admin
Yes you can freeze before baking or after baking but without the filling
Laura
Excellent recipe!!!
Yara Issa
The salted caramel just hits different
Eirini Dimitropoulou
One of the best tarts I’ve ever made! ❤️
admin
Thanks happy that you love it!
Sarah Alsulaiman
Me and my family loved it! So delicious and easy to make.
Thank you for amazing recipes 💕👍keep going
alice
Grazie mille della tua ricetta, dosi perfette, istruzioni impeccabili, il risultato è assicurato con te!!!
Senza dimenticare il favolo sapore e l'armonia tra dolce salato di questa torta magica!!!! Grazie!!!
admin
Grazie!! 🙂
Anett
I tried the fillings of this tart and both came out perfect! Thank you for sharing such wonderful recipes!
admin
Thanks for your kind feedback!
RobertaRoma
I finally had the chance to feel like a true "Pasticcera"!! This recipe had great success for the friends' dinner I have prepared, and will not stop following these meticulous recipes written by you! Plus, HIGHLY recommended buying the simple tools we suggest, as they will take a great part in making the recipe a success! SO well done! please keep on sharing your secrets, you are truly a gem! <3
admin
So happy you for you and your pastry shop looking tarts:) Thanks!
Lorena Afonso
A great and delicious recipe. I have done it and it comes out perfectly. Thanks for sharing it.
admin
Thanks for making my recipe! Happy to hear your success:)