
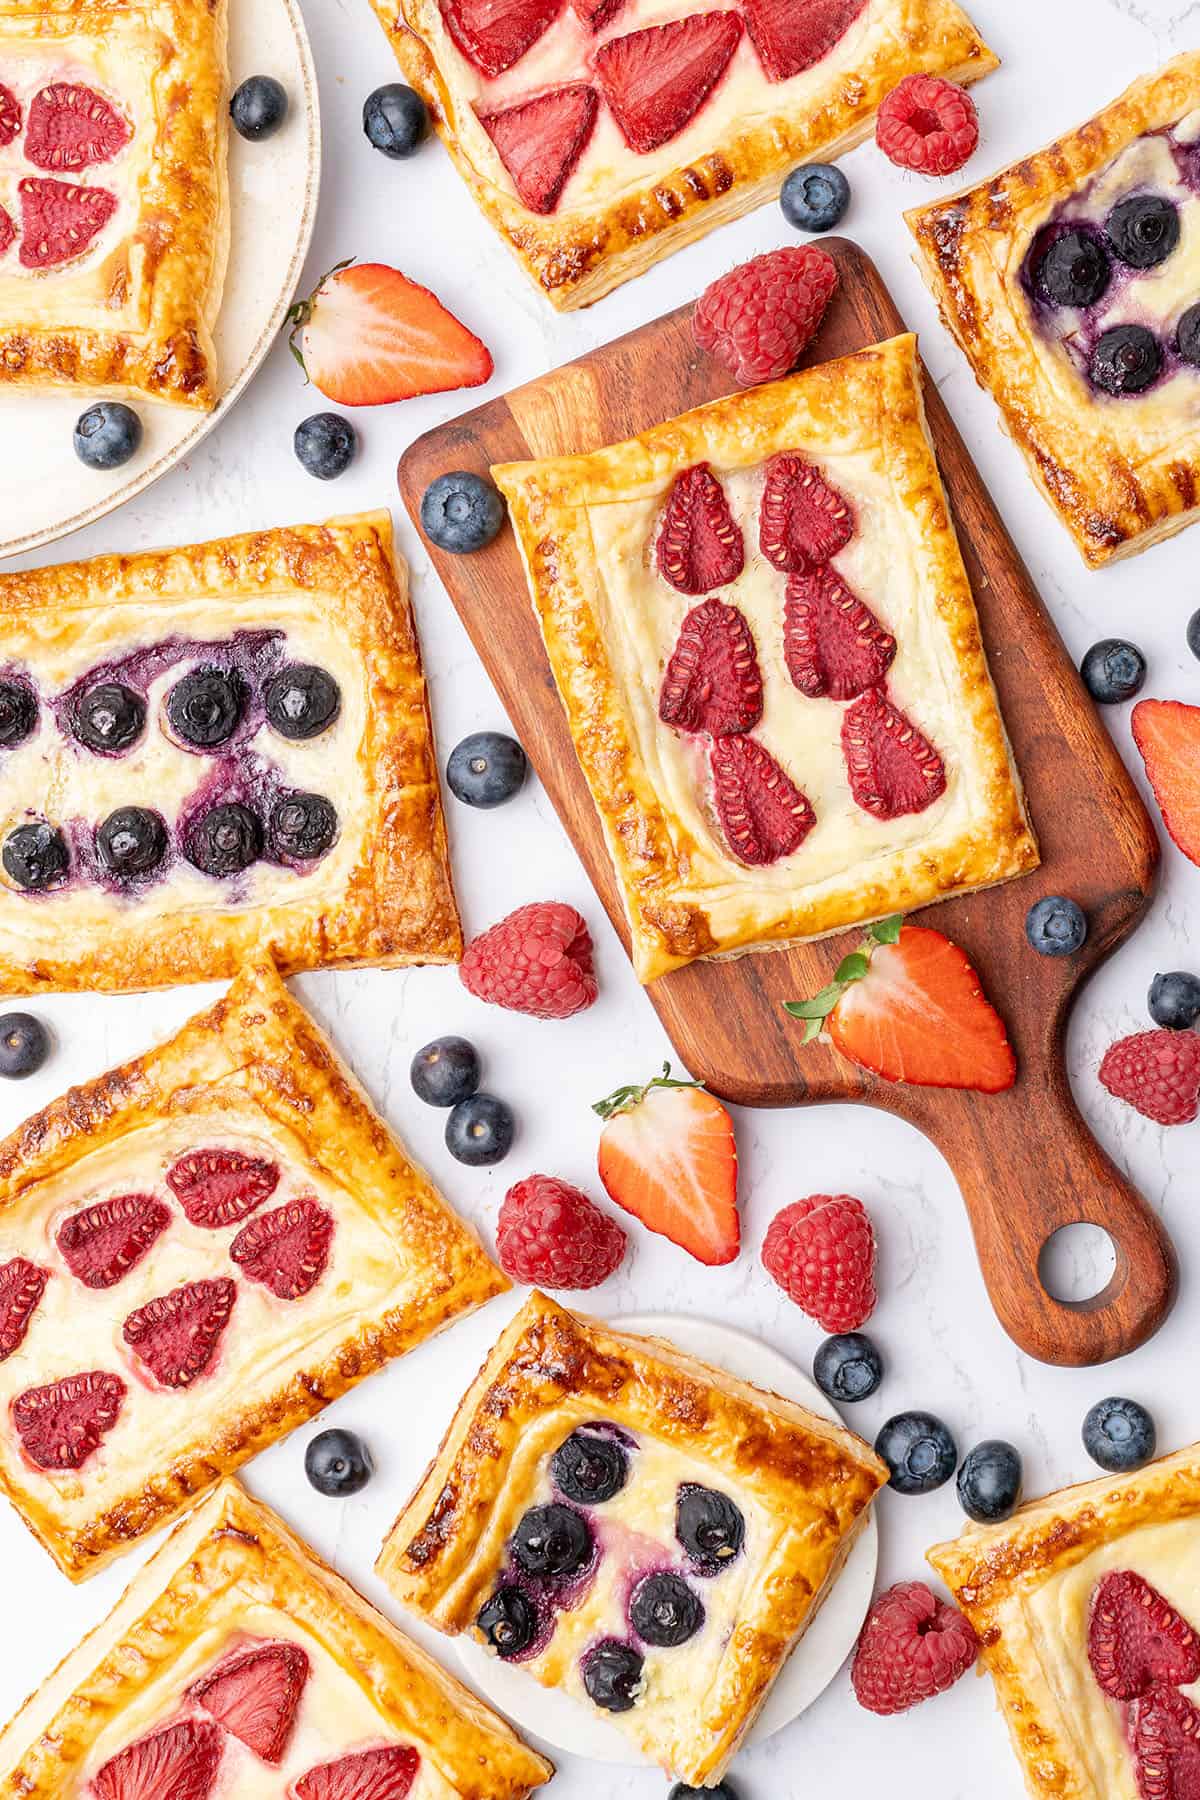
This cream cheese puff pastry Danish is a quick and beautiful bake made with flaky store-bought or homemade puff pastry, a rich vanilla cream cheese filling, and fresh berries. It comes together in about 15 minutes of hands-on time and delivers a result that looks far more impressive than the effort required. Whether you are serving these at a weekend brunch or a special afternoon tea, they are the kind of recipe that earns compliments every single time.
This recipe was first shared on the blog back in 2022. Since then, I've rebaked it many times (with or without the final showstopping decoration). I've updated the recipe with new photos and included helpful baking tips based on your questions.
Read what others said about this recipe

"I made these for a brunch with friends, and they were great. I used raspberries on some, cherries on some, and apricot jam on some. They were all devoured. Easy addition to breakfast or brunch." MLW
What is the difference between puff pastry and Danish pastry
The terms puff pastry and Danish pastry are often used interchangeably because the finished results can look very similar. However, they are made quite differently.
Danish pastry is a richer, more complex dough. It is leavened with yeast, enriched with egg, milk, and sometimes cream, and contains a higher proportion of fat than classic puff pastry. True Danish pastry dough is made using a lamination technique similar to croissants.
Classic French puff pastry, on the other hand, contains no yeast and no eggs. It is made from just flour, butter, water, and a little vinegar or lemon juice. You can read more about how it is made in my homemade traditional French puff pastry guide. The result is a crispier, airier, and more shattery pastry texture.
The recipe below uses store-bought puff pastry to keep the process simple and accessible, but the shape and style of the finished tarts are what have led them to be widely called Danish.
If you want to take it one step further from scratch, my quick rough puff pastry is a much faster alternative to the full classic puff pastry method and still delivers excellent results.
Katalin's key take on how to make this Cream Cheese Puff Pastry Danish perfectly flaky
Puff pastry is a laminated dough, meaning it is made from hundreds of thin layers of dough and butter. When the cold! pastry goes into a hot oven, those layers of butter create steam, which pushes the layers apart and produces that dramatic, airy rise and shatter-crisp texture.
If the pastry warms up before baking, the butter softens and blends back into the dough instead of staying separate, and you lose the puff entirely. This is why keeping everything as cold as possible, right up until the moment it goes into the oven, is non-negotiable.
Restraint matters just as much. It is tempting to pile more and more cream cheese filling and berries. However, too much filling prevents the dough from rising properly and causes the pastry to go soggy underneath rather than baking through.
Oven temperature is the third factor that ties everything together. The oven must be fully preheated and genuinely hot before the tarts go in. At 200°C / 390°F, the heat hits the cold butter in the dough immediately, converting it to steam fast enough to push those layers apart before the pastry has a chance to set. If the oven is not hot enough, the butter melts and drains out slowly instead, and the pastry bakes flat and greasy rather than puffed and crisp. Always use a digital oven thermometer to confirm the real oven temperature.
Ingredient notes

Puff pastry — Use store-bought frozen puff pastry to keep this recipe quick and easy, or make your own with my rough puff pastry recipe. Store-bought sheets vary quite a bit in size by brand and country, so the number of tarts you get from one sheet will vary accordingly. A standard large sheet typically yields 6 rectangles, but if you are buying smaller sheets, you may get fewer, or if your supermarket sells pre-cut pastry rectangles, you can use those directly and skip the cutting step entirely. Either way, the method stays the same.
Cream cheese — Full-fat only, ideally Philadelphia. Low-fat versions contain too much water and the filling will run during baking.
Egg yolk — Goes into the filling to help it set in the oven so it holds its shape rather than melting into the pastry.
Granulated sugar — Regular white sugar works perfectly here. See my sugar guide if you want to learn more about how different sugars behave in baking.
Vanilla extract — Use pure vanilla extract, not imitation. The filling is simple enough that the vanilla flavor really comes through.
Egg and milk — Combined to make the egg wash that gives the pastry border its golden color and shine. See my egg wash guide for more details.
Berries — Strawberries, raspberries, blueberries, or a mix of all three. Pat them dry before using to avoid excess moisture on the pastry. Don't use frozen fruits, they release way too much water during baking.
🛒 You’ll find detailed measurements for all ingredients in the printable version of the Recipe Card at the bottom of this post.
Making the cream cheese filling
Use full-fat cream cheese, ideally Philadelphia, and make sure it's properly softened before you begin. You want it to be soft enough to whisk without effort. Read my guide on how to soften cream cheese quickly if you are short on time.
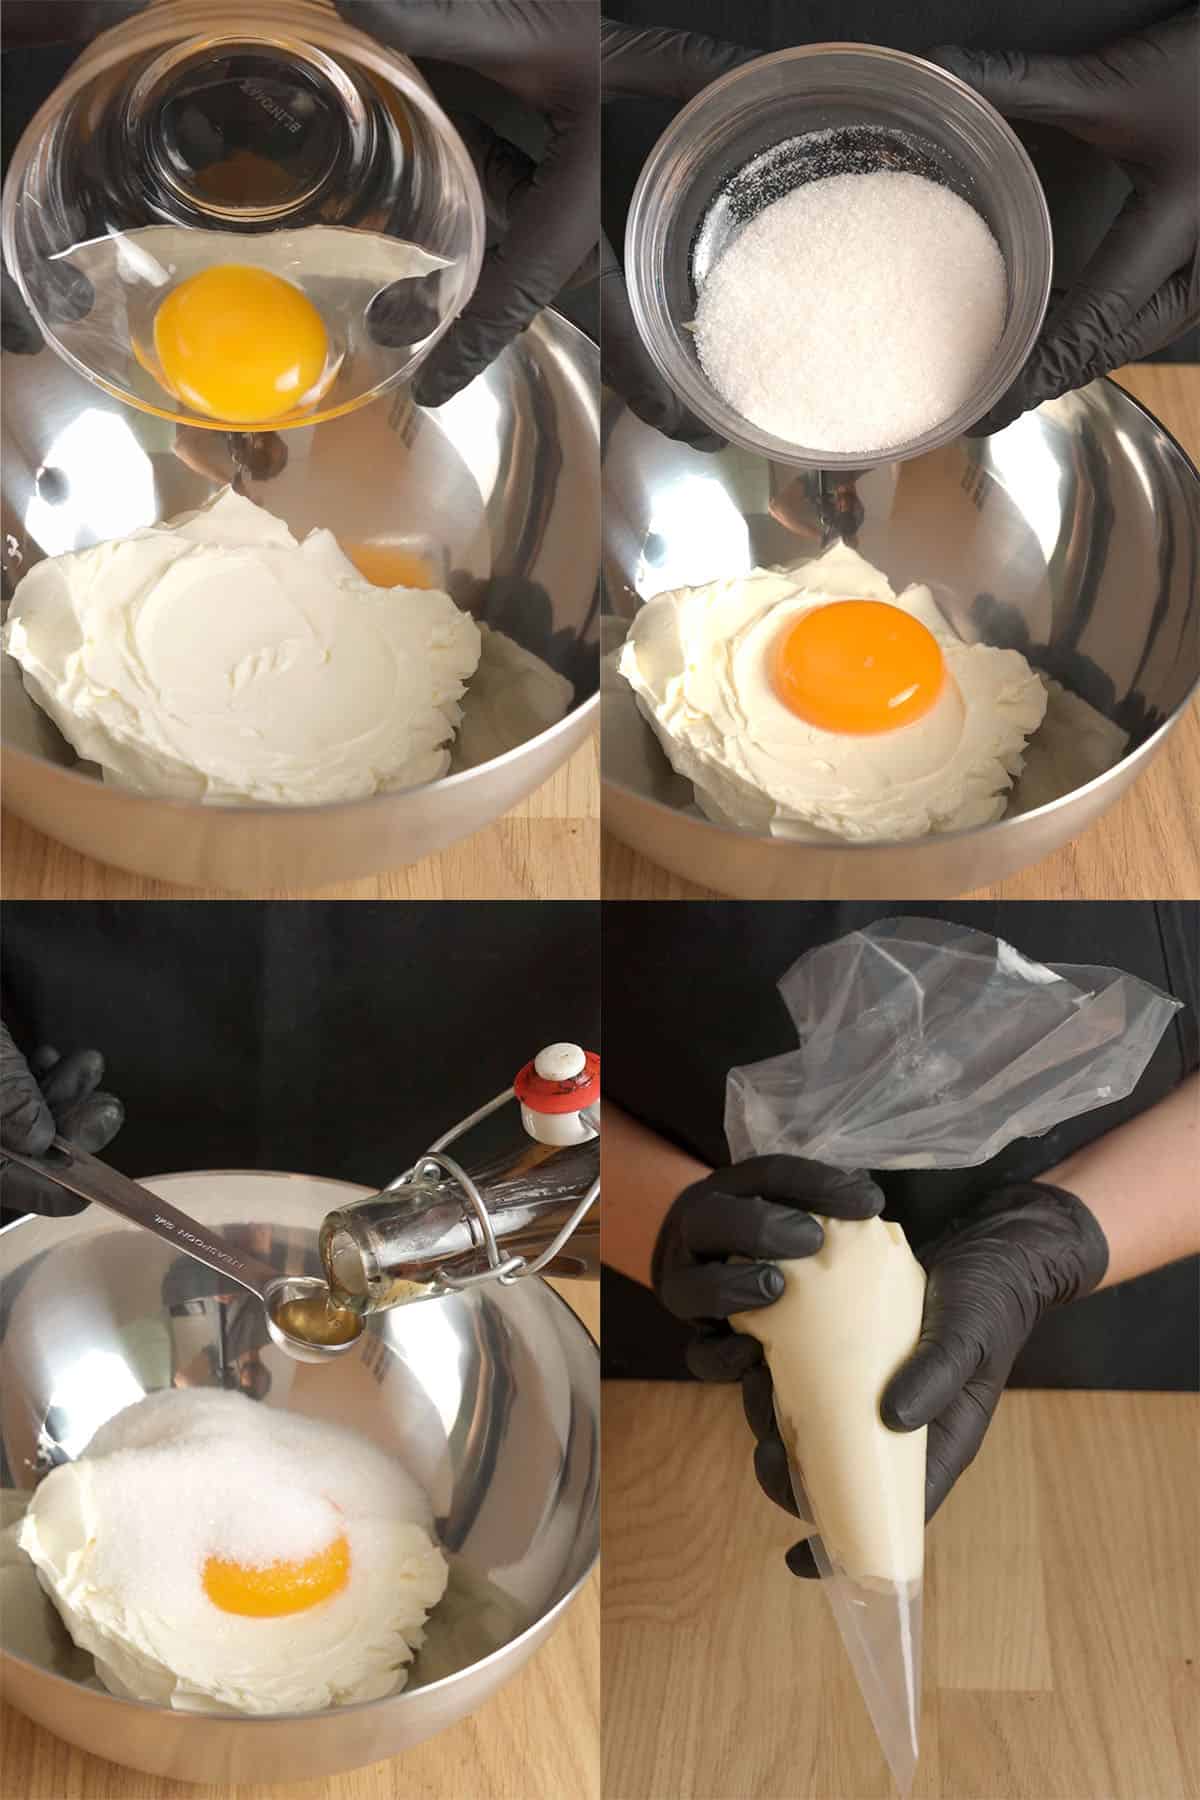
Add the egg yolk, granulated sugar, and vanilla extract to the cream cheese, whisking for a few minutes (or using an electric hand mixer) until the mixture is fully smooth.
The finished filling should be thick, smooth, and spoonable. Keep it in the fridge while you prepare the pastry so it stays cold.
Preparing the puff pastry
If you are using frozen store-bought puff pastry, thaw it in the refrigerator rather than at room temperature. You want the sheets to be pliable enough to unfold without cracking, but still cold and firm to the touch. If they are too warm, they will stick to the work surface and become almost impossible to handle.
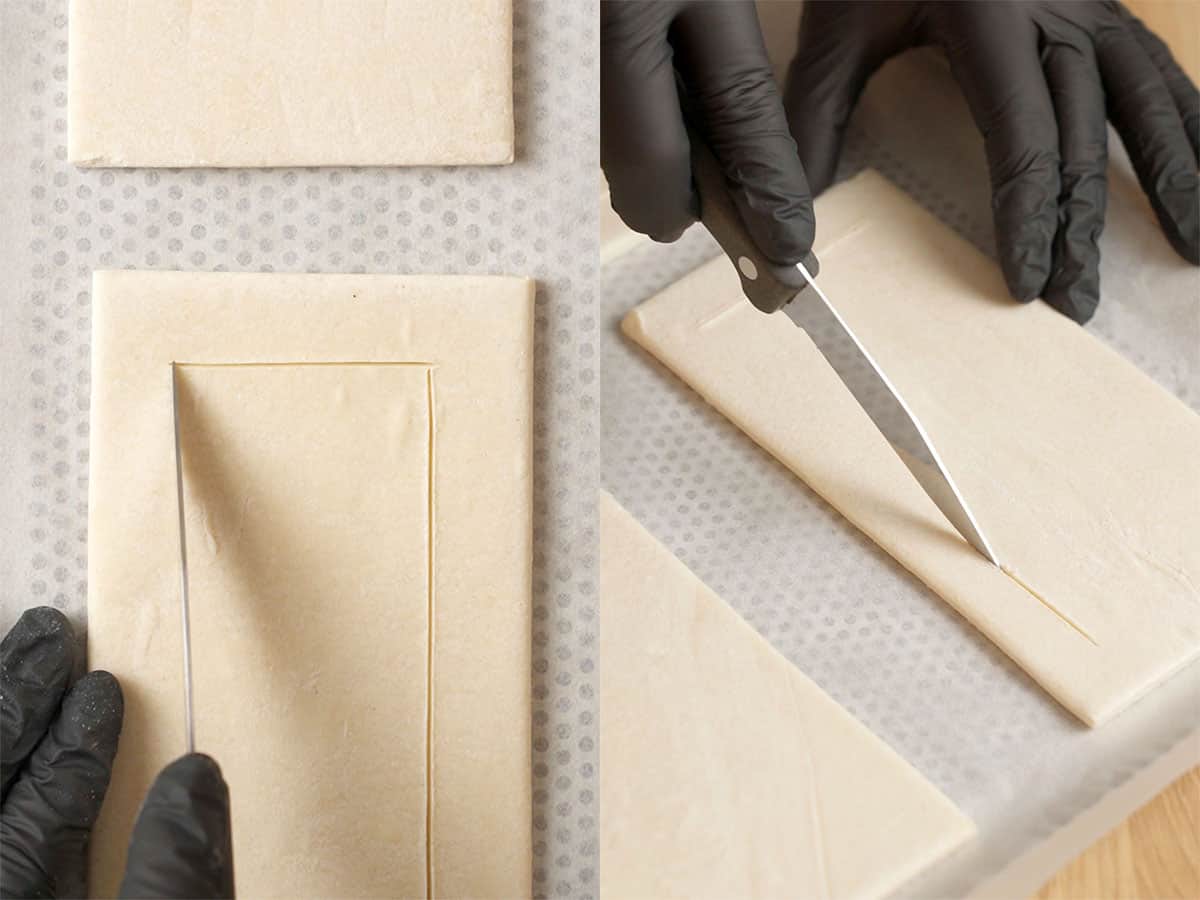
Once thawed, unfold one sheet onto a lightly floured surface and cut it into six equal rectangles. Use a sharp knife and make clean, confident cuts rather than dragging the blade.
Using the tip of the knife, lightly score a border about 1.5 cm / half an inch in from each edge of every rectangle. The scoring should be shallow, just cutting through the top surface without going all the way through the pastry. This scored border is what rises into a frame around the filling during baking, creating those characteristic puffed edges. If you accidentally cut all the way through, the pastry will separate rather than frame the filling.
Place the cut and scored rectangles onto a lined baking sheet and return them to the fridge while you prepare the egg wash and berries.
Filling, egg wash, and assembling the tarts
Wash the berries and slice any larger fruit, such as strawberries or raspberries, lengthwise into halves. Smaller blueberries can be left whole. Pat the fruit dry with a piece of kitchen paper before placing it on the pastry, as excess moisture from the berries can make the pastry soggy.
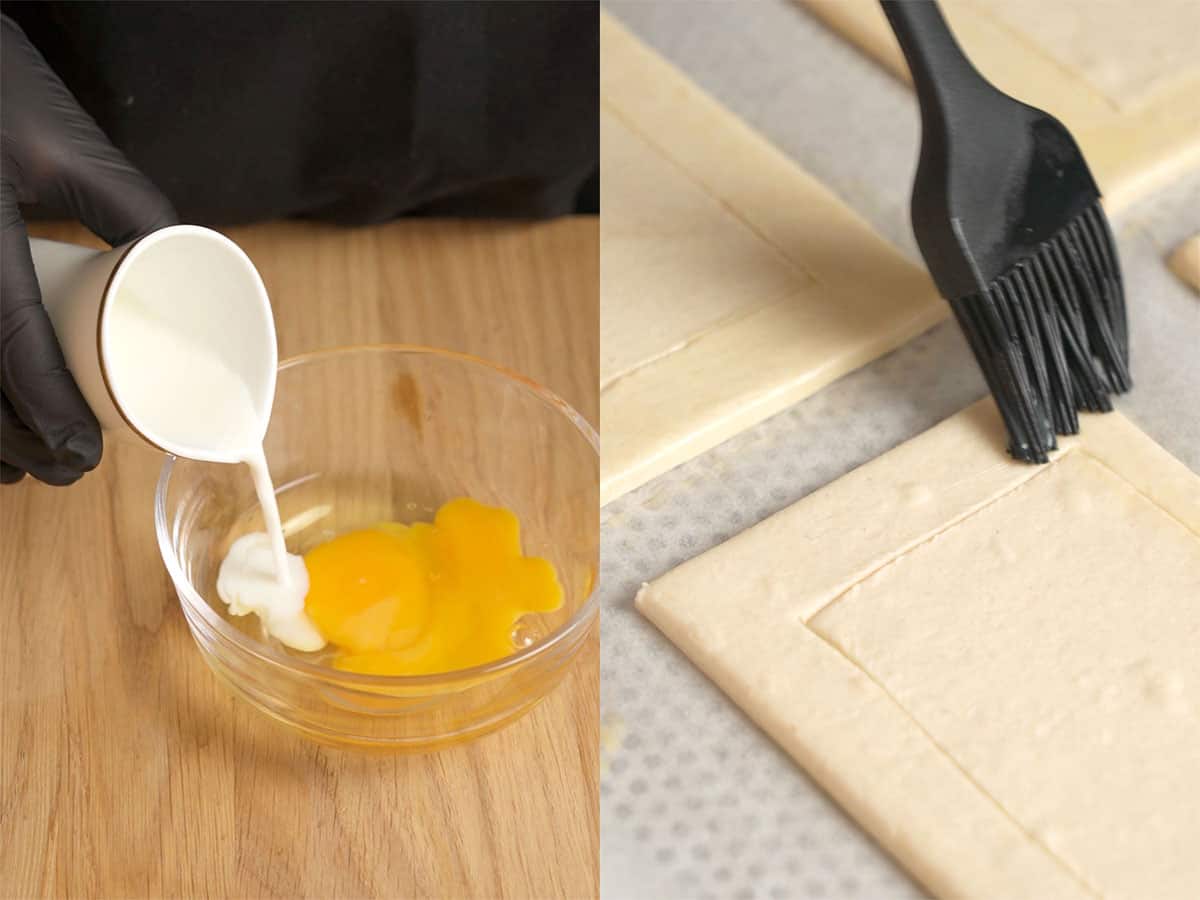
For the egg wash, whisk one whole egg with a small splash of milk until fully combined.
Take the chilled rectangles from the fridge. Using a pastry brush, lightly apply the egg wash to the scored border of each tart.
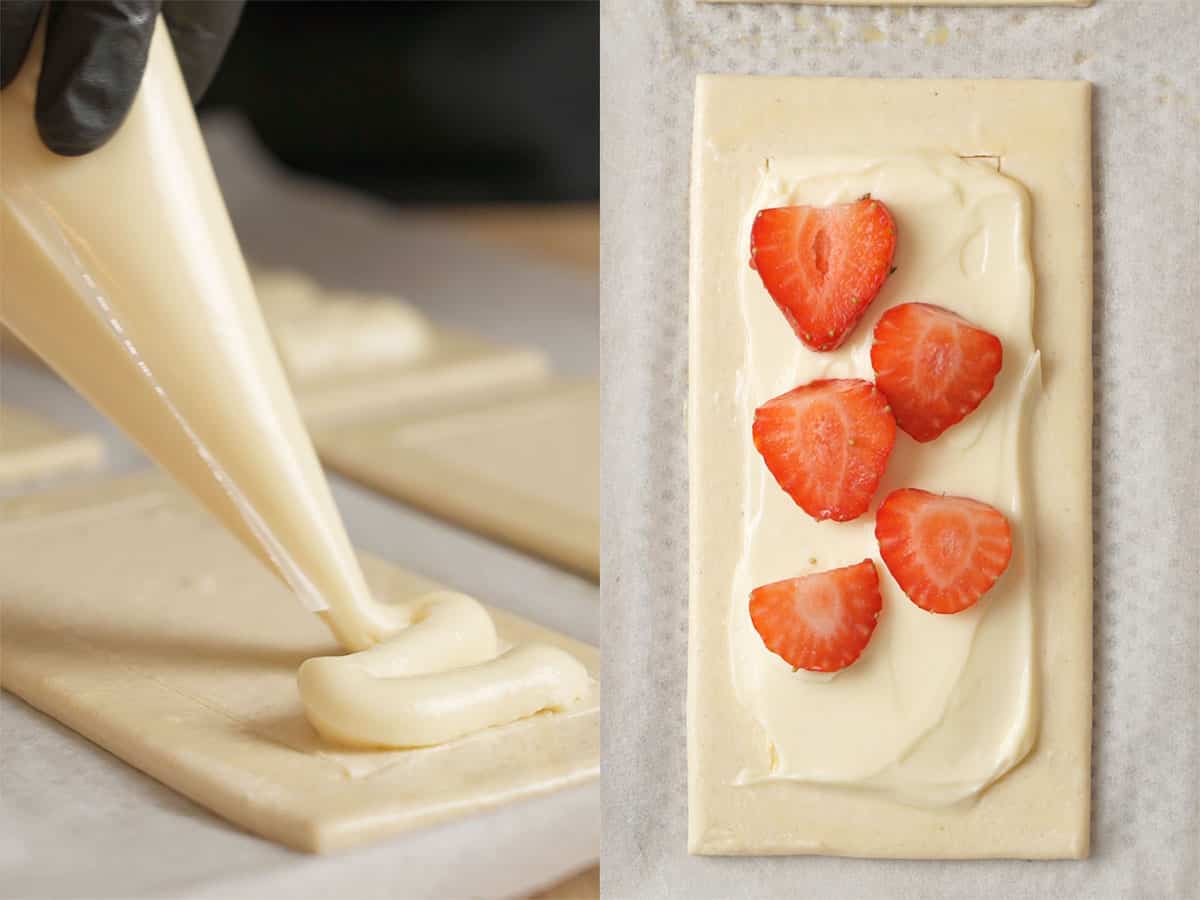
Working quickly, spread exactly the cream cheese filling inside the scored border of each rectangle, leaving the scored edges completely clear. Use either a tablespoon or a piping bag and an offset spatula to work neatly.
Then arrange the prepared fruit on top of the cream cheese layer, keeping everything within the border.
Repeat the process with the remaining pastry.
How to bake
Once assembled, move the baking trays to the fridge to chill the pastry while you preheat the oven. This chilling step is important. The pastry needs to go into the oven as cold as possible to ensure maximum lift.
Preheat the oven to 200°C / 390°F, without a fan. Once fully preheated, bake the tarts for 40 to 45 minutes. If the puff pastry edges are browning too much, loosely cover the tarts loosely with a sheet of aluminum foil. This allows the bottom to continue baking through without the top burning before the inside is cooked.
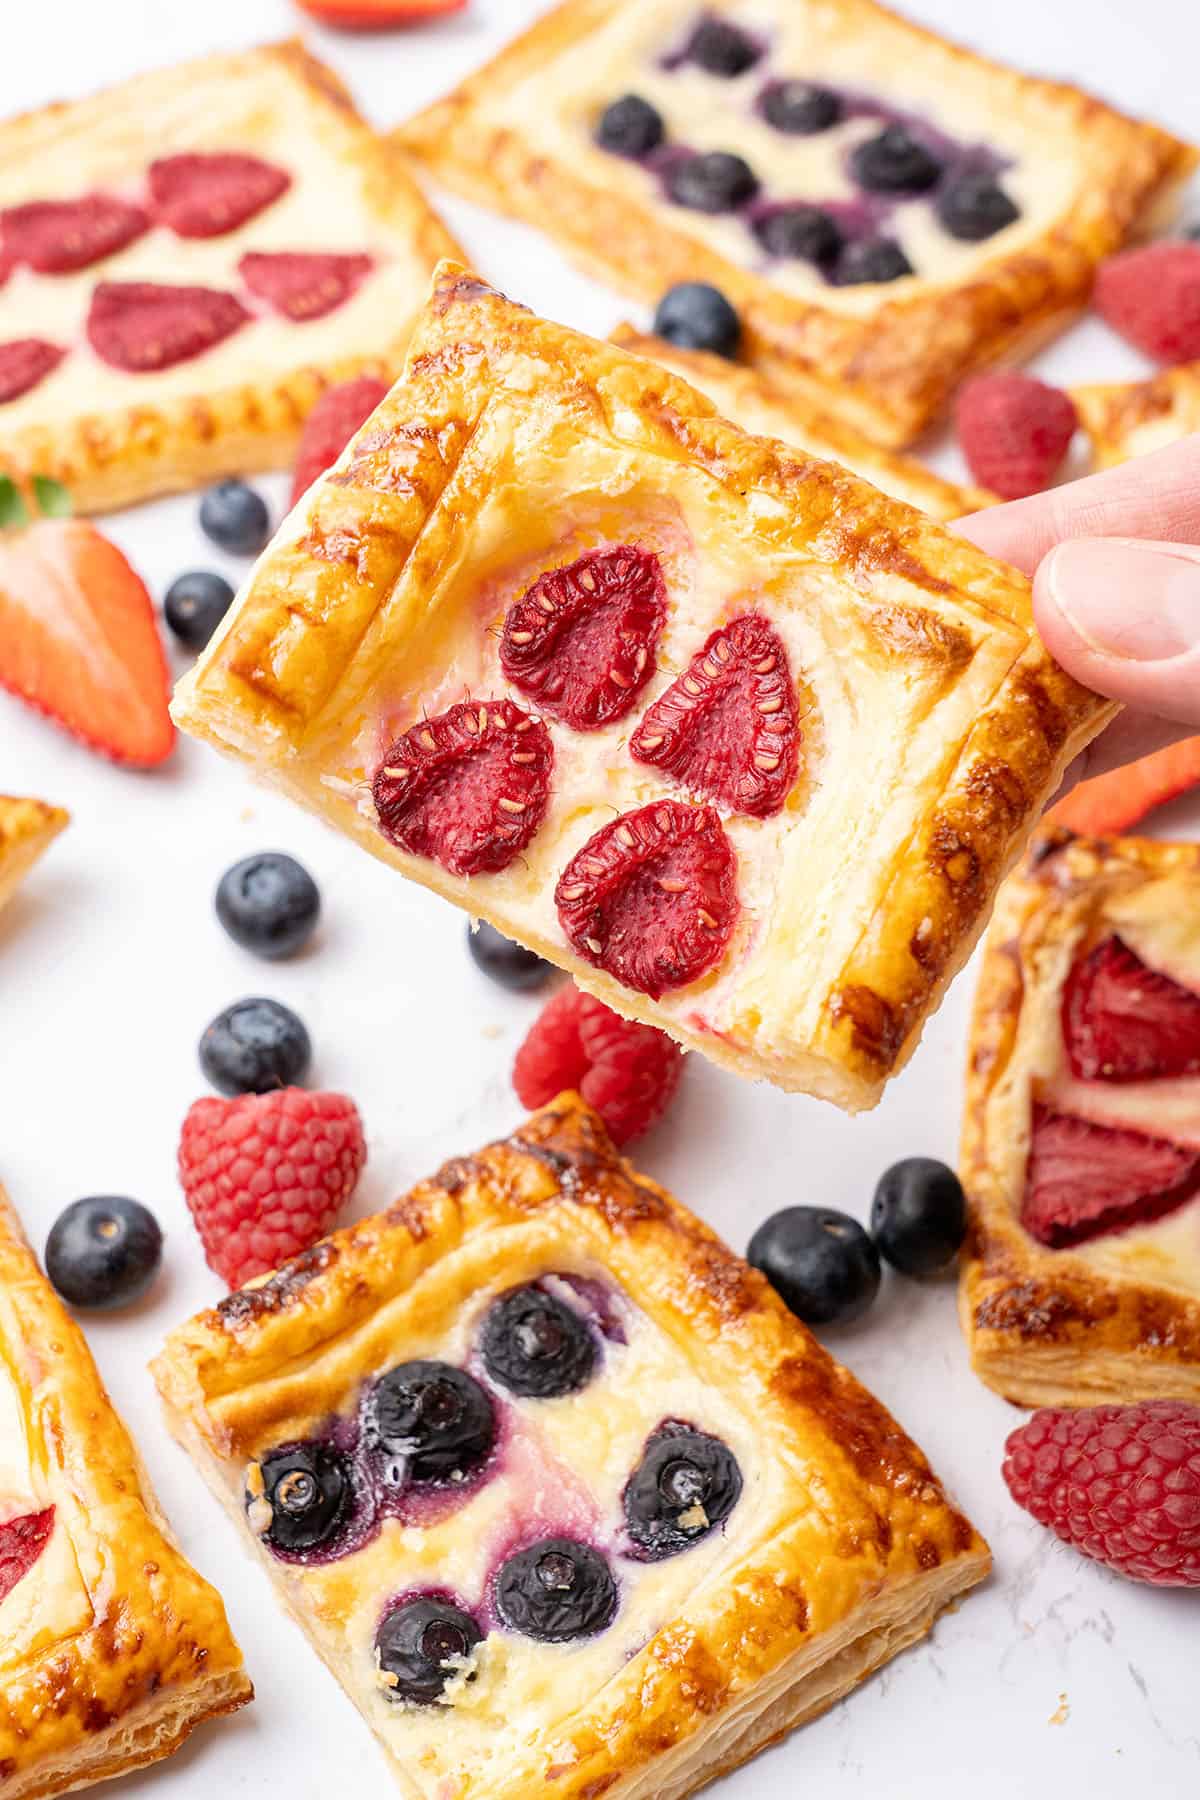
Before removing the tarts from the oven, check the bottom of the pastry. It should be a deep, even golden brown with no wet or doughy patches.
Once baked, let the tarts rest on the baking tray for three minutes, then transfer them to a wire rack to cool. Attempting to move them immediately risks breaking the still-soft pastry.
Storage & freezing
These cream cheese puff pastry Danishes are at their absolute best when served fresh on the day they are baked. Puff pastry easily absorbs moisture from the air and from the filling over time, causing it to soften and lose its crispness.
Any leftovers can be stored in an airtight container in the refrigerator for 2 to 3 days. To refresh them, reheat in the oven at around 160°C / 320°F for 8 to 10 minutes rather than in the microwave.
To freeze, allow the tarts to cool completely, then layer them between sheets of parchment paper inside a freezer-safe container. They will keep for up to two months. Thaw in the refrigerator and reheat in the oven to restore some of the crispness.
Make-ahead instructions
The cream cheese filling can be made up to two days ahead and stored in an airtight container in the refrigerator.
The pastry itself is best cut and assembled on the day you plan to bake, as pre-assembled tarts tend to go soggy if left too long. However, you can cut and score the rectangles the night before, keep them on a lined tray in the fridge, and simply fill, egg wash, and bake them fresh the next morning.
Flavor variation ideas
For the filling, add a teaspoon of finely grated lemon or orange zest to brighten the flavor. You can also swap the vanilla extract for almond extract for a slightly more fragrant, marzipan-like note. Or, add a small pinch of cinnamon for a warmer, spiced version.
For the fruit, the recipe works well with almost any fruit that is not too juicy. Try thinly sliced apples, apricot halves, or sliced pears as I use in my pear puff pastry tarts. Stone fruits like cherries and plums also work well. Avoid very watery fruits such as very ripe peaches.
If you prefer to skip fruit entirely, the cream cheese filling works on its own, or you can top it with a small amount of good-quality jam, chocolate chips, or crushed nuts pressed gently into the filling before baking.
For a savory take, omit the sugar and vanilla from the cream cheese and top with combinations like ham and gruyère, pesto and sun-dried tomatoes, or a slice of brie with honey and walnuts.
Once baked, a light dusting of powdered sugar always finishes these beautifully. A drizzle of my homemade caramel is another excellent option for an indulgent finish.
Optional decoration
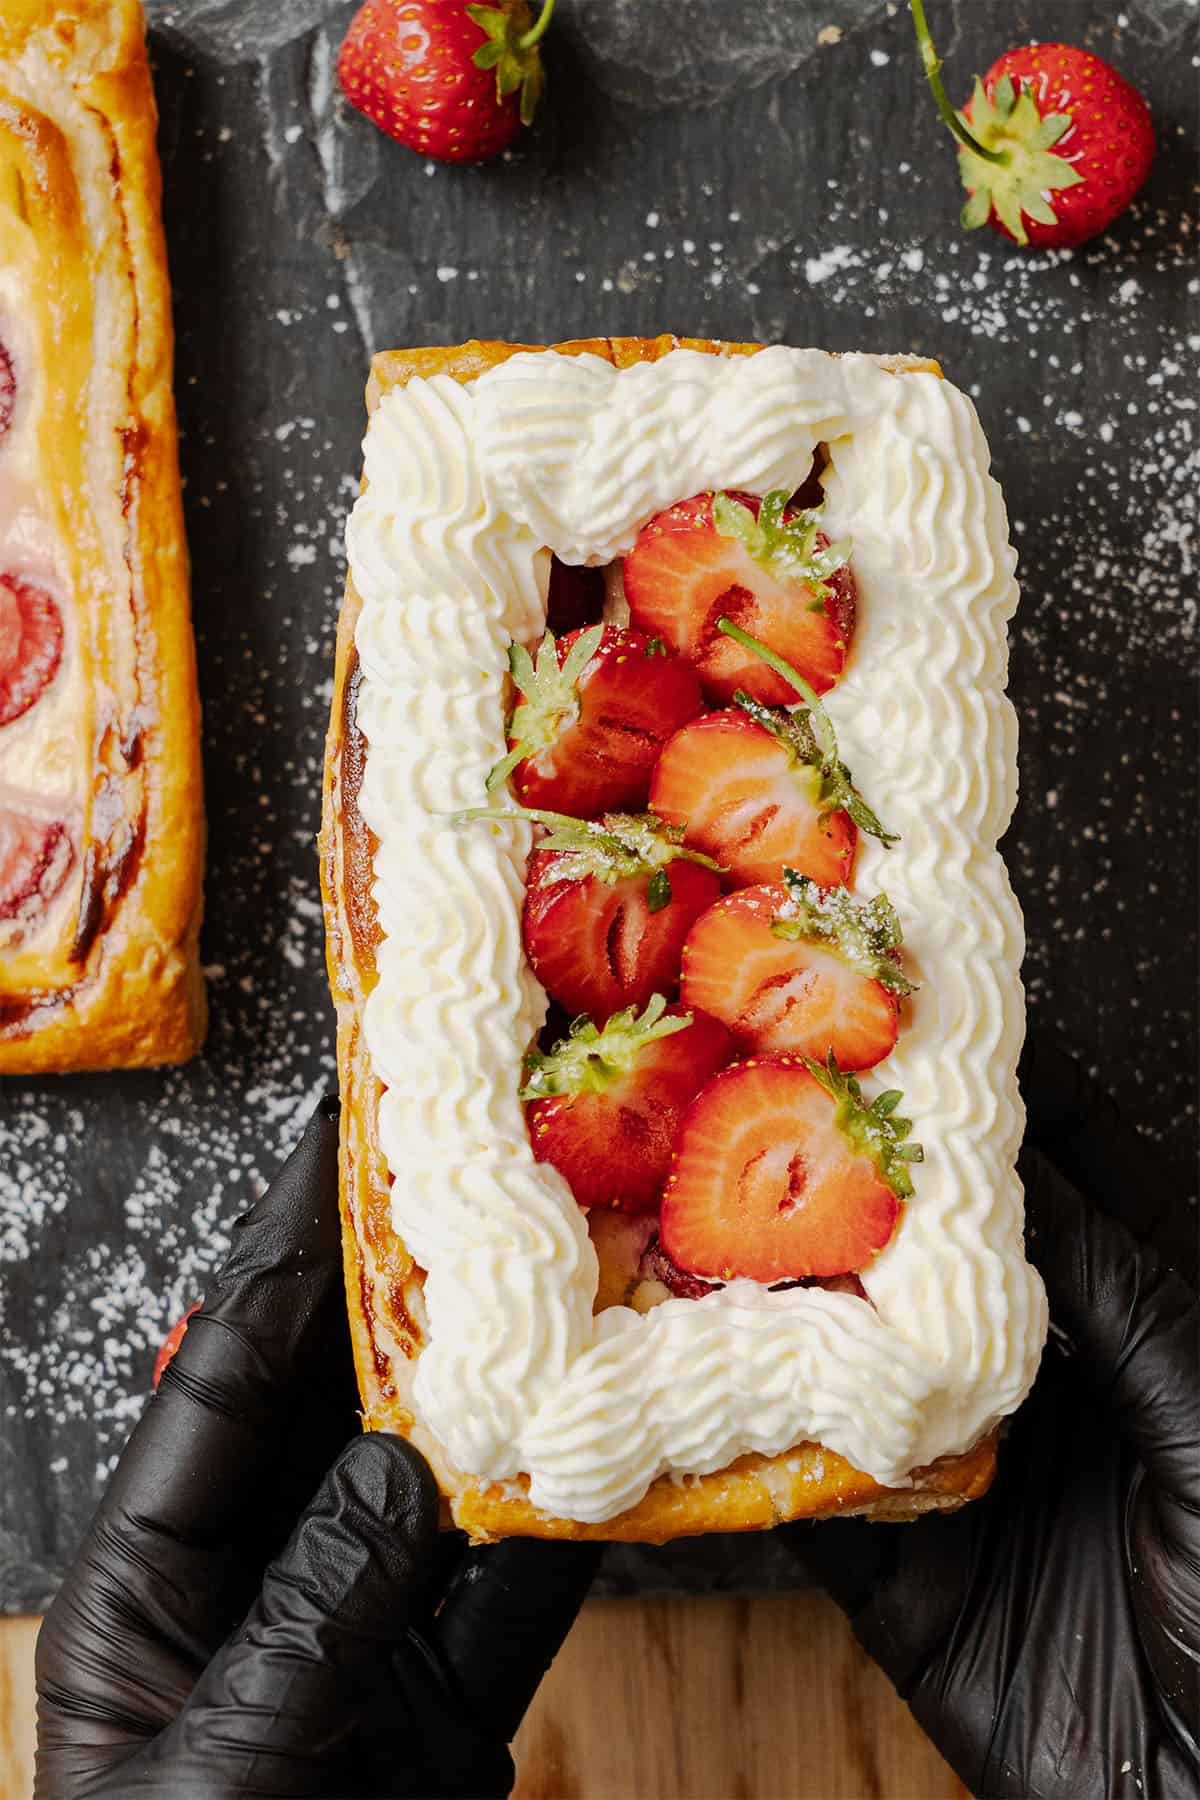
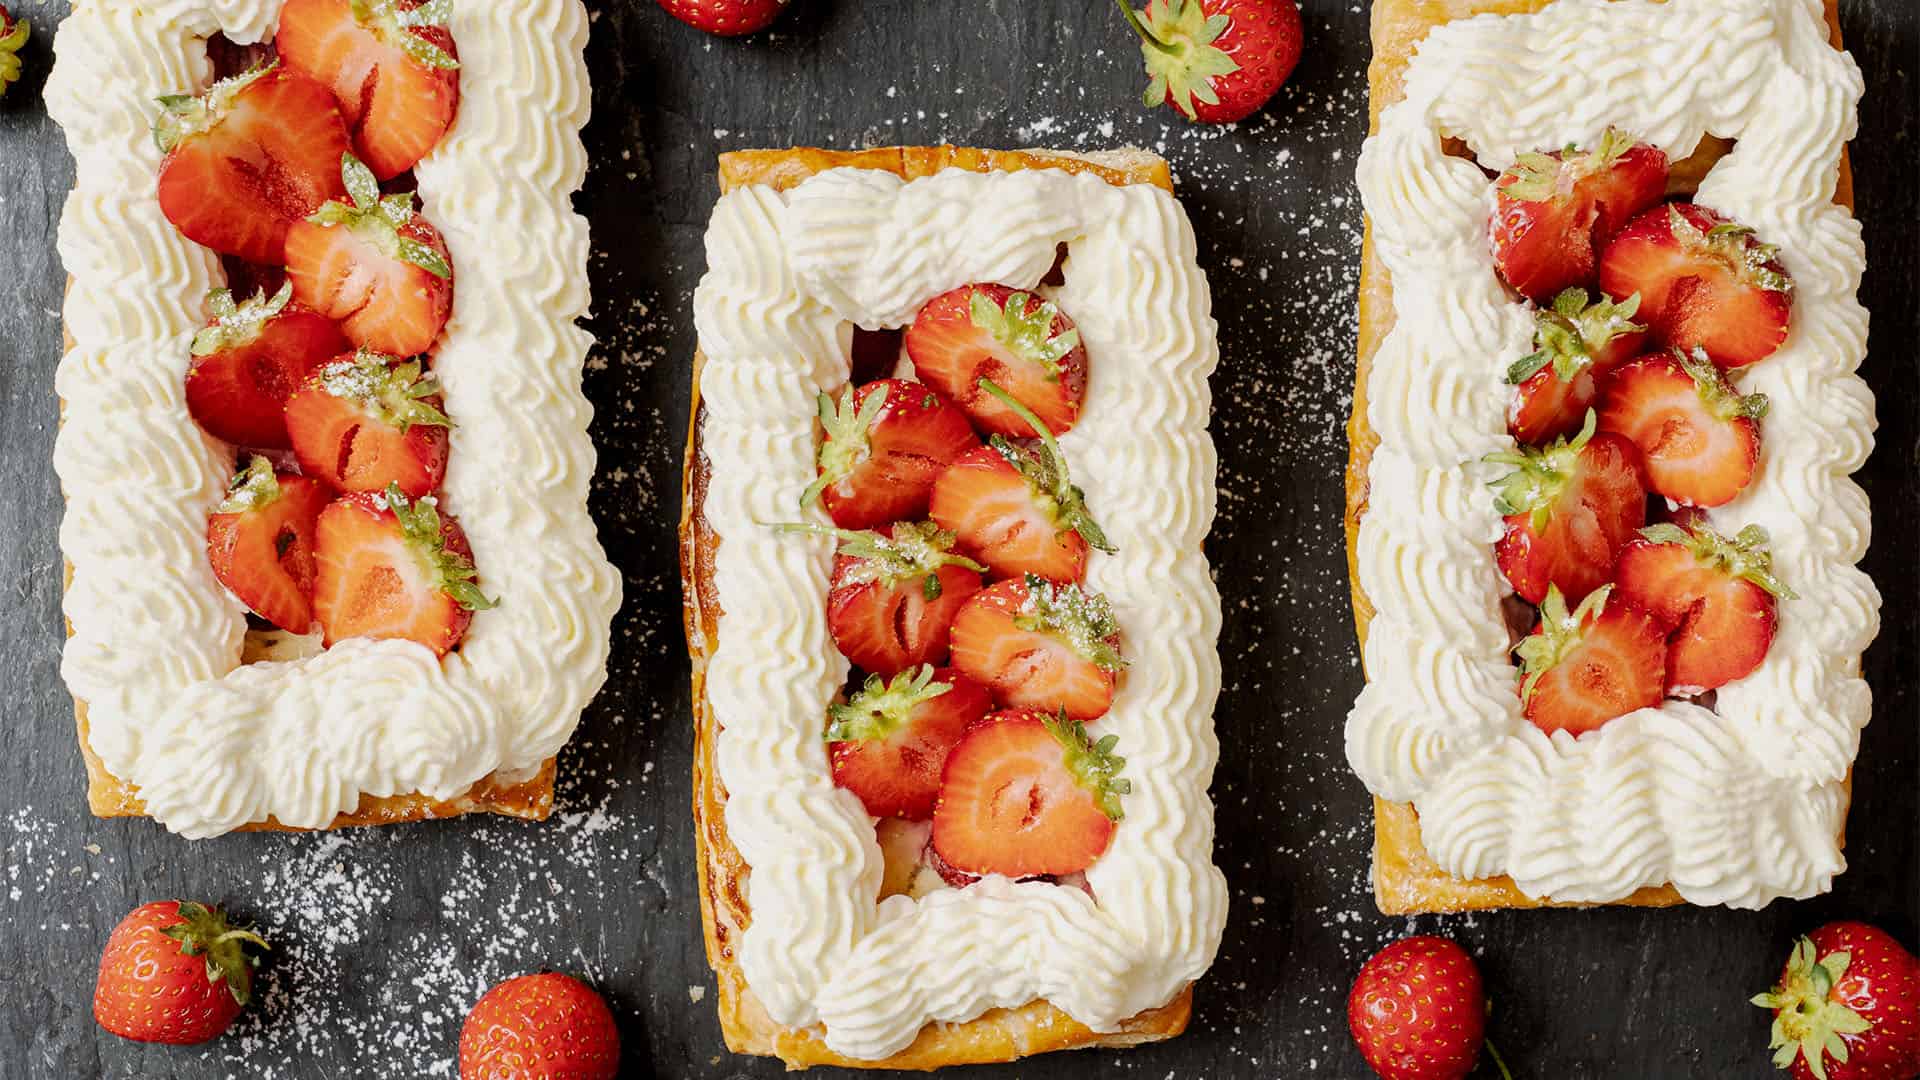
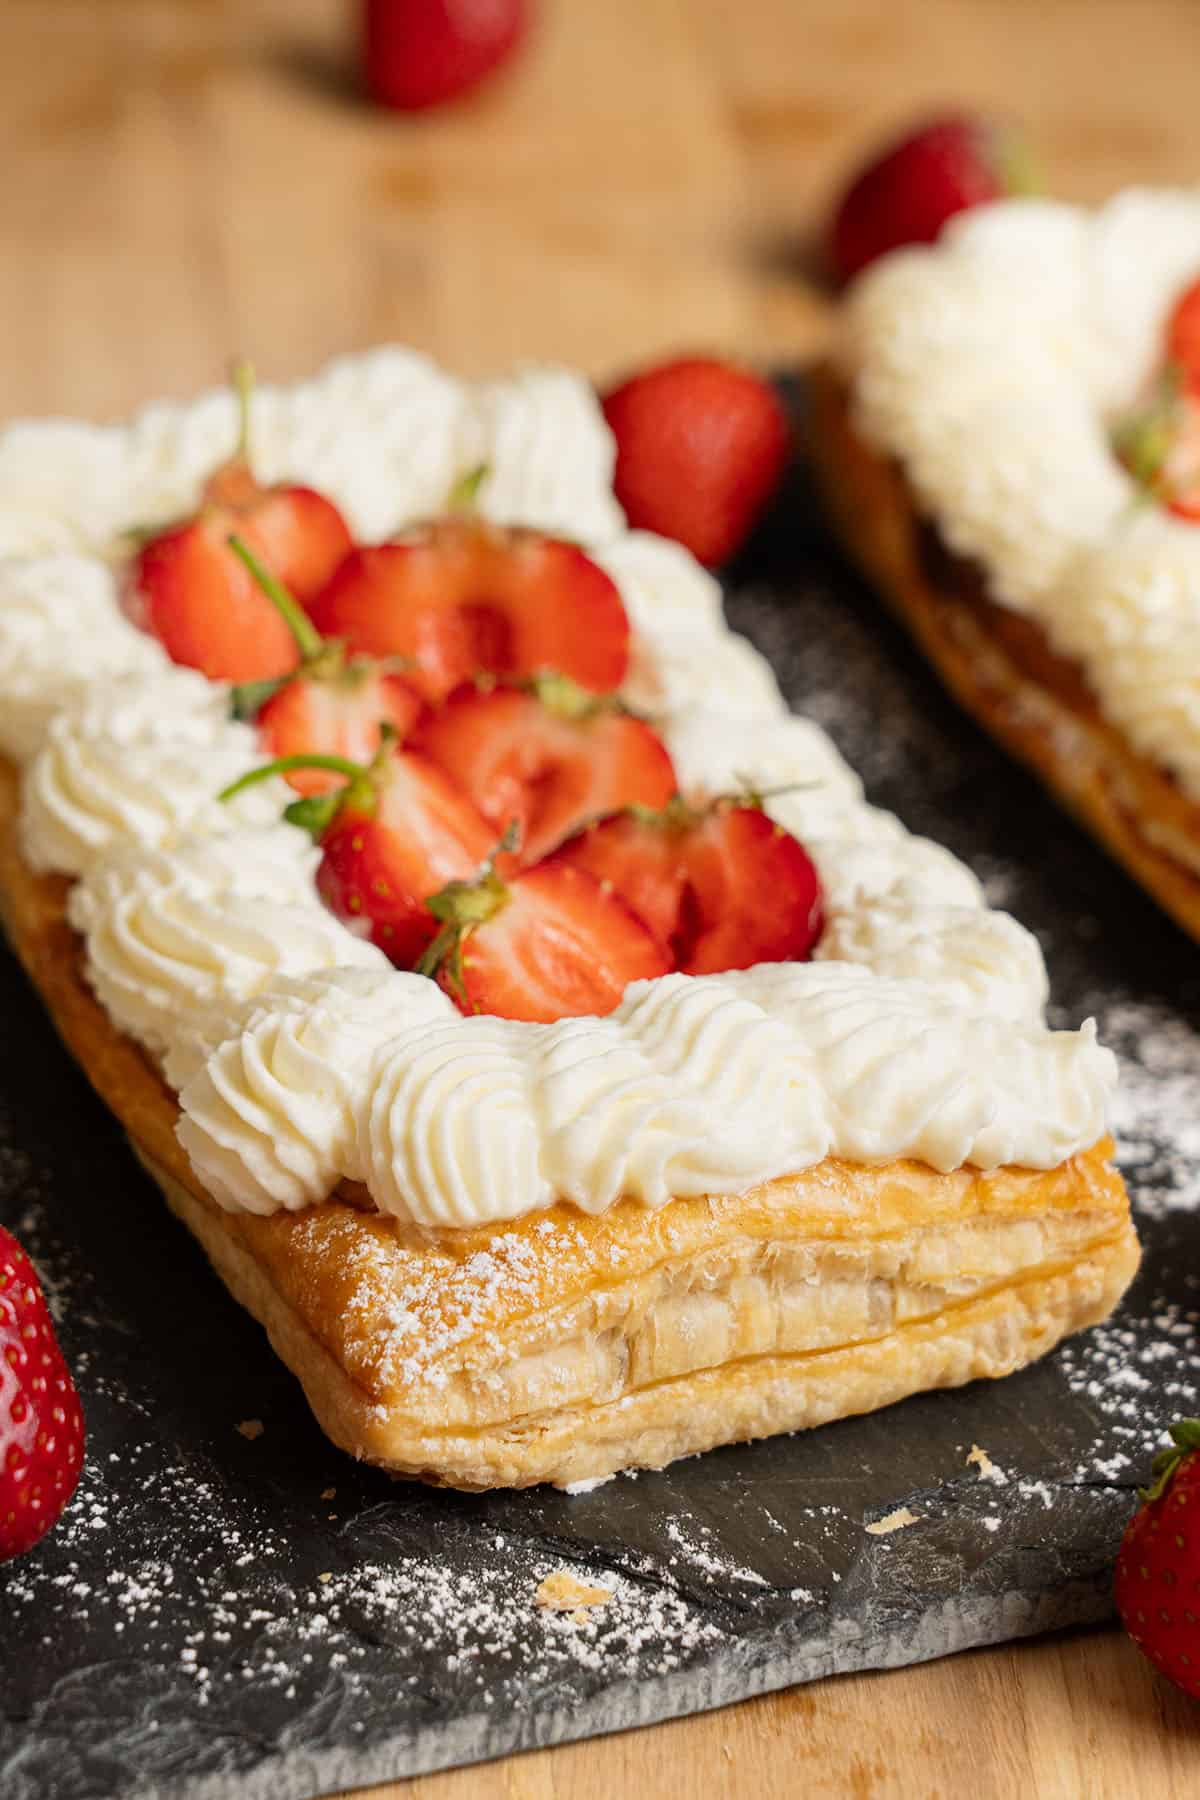
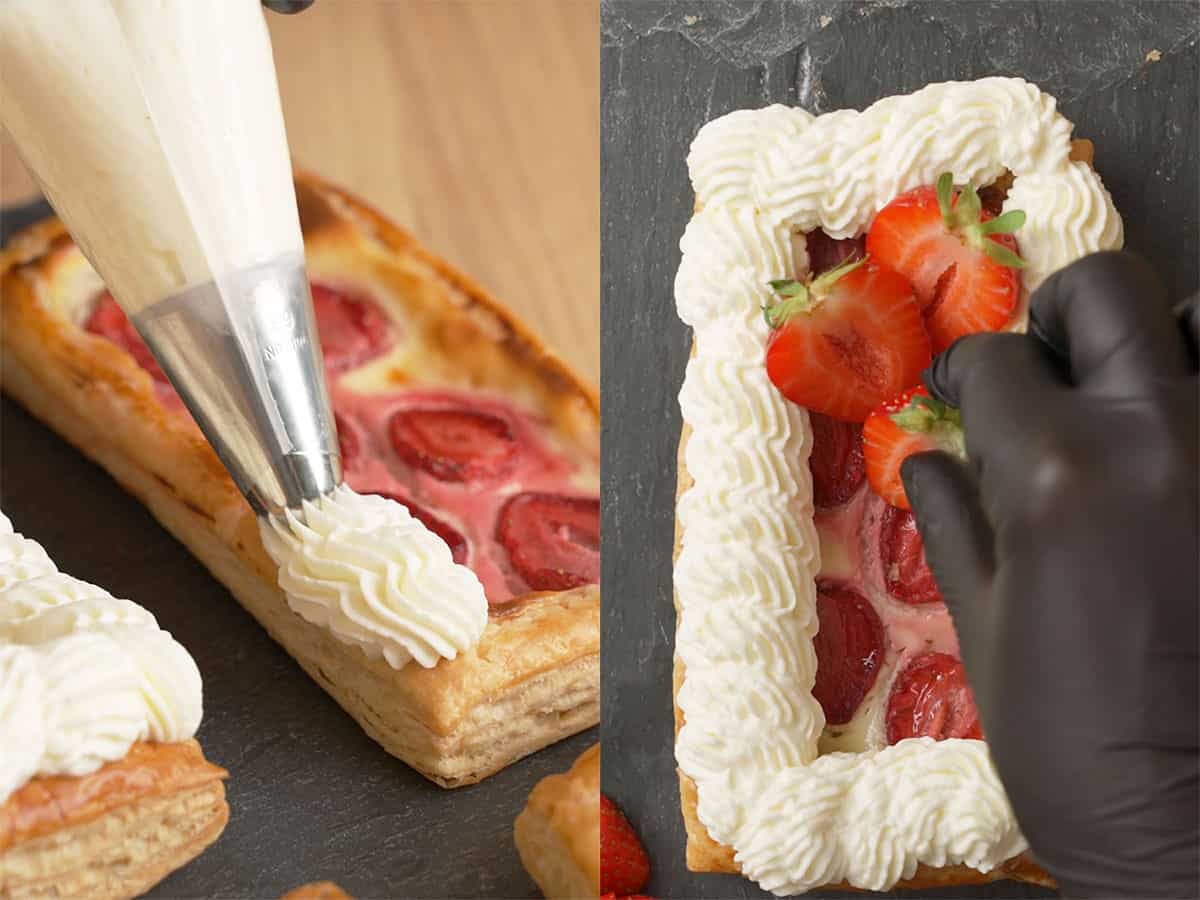
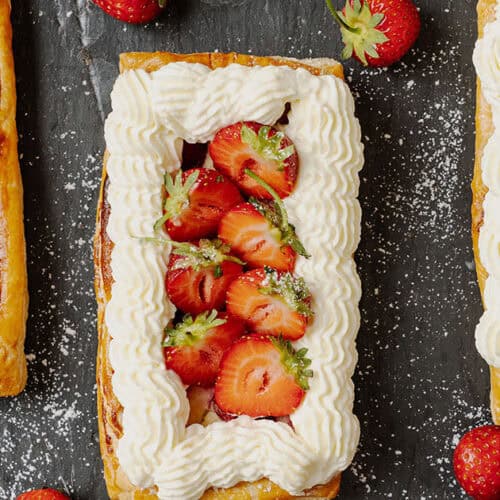
To turn these into a real showstopper, whip up a quick batch of my cream cheese frosting without butter: just cream cheese, heavy cream, and powdered sugar. Pipe a decorative border around the edge of each baked and cooled tart. Fill the center with fresh strawberries and serve immediately.
It takes a simple brunch bake and turns it into something that looks genuinely bakery-worthy with very little extra effort.
Ingredient substitutes
The filling relies on full-fat cream cheese, and this is the one ingredient I would not swap. Low-fat, light, or whipped cream cheese contains more water and less fat, which makes the filling runny during baking and can cause it to seep into the pastry.
The egg yolk in the filling is important for structure and richness. If you need an egg-free version, the filling can be made without it, but the set will be slightly looser. For a full egg substitution guide, see my egg substitute for baking post.
To make these gluten-free, use a good-quality gluten-free puff pastry, which is increasingly available in most supermarkets.
For a fully vegan version, use a dairy-free cream cheese and a plant-based puff pastry (many store-bought puff pastries are already dairy-free, but check the label). Substitute the egg wash with plant-based milk brushed over the pastry border.
Expert tips
1. Work as quickly as you can once the pastry comes out of the fridge. As soon as the butter in the dough starts to soften, it becomes sticky and difficult to handle. If at any point the pastry feels warm, put it back in the fridge or freezer for 5 minutes before continuing.
2. Use room temperature cream cheese and egg yolk for the filling. Cold cream cheese will not whisk into a smooth mixture. However, keep the filling itself in the fridge after mixing, so it goes onto the cold pastry and helps maintain the overall chill right through to the oven.
3. Do not overfill, as this would cause the filling to bubble over the edges, prevent the border from rising properly, and make the bottom of the pastry wet before it has a chance to bake through. If you want more filling, apply it as decoration instead.
4. Check the bottom before you decide the tarts are done. The top can look golden and finished, while the bottom remains pale. Lift one tart gently with a spatula and check that the base is a deep golden brown all the way through.
Equipment notes
A digital scale is essential for baking. A digital oven thermometer also ensures you bake your cake at the right temperature.
Using an electric hand mixer to mix the ingredients and a rubber spatula to fold and scrape the bowl are two of my top picks.
More puff pastry recipes
If you enjoyed this recipe, here are some other puff pastry bakes worth exploring:
- Nutella Puff Pastry Twists
- Apple Roses with Puff Pastry
- Puff Pastry Apple Turnovers
- Puff Pastry Cinnamon Twists
- Chocolate Puff Pastry
Have you tried this recipe?
Please leave a 5-star ⭐️⭐️⭐️⭐️⭐️ rating on the recipe card and consider leaving a comment as well!
Cream Cheese Puff Pastry Danish
Ingredients
Cream cheese puff pastry Danish
- 2 packs Puff pastry store-bought or 2 portions of my homemade rough puff pastry
- 226 g (1 cup) Cream cheese full fat, eg. Philadephia at room temperature
- 50 g (¼ cup) Granulated sugar
- 1 Egg yolk
- 1 teaspoon Vanilla extract
- 1 Egg for the egg wash
- Splash of milk for the egg wash
- Strawberries, raspberries, blueberries or any other berries
Optional: decoration
- 226 g (1 cup) Cream cheese full fat, eg. Philadephia, use it cold
- 226 g (1 cup) Heavy cream 36% fat, use it cold
- 60 g Powdered sugar
- Strawberries, raspberries, blueberries or any other berries
US customary cup measurement is an indicative figure only. Measure the ingredients with a digital scale by weight (gram). Baking is art but also science which requires precision and accuracy.
Instructions
- If using frozen puff pastry, thaw in the refrigerator until pliable but still cold.
- Wash and dry the berries. Slice strawberries and raspberries lengthwise. Pat all fruit dry.
- Whisk the softened cream cheese, sugar, egg yolk, and vanilla extract together until fully smooth. Keep refrigerated until needed.
- Cut each puff pastry sheet into 6 equal rectangles. Using a sharp knife, lightly score a border about 1.5 cm / ½ inch from each edge. Do not cut all the way through. Return to the fridge while you prepare the egg wash.
- Whisk the egg with a splash of milk. Brush the egg wash over the pastry border only, avoiding the filling and fruit.
- Spread the cream cheese filling inside the scored border of each rectangle. Arrange the fruit on top.
- Continue with the other puff pastry sheet until you get 12 tarts. Bake 6 at once.
- Chill the assembled tarts while preheating the oven to 200°C / 390°F (no fan).
- Bake at 200°C / 390°F (no fan) for 40 to 45 minutes. Halfway through, check the pastry and cover loosely with foil if it is browning too quickly.
- Before removing from the oven, check that the bottom is deep golden brown. Cool on the tray for 3 minutes, then transfer to a wire rack.
- Optional decoration: Once baked and cooled, pipe a border of cream cheese frosting around the edge, fill the center with fresh strawberries, and serve immediately.
- StorageBest served fresh on the day of baking. Leftovers can be stored in an airtight container in the refrigerator for 2 to 3 days. Reheat in the oven at 160°C / 320°F for 8 to 10 minutes to restore crispness. Do not microwave. To freeze (without decoration), cool completely, layer between sheets of parchment paper, and freeze for up to 2 months. Thaw in the refrigerator and reheat in the oven.
Notes
- Use full-fat cream cheese only. Low-fat versions contain too much water, and the filling will run during baking.
- Pat the berries completely dry before placing them on the pastry to avoid excess moisture.
- Use pure vanilla extract, not imitation.
- Keep the pastry as cold as possible throughout. If it warms up and becomes sticky at any point, return it to the fridge or freezer for a few minutes before continuing.
- Do not overfill, or the filling will leak, and the pastry won't bake properly.
- Check the bottom of the pastry before removing from the oven. It should be deep golden brown throughout, not pale or doughy.
- The oven must be fully preheated before the tarts go in. Use a digital oven thermometer if you have one, as most home ovens run hotter or cooler than the dial indicates.
Dena
If I am using your puff pastry recipe, will it still make 12 or do I need to adjust how many I am making?
Katalin Nagy
It should be enough but depends on thin you roll it (should be very thin as it will puff up).
MLW
I made these for a brunch with friends and they were great. I used raspberries on some, cherries on some, and apricot jam on some. They were all devoured. Easy addition to breakfast or brunch.
Amanda Tucker
I used the egg whites instead of a extra egg when I egg brushed ot so I didn't waste it! I halfed the recipe as I only had 1 fridge puff pastry! looks amazing hope it's good!
Marvina
May I just make a cream cheese Danish? Not fond of fruit on my desserts.
Katalin Nagy
Yes, fruit is optional.
Yer
Do you still bake the pastry for 40 mins if they are store bought? Is it to ensure the cream cheese egg mix cooks thoroughly?
Thank you , I look forward to trying this recipe.
Katalin Nagy
You need to bake up until the bottom of the pastry is golden brown. It can easily get underbaked due to the cream cheese mixture - if not checked the bottom.
Vicki
Thank you