
Once you try this incredibly quick, easy, and super flaky homemade mini pie crust shell, you will never want to buy that sad-looking supermarket store-bought dough! The crust bakes golden and perfectly crisp, the kind you can fill with a silky pastry cream one day and a savory quiche filling the next.
This pie crust uses a simple butter dough and an upside-down muffin-tin method that guarantees even walls, no slumping, and a beautiful golden finish. The recipe works perfectly for tartlets, mini pies, and mini quiche!
This mini pie crust recipe has been on the blog since 2022. So many readers have made it since then (with brilliant results), and I haven't changed the recipe, but I've updated the post with helpful baking tips based on your questions and have included more filling options.
Read what others said about this mini pie crust recipe

"My new favorite pie dough recipe! Perfect pie crust every time, and it's so quick and easy. Will never make pie crust any other way." Stella
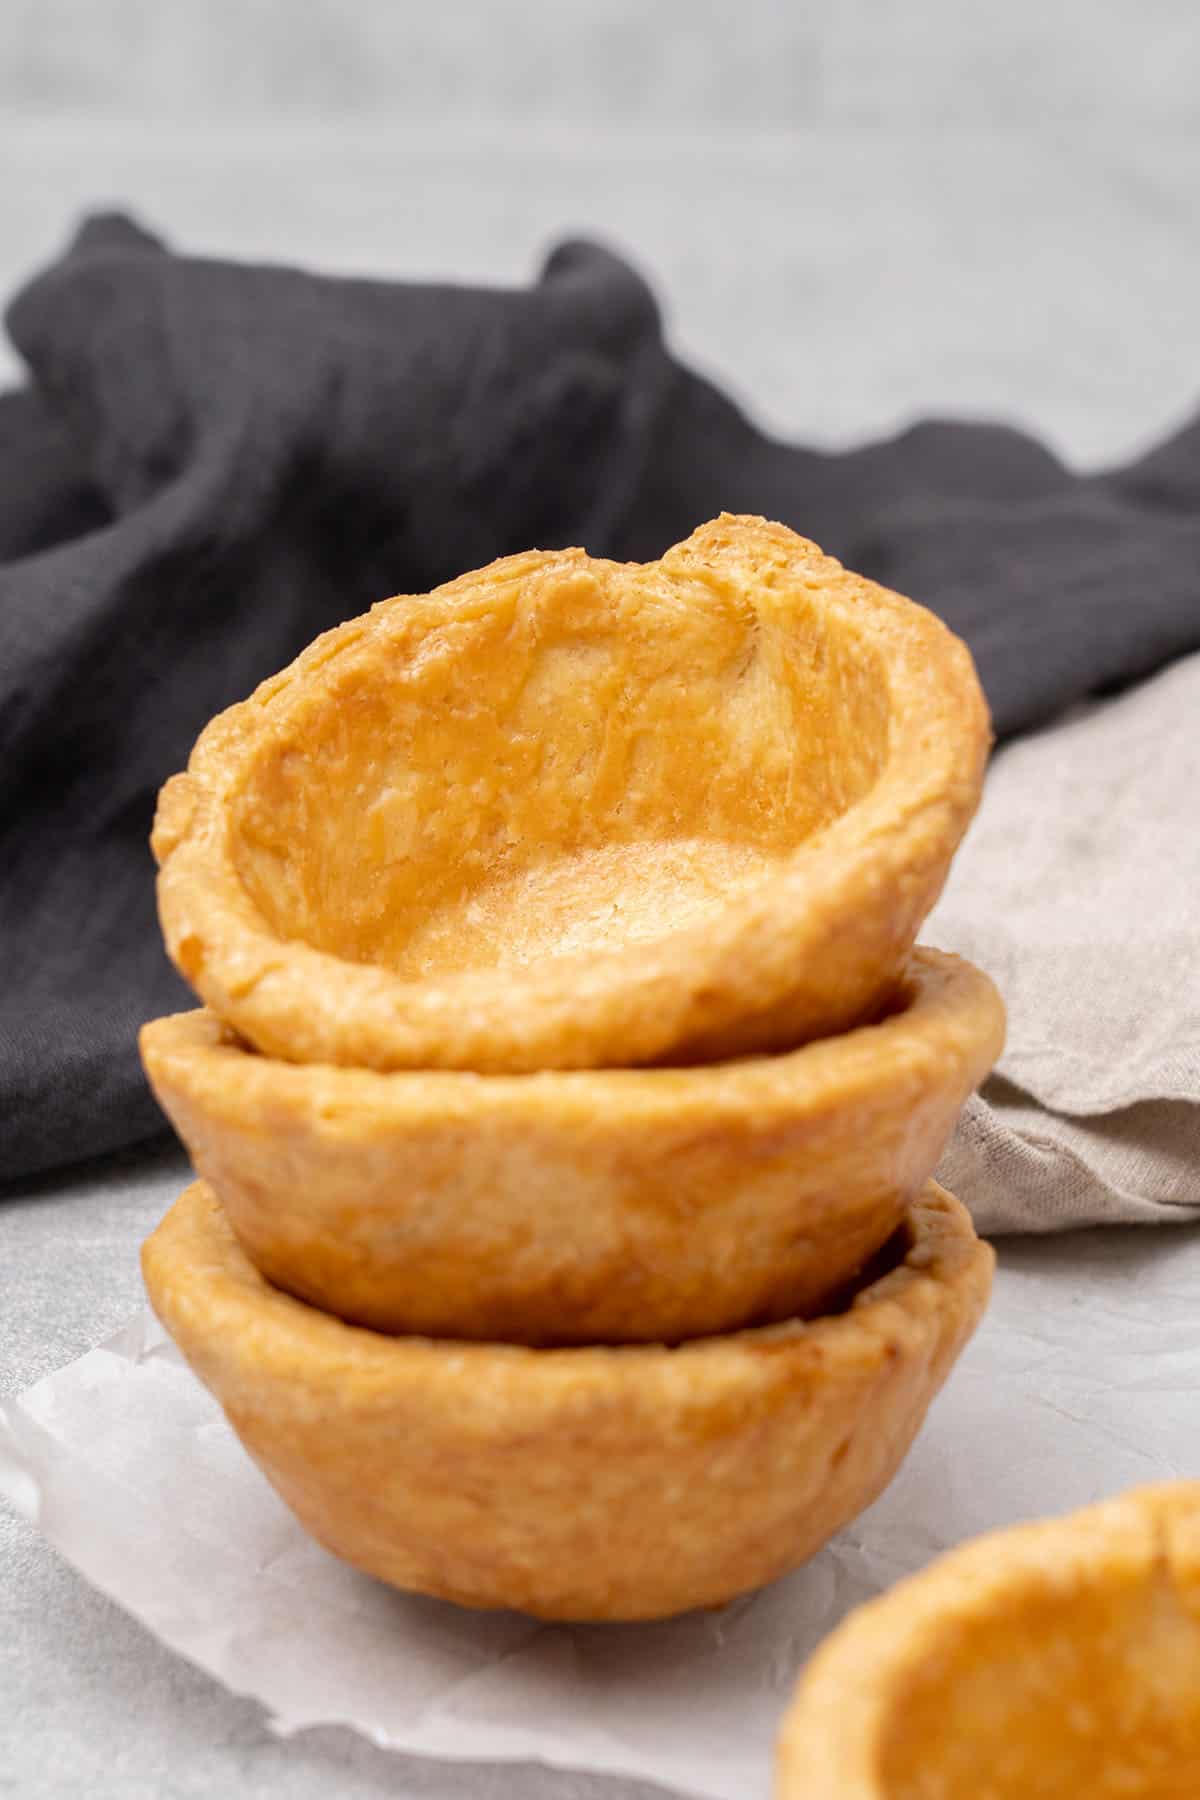
Best Mini Pie Crust Recipe
There are a few ways to make mini pie shells, and most of them end in frustration: crusts that shrink down the sides of the muffin tin, thick, uneven bottoms, or shells that stick and break when you try to remove them. The upside-down muffin tin method solves all of this at once.
What makes this recipe different comes down to a few things.
The dough itself: high-fat butter (82%), a precise water-to-flour ratio, and hands only (no food processor), which gives you control over gluten development and the fat distribution that creates flakiness.
The dough needs to rest in the fridge for at least two hours before you roll it. This is not optional. Rolling dough that has not rested will spring back as you work it and shrink more in the oven. Resting gives the gluten time to relax so the dough stays where you put it.
The circle size formula: I give you the exact calculation to cut circles that fit your tin perfectly, so you don't have to guess.
Another key step is freezing the shaped shells for at least 15 minutes before they go into the oven. Cold butter in a hot oven creates those distinct flaky layers. If the butter softens during handling, the shells will be more tender than flaky and more prone to shrinking.
If you want to go deeper into flaky pastry technique, my flaky pie crust post covers lamination and butter distribution in detail. The same principles apply here in a smaller format.
Katalin's key take on the upside down baking method
The reason most mini pie shells fail is simple: gravity works against you when you press dough inside a muffin cavity. The dough wants to slide down the sides. It pulls away from the walls during baking. The result is a thick, dense bottom with thin, uneven sides, or worse, a shell that has shrunk into an unusable little disk.
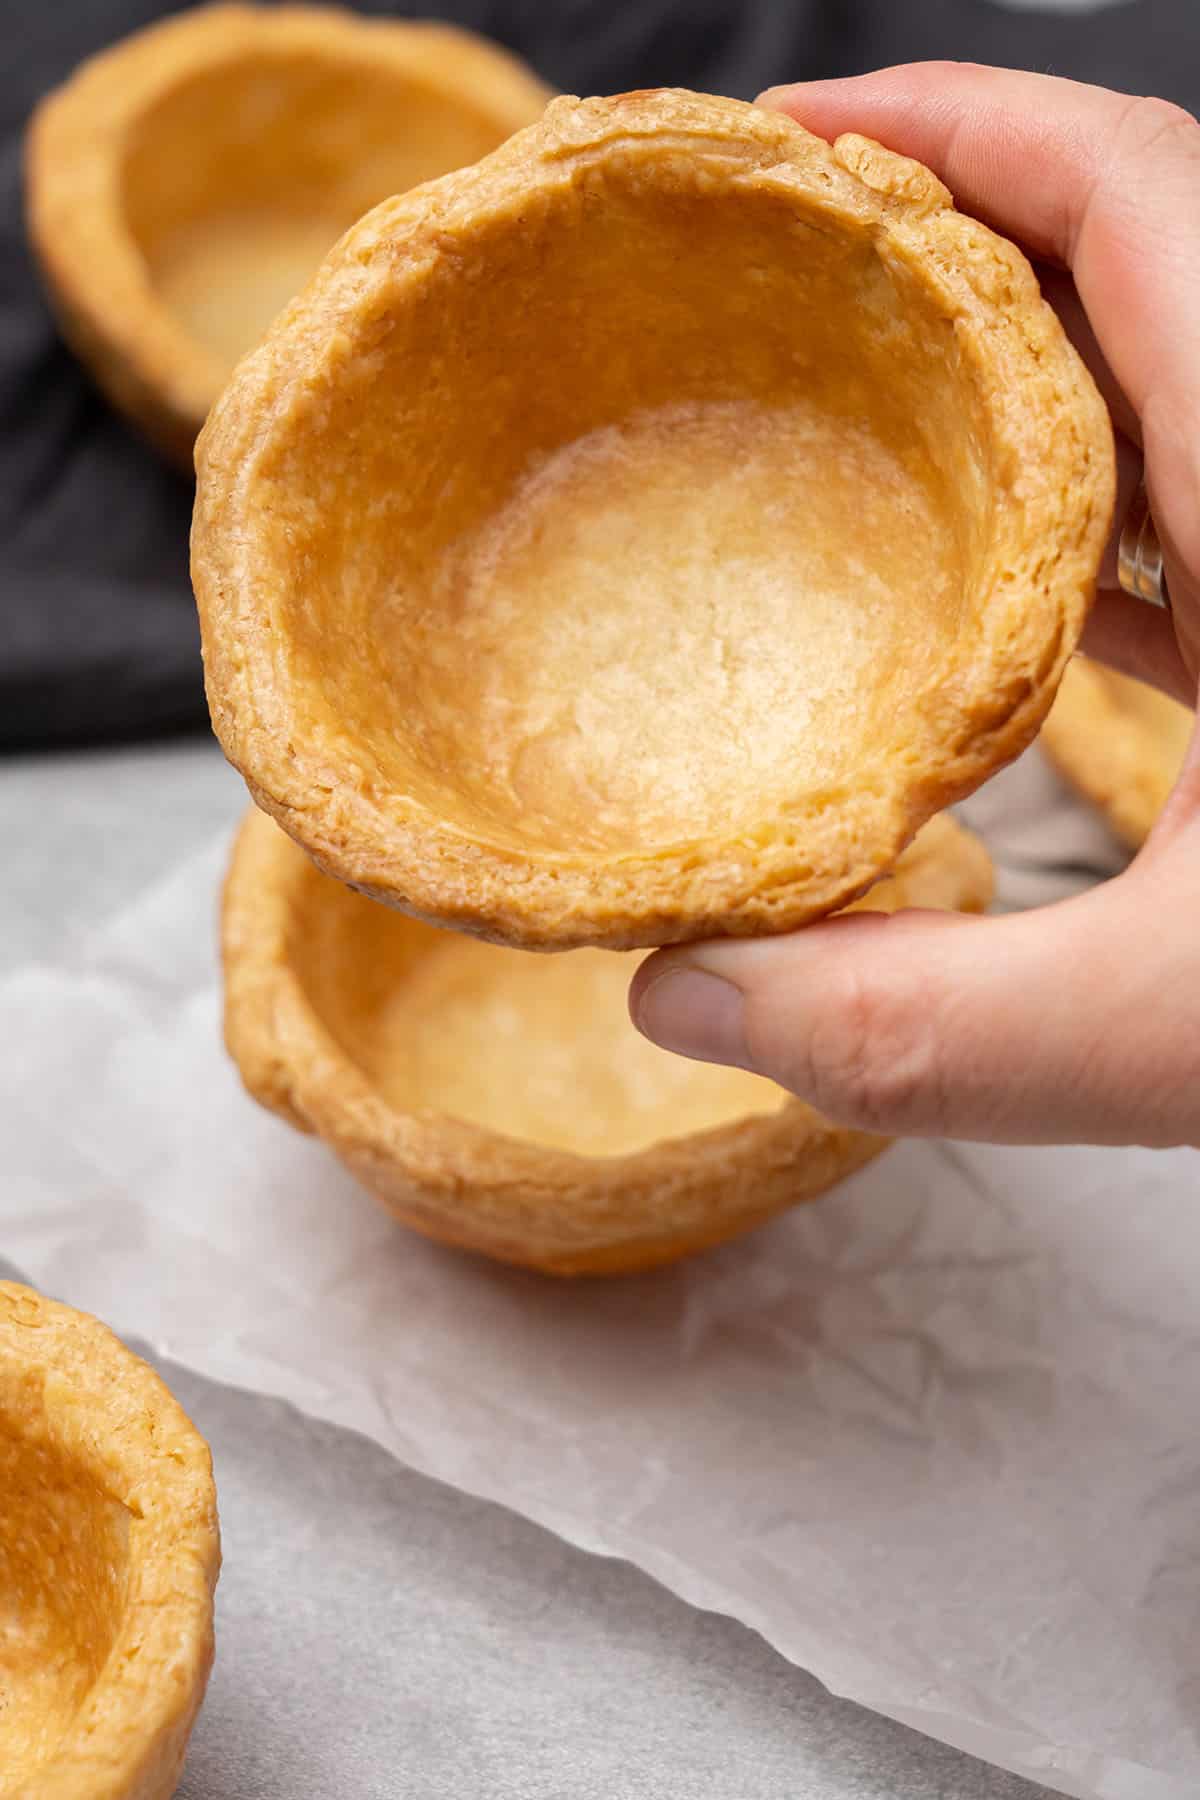
Draping the dough over the outside of an inverted muffin tin is the fix, and honestly, it is the easiest way to make mini pie crusts. Gravity now works for you. The dough drapes naturally over the curved surface, stays put during baking, and gives you even walls every time. There is no blind bake, no pie weights, no rice, no beans. The oven does the work.
Make the Pie Dough
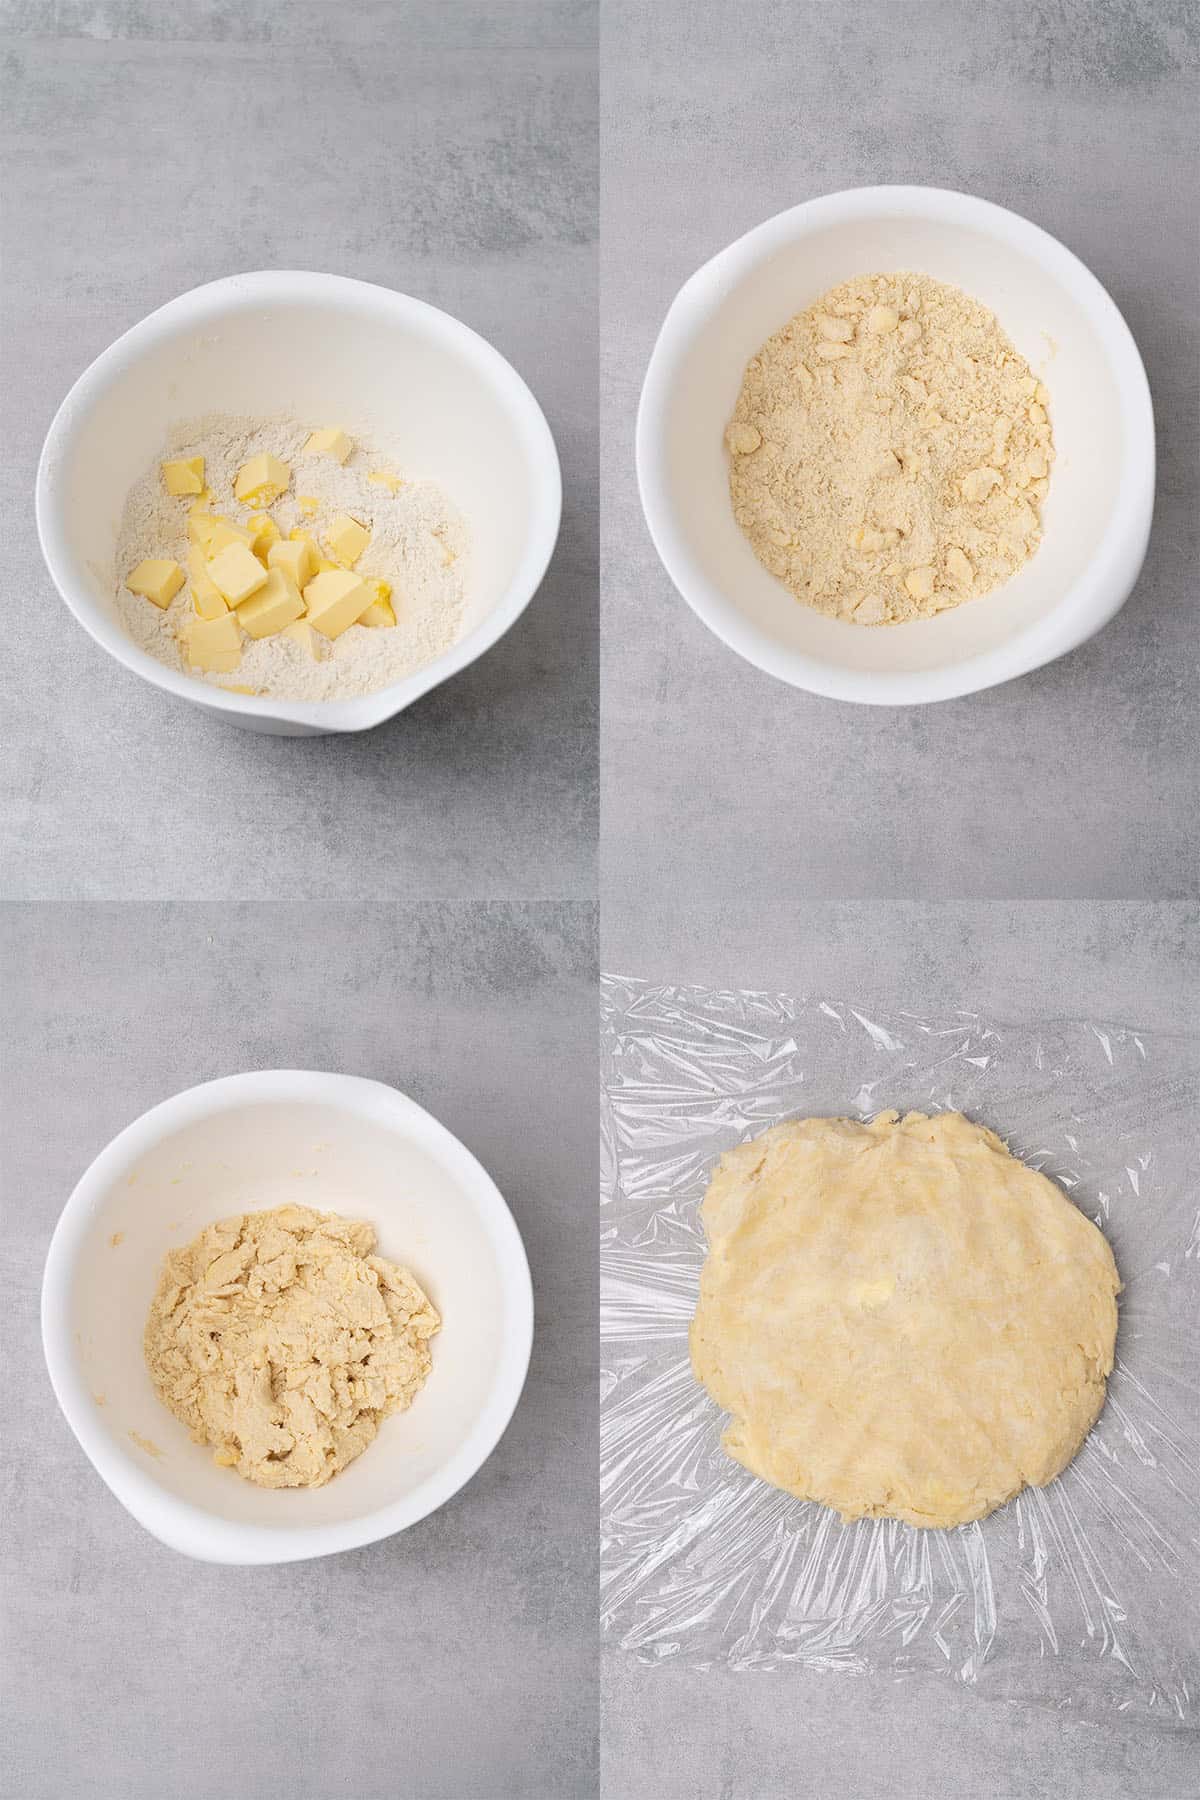
Start by chilling everything. Mix the all purpose flour and salt in a large bowl, then freeze the bowl for 5 to 10 minutes. At the same time, cut the cold butter into small chunks and freeze it for 5 to 10 minutes. Everything must be cold before you start making the pie dough.
Then, add the butter to the flour and rub the mixture between your fingers until it has a coarse, sandy texture with some irregular butter pieces still visible throughout. Do not fully incorporate the butter into the flour. Those butter pieces are what create the flaky layers, so stop before it becomes uniform.
Add the ice-cold water a small amount at a time, stirring with a spatula or wooden spoon after each addition. Once the water is in, gently work the dough with your hands. It will look crumbly at first but should come together within a minute or two. Stop as soon as it holds together. Do not knead it, and do not use a mixer.
Form the dough into a flat disc, wrap tightly in plastic wrap, and refrigerate for at least 2 hours. This rest is not optional. It gives the gluten time to relax and the butter time to firm back up, both of which make the dough easier to roll and less likely to shrink.
How to Size and Cut Your Circles
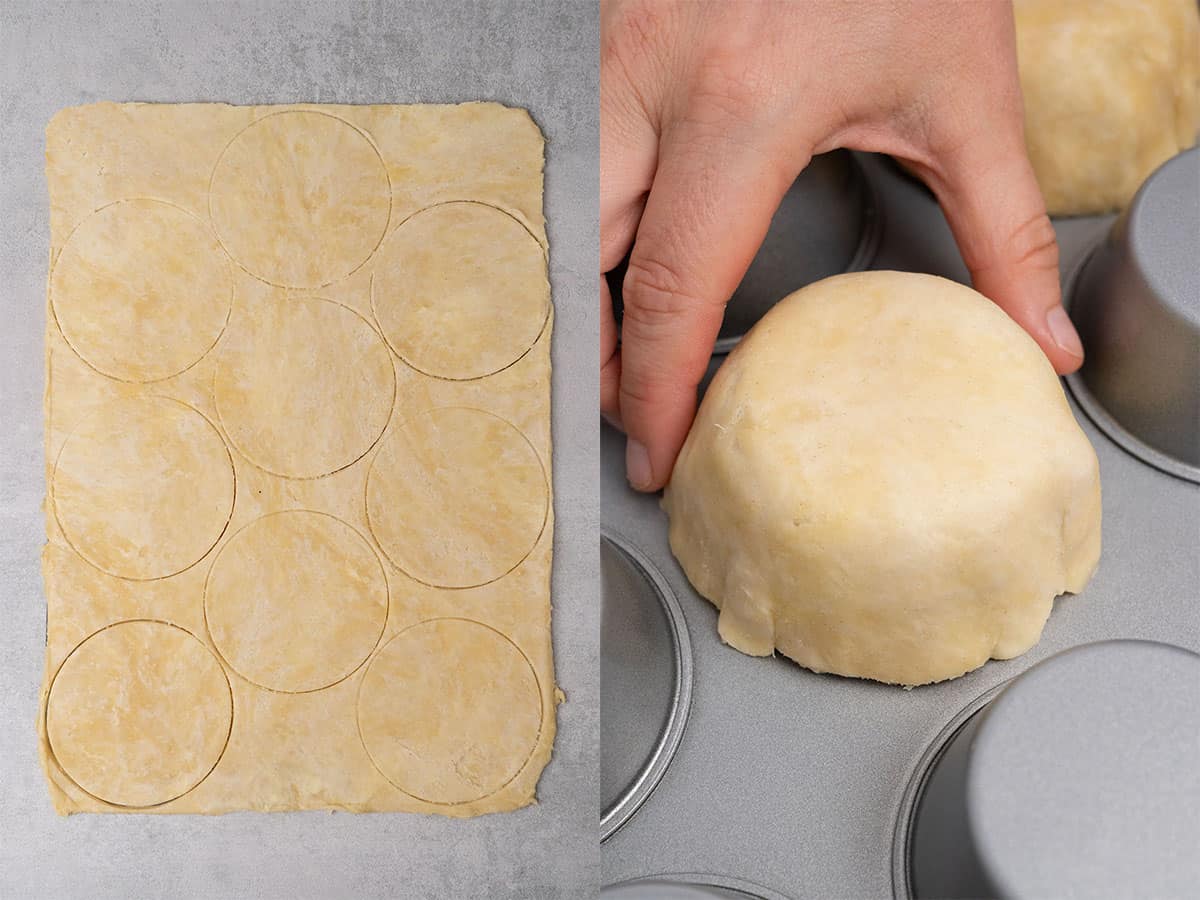
Measure your muffin tin. The circle you cut needs to cover the bottom of the cavity plus both sides. The formula is: circle diameter = 2 × side height + 1 × bottom diameter.
For a standard 12-cup muffin tin (also called a cupcake pan), this typically works out to around 4 inches (11 cm). Use a round cookie cutter or a glass of that diameter. If you don't have the right size, a circle traced on parchment and cut out with a knife works fine.
After resting, take the dough out of the fridge and let it rest on the counter for a few minutes, until it's pliable enough to roll without cracking. It should still feel cold. Roll it out on or between two silicone baking mats (or a lightly floured surface) into a rectangle of approximately 16x12 inches (42x30 cm). If the dough starts to stick or warm up at any point, put it back in the fridge for a few minutes before continuing.
Cut circles and gently re-roll scraps to cut more. This recipe makes approximately 12 shells.
Bake the Mini Pie Crusts
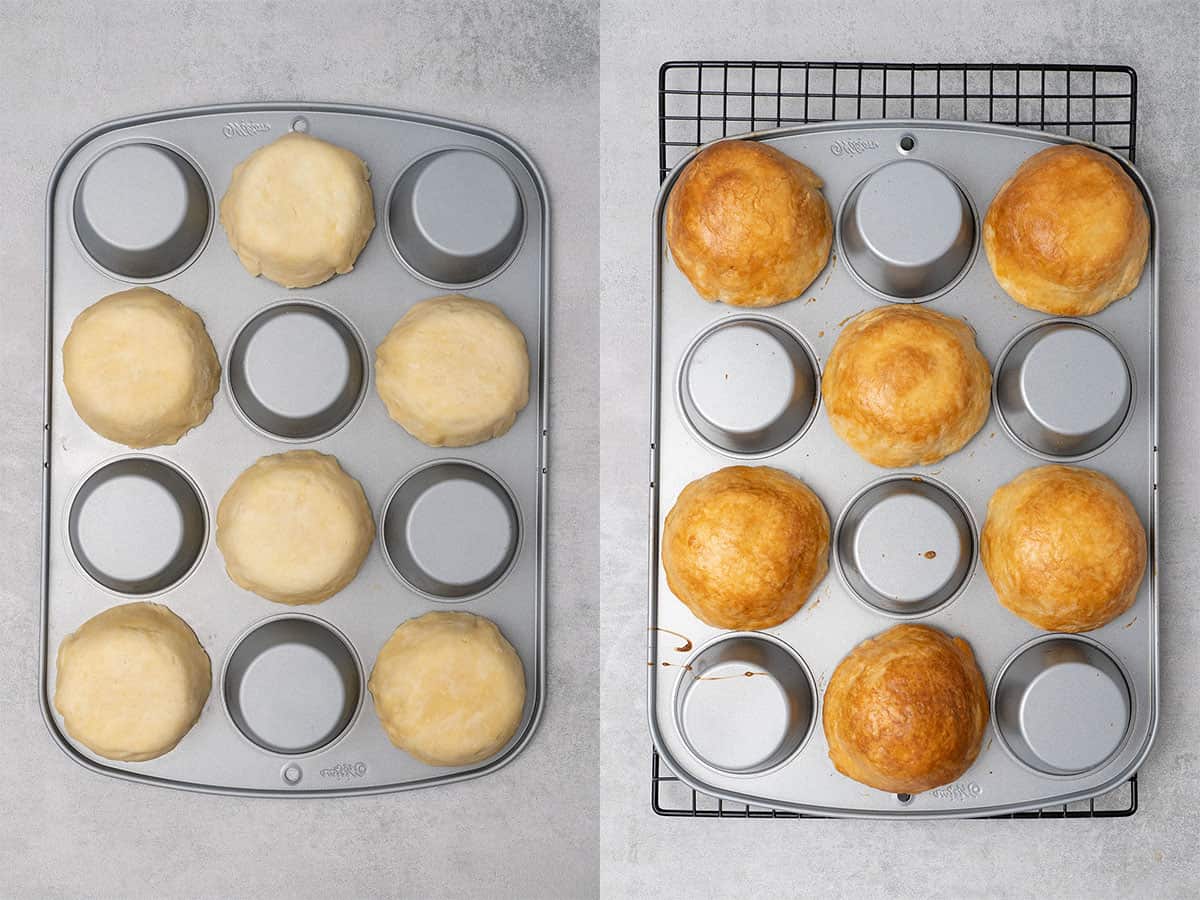
Invert your muffin tin so the bottoms face up. Use every other cavity on the inverted muffin tin, not every one. This gives the shells space and prevents them from touching and fusing together during baking. No need to pierce your dough with a fork.
Place the shaped shells in the freezer for 15 minutes. While they freeze, preheat your oven to 390°F (200°C).
Set the inverted tin on a baking sheet and bake for 20 minutes at 390°F (200°C). The shells will bake through but stay pale at this stage.
Then remove the tin from the oven, carefully lift each shell off with a small offset spatula or butter knife, and place them right side up on a sheet of parchment paper.
Brush each shell generously with egg wash. Use a pastry brush to apply the egg wash evenly. This helps fully and evenly coat the mini crusts. For a full guide on egg wash technique, see my egg wash guide.
Return them to the oven on the parchment-lined baking sheet (not on the tin) for another 5 minutes again at 390°F (200°C) until deep golden and shiny.
Let the shells cool completely on a wire rack before filling.
How to Use Mini Pie Crust Shells
For most cream and fruit-based fillings like pastry cream, whipped cream, and curd, the shells go in fully baked, and the filling goes in cold. That is the standard approach, and most of the recipes below use it.
Pastry cream the most classic filling. Pipe it in and top with fresh fruit. Another classic is Chantilly cream.
Mini Strawberry Pies: strawberries and cream in an individual shell.
Blueberry Cream Pie: pastry cream under a layer of fresh blueberries. You can use my full pie recipe and scale it down to individual servings.
Banana Cream Pie: pastry cream, sliced banana, and whipped cream.
Butterscotch Pie: rich, deep butterscotch filling for something a bit different.
Can you bake fillings in the mini pie shells?
If you want to bake the filling and the crust together, the entire method is different, not just a timing tweak. This recipe's upside-down technique is designed to pre-bake the shells and fill them later.
If you want to bake the filling inside the crust from the start, like an apple pie or a quiche, bake the crust right-side up in the muffin tin (or in a dedicated mini pie dish), not draped over the outside. The dough goes inside the cavity; you press it in, and the filling bakes with it. For a detailed example of this method in mini format, see how I make my Hokkaido tarts.
Expert tips
- All the ingredients must be cold when making the pie dough. If the butter begins to melt or the dough starts to soften, put it in the fridge or freezer immediately so it can firm back up.
- For the most buttery rich flavor use European-style unsalted butter with 82% fat content.
- Never knead the dough or use a mixer. Always combine the butter and flour with your fingers to keep large butter chunks and create a flaky texture.
- How much water you will need can vary. This is why you only want to add a little bit at a time and stop adding it once the dough comes together.
- Resting the pie dough in the fridge is not optional. It's a mandatory step that gives the butter time to firm up and for gluten to develop as well.
- It's important to measure the diameter of your muffin pan holes before using a cookie cutter to cut the dough. Not doing so can result in dough circles that are either too big or too small.
- The mid-bake egg wash gives the shells their glossy, deep golden color. Do not skip it.
Storing and Freezing
Store baked empty shells at room temperature for up to 3 days in an airtight container. Once filled, store in the fridge and consume within the shelf life of the filling used.
To freeze baked shells, let them cool completely and then freeze in a single layer in an airtight container for up to 3 months. Thaw at room temperature for 20 minutes before filling and they will crisp back up perfectly.
You can also freeze unbaked dough circles on a parchment-lined tray, then transfer them to a zip bag. Bake directly from frozen, adding 2 to 3 extra minutes.
Flavor Variations
The base dough is intentionally neutral and works in sweet and savory contexts equally well.
For a sweet pastry, add one or two tablespoons of granulated sugar to the flour before mixing in the butter.
Replace ¼ cup (30g) of flour with finely grated Parmesan if you want to try a cheese pastry.
For an herb pastry, add a teaspoon of dried thyme or rosemary to the flour. Pairs well with creamy savory fillings like spinach and ricotta.
For an almond pastry, replace ⅓ cup (40g) of flour with ground almonds.
Equipment notes
A digital scale is essential, as dough ratios matter and volume measurements for flour are notoriously unreliable.
A digital oven thermometer is worth using, as ovens often run a few degrees off.
A rolling pin gives you even thickness.
Silicone baking mats are the easiest surface to roll the dough on without sticking.
A 12-cup muffin pan is the base of this recipe.
Use a round cookie cutter of the correct diameter (or a glass as a substitute) to cut the circles. A small offset spatula helps lift the baked shells off the inverted tin.
Have You Tried This Recipe?
Please leave a 5-star ⭐️⭐️⭐️⭐️⭐️ rating on the recipe card and consider leaving a comment as well!
Mini Pie Crust
Ingredients
Pie dough
- 375 g (3 cups) All purpose flour
- 270 g (1¼ cups) Unsalted butter 82% fat, use it very cold
- 120 g (½ cups) Water use it very cold
- ¾ teaspoon Salt
US customary cup measurement is an indicative figure only. Measure the ingredients with a digital scale by weight (gram). Baking is art but also science which requires precision and accuracy.
Instructions
- In a large bowl, mix the flour and salt until fully combined, then place in the freezer for 5-10 minutes.
- Cut cold butter into small chunks and freeze for 5-10 minutes.
- Once all ingredients are nicely chilled, add very cold butter chunks into flour and rub the mixture between your fingers until it becomes a sand-like consistency.
- Add very cold water into the dough, a small amount at a time, and stir with a spatula or wooden spoon after each addition.
- Start working the dough by hand. At first, it will look crumbly, but it should come together within a minute or so. No need to knead the dough; stop mixing it as soon as it comes together. Remember: leave in some butter chunks, don't overwork the dough, and don't use a mixer.
- Form a disk, cover it with plastic wrap, and refrigerate for at least 2 hours.
- After 2 hours, take the pie dough disk out of the fridge and let it rest for a few minutes on the kitchen counter. The dough should stay cold but slightly warmed so you can roll it out without breaking it.
- The easiest way is to roll the dough on or between two silicone baking mats. With the help of a rolling pin, roll the dough into a rectangle of 42x30 cm / 16x12 inches. Alternatively, roll the dough on a lightly floured surface.
- Check the size of your muffin pan holes. The dough circle's diameter should match the muffin tin hole size (from the back) as follows: 2x side + 1x bottom; in my case, it was 11 cm / 4 inches.
- Using a cookie cutter, cut circles from the dough to fit your muffin pan holes.
- Flip your muffin tin and slightly press down the dough on every second cavity of the tin.
- Chill the dough again in the freezer for 15 minutes while preheating the oven to 370°F (200 °C).
- Bake the mini pie crust in the following way: 20 minutes on the tin, then remove from the oven, carefully lift each shell off the tin using a small offset spatula and set right-side up on a parchment-lined baking sheet, brush generously with egg wash, and return to the oven for another 5 minutes, until deep golden and shiny.
- Cool completely on a wire rack before filling.
Storage
Unfilled shells: store at room temperature in an airtight container for up to 3 days. Do not refrigerate unfilled shells. Filled shells: refrigerate and consume within the filling's shelf life. Freeze baked empty shells for up to 3 months. Thaw at room temperature 20 minutes before filling.
Notes
- Butter must be cold, not room temperature.
- Water must be ice-cold. Warm water melts the butter into the flour.
- 82% fat butter is the right choice here. Lower-fat butters contain more water and give a tougher result.
- Circle formula: diameter = 2 × side height + 1 × bottom diameter. Measure your tin before cutting.
- Use every other cavity on the inverted tin. This prevents the shells from touching and allows even airflow around each one.
- Freeze the shaped shells for 15 minutes before baking. This resets the butter temperature and minimizes shrinkage.
- Apply egg wash only after the first 20-minute bake, once the shells are off the tin and right-side up. Egg wash applied before baking will drip and burn on the tin surface.
- Do not fill hot or warm shells. Cool completely first.
Stella
My new favorite pie dough recipe!
Perfect pie crust every time, and it's so quick and easy. Will never make pie crust any other way.
Judy Good
I would like to use these to make mini quiches. So I would just follow the directions for making and baking - then fill them with the egg mixture and put them on a baking sheet to re-bake for the quiche filling? Won't the crusts then burn/overbake - or is there a way to prevent this
Katalin Nagy
You might need to cover the side of the crust with aluminium foil for the second bake.
Nancy
Just perfect!