
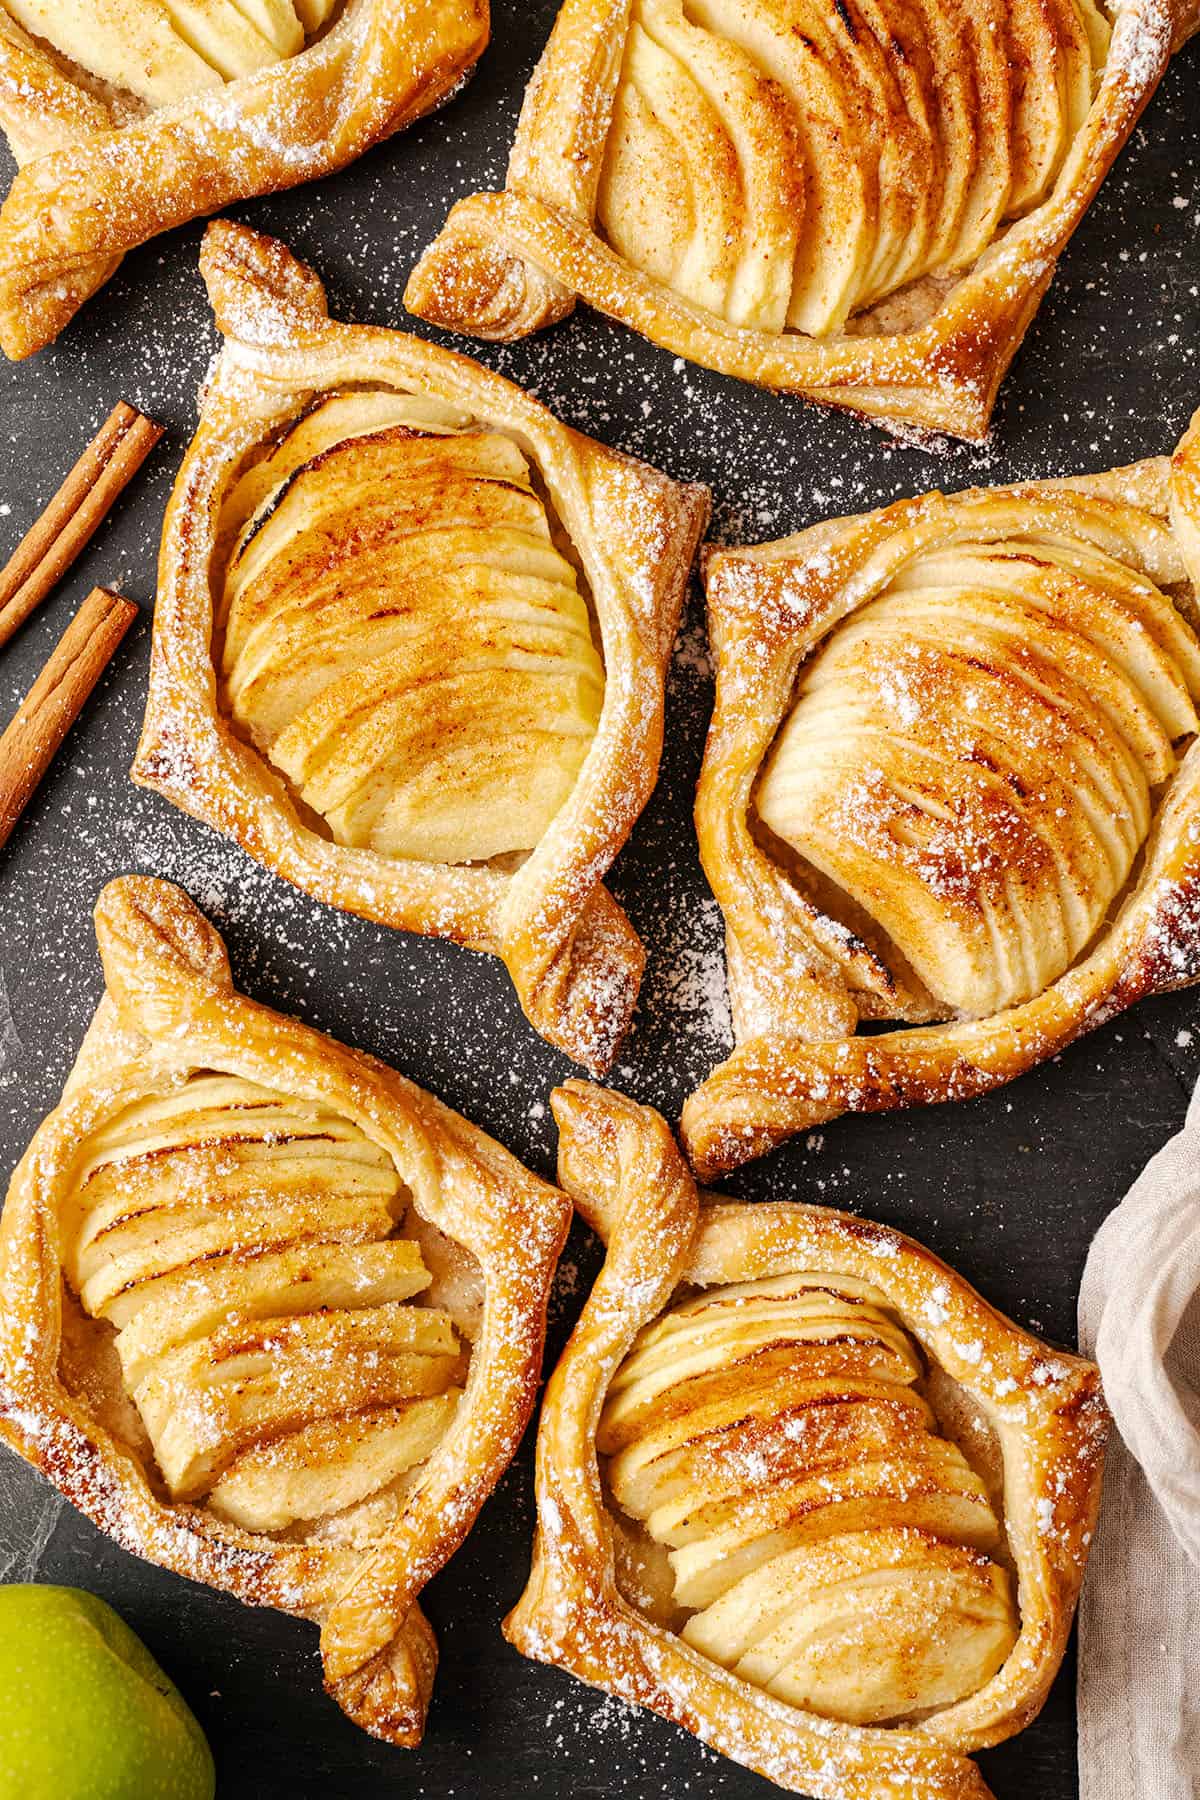
This apple danish is made with individual squares of buttery, flaky rough puff pastry topped with thinly sliced apples and a warm cinnamon sugar finish. The base stays crisp, the apples turn perfectly tender, and each square bakes up looking like it came from a proper bakery. Ideal for a weekend brunch or a cozy autumn breakfast when you want something genuinely impressive without spending the whole morning in the kitchen.
What Is a Danish Pastry?
A traditional danish is made with enriched, yeast-leavened dough that is laminated with butter in a process similar to croissant-making. It is delicious, but it also takes hours. A puff pastry danish uses store-bought or quick homemade rough puff pastry to achieve the same flaky, layered result in a fraction of the time. The texture is crispier and lighter than traditional bready Danish pastry, but the layers, the butter flavor, and the contrast with a warm fruit filling are all there.
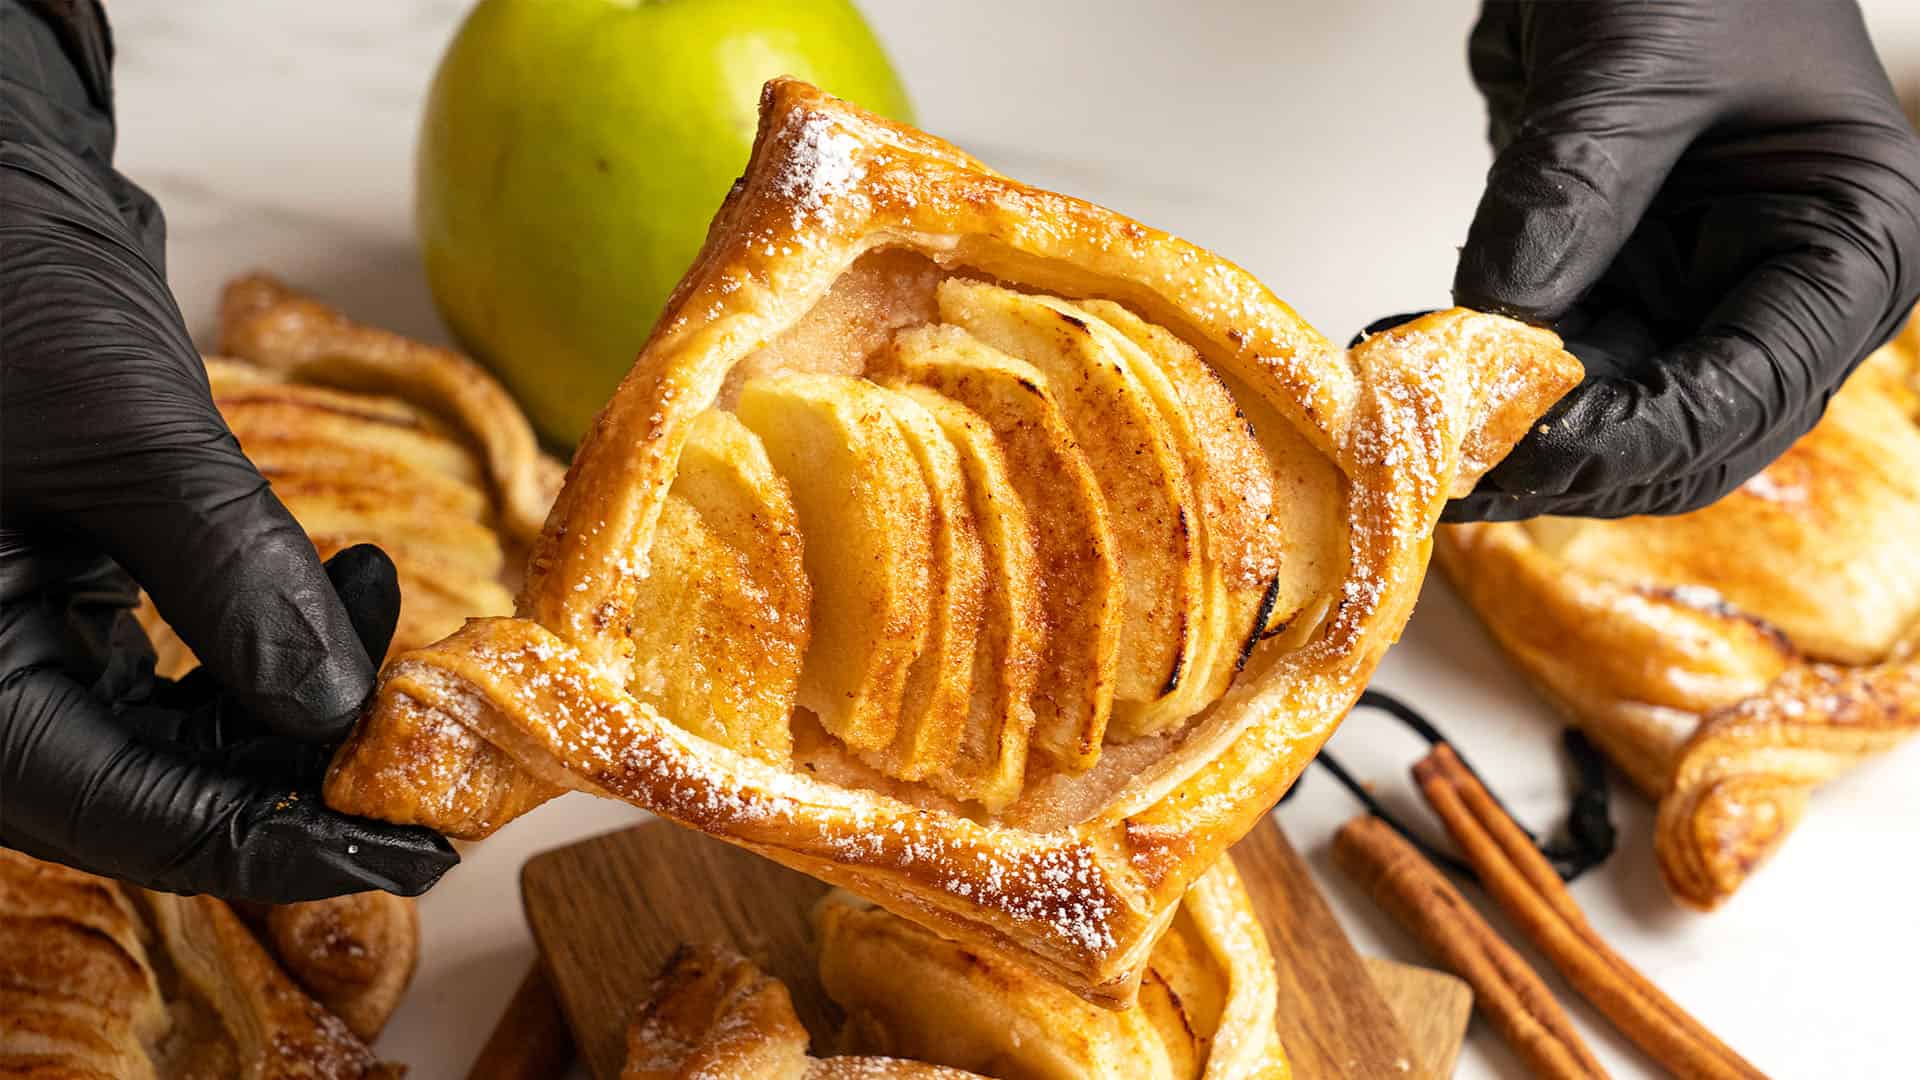
This recipe uses individual square portions that are scored with a border and then shaped by folding the four corners of the outer strip inward before baking. The folded corners create a distinctive raised oval frame around the apple filling, and the whole border puffs up in the oven. It looks impressive, and this shaping takes only a few seconds per square once you have done the first one.
Katalin's Key Take on How to Keep the Base of This Pastry Crisp
There are three things working against a crisp base in a fruit Danish. All three need to be addressed for this recipe to work properly.
The first is temperature. Puff pastry gets its rise from the alternating layers of dough and butter that are built into its structure. In a hot oven, the water in that butter turns to steam and pushes the layers apart; that is where all the height and flakiness comes from. But the pastry needs to be cold when it hits the heat. Refrigerating the shaped squares right up until they go into the oven is not optional.
The second is oven temperature. Preheat properly and use a digital thermometer to check. The steam has to form fast enough to puff the layers before they set.
The third is the apple itself. Raw apples release moisture as they cook, and that liquid will seep into the pastry and soften the base from below before the layers have had a chance to crisp up. A thin layer of almond flour in the center of each square solves this; it's the same technique I use in my apple galette. It draws the moisture up away from the pastry as the apple cooks. So the base stays dry and bakes through completely without needing to pre-cook the fruit.
Ingredient Notes
This recipe is designed for my rough puff pastry, which takes about 30 minutes to make. Homemade puff pastry delivers a noticeably better result than most store-bought versions. That said, a good-quality all-butter store-bought puff pastry works well here. Avoid puff pastry made with vegetable shortening; it lacks the butter flavor that makes these danishes worth making.
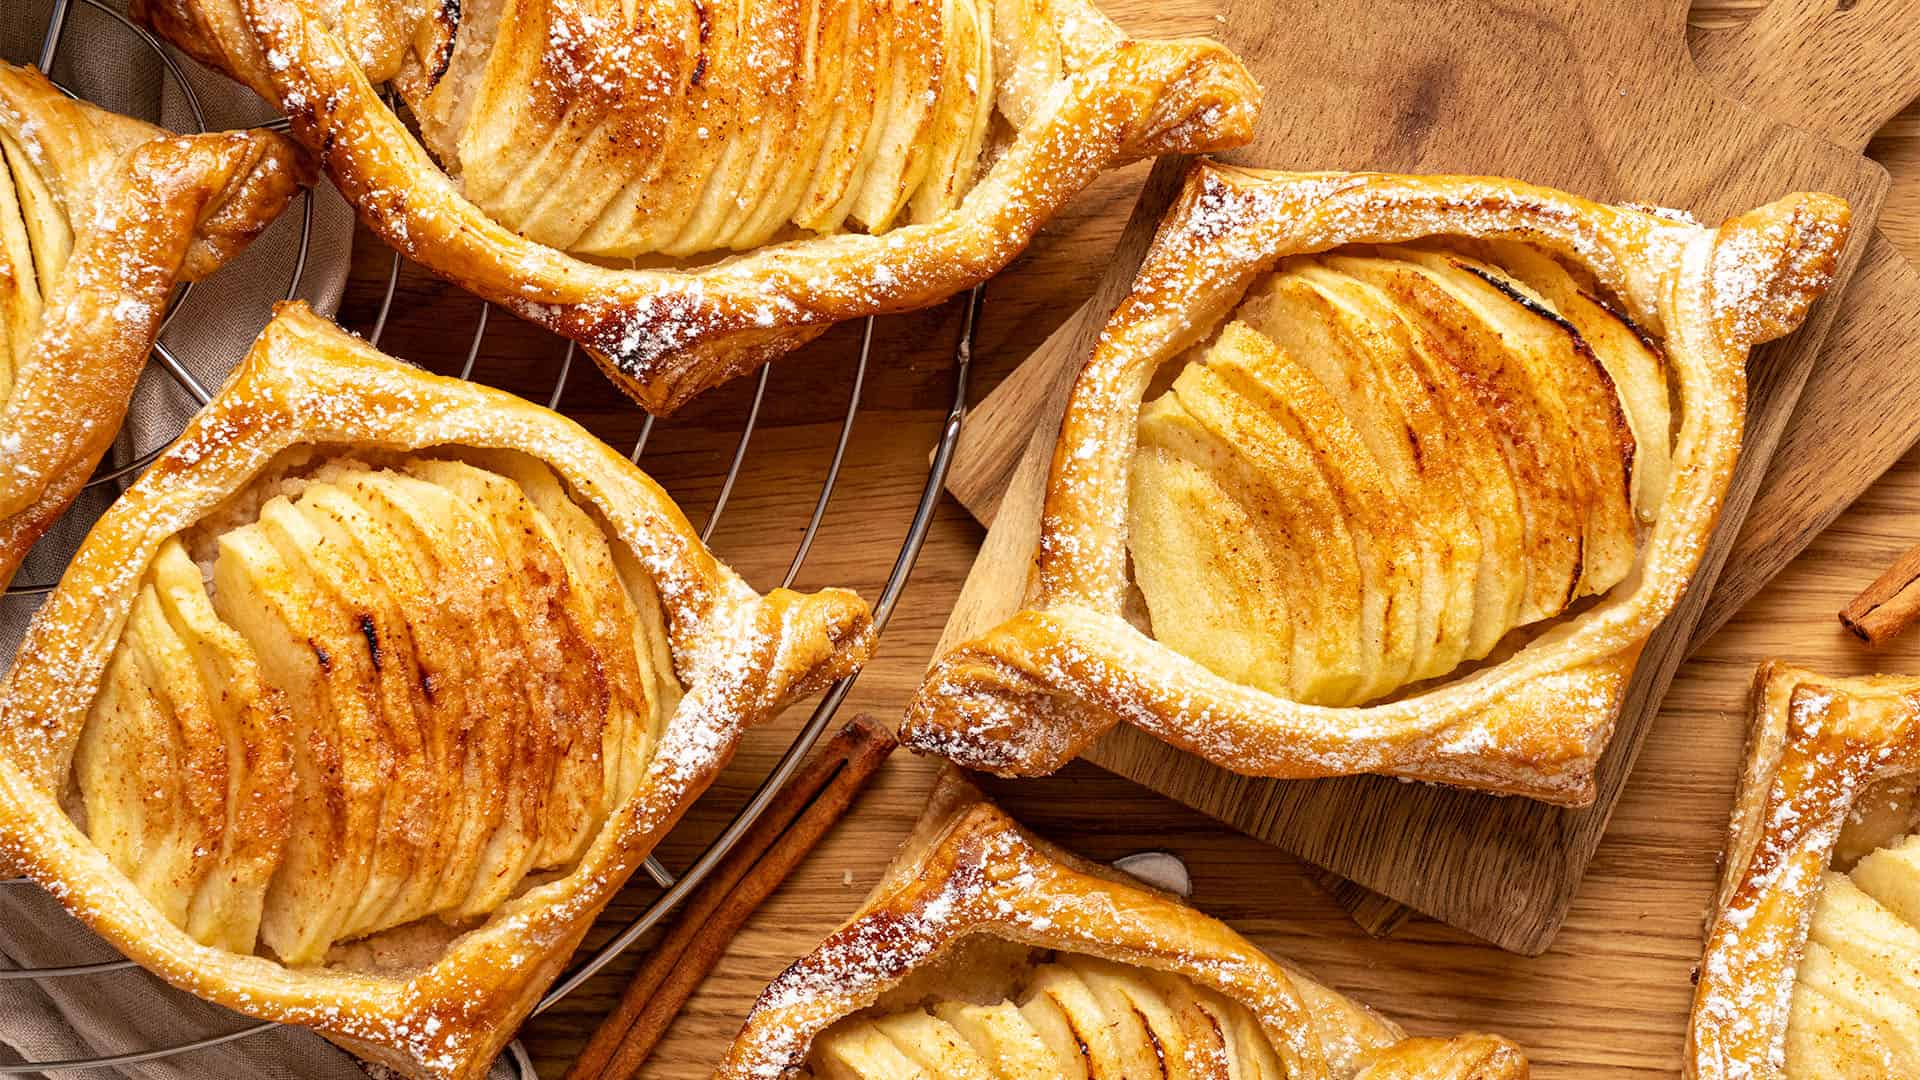
Granny Smith hold their shape when sliced thin and baked. Their low water content and firm texture mean they do not collapse or go mushy in the oven. Their natural tartness also balances the sweetness of the cinnamon sugar without needing any extra adjustments. Braeburn or Pink Lady are the closest alternatives if you cannot find Granny Smith.
A fine-ground almond flour works best here, not almond meal, which is coarser and oilier. Almond flour keeps the base from getting soggy, so don't skip it. If you need to avoid nuts, a light dusting of fine plain breadcrumbs works as an alternative moisture barrier.
The cinnamon sugar ratio used here is 100 g caster sugar to 1 teaspoon of ground cinnamon. You can increase the cinnamon to taste; the ratio is forgiving. Adding a pinch of ground ginger or cardamom alongside the cinnamon gives the filling more depth if you want it.
Prepare Danish pastry squares
Follow my rough puff pastry recipe, which makes enough for eight individual danish squares. Or, if you prefer to use store-bought, just make sure it is fully thawed before you start.
Once the dough is ready (meaning cold but pliable), roll it out on a lightly floured surface into a large rectangle roughly 3 mm (⅛ inch) thick.
Cut into eight equal squares, approximately 15 x 15 cm (6 x 6 inches) each.
Then, transfer the squares to two parchment-lined baking trays, spacing them a few centimeters (about 2 inches) apart to give them room to puff.
Refrigerate the dough while you prepare the filling.
Prepare the Cinnamon Apple Filling
Peel and core the Granny Smith apples, then cut each one in half. Slice each half thinly, around 2 to 3 mm (about ⅛ inch) thick, keeping the slices together so they fan out in the shape of the half apple. As you cut, sprinkle the slices with a little lemon juice to prevent browning. Lemon juice also adds a subtle brightness that balances the sweetness of the cinnamon sugar.
In a small bowl, mix the granulated sugar and cinnamon together until evenly combined.
Assemble the Danish Pastry
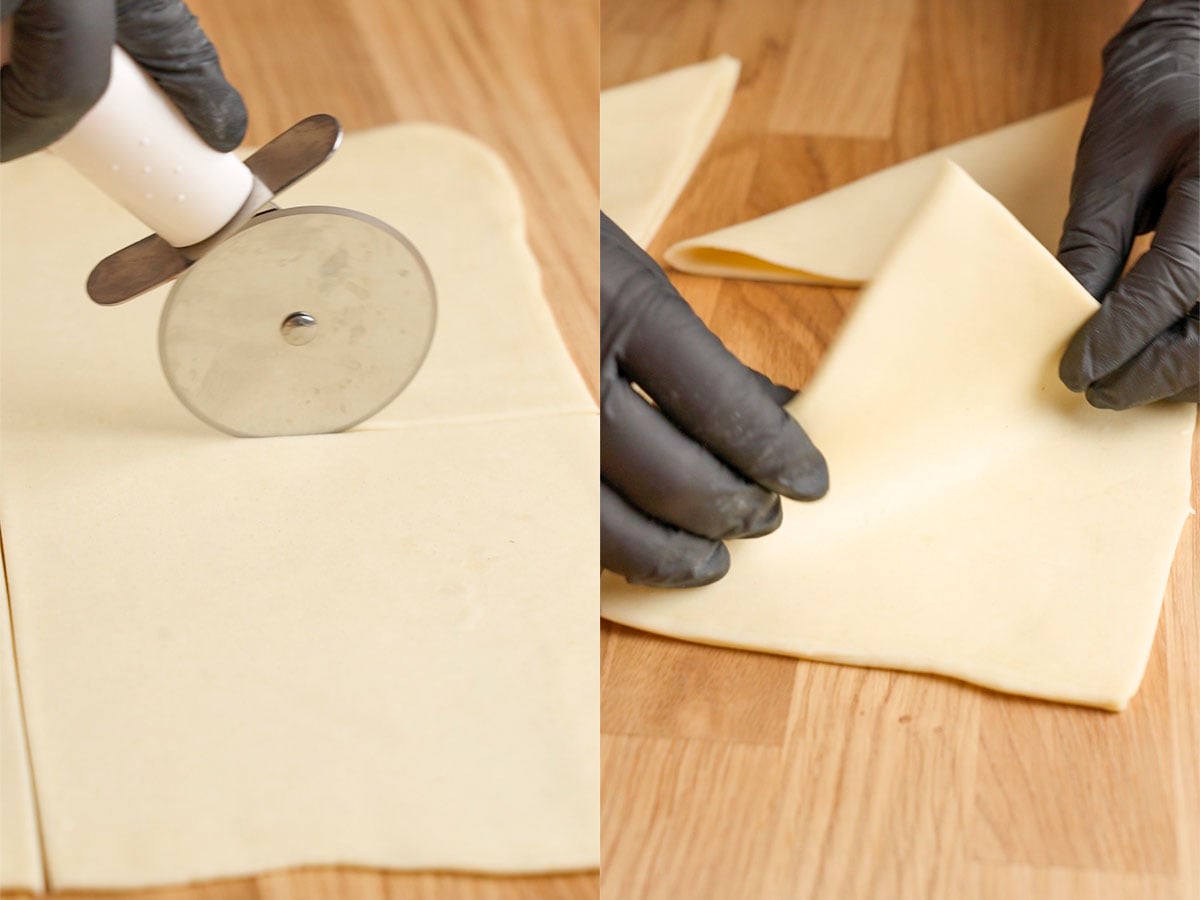
Bear with me, and besides reading the step-by-step instructions, please also check the step-by-step pictures and video. It is honestly easier to actually do this technique than to explain it in writing.
Work with one square at a time, keeping the rest chilled. Fold the square in half diagonally to form a triangle. Using a sharp knife, make a cut parallel to one of the open sides of the triangle, starting at the base ½ inch (1.5 cm) from the corner and stopping about ½ inch (1.5 cm) from the top point, leaving the point intact. Make the same cut on the second open side.
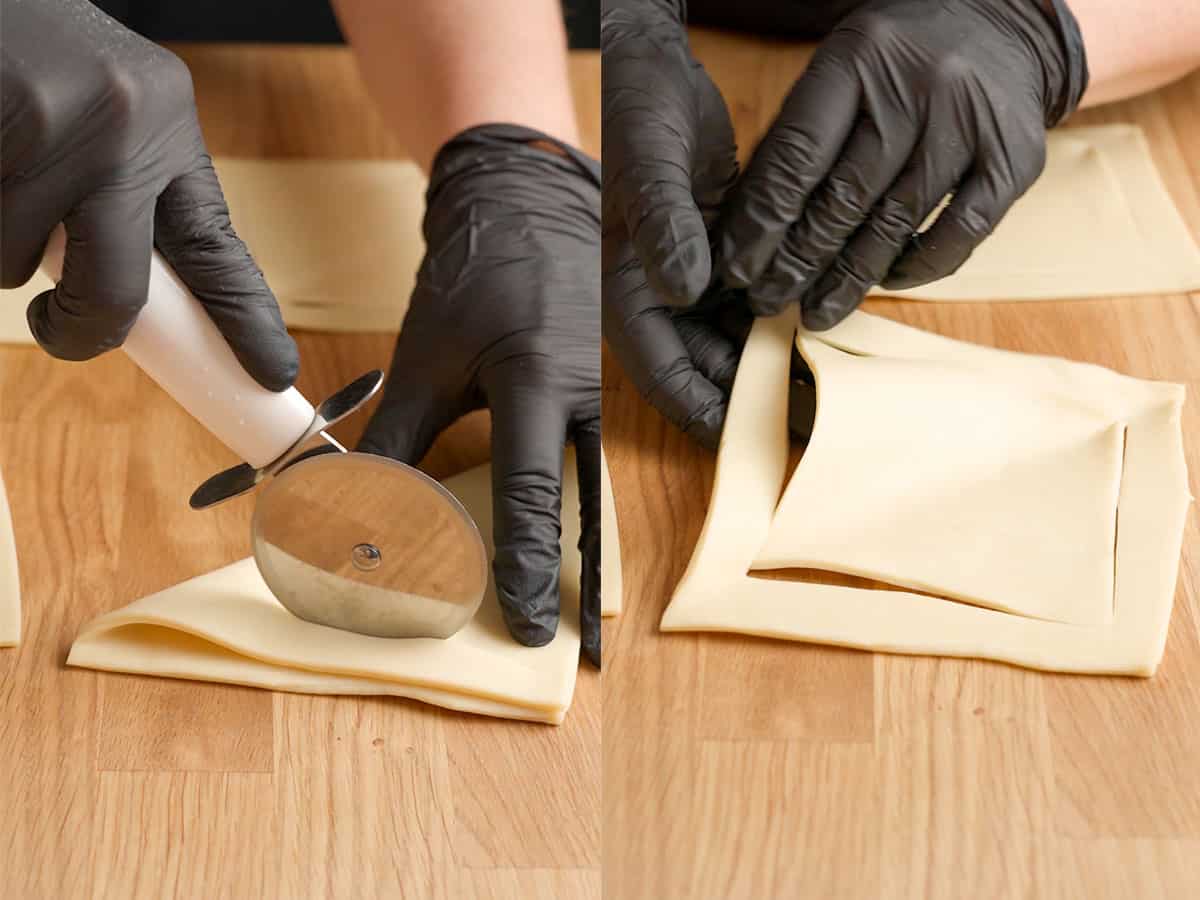
Gently unfold the triangle back into a square. You will now have two parallel cut strips running diagonally across opposing sides, joined at the center.
Sprinkle ½ tablespoon of almond flour evenly across the center of the unfolded square. Arrange one-half apple slices on top of the almond flour, fanning them out so they lie flat in the center.
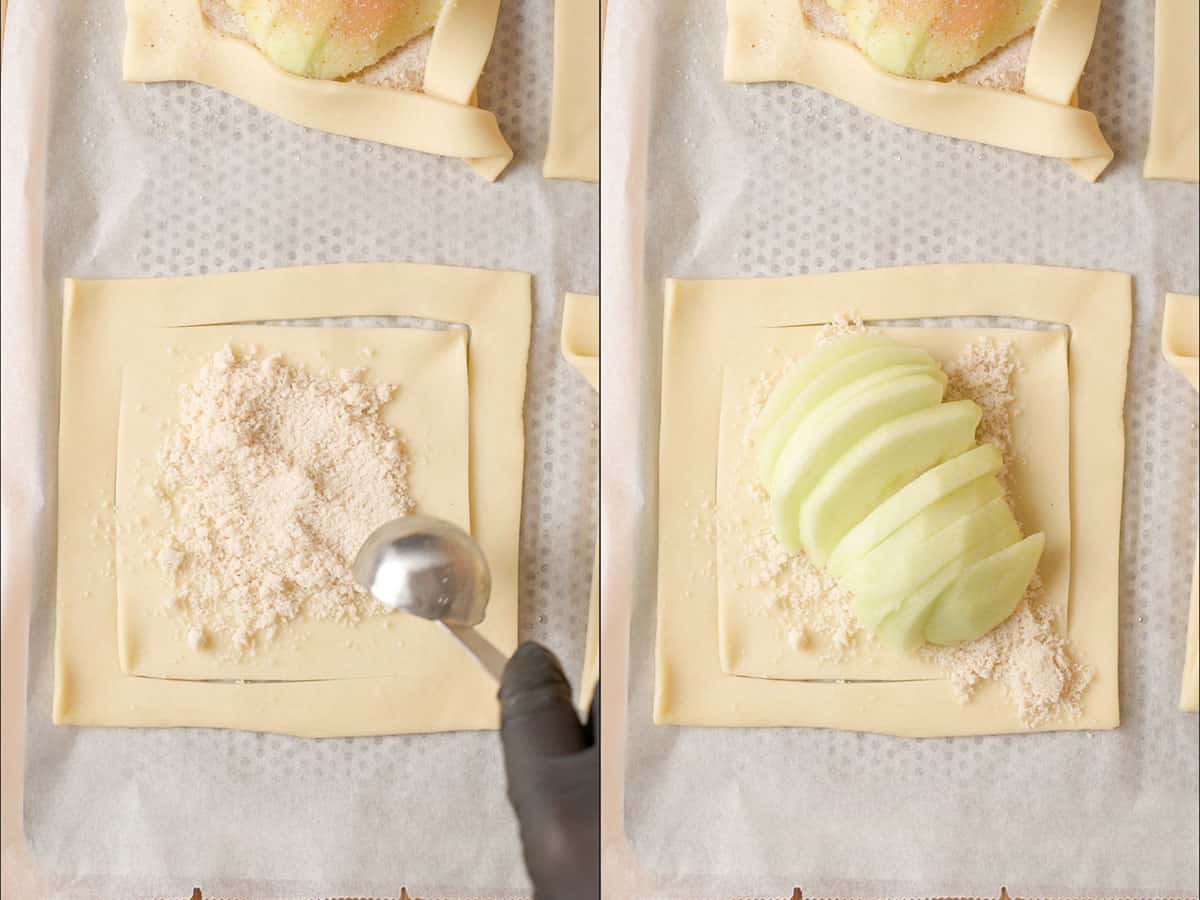
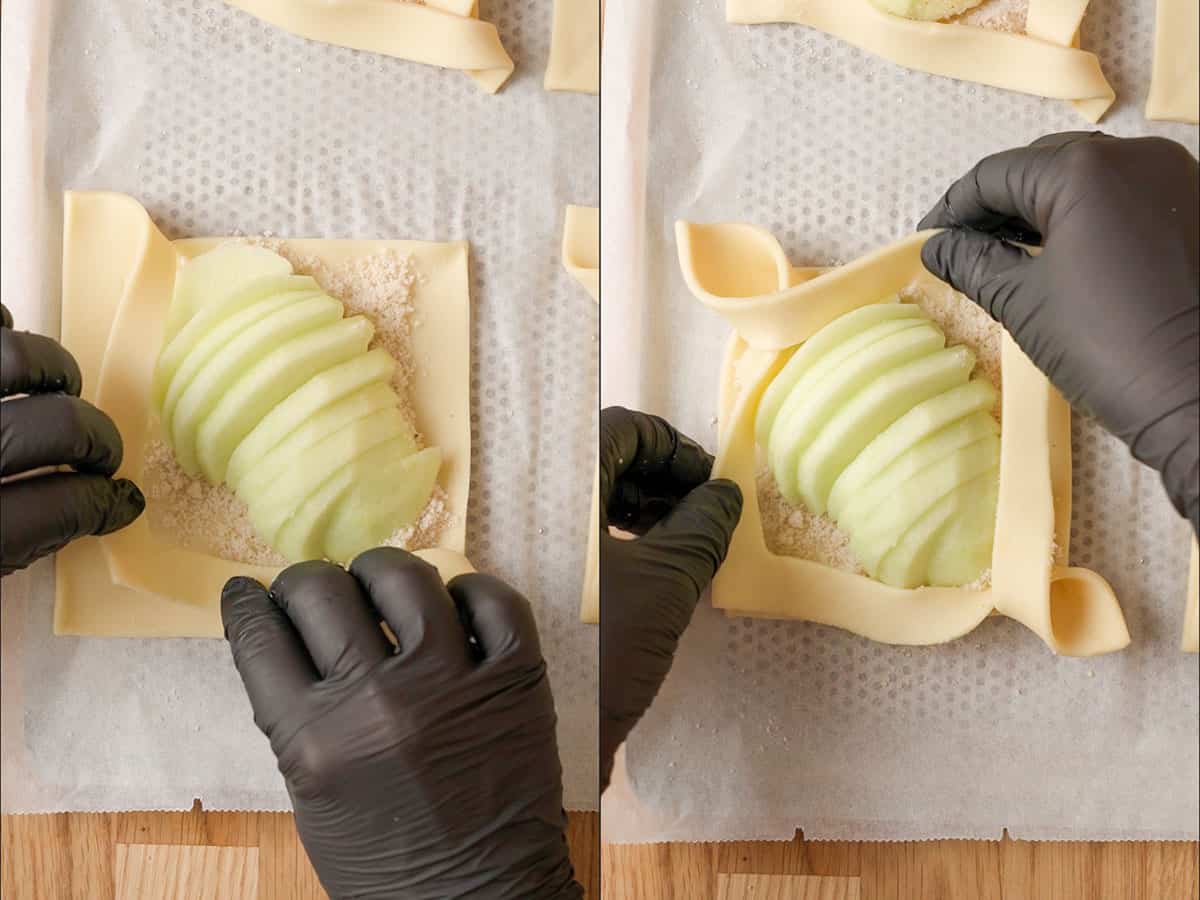
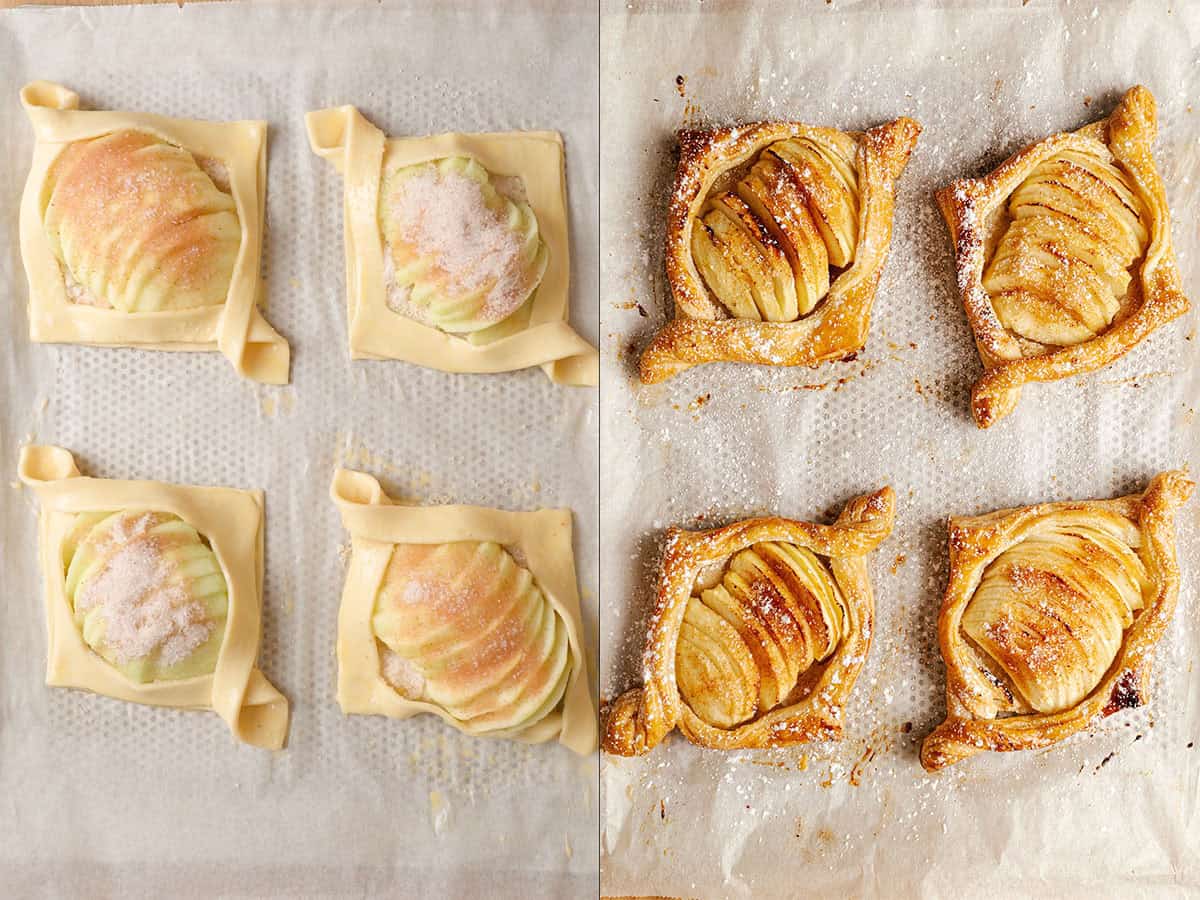
Now cross the border strips over the filling. Lift the left-hand border strip and fold it diagonally across to the opposite side, aligning the edge with the edge of the inner square. Repeat with the right-hand border strip, crossing it to the other side in the same way. The two strips overlap at the center, framing the apple filling and creating the distinctive peaked oval shape. Press the strips gently where they cross so they hold.
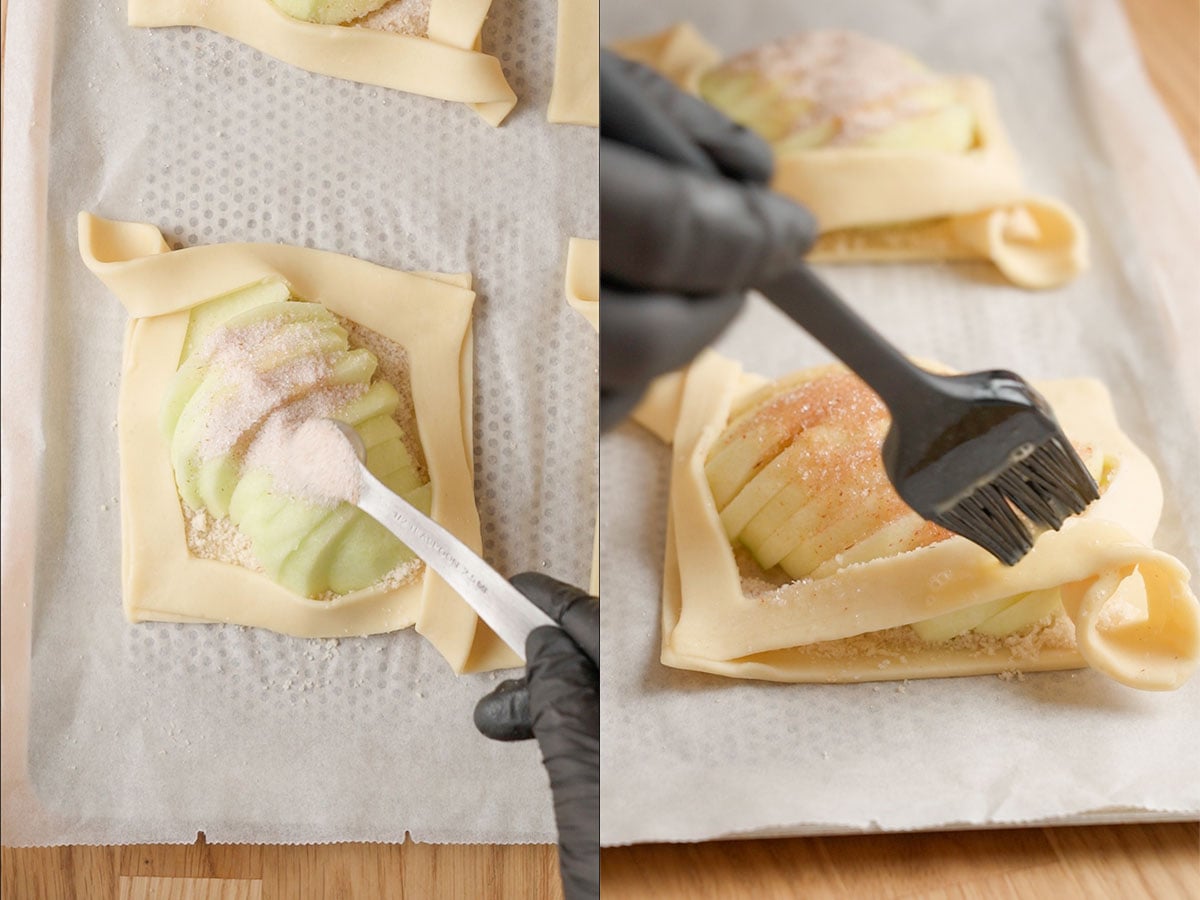
Sprinkle the cinnamon sugar generously over the apple slices.
Brush the border strips and crossed frame with egg wash. Apply it only to the pastry frame, not over the apple slices.
Continue with the second pastry square and keep the rest refrigerated.
Once all pastry squares are done, pop the pastry into the freezer or fridge while preheating the oven to 200°C / 400°F (no fan).
Bake the Apple Danish
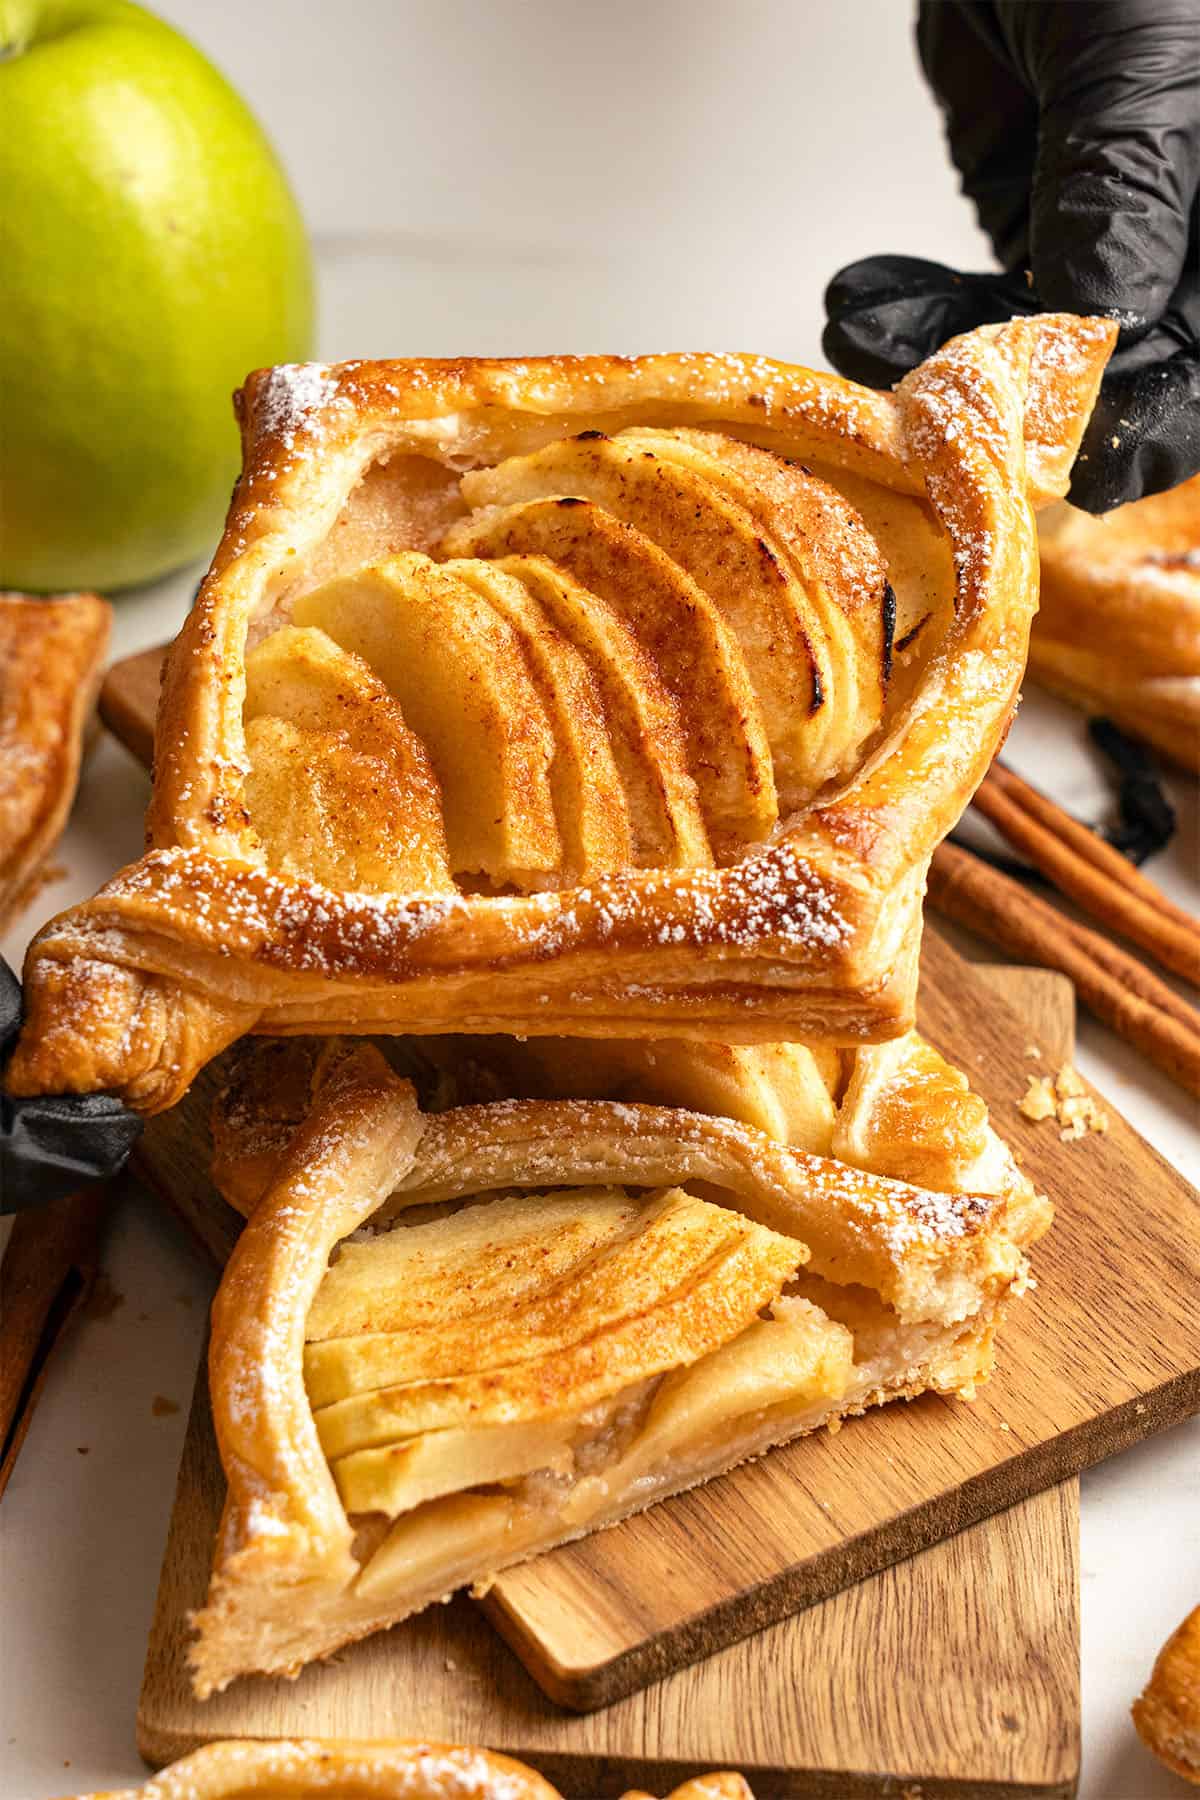
Bake the pastries on the center rack at 200°C / 400°F (no fan) for approximately 30-35 minutes. What you are looking to achieve is a border that is deeply golden and well puffed, and apple slices that are tender and caramelized.
If they are browning too much, loosely cover the danishes with a sheet of aluminum foil.
Before taking them out of the oven, check the base by gently lifting one corner. The bottom should be a deep, even golden brown. If it looks pale, continue baking for a few more minutes with the foil still on.
Remove them from the oven and let them cool on the tray for 5 minutes before serving. They are best eaten warm or at room temperature on the day they are baked.
Storing and Make Ahead
Store leftover danishes in an airtight container at room temperature for up to 1 day. Or, refrigerate for up to 2 days.
To bring back some of the crispness, reheat on a baking tray at 180°C / 355°F for 6 to 8 minutes before serving. The pastry will not fully recover its fresh-from-the-oven crispness after refrigeration, but it is still very good warm.
For make-ahead, you can shape and score the pastry squares up to a day in advance and refrigerate them covered on the trays. Slice the apples, toss with lemon juice, and refrigerate separately. Assemble, add egg wash, and sprinkle with cinnamon sugar just before baking.
Expert Tips
- Keep the pastry cold at every stage. If at any point the dough feels soft or greasy to the touch, return it to the refrigerator for 10 to 15 minutes before continuing. Cold butter going into a hot oven is what produces the distinct flaky layers.
- Leave the top point of the triangle attached when cutting. The two parallel cuts should stop about ½ inch (1.5 cm) from the point — this connected point is what keeps the border strips joined after you unfold. If you cut all the way through, the strips separate and the shape falls apart.
- Add the filling before crossing the border strips. Almond flour and apple slices go in first, then the strips are folded over to frame them. This is what creates the framed look rather than a flat pastry with topping sitting on the surface.
- Press the crossed strips firmly where they overlap. A small dab of egg wash underneath the crossing point helps them bond during baking and stops the frame from opening up in the oven.
- Check the base before taking them out of the oven. Lift a corner gently. The underside should be a deep, even golden brown. A pale base means the pastry is underbaked, even if the top looks done.
- As an ingredient substitute, you can use a wide range of other fruits; pear, plum, strawberry, blueberry, and apricot all can work really well.
What Equipment to Use
A digital scale is always a non-negotiable in baking. A digital oven thermometer is worth using here because puff pastry is sensitive to oven temperature: too low and the layers steam rather than crisp; too high and the edges burn before the base is done.
A sharp paring knife gives a cleaner edge when cutting and scoring. A small pastry brush for the egg wash, two parchment-lined baking trays, and a cooling rack complete what you need.
Try Some of My Other Pastry Recipes
If you loved this apple puff pastry danish, here are more puff pastry recipes to try next.
- Apple Tarte Tatin
- Apple Roses with Puff Pastry
- Puff Pastry Apple Turnovers
- Puff Pastry Cinnamon Twists
- Chocolate Puff Pastry
- Pear Puff Pastry Tarts
Have You Tried This Recipe?
Please leave a 5-star ⭐️⭐️⭐️⭐️⭐️ rating on the recipe card and consider leaving a comment as well!
Apple Danish
Ingredients
Apple Danish
- 2 packs Puff pastry Store-bought or 1 portion of my homemade rough puff pastry
- 4 Apples Granny smith
- Lemon juice
- 100 g (½ cup) Granulated sugar
- 1 teaspoon Cinnamon
- 4 tablespoons Almond flour
- 1 Egg for the egg wash
- Splash of milk for the egg wash
US customary cup measurement is an indicative figure only. Measure the ingredients with a digital scale by weight (gram). Baking is art but also science which requires precision and accuracy.
Instructions
- Prepare one portion of my rough puff pastry, or thaw store-bought puff pastry in the refrigerator until pliable but still cold.
- Roll the dough out on a lightly floured surface to roughly 3 mm (⅛ inch) thick. Cut into 8 equal squares, approximately 15 x 15 cm (6 x 6 inches) each. Transfer to two parchment-lined baking trays, spacing about 2 inches apart. Refrigerate while you prepare the filling.
- Peel, core, and halve the apples. Slice each half thinly, about 2 to 3 mm (⅛ inch) thick, keeping the slices together. Sprinkle with lemon juice as you go. In a small bowl, mix the sugar and cinnamon until combined.
- Working one square at a time, fold diagonally to form a triangle. Using a sharp knife, make one cut parallel to each of the two open sides of the triangle — start ½ inch (1.5 cm) from the base corner and stop ½ inch (1.5 cm) from the top point, leaving the point attached. Gently unfold back into a square.
- Sprinkle ½ tablespoon of almond flour across the center of the square. Place one half apple on top. Lift the left-hand border strip and fold it diagonally across to the opposite side; repeat with the right-hand strip, crossing it over to frame the filling. Press gently where the strips cross.
- Sprinkle cinnamon sugar over the apple slices. Brush the pastry frame with egg wash.
- Repeat with the remaining squares. Refrigerate or freeze the assembled danishes while preheating the oven to 200°C / 400°F (no fan).
- Bake on the center rack for 30 to 35 minutes, until the border is deeply golden and well puffed and the apples are tender. Cover loosely with foil if browning too quickly. Check the base; it should be deep golden brown before removing. Cool on the tray for 5 minutes before serving.
- StorageBest served fresh on the day of baking. Store at room temperature for up to 1 day, or refrigerate for up to 2 days. Reheat at 180°C / 355°F for 6 to 8 minutes.Make-ahead: cut and refrigerate the pastry squares up to 1 day ahead. Slice and refrigerate the apples separately. Assemble just before baking.
Notes
- Use all-butter puff pastry only, whether store-bought or homemade. Pastry made with vegetable shortening lacks the butter flavor that makes these danishes worth making.
- Granny Smith apples are the best choice here. Firm, tart, and low in water, so they hold their shape when sliced thin and baked raw. Braeburn or Pink Lady are the closest alternatives.
- Use fine-ground almond flour, not almond meal, which is coarser and oilier. It is what keeps the base crisp, so do not skip it. Fine plain breadcrumbs work as a nut-free substitute.
- See my full egg wash guide for ratios and dairy-free alternatives.
- Keep the pastry as cold as possible throughout. If it warms up and becomes sticky at any point, return it to the fridge or freezer for a few minutes before continuing.
- Leave the top point of the triangle attached when cutting. The cuts should stop about ½ inch (1.5 cm) from the point — this is what keeps the border strips joined after unfolding.
- The oven must be fully preheated before the tarts go in. Use a digital oven thermometer if you have one, as most home ovens run hotter or cooler than the dial indicates.
- Check the bottom of the pastry before removing from the oven. It should be deep golden brown throughout, not pale or doughy.
Leave a Reply