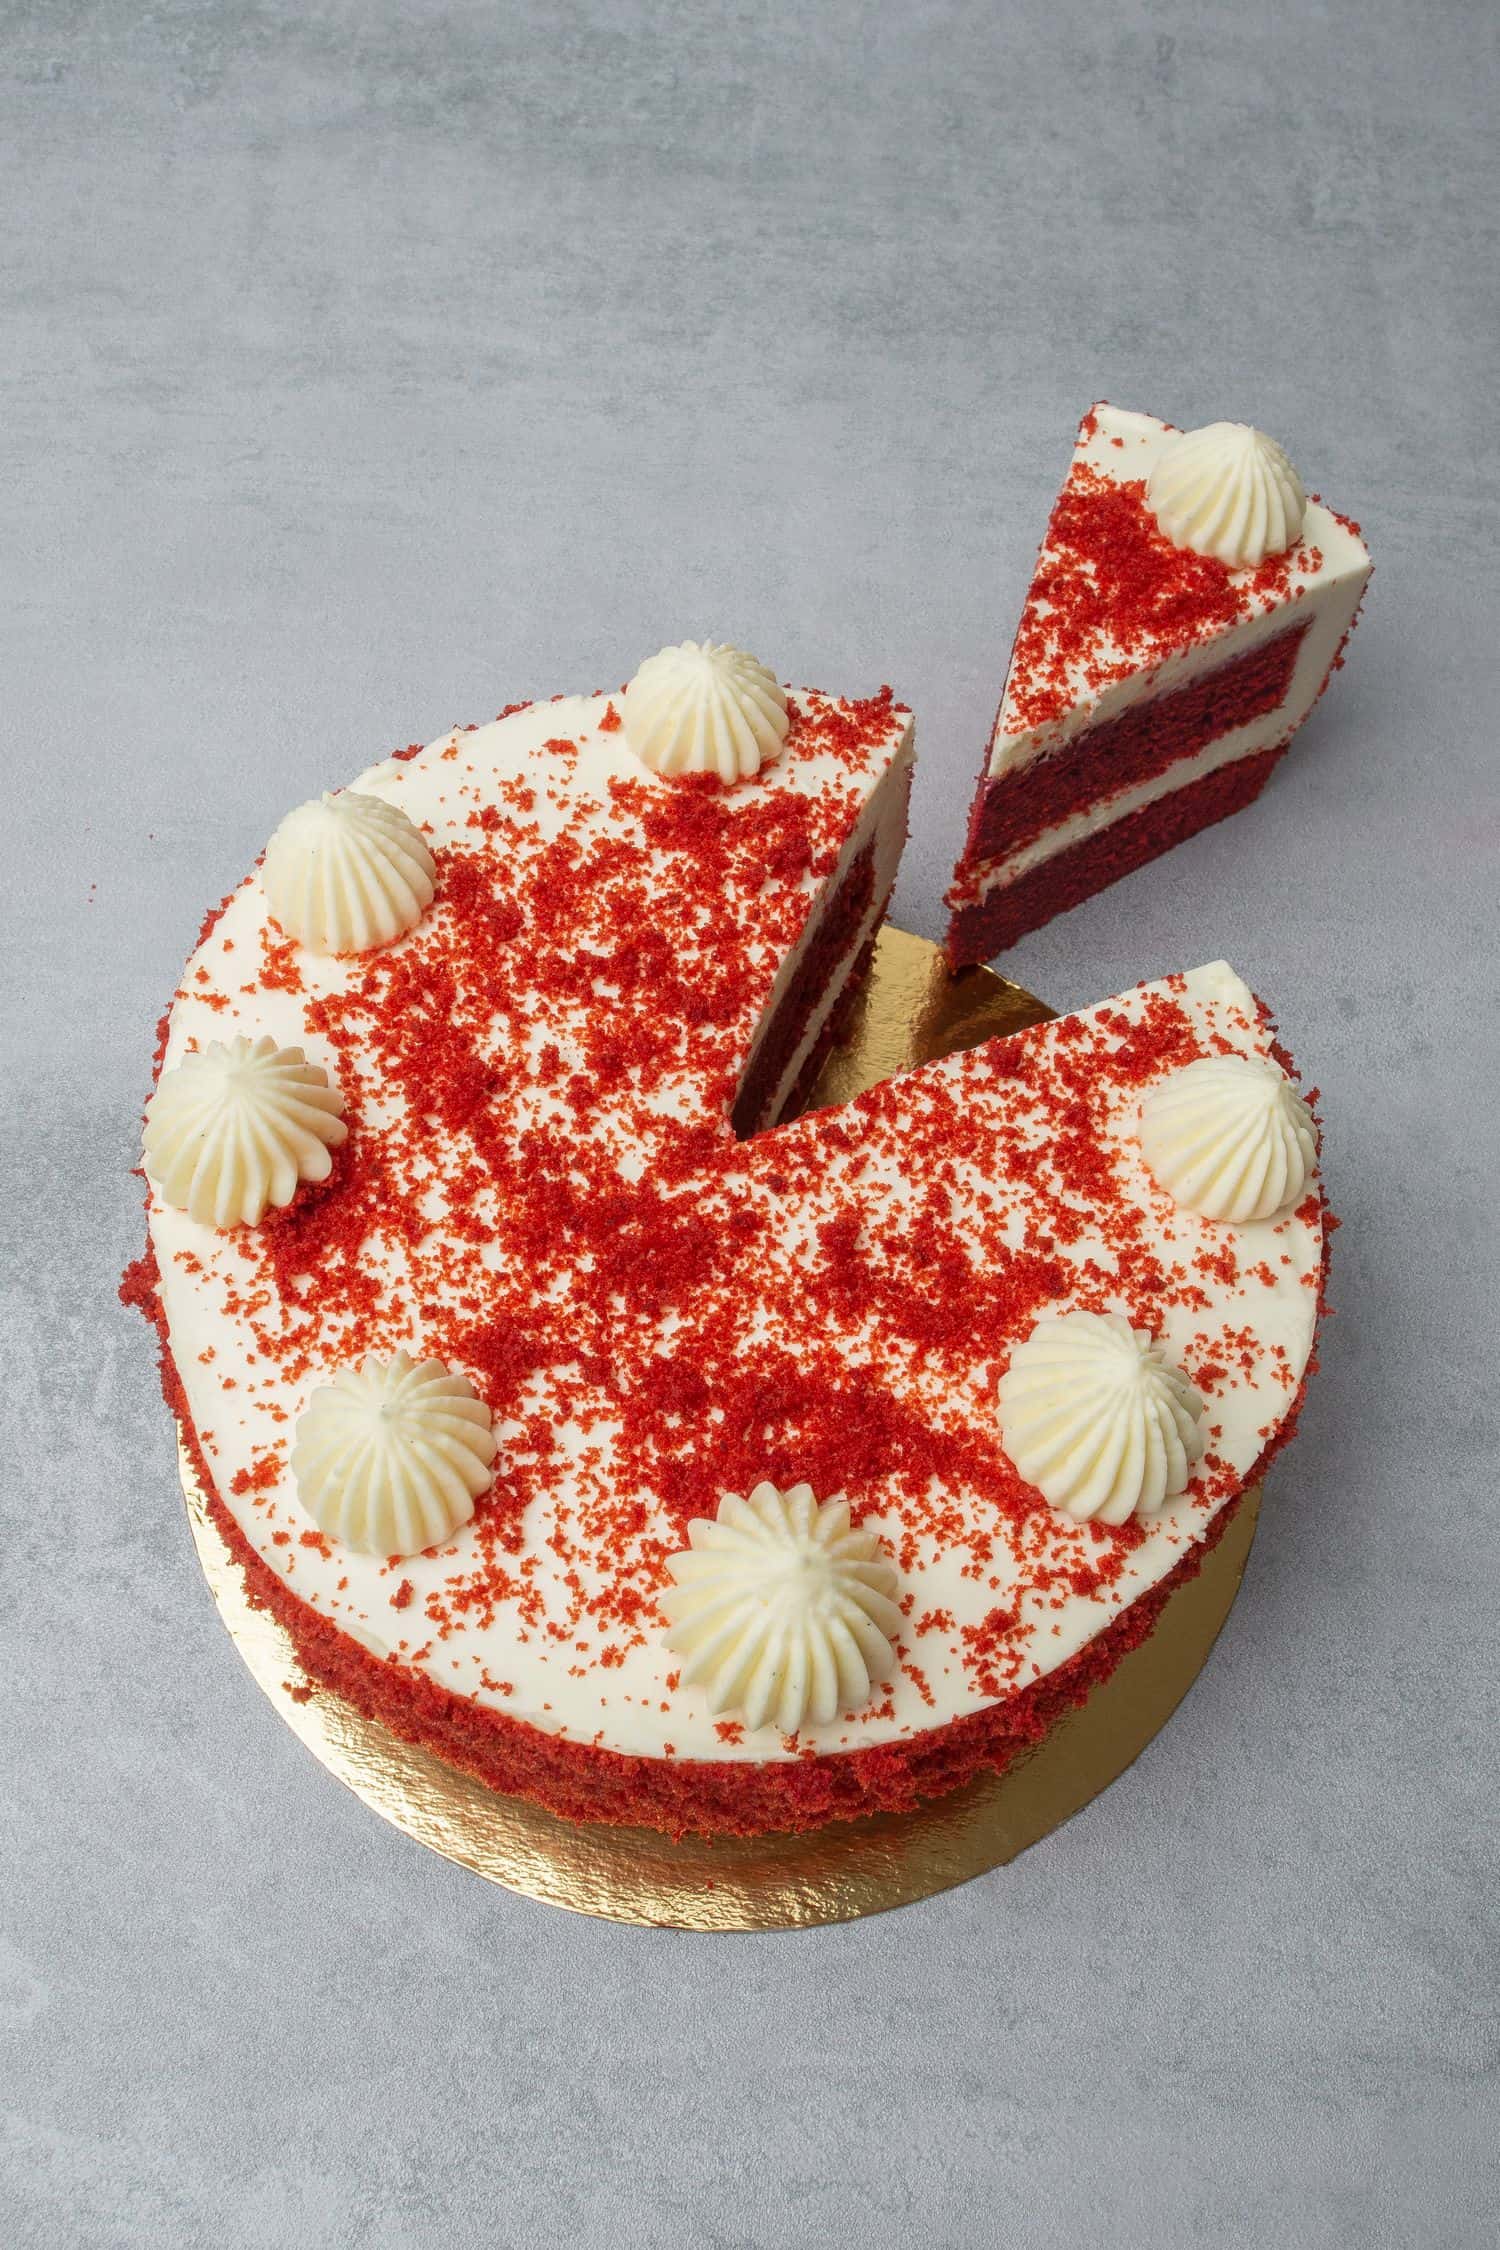
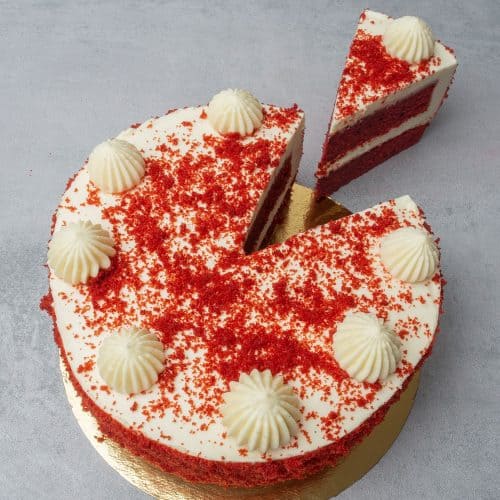
This Red velvet cake with cream cheese mousse is a lighter version of the well-known cake we all love! Bright red color super moist sponges filled with airy cream cheese mousse! Definitely, a must cake recipe for Valentine´s day but can be a showstopper dessert any time of the year! This is no doubt the Best Red velvet Cake recipe ever with airy mousse-like consistency, try it!
Jump to:
📖 What is Red Velvet Cake
Red velvet cake is a traditionally reddish-colored chocolate cake with cream cheese icing. A Red velvet cake recipe is usually made with a combination of buttermilk, butter, cocoa, vinegar, flour, and baking soda. Its red color is nowadays enhanced with natural or artificial food coloring – either way, it is a perfect contrast with the white cream cheese frosting. Red velvet cake is easily one of the most popular celebration cakes thanks to its mild chocolate taste, light cream cheese icing, and dramatic red look!
This Red velvet mousse cake recipe is a lighter version of traditional Red velvet cakes. What makes this cake particularly amazing is the cream cheese mousse filling that tastes thousands of times better and way lighter and fluffier than traditional buttercream. Let´s start, shall we?
📝 Ingredient notes
For the red velvet sponges
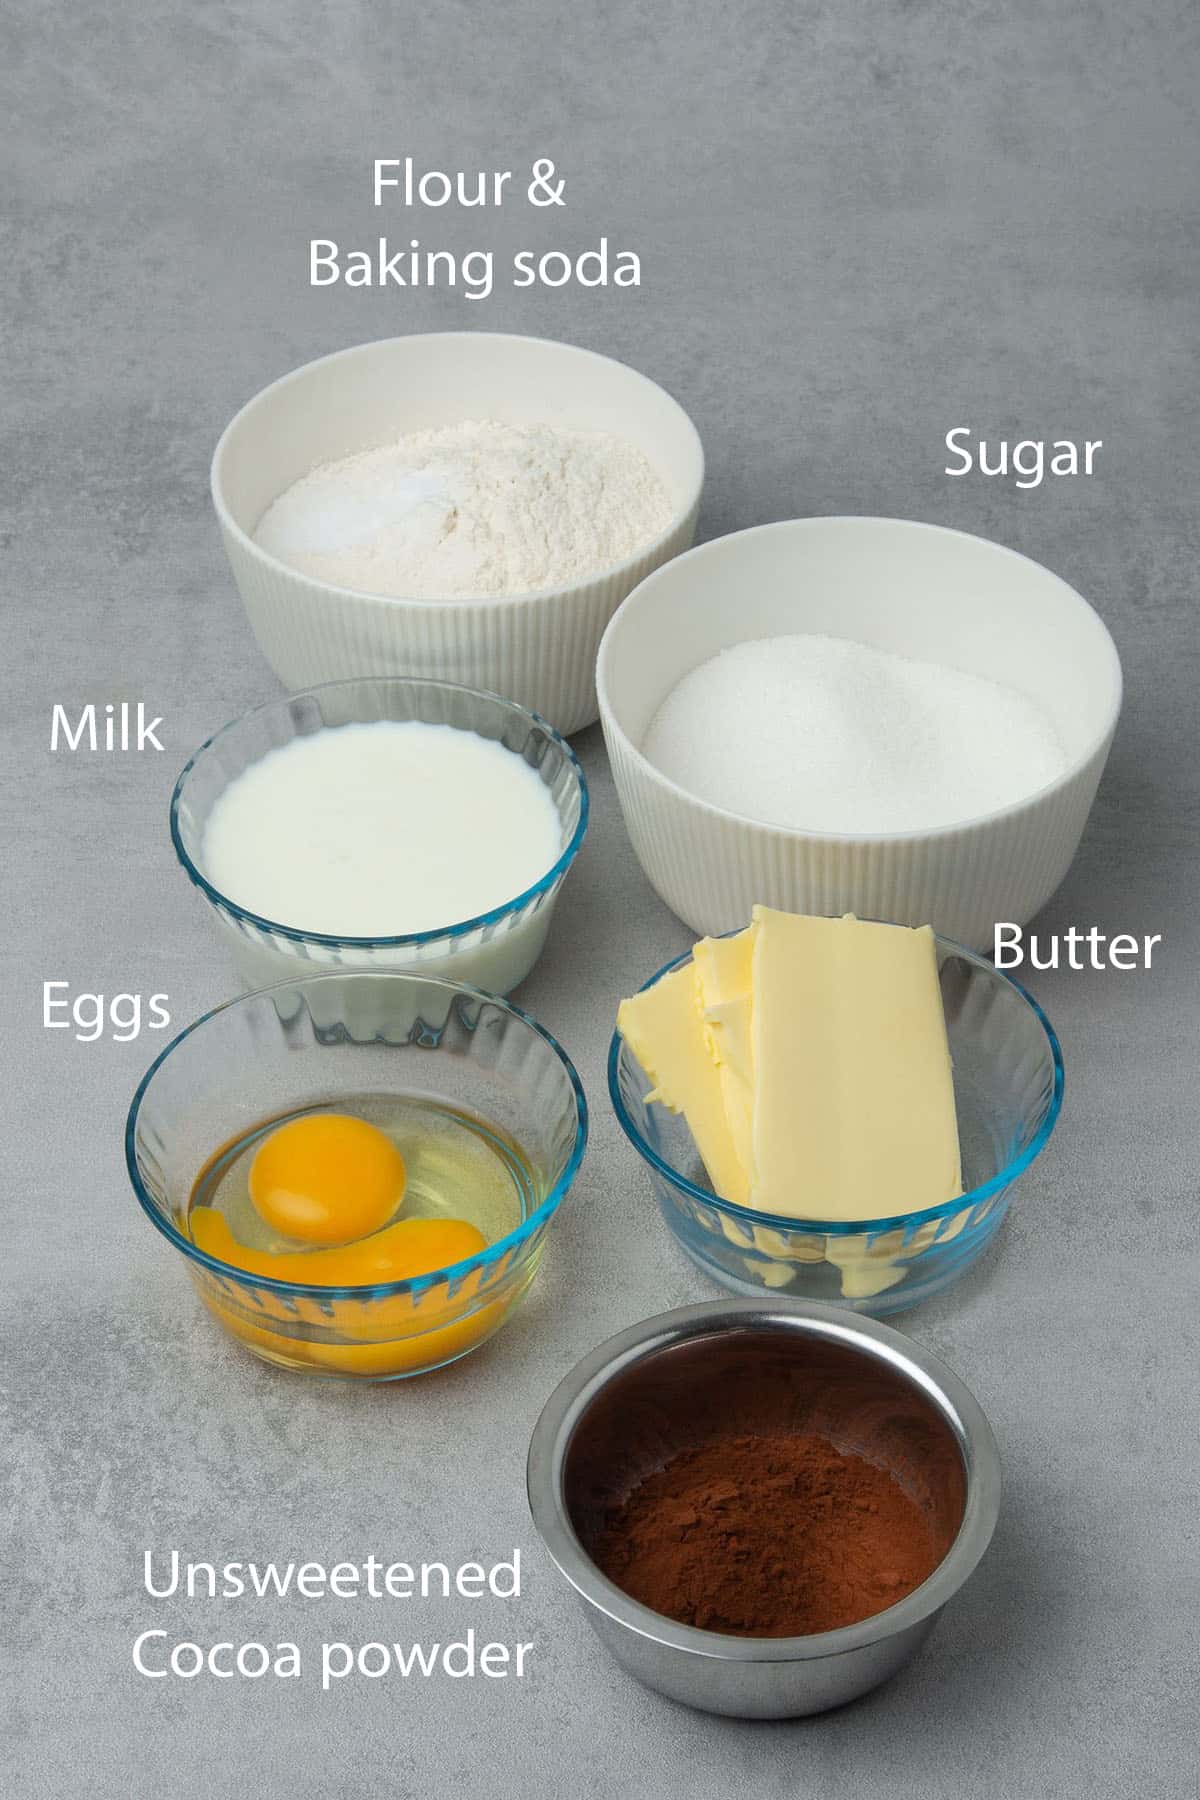
- Butter: Use always unsalted as you want to be in control of the quantity of the salt. I am using 82% fat content Europen-style butter in all my recipes. In this Red velvet cake recipe, the butter needs to be at room temperature which technically means soft enough to be able to cream but not too soft or runny so avoid last-minute microwaving
- Sugar: Standard, all-purpose granulated or white sugar is perfectly fine in this, nothing fancy
- Egg: Room temperature as always. You will need one egg and one yolk, the extra yolk makes the red velvet sponge even creamier
- Flour: All-purpose flour or pastry flour makes the best cakes. They are so-called “soft flour” which is low on protein resulting in a delicate, tender texture. If you want to be a Pro when it comes to deciding what type of flour to use in your baking, please read my flour guide
- Salt: An essential ingredient in almost all recipes especially when it comes to chocolate cake
- Baking soda: Any Red velvet cake recipe requires baking soda and vinegar to achieve the best, moist results. Has two functions: increase the volume and lighten the texture. Baking soda becomes activated when it's combined with an acidic liquid, like vinegar.
- White vinegar: See above while we need vinegar next to the baking soda. Don´t worry, the cake won´t taste the vinegar at all
- Milk: Use the milk at room temp, I prefer whole milk
- Unsweetened Cocoa Powder: Generally I suggest using unsweetened, 100% cocoa powder in baking. I always use dutch-process cocoa powder, it has a lovely dark color and it is lower in acidity however in this Red cake recipe if you have non-dutch-processed (that is lighter) unsweetened cocoa powder, it is even better. As mentioned above red velvet cake is generally a mild chocolate cake, however, you will need to balance the cocoa powder in this recipe and achieve the “sweet spot” – meaning when the cake already has chocolate flavor but the cocoa powder does not overpower the red color. It is difficult to give exact measurements as it depends on the strength and quality of the cocoa powder AND red food coloring you are using so you will need somewhat your own judgment
- Red food Coloring: You will need some sort of food coloring to make any Red velvet cake recipe. Beetroot powder can be used as a natural alternative however it won´t give as bright color as gel food colorings. In terms of brands, I used Silikomart here, try to choose a high-quality concentrated gel or it won't make it red enough. In terms of quantity, it is hard to give measurements when it comes to food coloring since it largely depends on the brands available in your country. As a general rule, start with a small amount, then increase it gradually. If your batter before baking has a bright red color, it should be colorful enough after baking, see my process picture later
🛒 You’ll find detailed measurements for all Ingredients in the printable version of the Recipe Card at the bottom of this post
For the cream cheese mousse
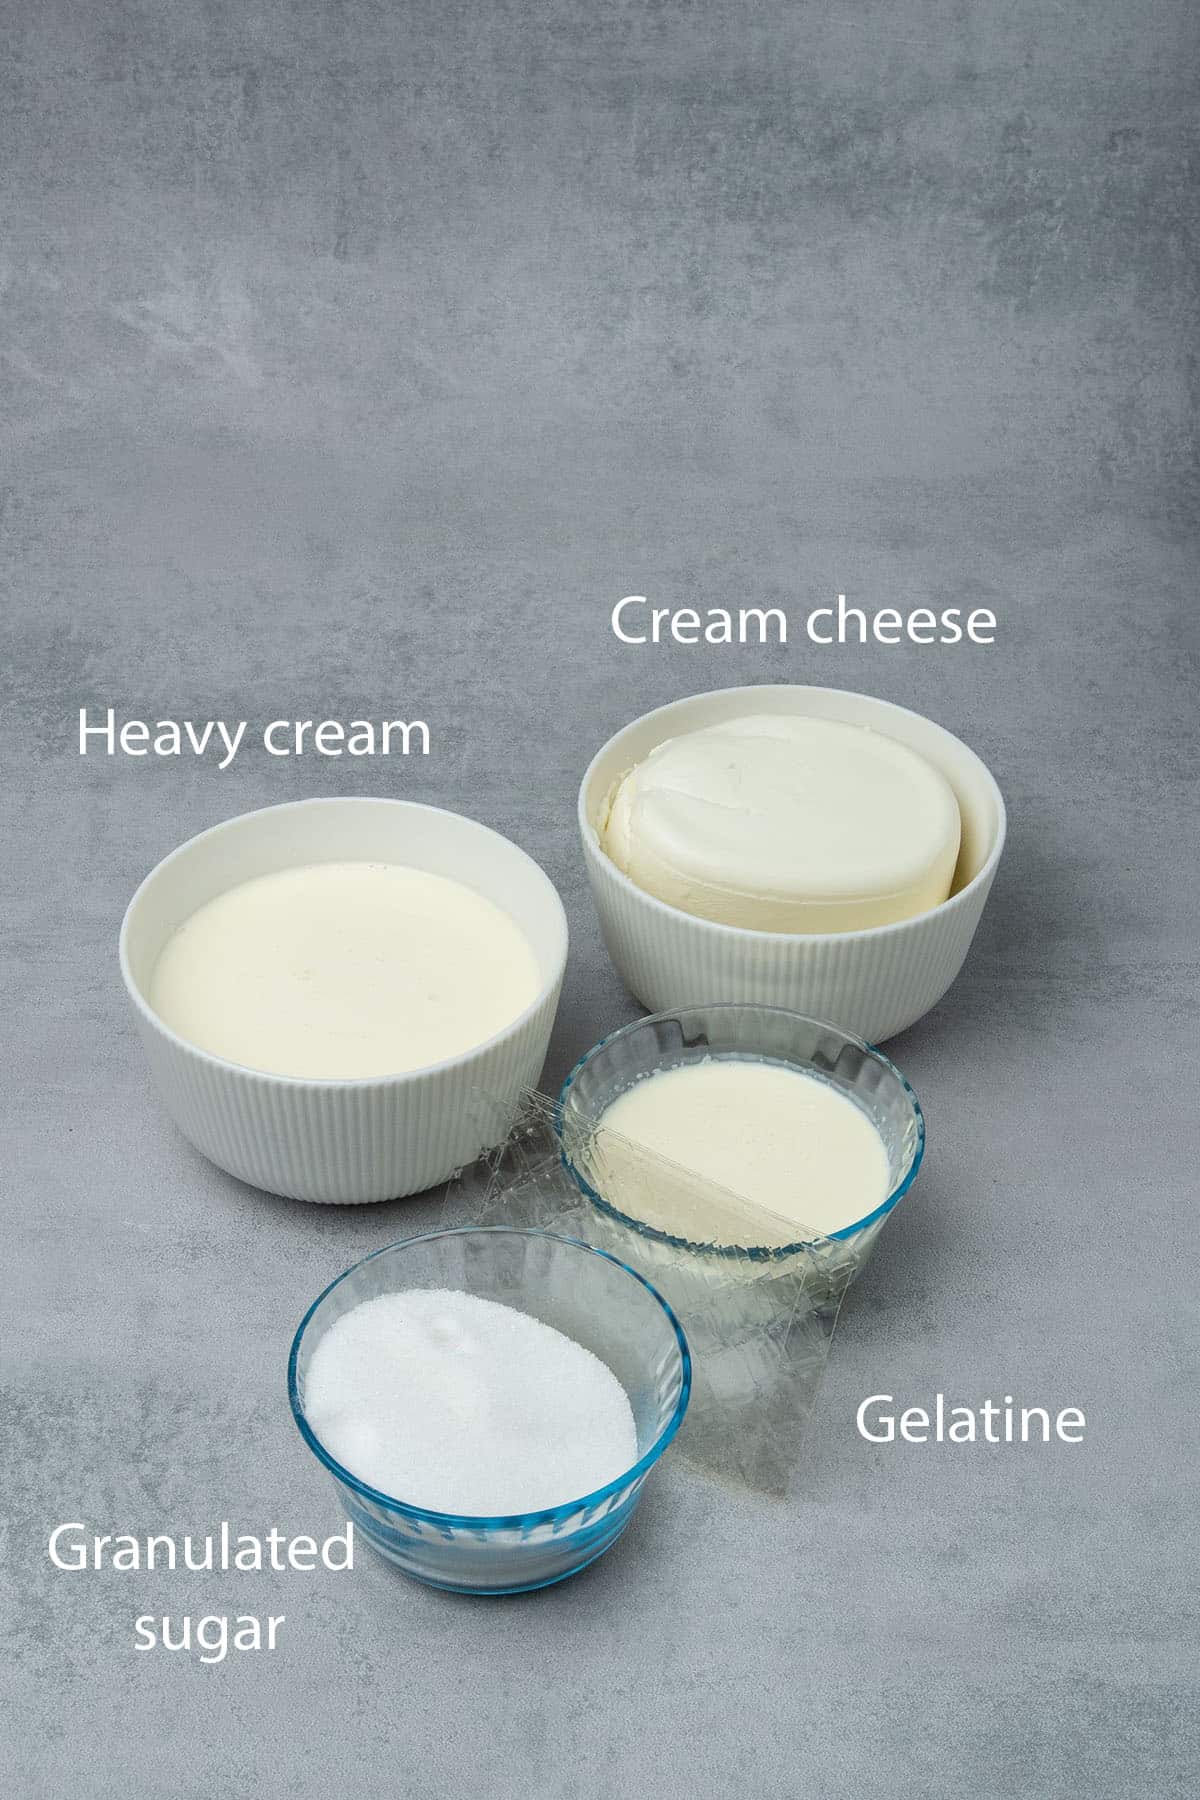
- Gelatine: It´s an odorless, tasteless, and colorless thickening agent, very often used by pastry chefs, particularly in mousse cakes. Powder or sheet versions are available, in my recipes I always use sheet (1,7 g / sheet), which I found easier to handle. For details on how to handle or substitute gelatin, check my gelatin article
- Heavy cream: Also known as whipping cream, has a fat content between 36% and 40% (I always use 36%). Use it very cold and do not substitute it with vegetable-based “whipping cream”. Heavy cream will make the filling extra smooth and creamy, effectively a mousse-like consistency.
- Granulated sugar: I use simple, white granulated sugar, nothing fancy. While heating it up with cream make sure the sugar granulates fully dissolve.
- Lemon juice: Use freshly squeezed lemon juice
- Cream cheese: A not-too-sweet cream cheese mousse is the hero in this Light Red velvet mousse cake recipe! I always use full-fat Philadelphia when I state cream cheese in my recipes. I find it easy to cream (need to bring it to room temperature first) and very pleasant in taste. I usually beat it with a hand mixer for less than a minute, just until it becomes fluffy and increases a bit in volume. Please avoid over whipping
- Vanilla bean paste: Avoid using artificial vanilla. There are several great brands for fine, pure vanilla, I use Nielsen massey which I love and really recommend
🛒 You’ll find detailed measurements for all Ingredients in the printable version of the Recipe Card at the bottom of this post
👩🍳 How to make this recipe
1. How to make red velvet sponges
This Red velvet recipe follows the traditional method using vinegar and baking soda besides classic cake ingredients like flour, egg, sugar. You will need also cocoa powder and red food coloring that are traditionally used. All in all this Red velvet cake base is a wonderful and easy and super moist sponge cake, you will love. It is also easy to prepare, the key is not to overwork the batter.
- Grease baking pans (I am using 2 x 18 cm / 7 inches pan )
- Pre-heat oven to 180 C / 356 F
- Ingredients must be all measured with a Digital scale
- Eggs must be at room temperature
- Cream the soft butter with sugar until fluffy
- Mix in egg
- Mix wet ingredients in a small bowl (milk, food coloring, vinegar)
- Sift dry ingredients together into another bowl (flour, baking soda, salt, cocoa powder)
- Fold in wet and dry ingredients into the egg butter mixture in the following 4 steps: wet - dry - wet - dry
- Add more red colorings, if needed, but please make sure you use a concentrated, high-quality gel food coloring so you won´t need to add too much to achieve the desired color
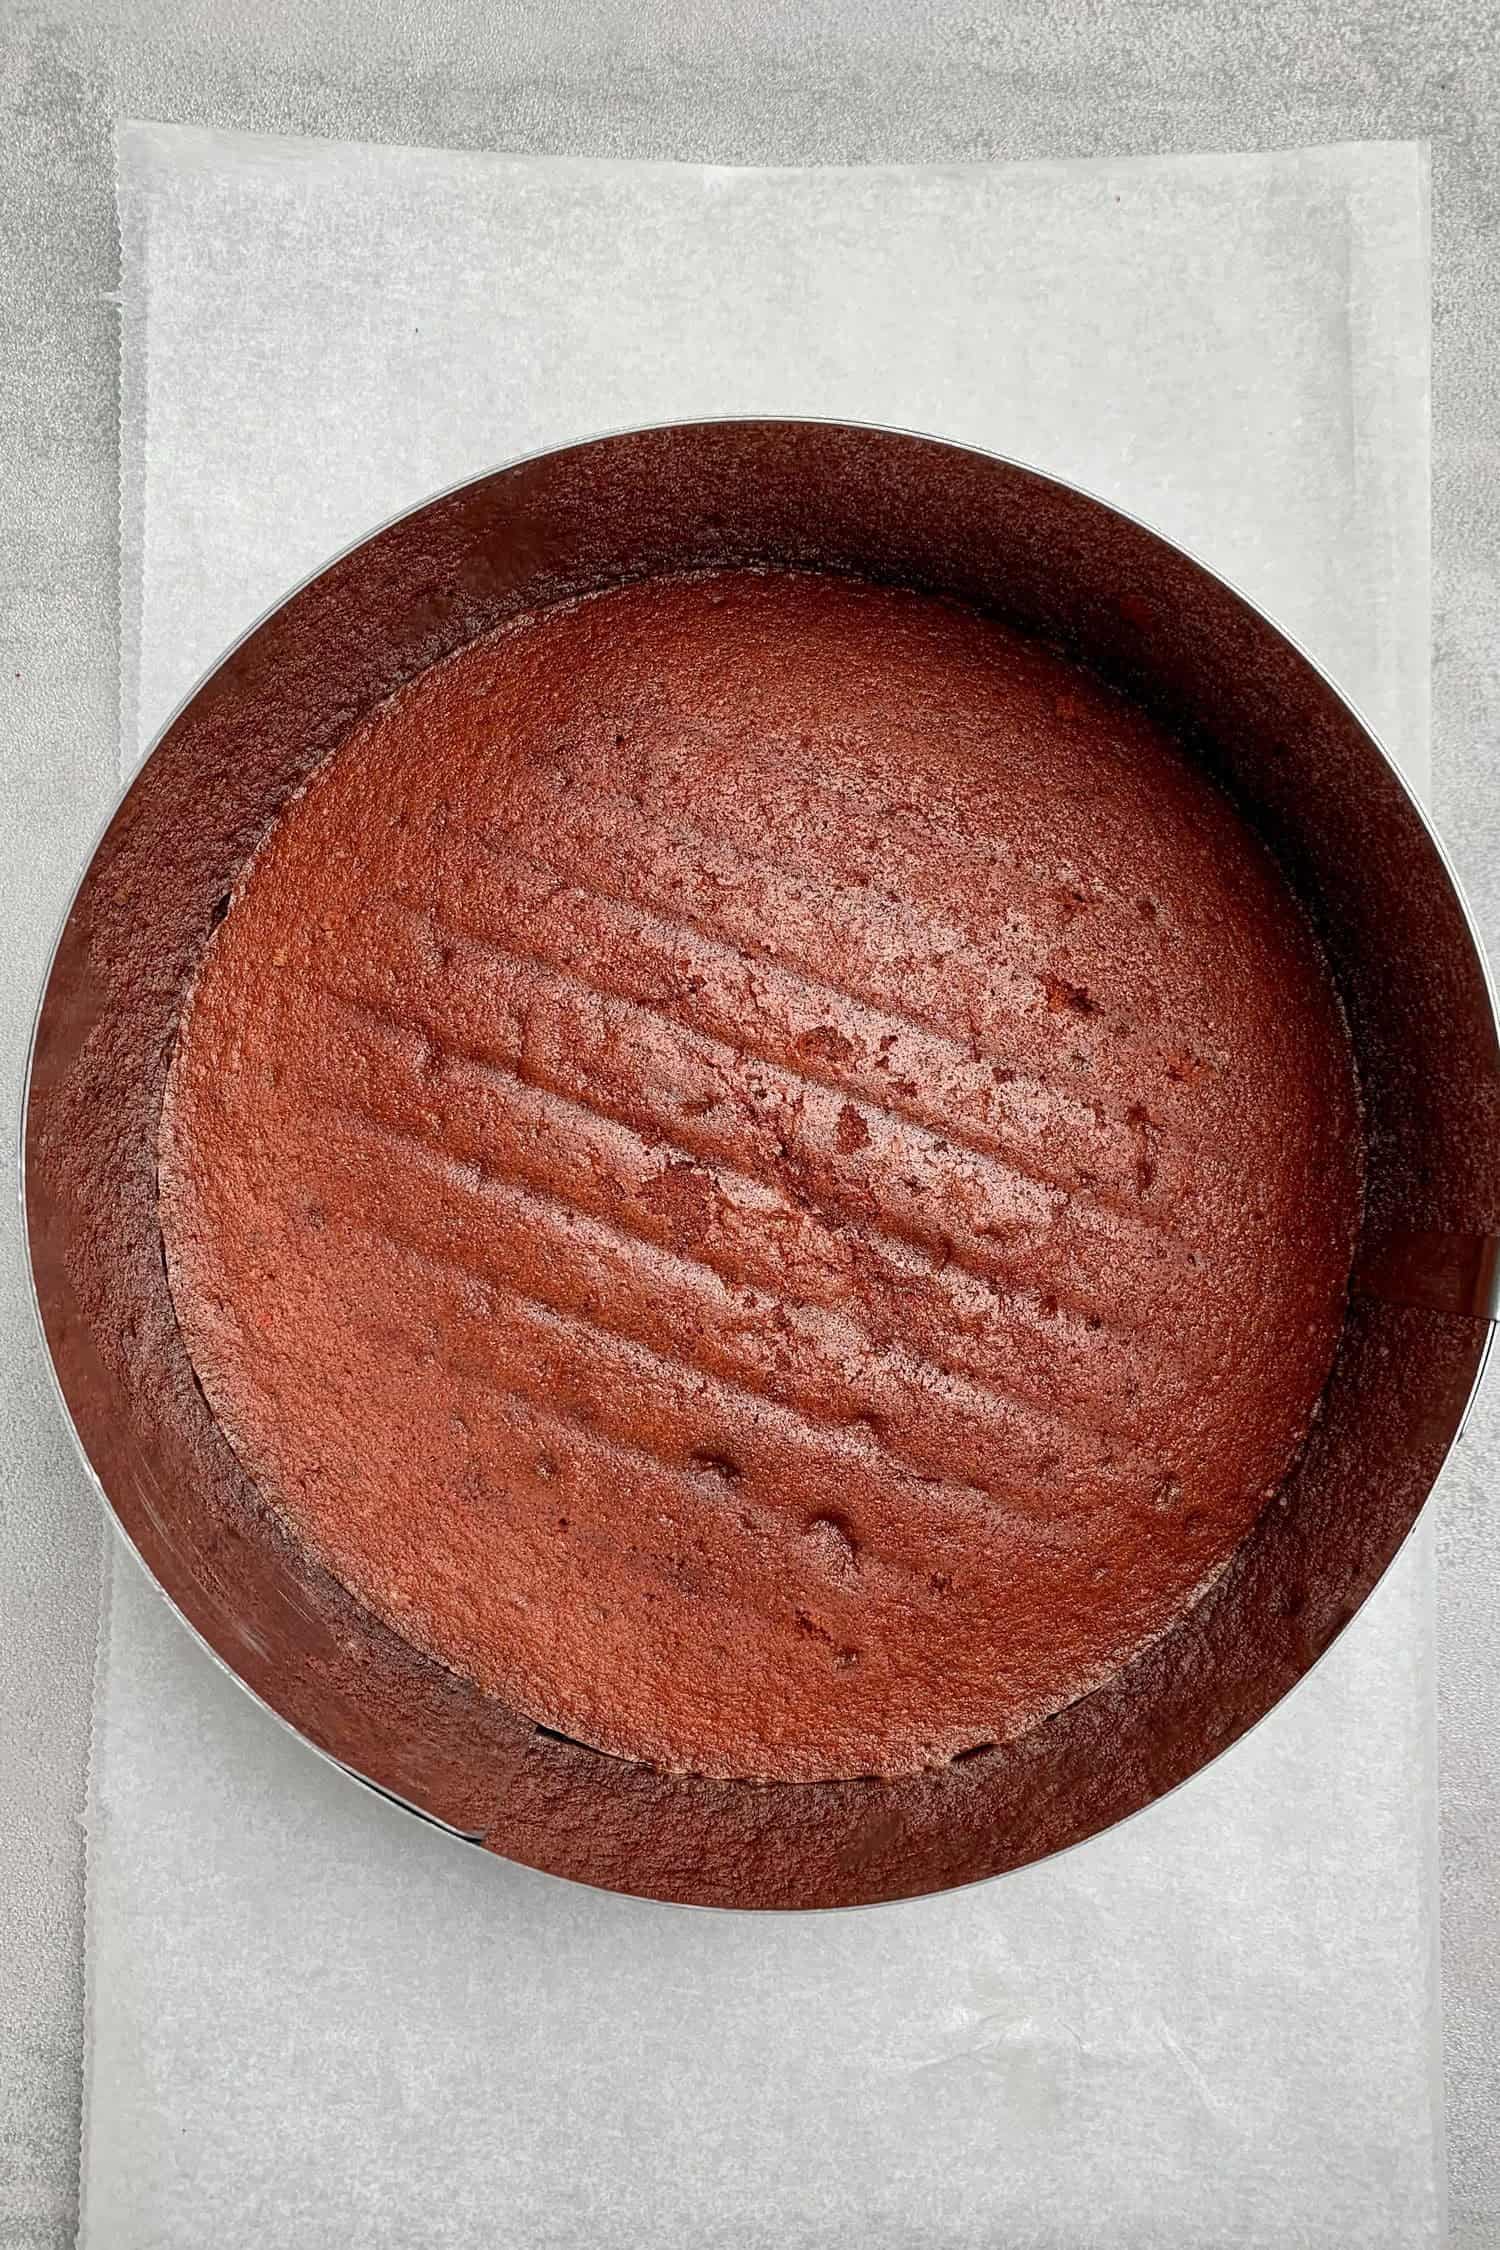
- Divide the cake batter by using a digital scale so they will be identical in weight/height. Pour cake batter into prepared baking pans (2 x 18 cm / 7 inches pan) and bake for 20 minutes.
- Do not open the oven door during baking. After 20 minutes check the middle of the cake with a toothpick. Bake until toothpick inserted comes out clean. Let them cool on a cooling rack
💡 Top Tip: Red velvet cake typically has a mild chocolate flavor due to the cocoa powder however we can´t add too much of it as that would make it difficult to color the cake batter red.

2. How to make cream cheese mousse
The Cream cheese mousse that we will be using is absolutely lush and what makes this Red velvet cake recipe different from other Red velvet cakes! It is not the usual, heavy, butter-based cream cheese frosting but light and airy with only a very small amount of sugar, feels like biting into the clouds!
Preparing the cream cheese mousse filling is a 3 steps process, do not try to combine them to “save time”.
- Prepare the gelatin mixture. Soak gelatin sheets into cold water, in the meantime heat cream and sugar until simmering. Mix gelatine sheets into the hot cream mixture then bring it to lukewarm temperature before step 2. Too warm? It will melt cream cheese in Step 2. Too cold? Gelatine will set and will be impossible to mix with the rest of the ingredients. Do not put the mixture into the fridge or freezer as gelatine can form lumps if it cools too quickly. Note: Straight after making this cream it will be runny but do not panic, it will set in the fridge
- Once the gelatine mixture is cooled to lukewarm temperature, whip room temperature full-fat cream cheese until fluffy, for about a minute. Fold fluffy cream cheese and the gelatin mixture together. Cream cheese is an interesting ingredient, it won´t get fluffier or harder if you beat it longer, in fact, it will break and become runny. I suggest using an Electric hand mixer to avoid overbeating
- After step 2, immediately whip very cold heavy cream until soft peaks then fold the cream into the rest of the mixture. Make sure heavy cream is very cold with a high-fat content (36%) or it might be difficult to whip up. While whipping heavy cream, remember that it will go through the following stages: runny, soft peak, stiff peak then it will break and a few minutes later buttermilk separates and you can make butter. For this recipe make sure you stop after a soft peak. The cream should not be runny but also should not be too stiff which would make it difficult to fold the cream with the rest of the ingredients.
For an individual dessert idea check this cheesecake mousse recipe from Erin.
💡 Top Tip: Please note that the cake contains 2 layers of cream cheese mousse plus the decoration on top (as you can see in the pictures) so you will have to make sure that there is enough cream left to do both layers and the decoration too.

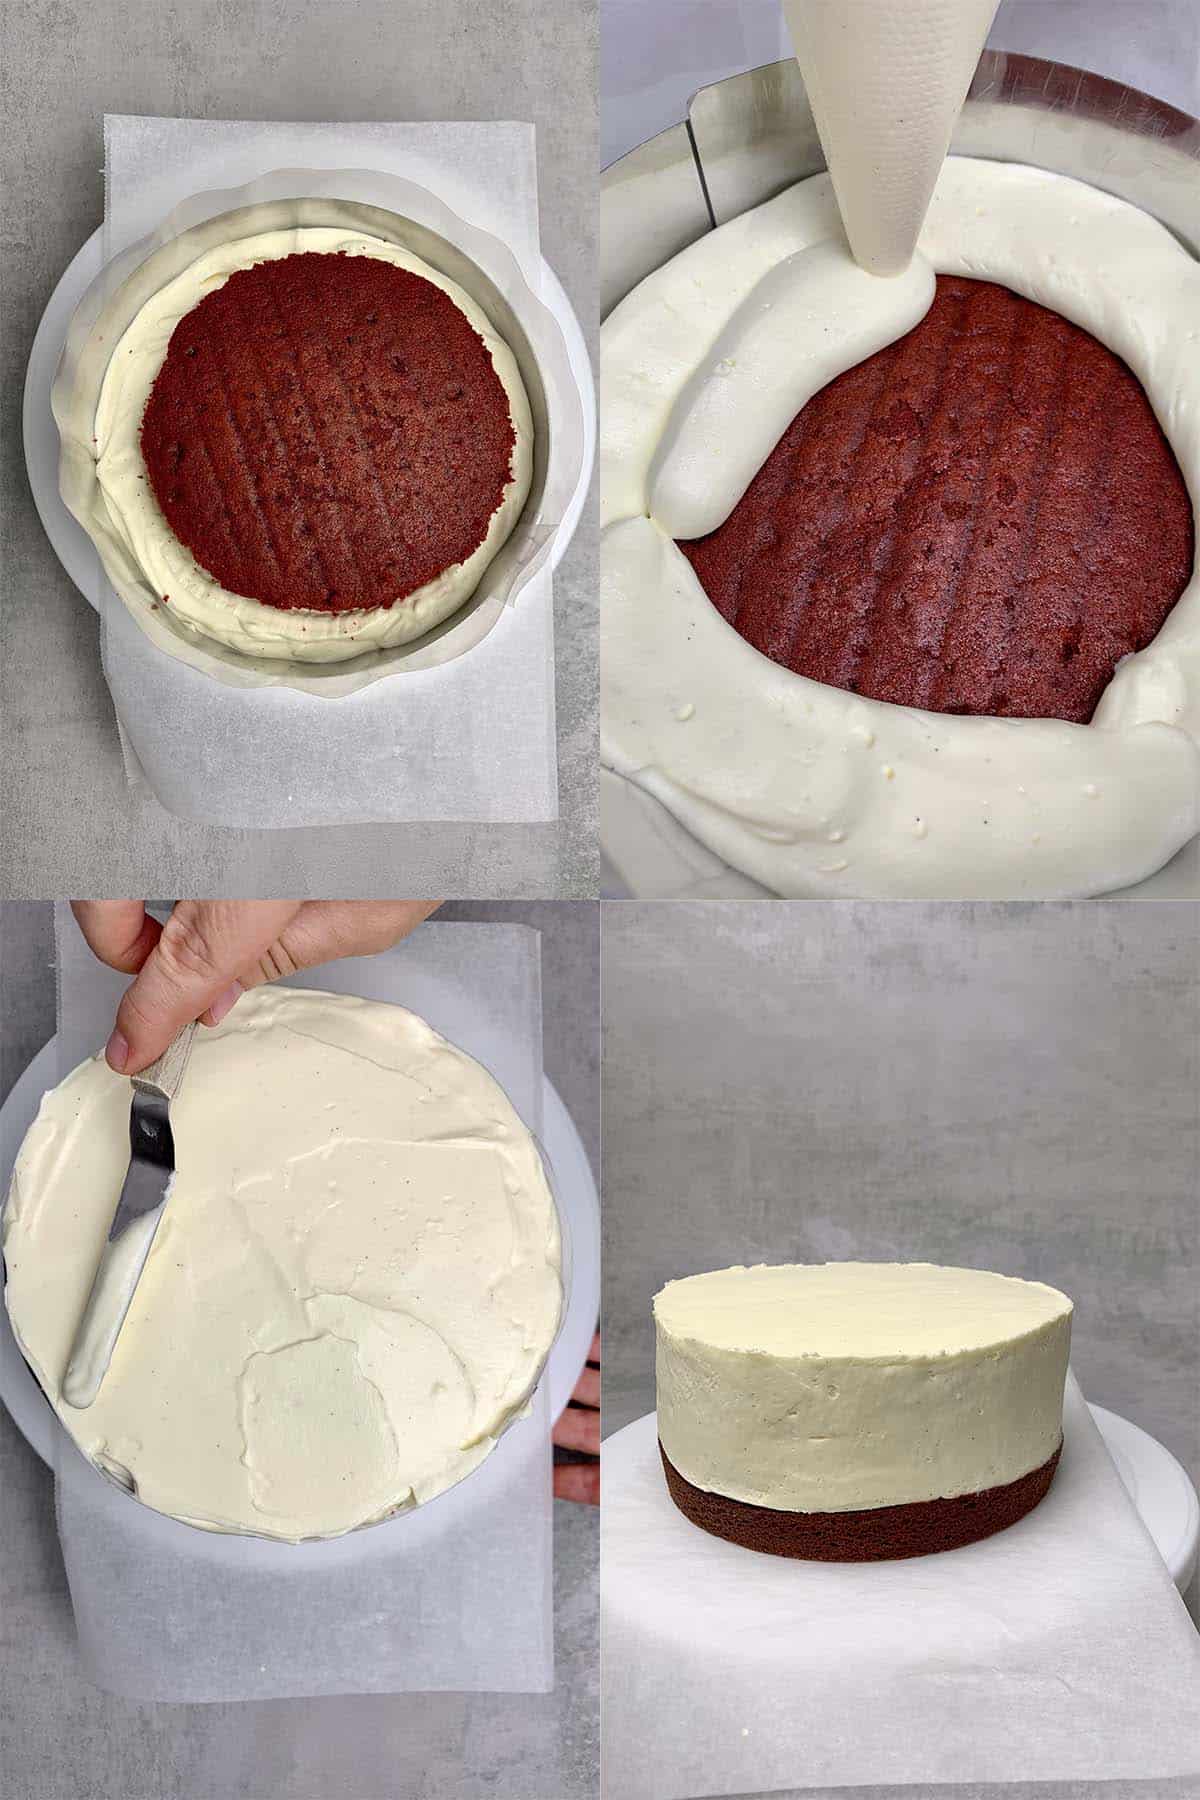
3. How to assemble the cake
Assembling the Red velvet cake with cream cheese mousse is super easy, however, a step-by-step process
1. You will need to make the 2 red velvet sponges first, and let them cool on a wire rack. For a neat-looking Red velvet cake, I recommend keeping one of the sponges as it is (that will be the bottom) and trimming 1-2 cm (0.5inch) around the other one, so it will be smaller in diameter - this will be the insert. Keep the trimmed edge for using it making the red crumble decoration for the velvety design. Freeze both sponges for half an hour before assembling so they are less crumbly.
2. While sponges are in the freezer prepare the cream cheese mousse as per instructions in the recipe. The consistency of the cream will be runny (but fluffy) at this point so it will be easy to assemble the cake, but, it will be set in the fridge in 4 hours into a mousse cake-like consistency
3. Assemble the mousse ring; Set Mousse cake ring (adjustable in size) to 18 cm / 7 inches, the same size as the larger sponge. Use Acetate cake collar around the ring inside for neat-looking end results. Place the larger, chilled cake into the mousse ring tightly then pipe cream cheese mousse on top and smooth the top with an Offset spatula. Chill the cake for 10 minutes in the freezer then place the second, smaller sponge on top of the cream cheese mousse and pipe another batch of cream cheese mousse on top and around and again smooth with a spatula. Place cake into the fridge for a minimum of 4 hours for the gelatine to set.
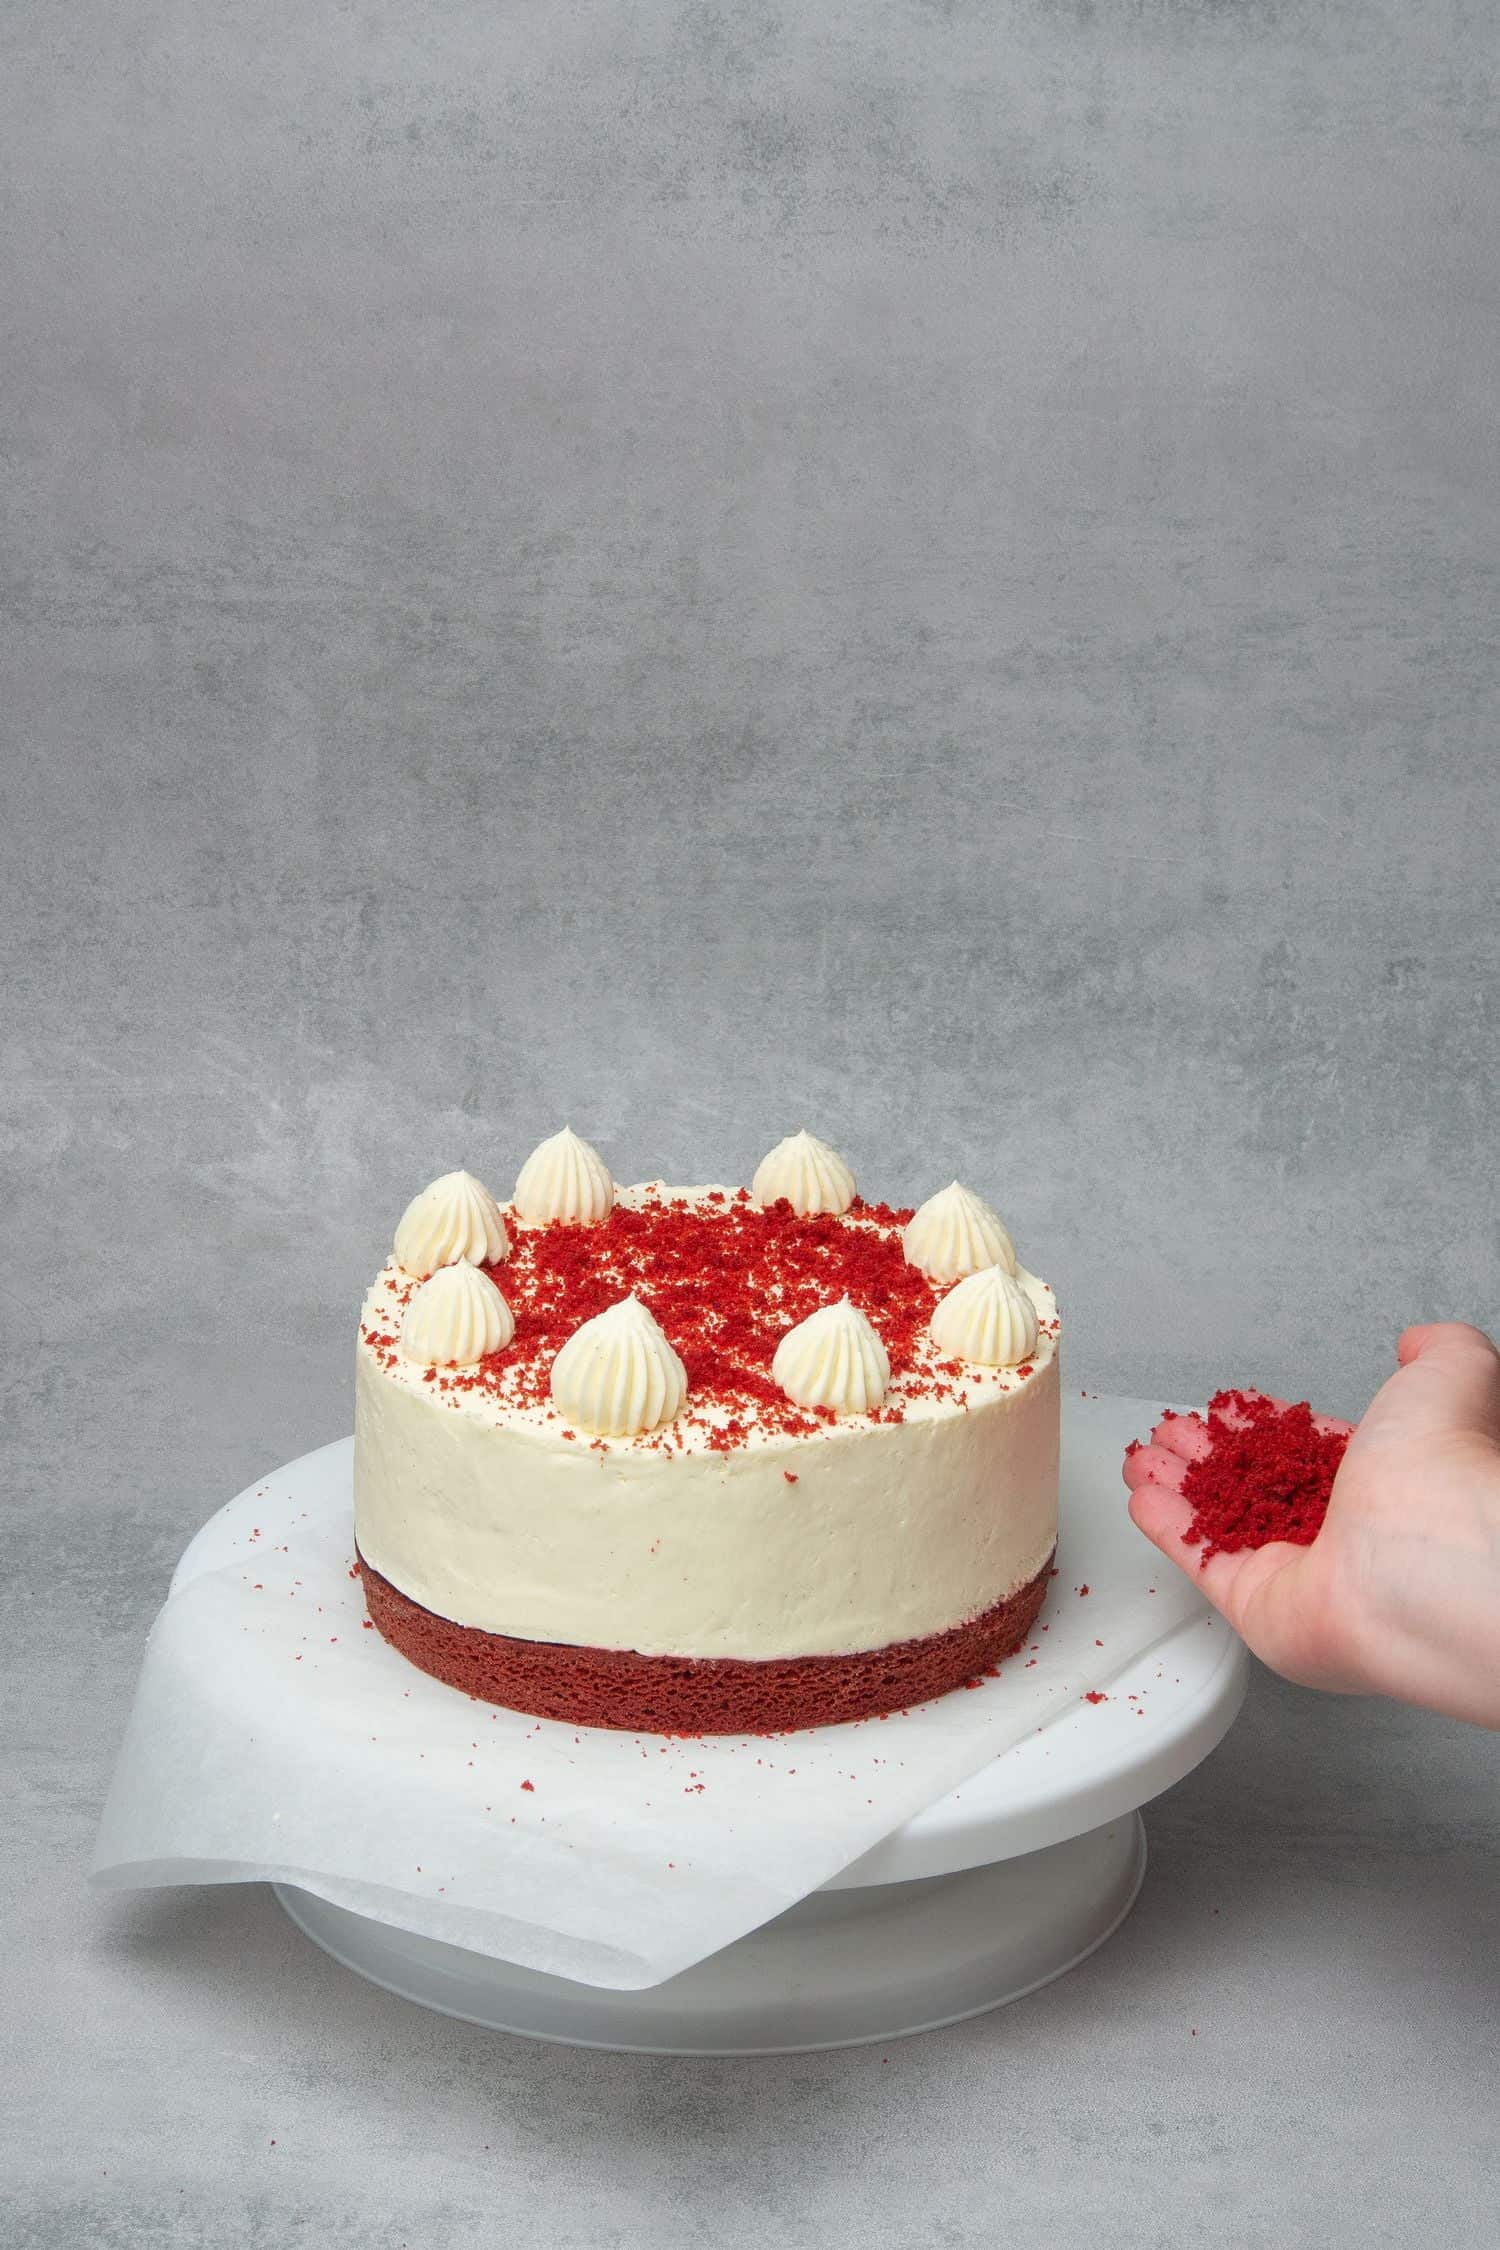
4. Decoration: Once both the cake as well as the remaining cream cheese mousse are set in the fridge, carefully remove the mousse ring and acetate cake collar from the cake and pipe decoration on top. I am using a French star nozzle tip. Decorate with red velvet crumbs according to your taste
💡 Top Tip: Measure the cream cheese mousse before piping so that the two cream layers are even.
🥣 Equipment notes
The recipe does not require a lot of fancy equipment however a Mousse cake ring (adjustable in size) and Acetate cake collar just makes everything neat and professional looking.
The Mousse cake ring (adjustable in size) can be replaced with spring form however mousse ring is adjustable in size and therefore can be used for many different kinds of cakes.
Acetate cake collar is an inexpensive baker hack you can purchase from Amazon and just makes all the difference! Once the mousse ring is set, place Acetate cake collar inside the ring and start building the cake up from bottom to top as stated in the recipe, it will encourage the side of the cake to look very neat.
Make sure you do not remove the mousse ring until the cake is set.
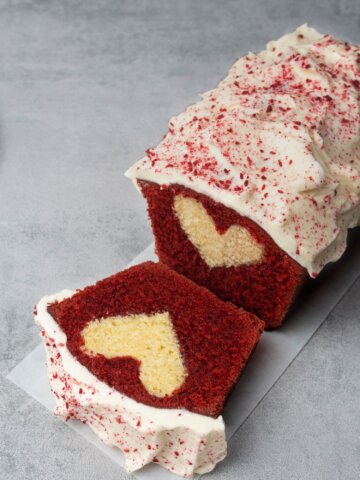
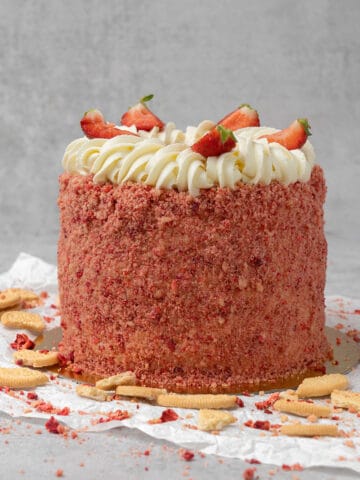
🍰 More Cake recipes

Check my friend's post here for some Valentine´s Day decoration ideas! She has the best taste ever!

Have you tried this recipe?
Please leave a 5-star ⭐️⭐️⭐️⭐️⭐️ rating on the recipe card and consider leaving a comment as well! I would love to hear about how your dessert turned out and your feedback also helps other Readers!
Red Velvet Cake with Cream Cheese Mousse
Equipment
Ingredients
Red velvet sponges
- 75 g (⅓ cups) Unsalted butter room temperature
- 200 g (1 cups) Granulated sugar
- 1 Egg room temperature
- 1 Egg yolk room temperature
- 200 g (1⅔ cups) All purpose flour
- 10 g (1⅓ tablespoon) Cocoa powder unsweetened
- ⅔ teaspoon Baking soda
- ⅓ teaspoon Salt
- 160 g (⅔ cups) Milk room temperature
- ⅔ teaspoon White vinegar
- Red food colouring use high quality concentrated gel
Cream cheese mousse
- 5 Gelatine sheet 1.7g / sheet
- 120 g (½ cups) Heavy Cream 36% fat
- 130 g (⅔ cups) Granulated sugar
- 10 g (1 tablespoon) Lemon juice freshly squeezed
- 400 g (1¾ cups) Cream cheese high fat, ex. Philadelphia tub
- 360 g (1½ cups) Heavy Cream 36% fat, use it very cold
- 1 tablespoon Vanilla bean paste
US customary cup measurement is an indicative figure only. Measure the ingredients with a digital scale by weight (gram). Baking is art but also science which requires precision and accuracy.
Instructions
Red velvet sponge
- Heat oven to 180 C / 356°F
- With an Electric hand mixer cream room temp butter with sugar
- Mix in egg and egg yolk
- Mix wet ingredients (milk, food colouring, vinegar) into another bowl
- Fold wet and dry ingredients into the butter egg mixture in the following steps: wet, dry, wet, dry
- Divide the cake batter in between the two pans equally using a digital scale
- Bake in 180C / 356F for 20-25 min or until skewer inserted comes out clean
- Cool the sponges on Cooling rack
- Once cakes are cooled, trim 1-2cm / 0.5inches off around the edges on one of them, keep the other one as it is. Pop them into the freezer for half an hour before assembling the cake
- Keep the trimmed edge for later decorating the cake
Cream cheese mousse
- Soak gelatin sheets into cold water
- Heat cream (the first cream that is 120g) with sugar on low medium heat until simmering
- Squeeze excess water from gelatin sheets and stir into hot cream then mix in the lemon juice. It won’t taste lemon but the lemon balances the flavors. Let it cool to room temperature. Do not place it into the fride as gelatin tends to form lumps if cools to quickly
- In another bowl whip cream cheese with an electric hand mixer until light and fluffy then fold in room temperature (not warm) gelatin mixture with the help of a Rubber spatula
- Whip heavy cream until soft peaks and very gently, using a Rubber spatula fold into the cream cheese mixture. It must stay light and fluffy
Assembling
- Assemble the mousse ring and set it to 18 cm / 7 inch in diameter (Mousse cake ring (adjustable in size)) just as the size of the larger sponge
- For a neat looking, smooth side surface use Acetate cake collar within the mousse ring
- Start to build up the cake from bottom to top
- Place the larger, 18 cm / 7 inch diameter sponge into the mousse ring then with the help of a Piping bag pipe some cream cheese mousse on top. Pop it into the freezer for 5 minutes to set
- Place the smaller sponge on top, then pipe cream cheese mousse around and also on top and smooth the top of the cream cheese with an Offset spatula. Make sure you leave some mousse for later usage decorating the cake
- Place the cake and the leftover mousse into the fridge to set for minimum 4 hours
- Once cake fully set, carefully remove the mousse ring and cake collar
- Take a Piping bag with French star nozzle tip and pipe decoration on top of the cake then decorate with red velvet cake crumbs
Sherrie
Do you recommend using cake flour or all purpose flour for this recipe? Thank you.
Katalin Nagy
Either work fine.
Sherrie
This recipe looks amazing and I am going to be making this for my mom’s 87th birthday, as she loves Red Velvet Cake. Can this be made one day ahead of time and kept in the refrigerator or do you think this would dry the cake out too much. Thank you so much for your reply and this wonderful recipe
Katalin Nagy
This is a mousse cake so it has to set in the fridge, a day ahead would be perfect.
Johnny
Hello! I haven't tried this yet, but I wanted to know if you think dying the mousse would be a detriment to it stability at all? Its a gel based coloring that would be used but im unsure if it would really mess things up.
Katalin Nagy
I haven´t tried, hard to say.
jesse
hi. i haven't done this recipe yet but i'm planning to make a mirror glazed heart shaped cake for valentine's day. i want to use this recipe so my question is, can i use the mousse in this recipe as base for my mirror glaze? i'm sorry if it's a dumb question. i just bake for my family & my daughter asked me to make a red velvet mirror glazed valentine's cake. since you have to have a frozen mousse or ganache for a mirror glazed cake, i was just wondering if your cream cheese mousse is ok to use for mirror glaze.
thank you in advance for your help.
Kata
Hey, theoretically yes but since I have not tested myself I can´t give you an exact answer.
Irene
wow you're awesome!!!
i've got a question: Is It possibile to freeze the entire cake, once added the cream cheese mousse?
thank you!
Kata
Yes this cream cheese mousse freezes well, however, like with any cake, it is best served fresh. I really do not like freezing cakes bec it always changes the texture and taste a bit.
Maria
Would this recipe for 3, 6 inch pans? Thanks!
admin
This is done in a 7 inch, but can be made in any size of pan however you need to adjust quantity and baking time:)
Larisa Albulescu
Love everything about this website❤️❤️
Jelena
Recipe and cake that made my day! So sophisticated and well balanced in taste. Great work! 👏☺
admin
So happy for your success:)! Thanks for your feedback
Sanela Jovovic
Explained in detail and so easy to do with such detailed instructions! Thanks for sharing!!!
admin
Thanks so much for your kind feedback, hope you will try some of my other recipes too:)
Ingrid
Thanks! Love your recipes!
Mari
Wow, this recipe is super detailed 😍
Thank you so much!!!
admin
The devil is in the details as people say:)