
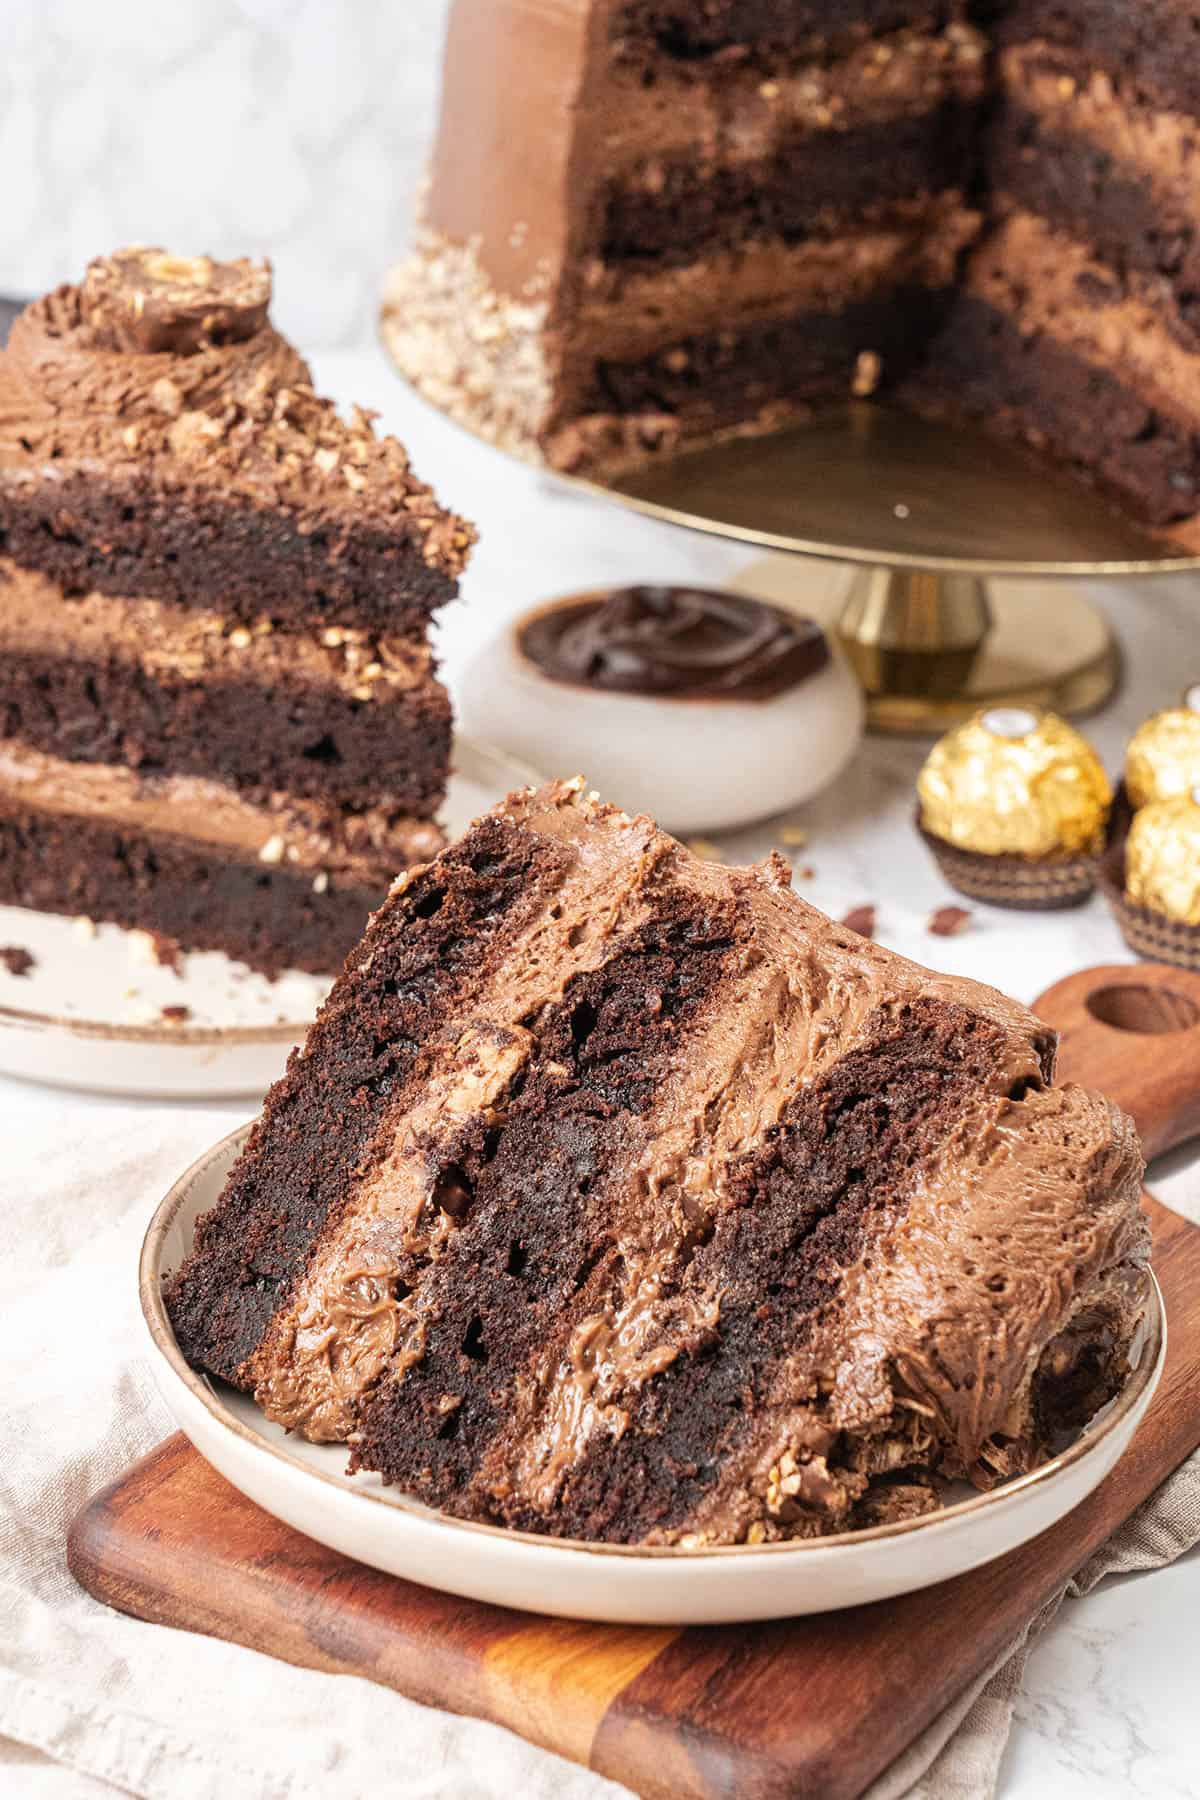
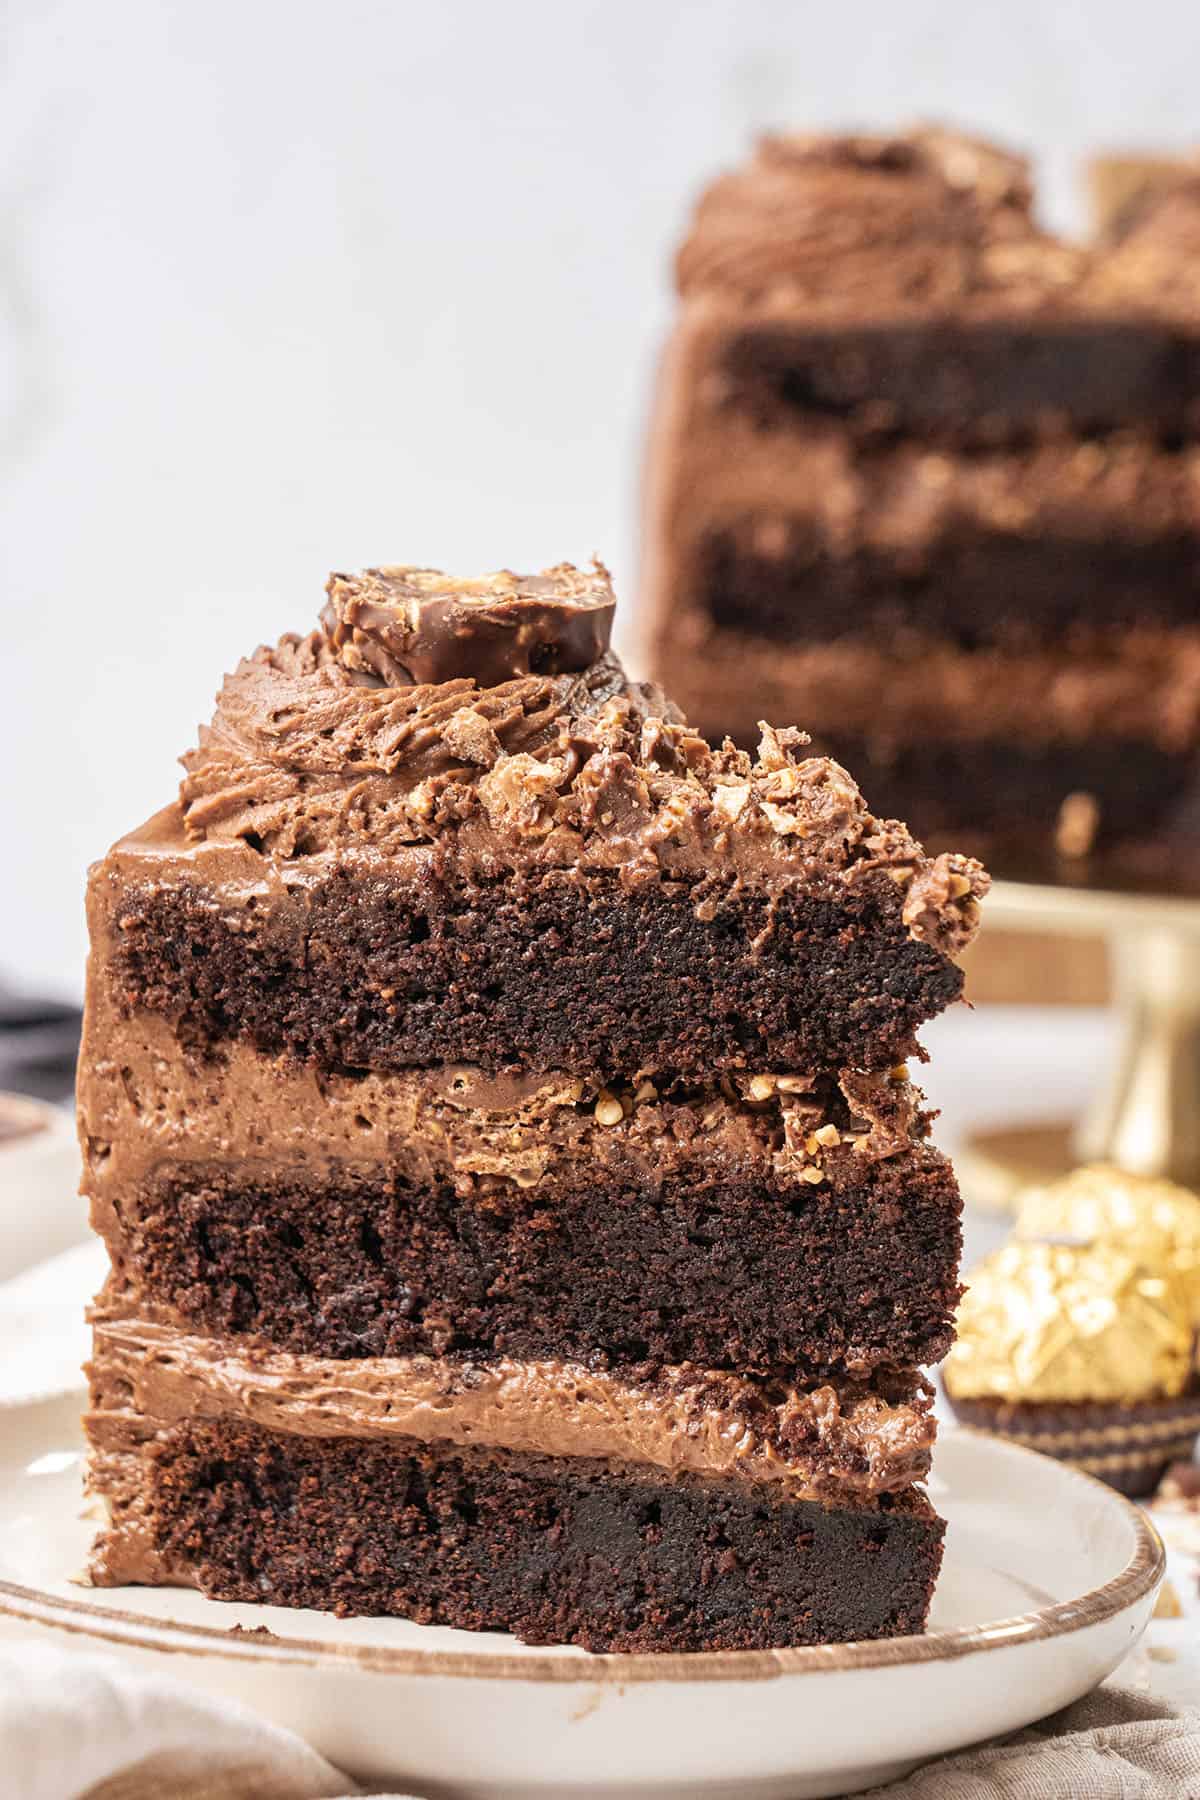
This Ferrero Rocher cake is the ultimate celebration cake: three layers of moist chocolate-hazelnut sponge, filled and frosted with a Nutella mousseline cream (my signature, not-too-sweet frosting recipe!) and finished with crushed toasted hazelnuts and whole Ferrero Rocher chocolates.
It perfectly captures everything you love about the candy: rich chocolate, deep hazelnut notes, crunch, and silkiness; all in a form that is far less sweet than a standard buttercream cake. It is a showstopper for Christmas, birthdays, and any occasion worth celebrating.
Read what others said about this recipe

"Absolutely fantastic! This is really the best Ferrero Rocher cake with the most delicious frosting. I have never made custard-based frosting before, but I certainly will make it again because it is simply the best and way more delicious than butter cream. Thank you so much for sharing your recipe." Anna
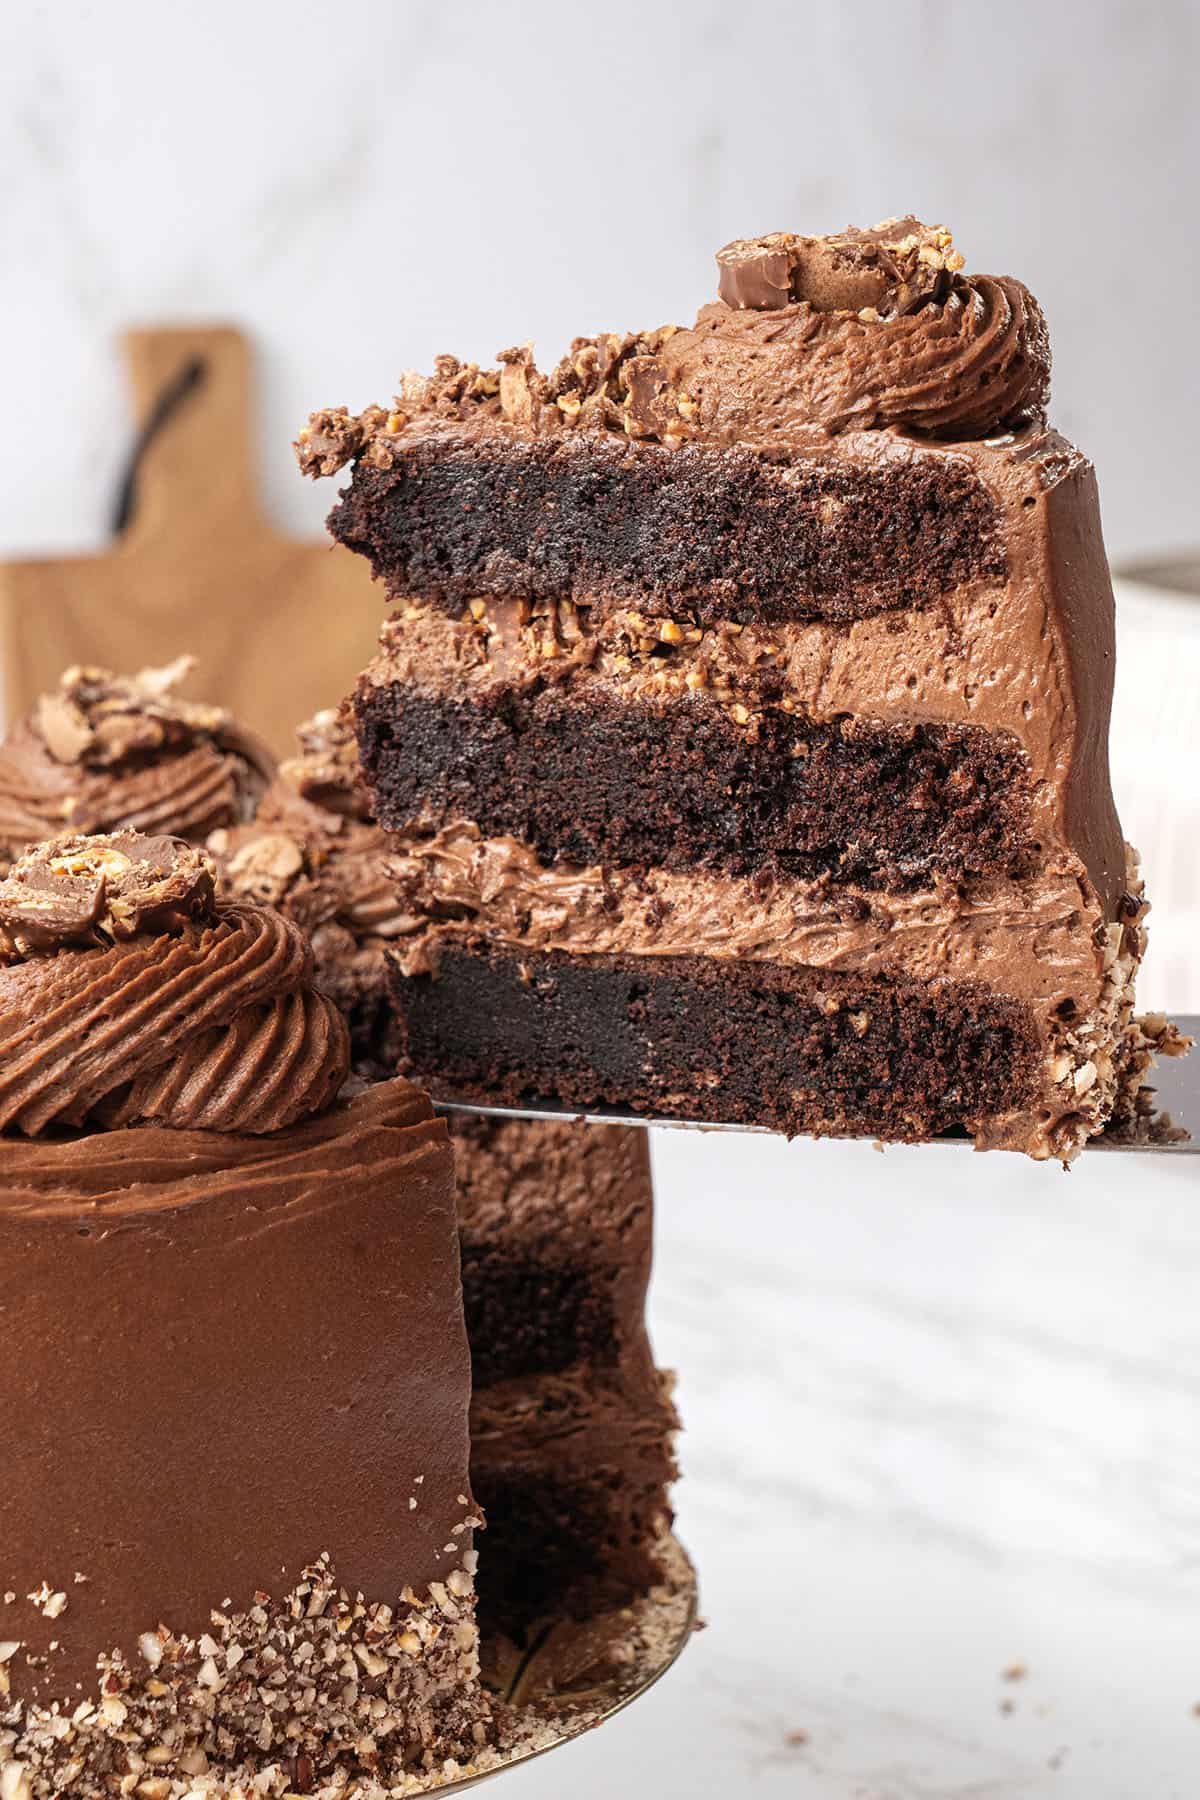
This recipe was first shared on the blog back in 2021. Since then, I've rebaked the cake many times, updated the recipe with new photos, added helpful baking tips based on your questions, and included a helpful video.
What makes a Ferrero Rocher cake truly taste like Ferrero Rocher
Ferrero Rocher is an Italian chocolate produced by Ferrero (the same company that makes Nutella), which explains the obvious similarity in the filling. Each bonbon has a whole roasted hazelnut at its center, encased in hazelnut cream, wrapped in a thin wafer shell, and coated in milk chocolate and chopped hazelnuts. I love it and even developed a homemade Ferrero Rocher recipe that hands down beats the store-bought ones!
To make a cake that genuinely tastes like a Ferrero Rocher, you need to deliver three things:
- Crunch — from crushed Ferrero Rocher candies between the layers (or feuilletine wafer if you want to source that separately).
- Deep hazelnut flavor — from hazelnut flour in the sponge and Nutella in the cream.
- Chocolate richness — from Dutch-processed cocoa in both the sponge and the cream, plus good-quality semi-sweet chocolate in the pastry cream base.
This recipe delivers all three in every single bite.
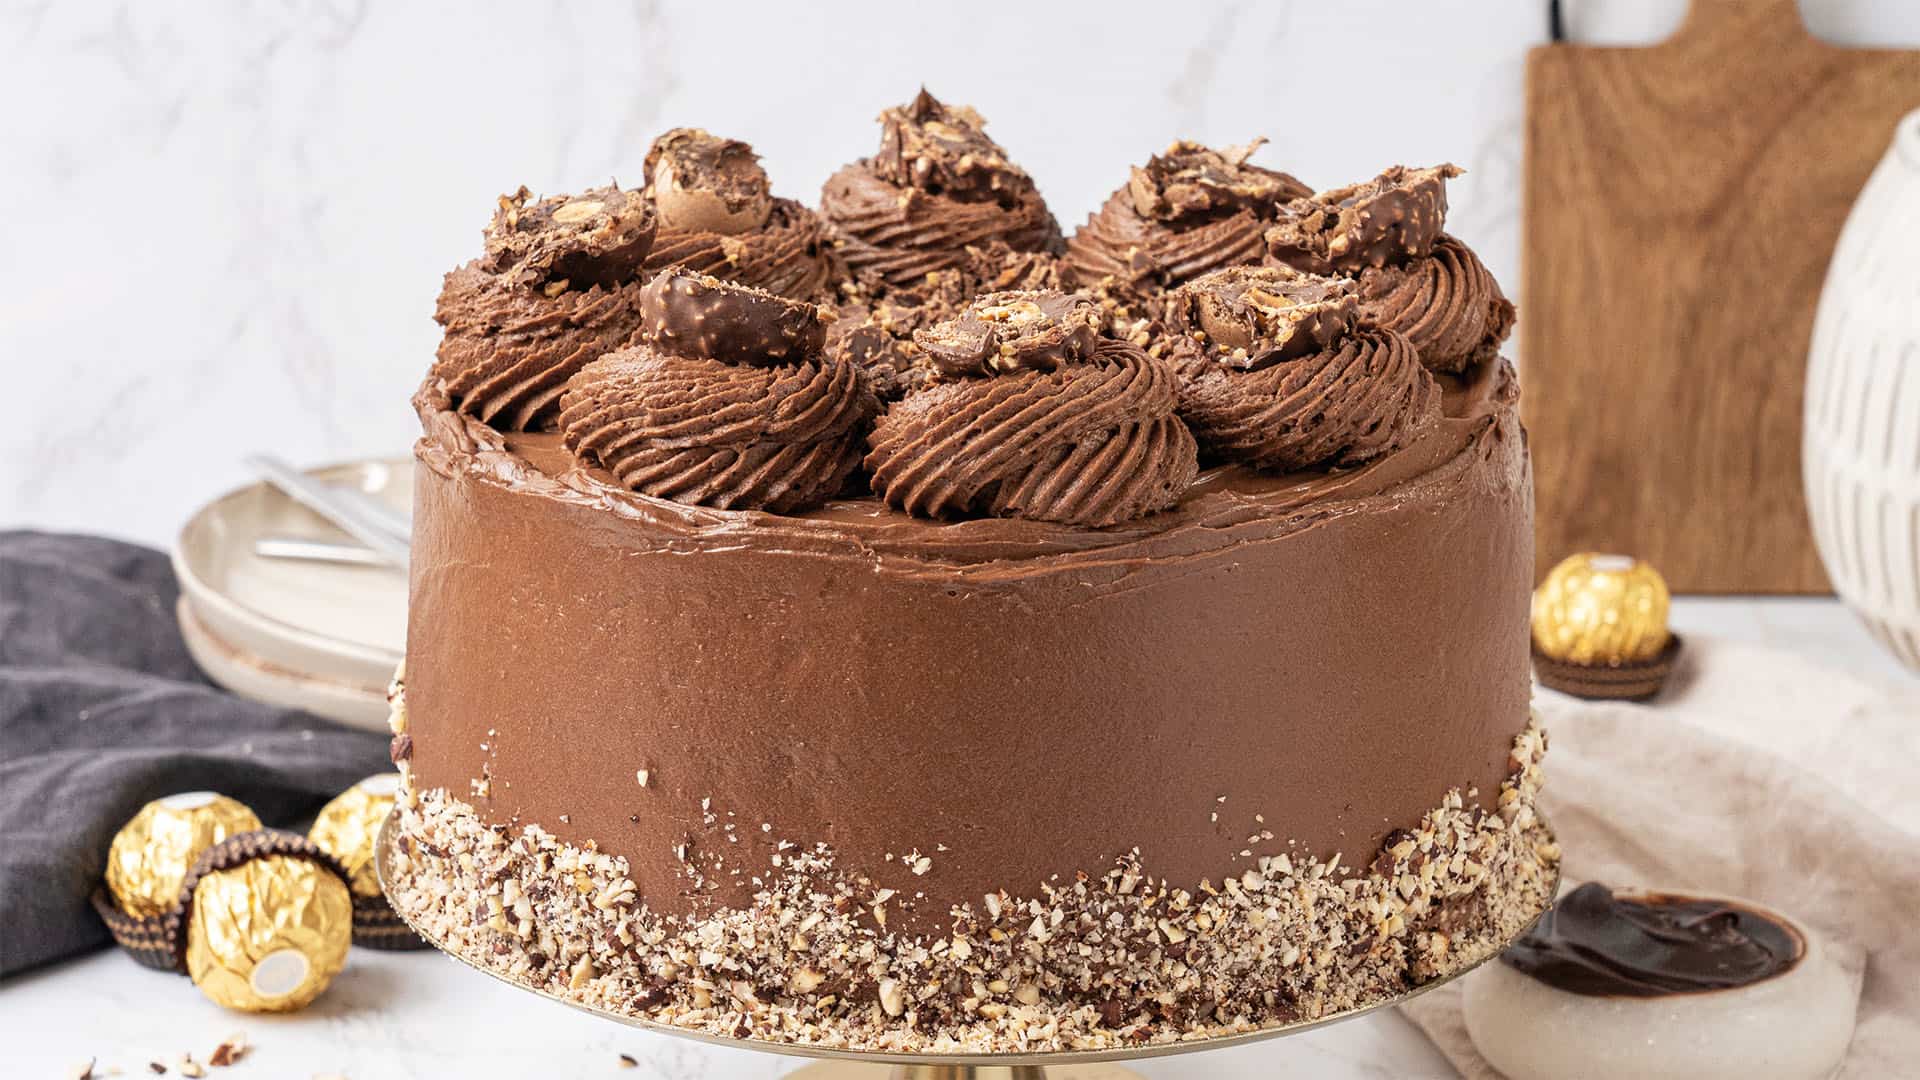
Katalin's key take on why this Ferrero Rocher cake tastes better than any other
Most Ferrero Rocher cake recipes you'll find online use a Nutella buttercream. It is quick and easy, but it has two significant drawbacks: it is very sweet and dense. Nutella already contains a lot of sugar, and combining it with a standard buttercream pushes the sweetness level past the point where you can properly taste the chocolate and hazelnut.
My version uses Nutella mousseline cream instead, which is the single biggest difference. Mousseline cream (also called German buttercream) is a classic French frosting: a cooked pastry cream (crème pâtissière) enriched with butter and, in this case, Nutella. Because the base is thickened by eggs and starch rather than sugar alone, the overall sweetness is far more balanced. The result is a silky, luxurious, intensely chocolatey cream, not sugary.
Once you learn how to make mousseline cream, you will find yourself using it for everything. It is the filling inside a classic Paris-Brest, it works beautifully in a Fraisier cake, and it is what makes this Ferrero Rocher cake taste genuinely homemade and bakery-quality, not like something from a box.
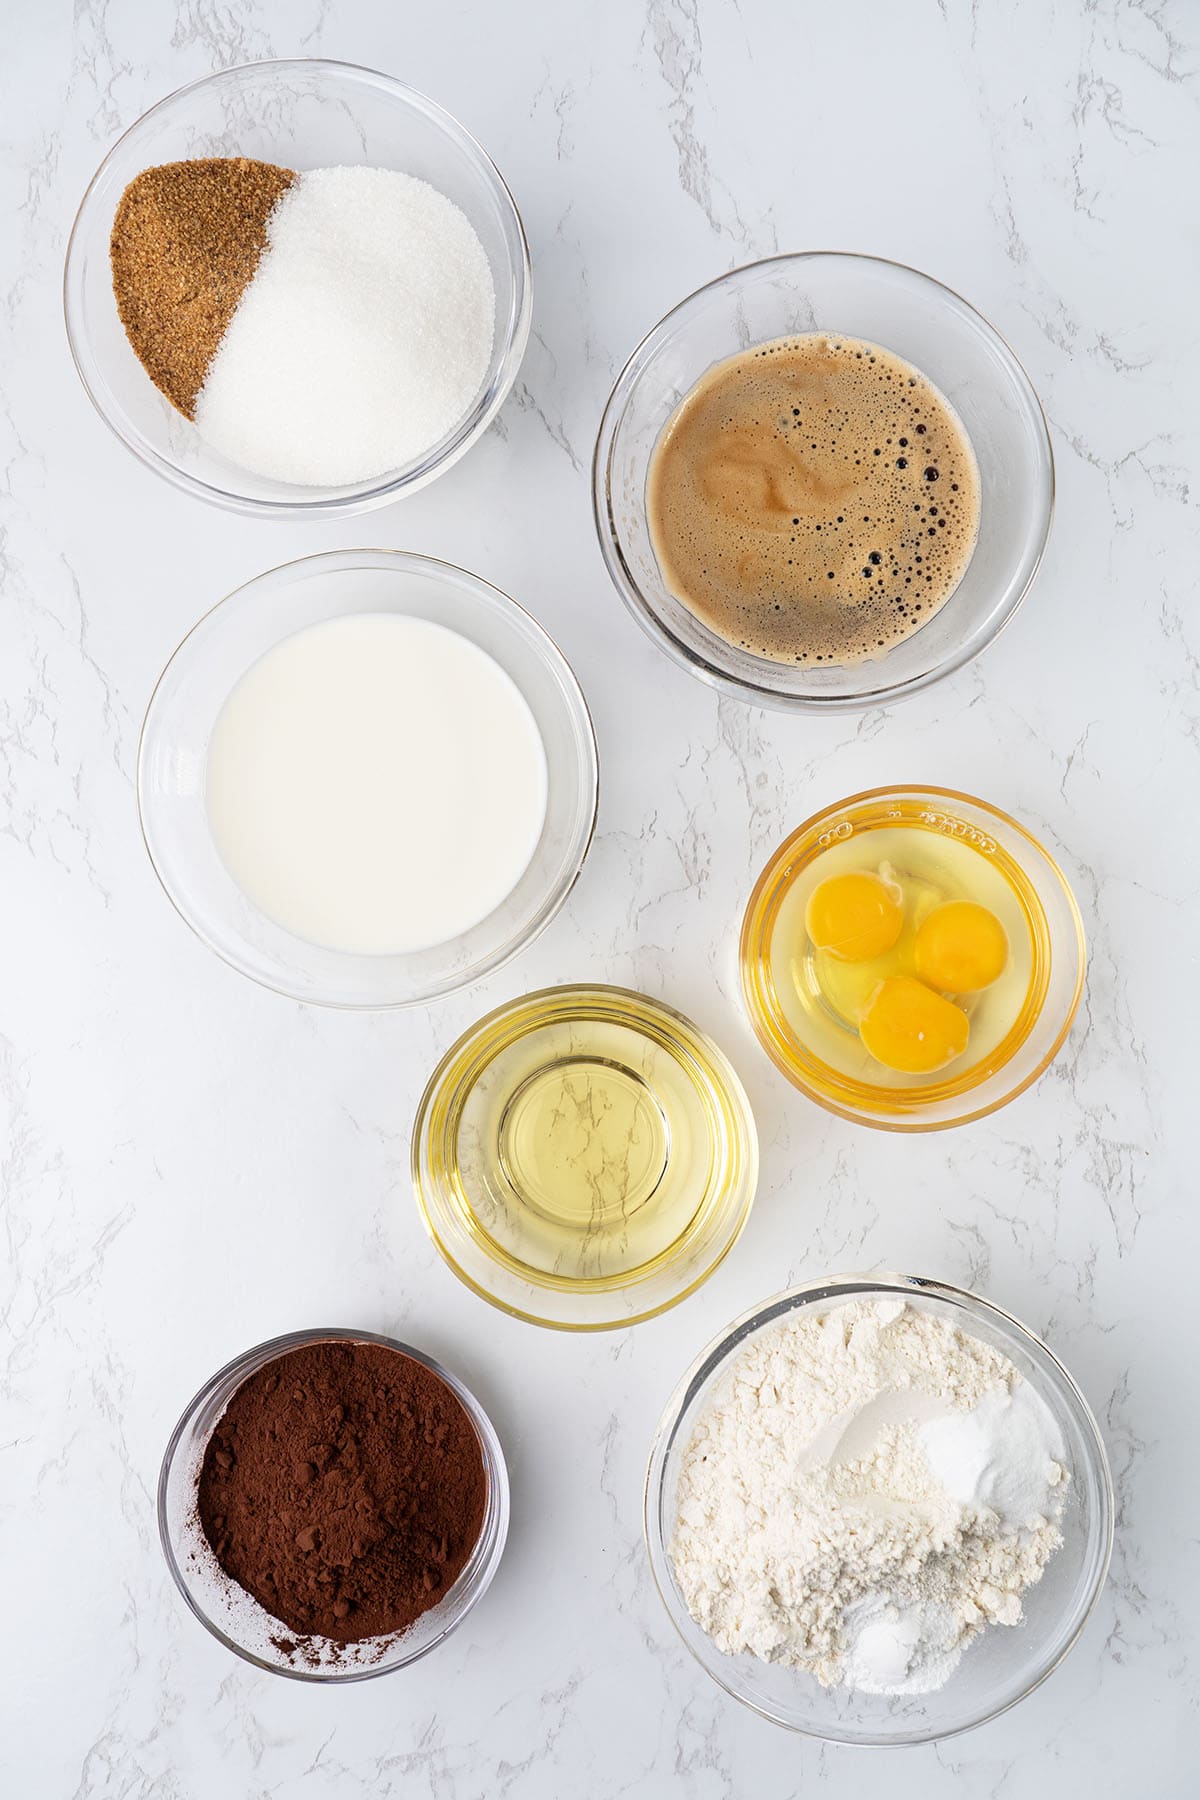
Ingredient notes — chocolate hazelnut sponge
Eggs — Use eggs at room temperature. Cold eggs do not emulsify properly with oil and milk, resulting in an uneven batter. This is not optional.
Oil — This sponge is oil-based, not butter-based. Oil stays liquid at room temperature, which means the cake stays moist even after a day or two in the fridge. Use a neutral vegetable oil with no flavor of its own.
Milk — Whole milk at room temperature. The higher fat content contributes to a more tender crumb.
Coffee — Freshly brewed espresso or strong filter coffee. You will not taste the coffee in the finished cake at all, but it amplifies the chocolate flavor. If you do not have coffee available, use lukewarm water instead.
Sugar — A mix of brown and white granulated sugar. Brown sugar adds a subtle molasses depth that works beautifully with chocolate and hazelnut.
All-purpose flour — Use all-purpose or pastry flour. Low-protein flour produces a more delicate, tender crumb. Always sift before using. For more on choosing the right flour, read my flour guide.
Hazelnut flour — This is one of the key differences between a standard chocolate cake and a proper Ferrero Rocher cake. The hazelnut flour brings genuine, deep hazelnut notes to the sponge. You can either purchase it ready-made, or blend whole-roasted hazelnuts with the flour for a few seconds. Do not blend the hazelnuts on their own, or they will turn into a paste.
Baking powder and baking soda — Both are used, and they have slightly different functions. Baking soda reacts with the acidic elements in the batter (cocoa, coffee) to create bubbles and lift, while baking powder provides additional and more even rise. Use both.
Dutch-processed cocoa powder — Always use unsweetened, Dutch-processed cocoa powder. It has a darker color and lower acidity than natural cocoa, which produces a richer chocolate flavor and a deeper-colored sponge. Always sift to avoid lumps.
Salt — Do not skip salt in a chocolate cake. It balances sweetness and enhances every other flavor in the recipe, especially the chocolate.
Exact quantities are in the recipe card below.
Ingredient notes — Nutella mousseline cream
Whole milk — Use the highest fat milk you can find. Full-fat whole milk produces a richer, more deeply flavored pastry cream base.
Granulated sugar — Plain white granulated sugar works perfectly here.
Egg yolks — Use only yolks, not whole eggs. Yolks produce a richer, more stable pastry cream.
Vanilla — Vanilla bean paste or pure vanilla extract. Technically optional here since Nutella and chocolate dominate, but it adds a gentle roundness. Avoid artificial vanilla.
Corn starch — Used as a thickening agent along with the cocoa powder.
Unsalted butter — Used twice: once in the pastry cream itself, and again when whipping the mousseline. It must be soft (room temperature) but not melted. If too cold, it will leave chunks in the cream. If too warm, the entire mixture will turn runny and greasy.
Semi-sweet chocolate — Use good-quality semi-sweet baking chocolate. This transforms the vanilla pastry cream into a chocolate pastry cream base. Quality matters here; the chocolate flavor should be pleasant and clean.
Dutch-processed cocoa powder — Unsweetened and Dutch-processed. First used as a thickening agent in the pastry cream, then added at the mousseline stage to deepen the chocolate color and flavor without adding extra sweetness.
Salt — Do not skip salt in a chocolate cake. It balances sweetness and enhances every other flavor in the recipe, especially the chocolate.
Nutella — The essential ingredient. If you want to go the extra mile, you can use my homemade Nutella. It is less sweet and has a more intense hazelnut flavor than the store-bought version.
Exact quantities are in the recipe card below.
How to make the chocolate pastry cream
The chocolate pastry cream is made first, because it needs time to set before it can be turned into mousseline cream. You can make it several hours or even a day ahead.
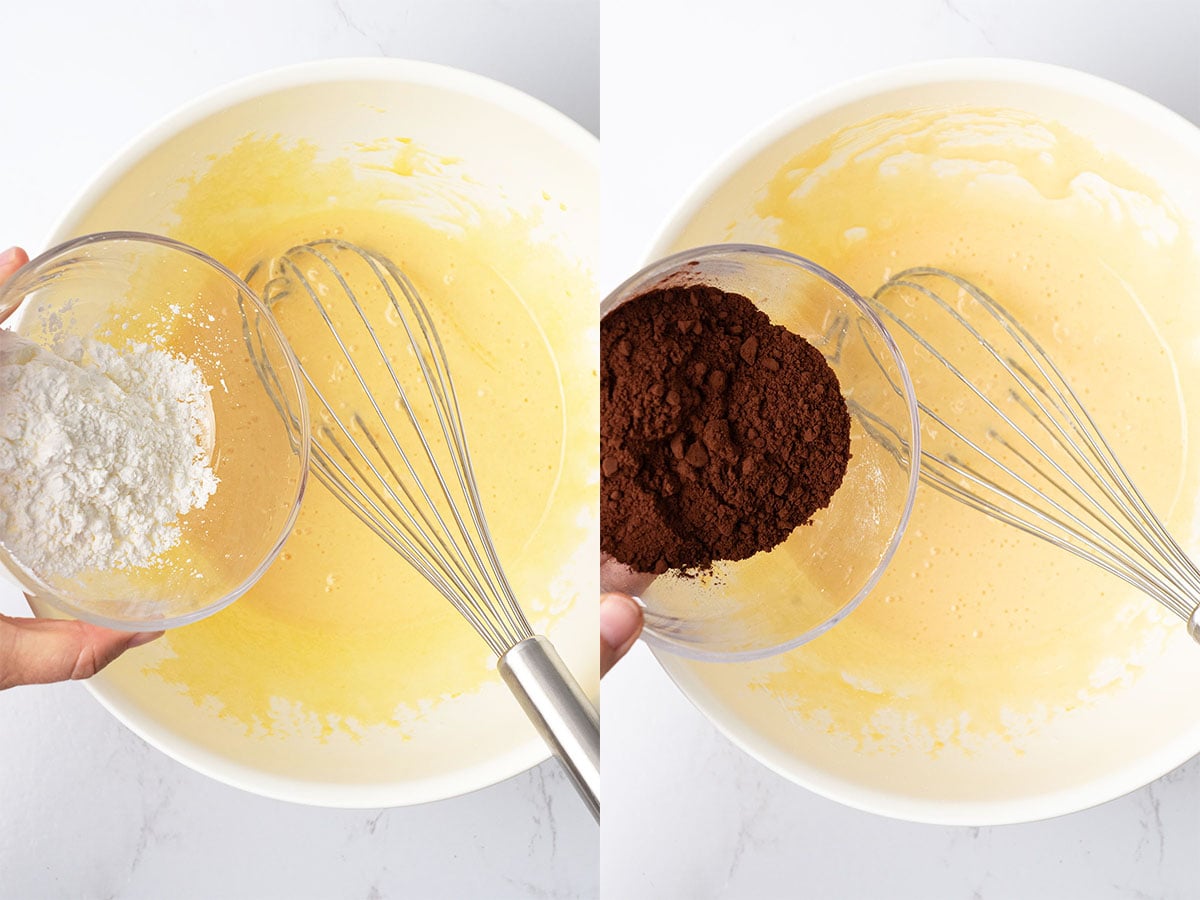
In a mixing bowl, whisk together the sugar and egg yolks until slightly pale and a little fluffy, about 1–2 minutes. Whisk in the cornstarch, cocoa powder, and vanilla until smooth and lump-free.
In a medium saucepan, bring the milk to a simmer over medium heat. Watch it carefully and remove from the heat as soon as it begins to bubble. Do not let it boil hard, as this can scramble the yolks at the next stage.
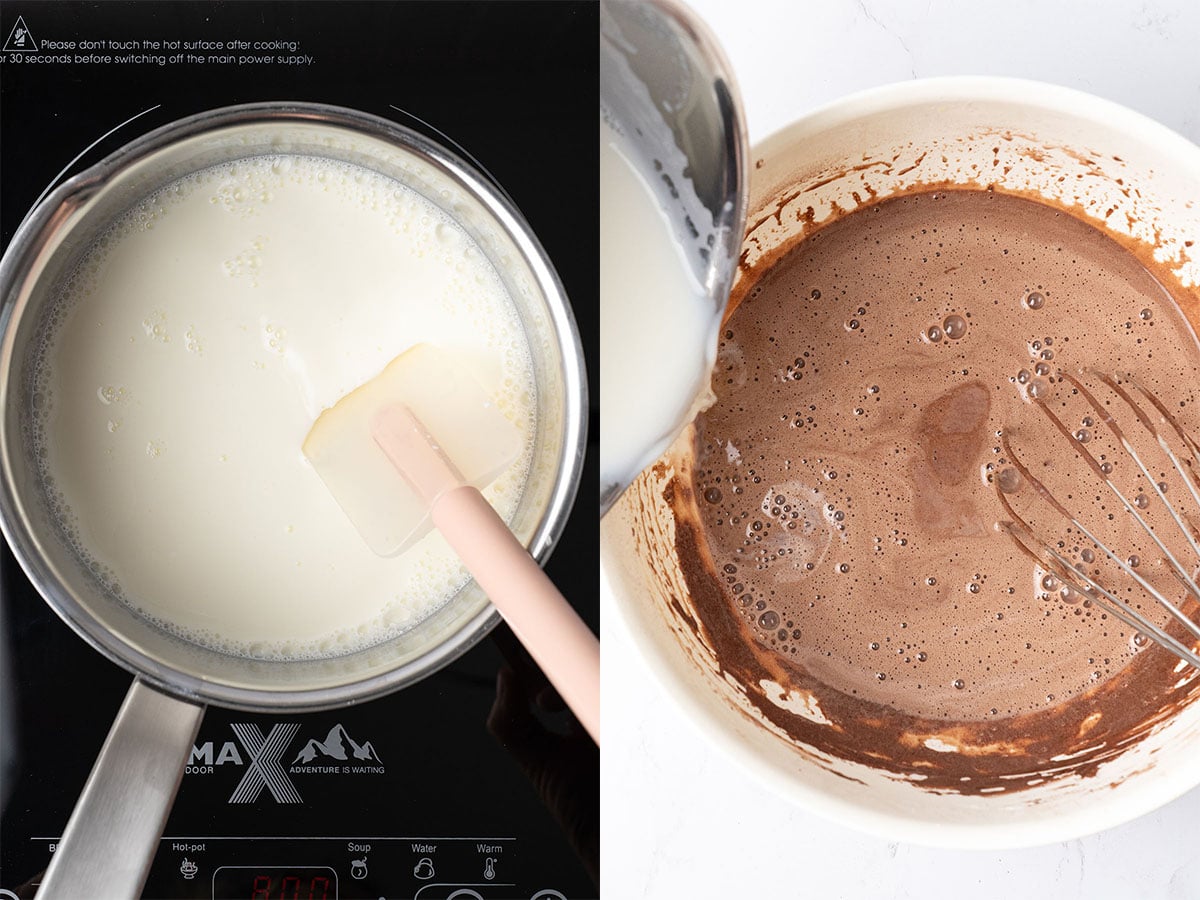
Very slowly pour the warm milk into the egg yolk mixture while whisking constantly and vigorously. This is called tempering; it gradually warms the yolks without cooking them. The mixture will begin to thicken slightly as the milk goes in.
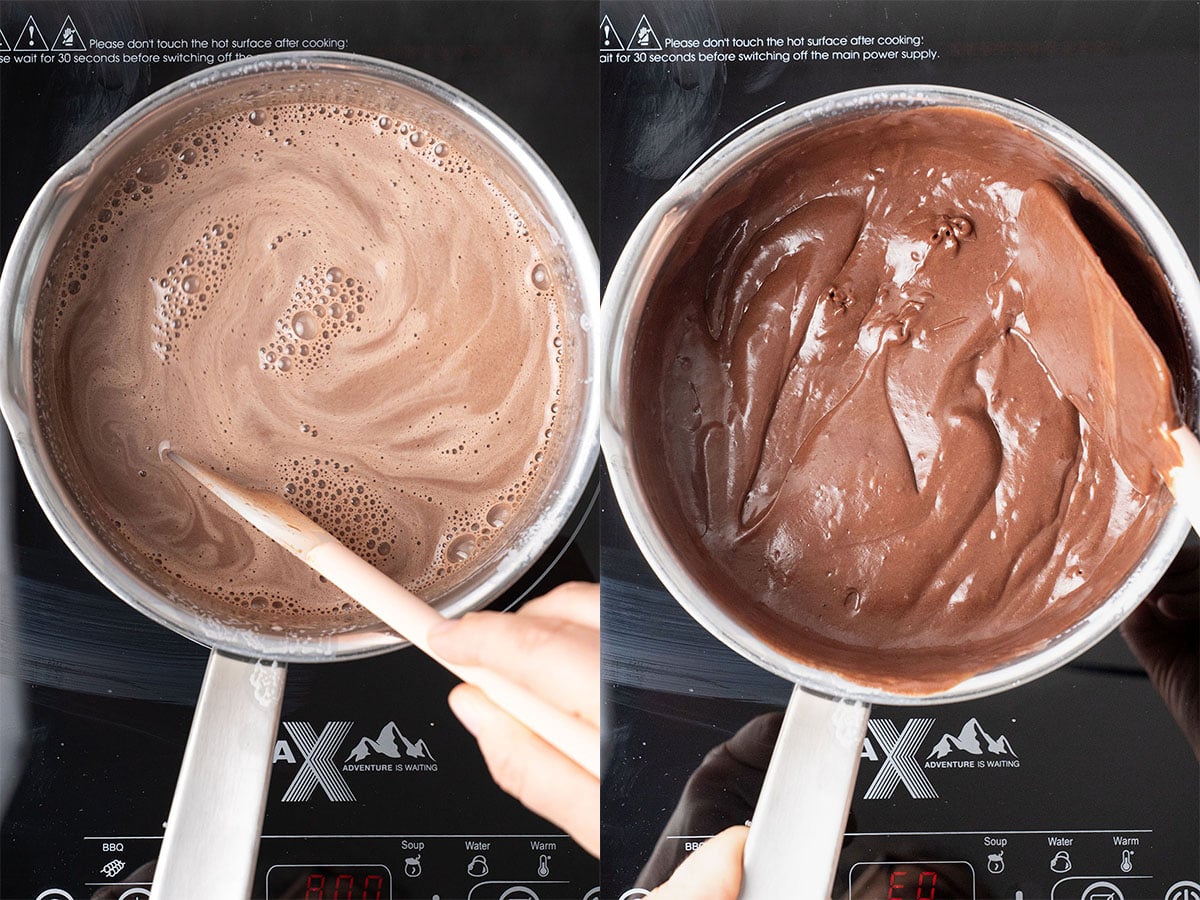
Pour the mixture back into the saucepan and return to medium heat, whisking constantly. Cook until the cream thickens significantly, approximately one minute after it first comes to a boil. The cream may look lumpy briefly, but keep whisking firmly, and it will smooth out into a glossy, thick custard. If any lumps remain, pass the cream through a fine-mesh sieve.
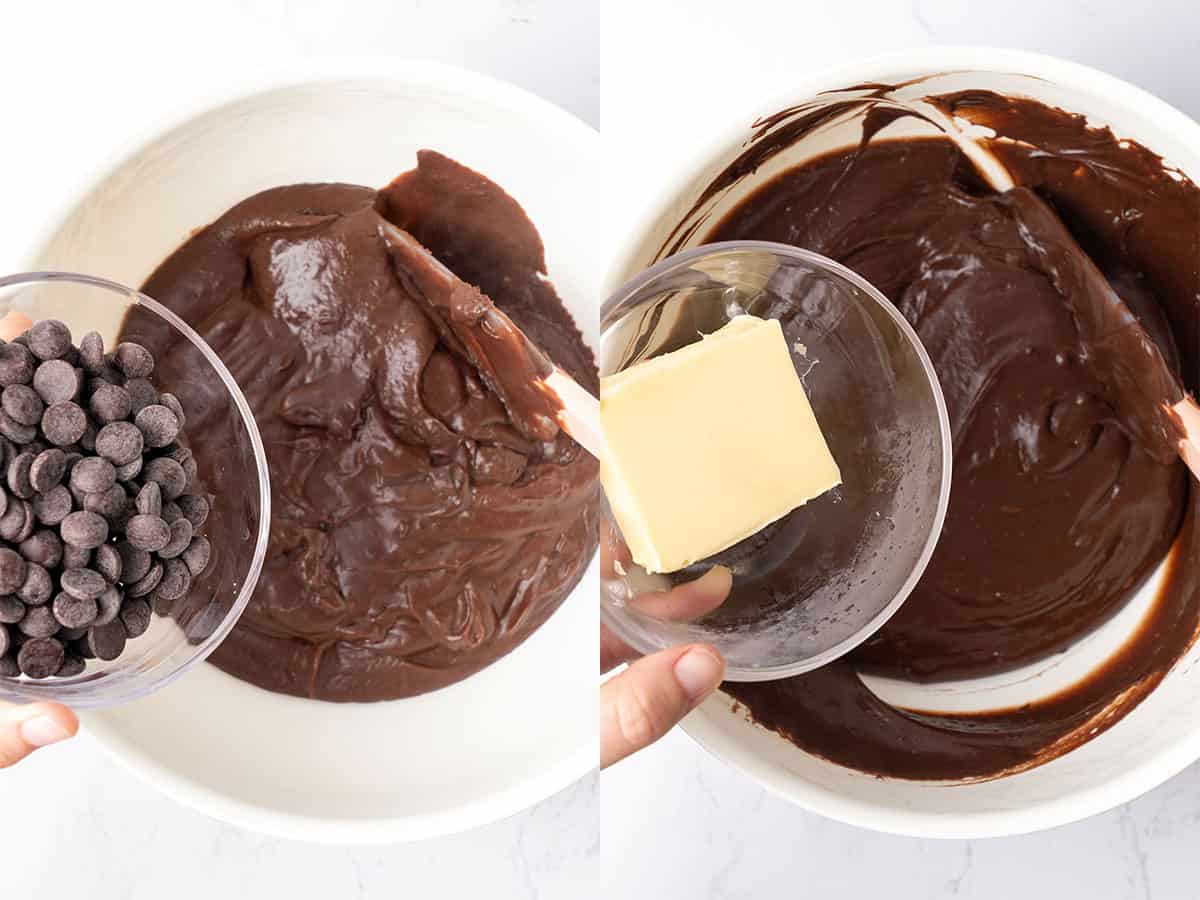
Add the semi-sweet chocolate immediately while the cream is hot, in three stages, stirring well with a rubber spatula after each addition until completely melted and incorporated. The same method is applied when adding the butter.
Transfer the finished pastry cream into a shallow bowl and press a sheet of plastic wrap directly onto the surface. This prevents skin from forming on top. Allow it to cool at room temperature, then refrigerate until fully set.
The pastry cream can be stored in the fridge for up to 2 days, but it cannot be frozen. For a full deep-dive into pastry cream technique, troubleshooting, and variations, see my dedicated pastry cream guide.
Bake the chocolate hazelnut sponge
Start by preparing your three 20 cm (8-inch) round cake pans. Brush the inside of each pan lightly with oil — just enough for the parchment to stick — then line both the base and the sides with parchment paper. This ensures clean, effortless release every time.
Preheat your oven to 175°C / 345°F. Measure all ingredients by weight with a digital scale before you begin.
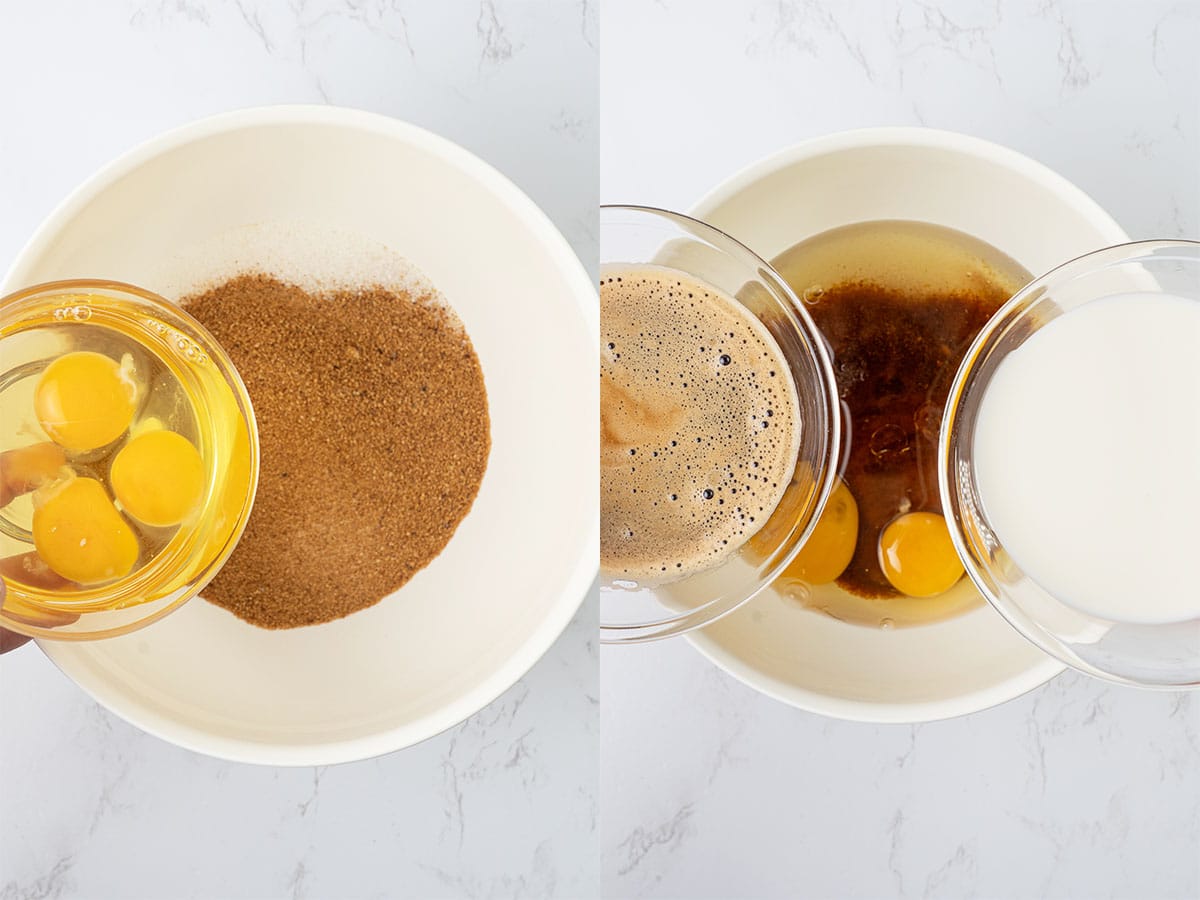
In a large bowl, whisk the room-temperature wet ingredients together with an electric hand mixer for 1–2 minutes: eggs, vegetable oil, both sugars, milk, and coffee.
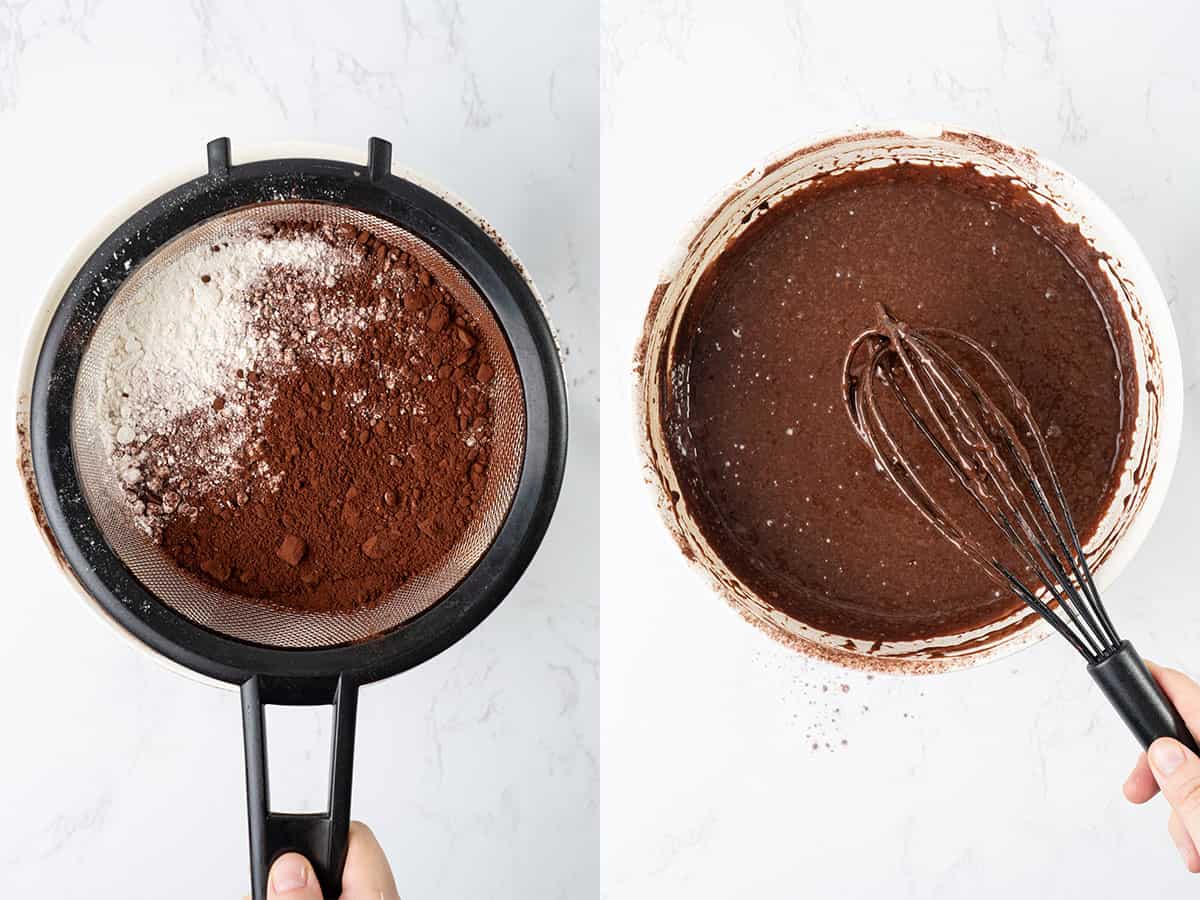
In a separate bowl, sift together all the dry ingredients: all-purpose flour, hazelnut flour, Dutch-processed cocoa powder, baking powder, baking soda, and salt.
Pour the wet ingredients into the dry ingredients and fold gently by hand with a rubber spatula until just combined.
Divide the batter equally between the three prepared pans using a digital scale for accuracy. Bake at 175°C / 345°F for 25–30 minutes, without opening the oven door. Check doneness by inserting a toothpick or skewer into the center of each cake. It should come out clean.
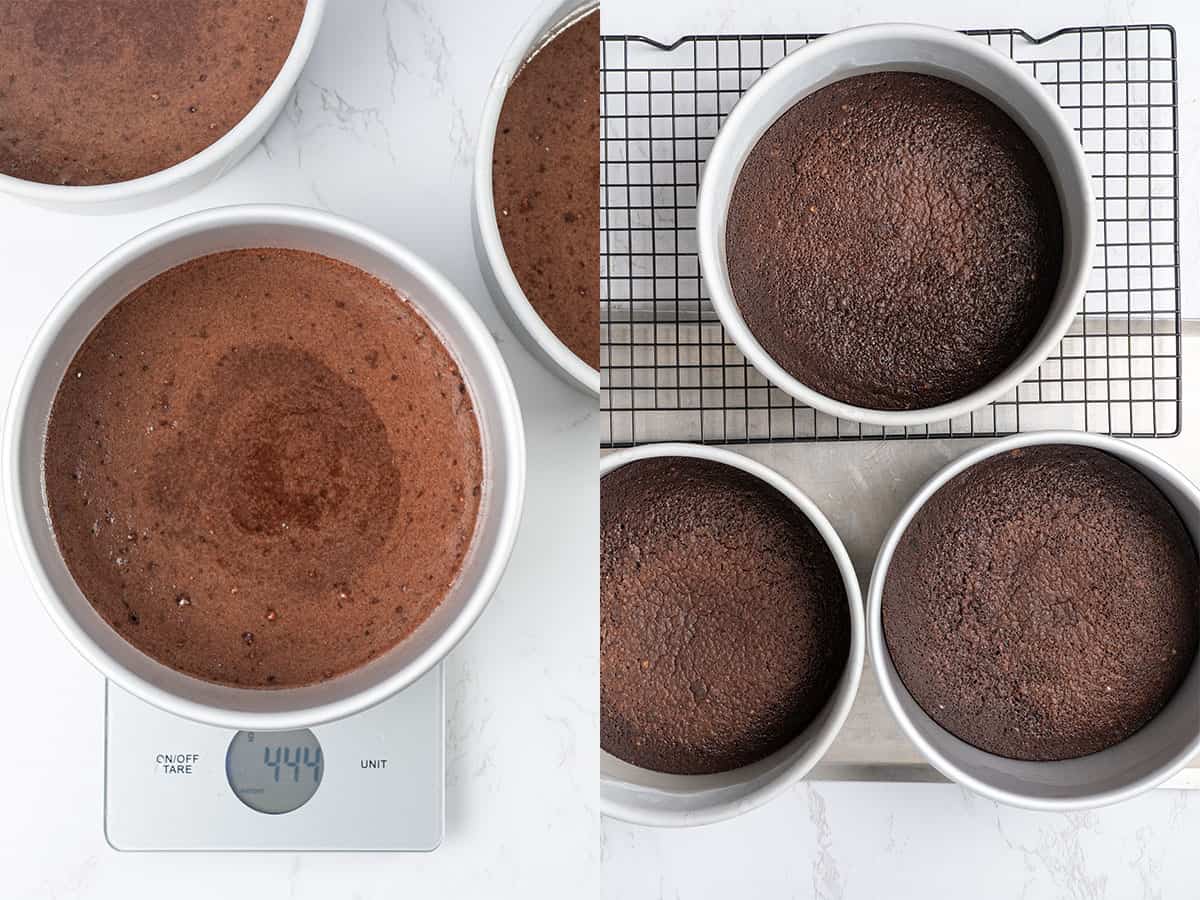
Once baked, transfer the sponges to a wire cooling rack and allow them to cool completely. Because the sponges are fragile when warm, do not attempt to move or handle them until they are fully cool. Once at room temperature, chill them in the fridge before assembly. Cold sponges are easier to handle and frost.
If you ever encounter issues like a sunken center, check my guide on why cakes sink and how to avoid it.
How to make my signature Nutella mousseline cream
To start with, the pastry cream must be set but back at room temperature, not cold from the fridge. The butter must be genuinely soft and pliable, not just cool to the touch. If either is too cold, the mixture will stay lumpy. If either is too warm, the cream will break. Take the pastry cream out of the fridge well in advance and let it come fully to room temperature before you begin.
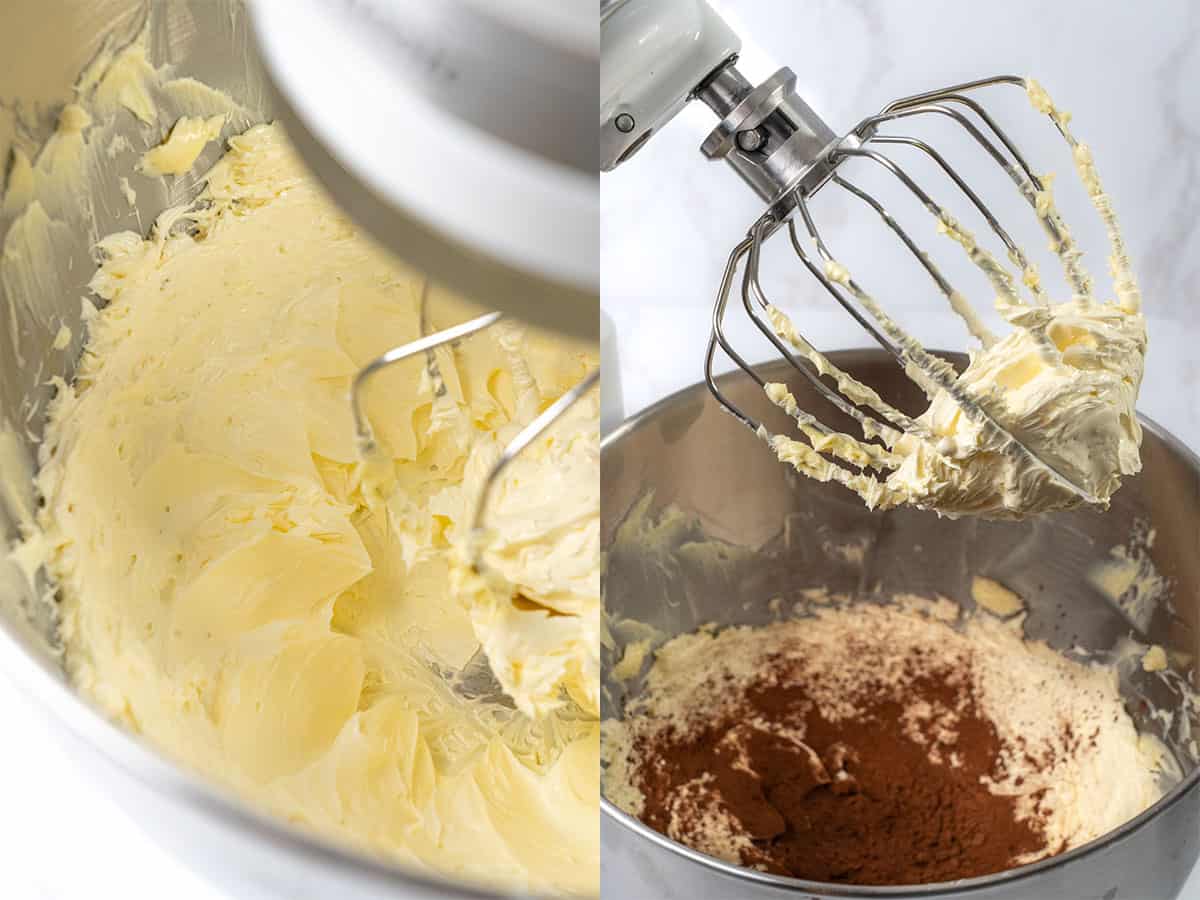
Place the soft butter in the bowl of a stand mixer fitted with the whisk attachment (or use an electric hand mixer). Whip on medium-high speed for 2–3 minutes until the butter becomes pale, fluffy, and creamy.
Add the Dutch-processed cocoa powder and salt and whip for another minute. Then add the Nutella and whip until fully combined and uniform.
Now begin adding the room-temperature chocolate pastry cream in 4 equal additions, allowing the mixer to run between each addition until fully incorporated before adding the next. Once all the pastry cream is in, continue whipping for about 3 minutes until the cream is light and fluffy, with a pipeable consistency.
Stop as soon as the cream looks fluffy and stable. This is the single most critical technique point in the recipe. Unlike whipped cream, mousseline cream does not get better or stiffer with more whipping, it will abruptly break, and the butter will separate, leaving a greasy, curdled mixture.
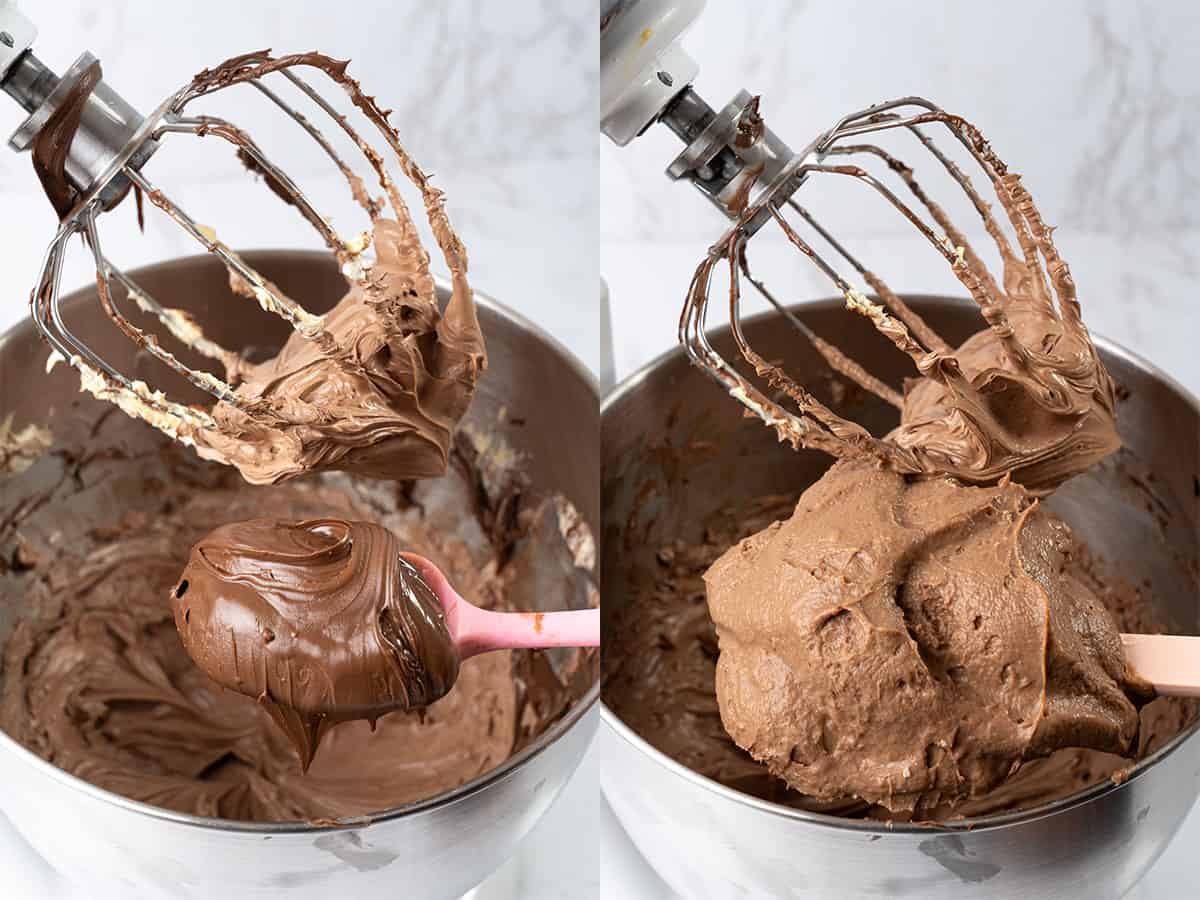
If the cream feels soft after whipping (which is normal if your kitchen is warm), refrigerate it for 30–60 minutes before assembly. Due to its butter content, it will firm up in the fridge and become much easier to frost with. This also means that if you store it too long in the fridge, you need to bring it back to near room temperature to pipe.
Assemble the Ferrero Rocher cake
Before assembly, make sure you have everything ready: three chilled chocolate-hazelnut sponges, a stable Nutella mousseline cream, crushed Ferrero Rocher chocolates between the layers, and whole Ferrero Rochers and chopped roasted hazelnuts for decoration.
Note that you will be using the same mousseline cream for three purposes — filling the layers, frosting the outside, and piping the decoration on top. Keep this in mind and do not use it all up during the filling stage.
Place the first sponge layer on the plate or cake board you plan to serve from.
Pipe a border of mousseline cream around the outer edge of the sponge (this acts as a dam to hold the filling in place), then pipe or spread cream across the center. Add a generous scattering of crushed Ferrero Rocher chocolates over the cream.
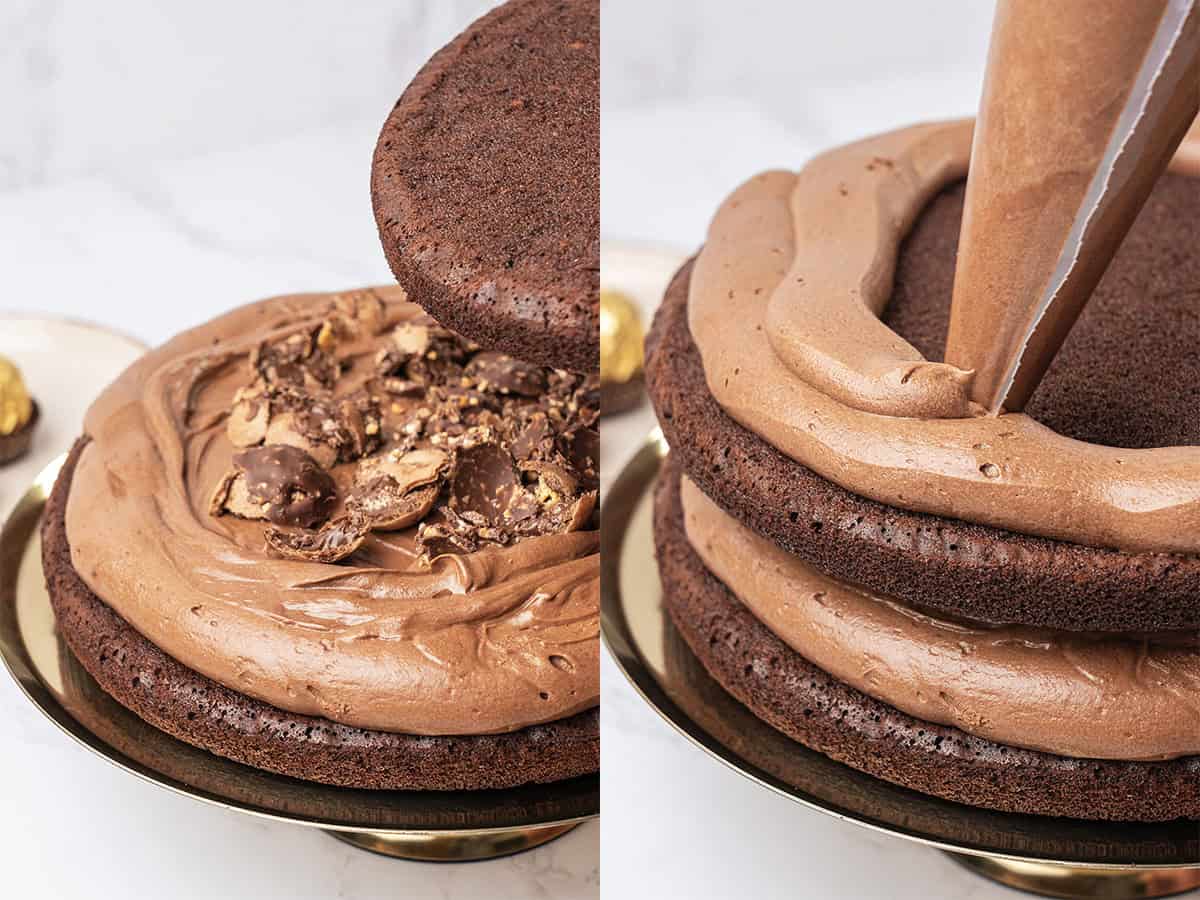
Place the second sponge layer on top and repeat exactly: cream border, cream fill, crushed Ferrero Rochers.
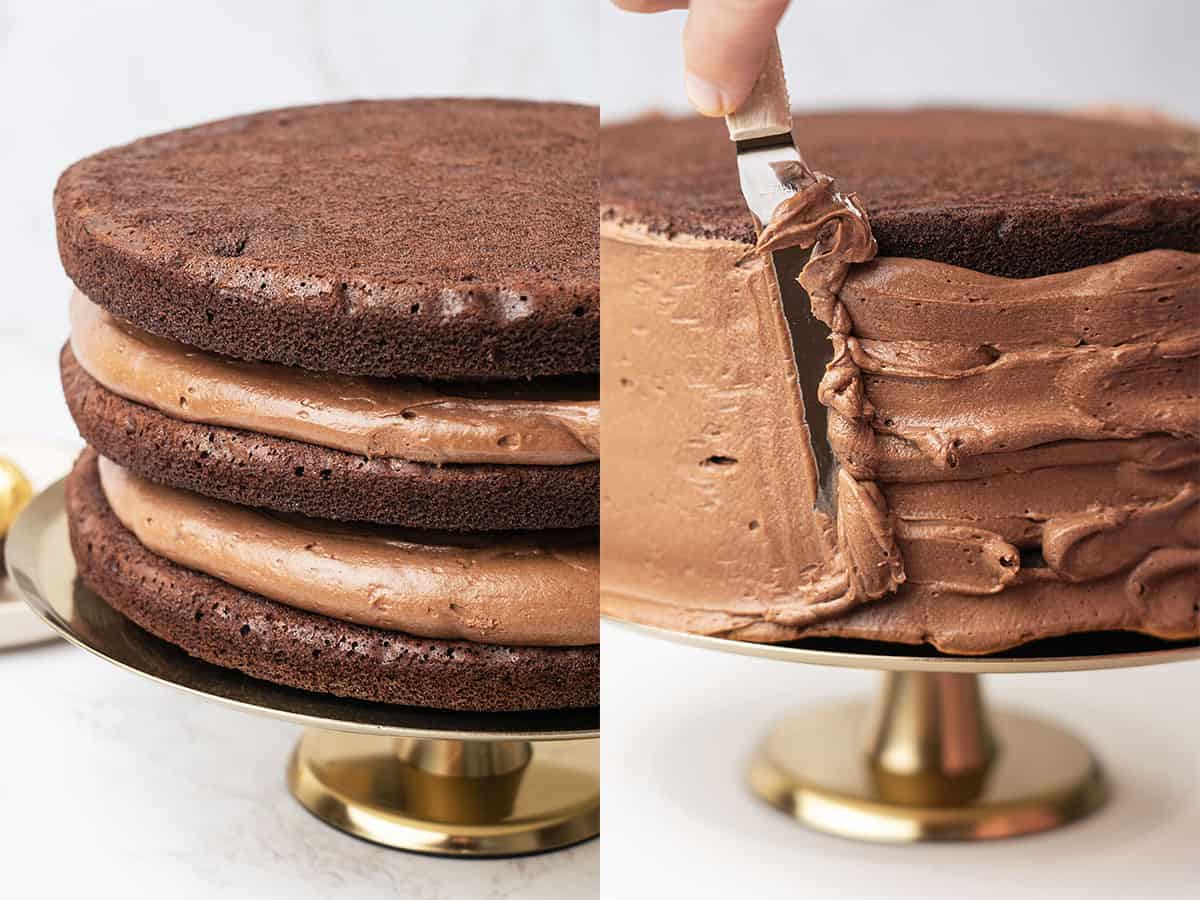
Place the third sponge layer on top. Check from eye level that all three layers are even and well-aligned. Chill the assembled, unfrosted cake in the fridge for about 1 hour, or in the freezer for 15 minutes, until the cream layers have firmed up and the structure feels stable.
Now, finish with decorating the cake
Once chilled, apply a thin crumb coat; a light, even layer of mousseline cream over the entire outside of the cake to seal in any loose crumbs. Chill again for 30 minutes.
Apply the final outer layer of mousseline cream. An offset spatula and a cake turntable make this much easier. The cream does not need to be perfectly smooth; a slightly textured finish looks beautiful and very intentional. Chill once more for at least 30 minutes before decorating.
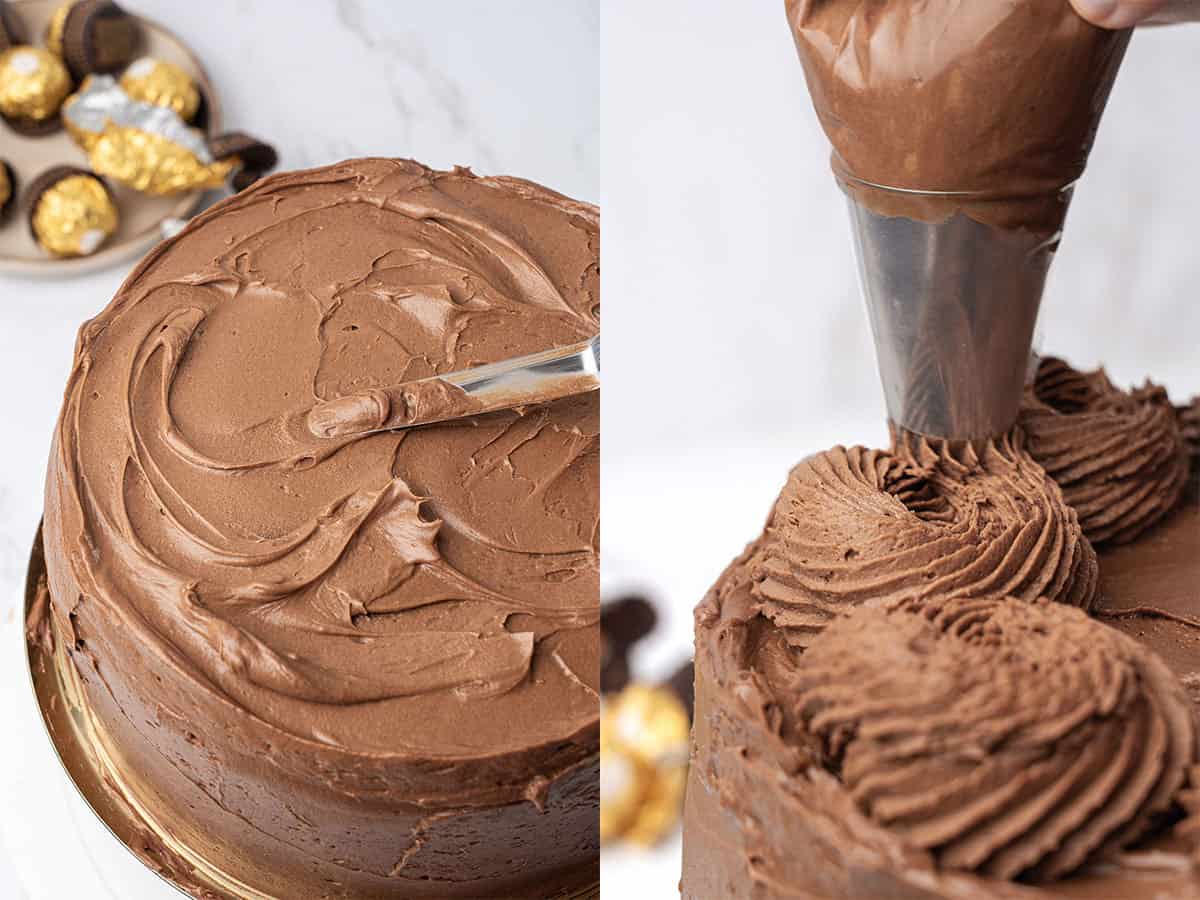
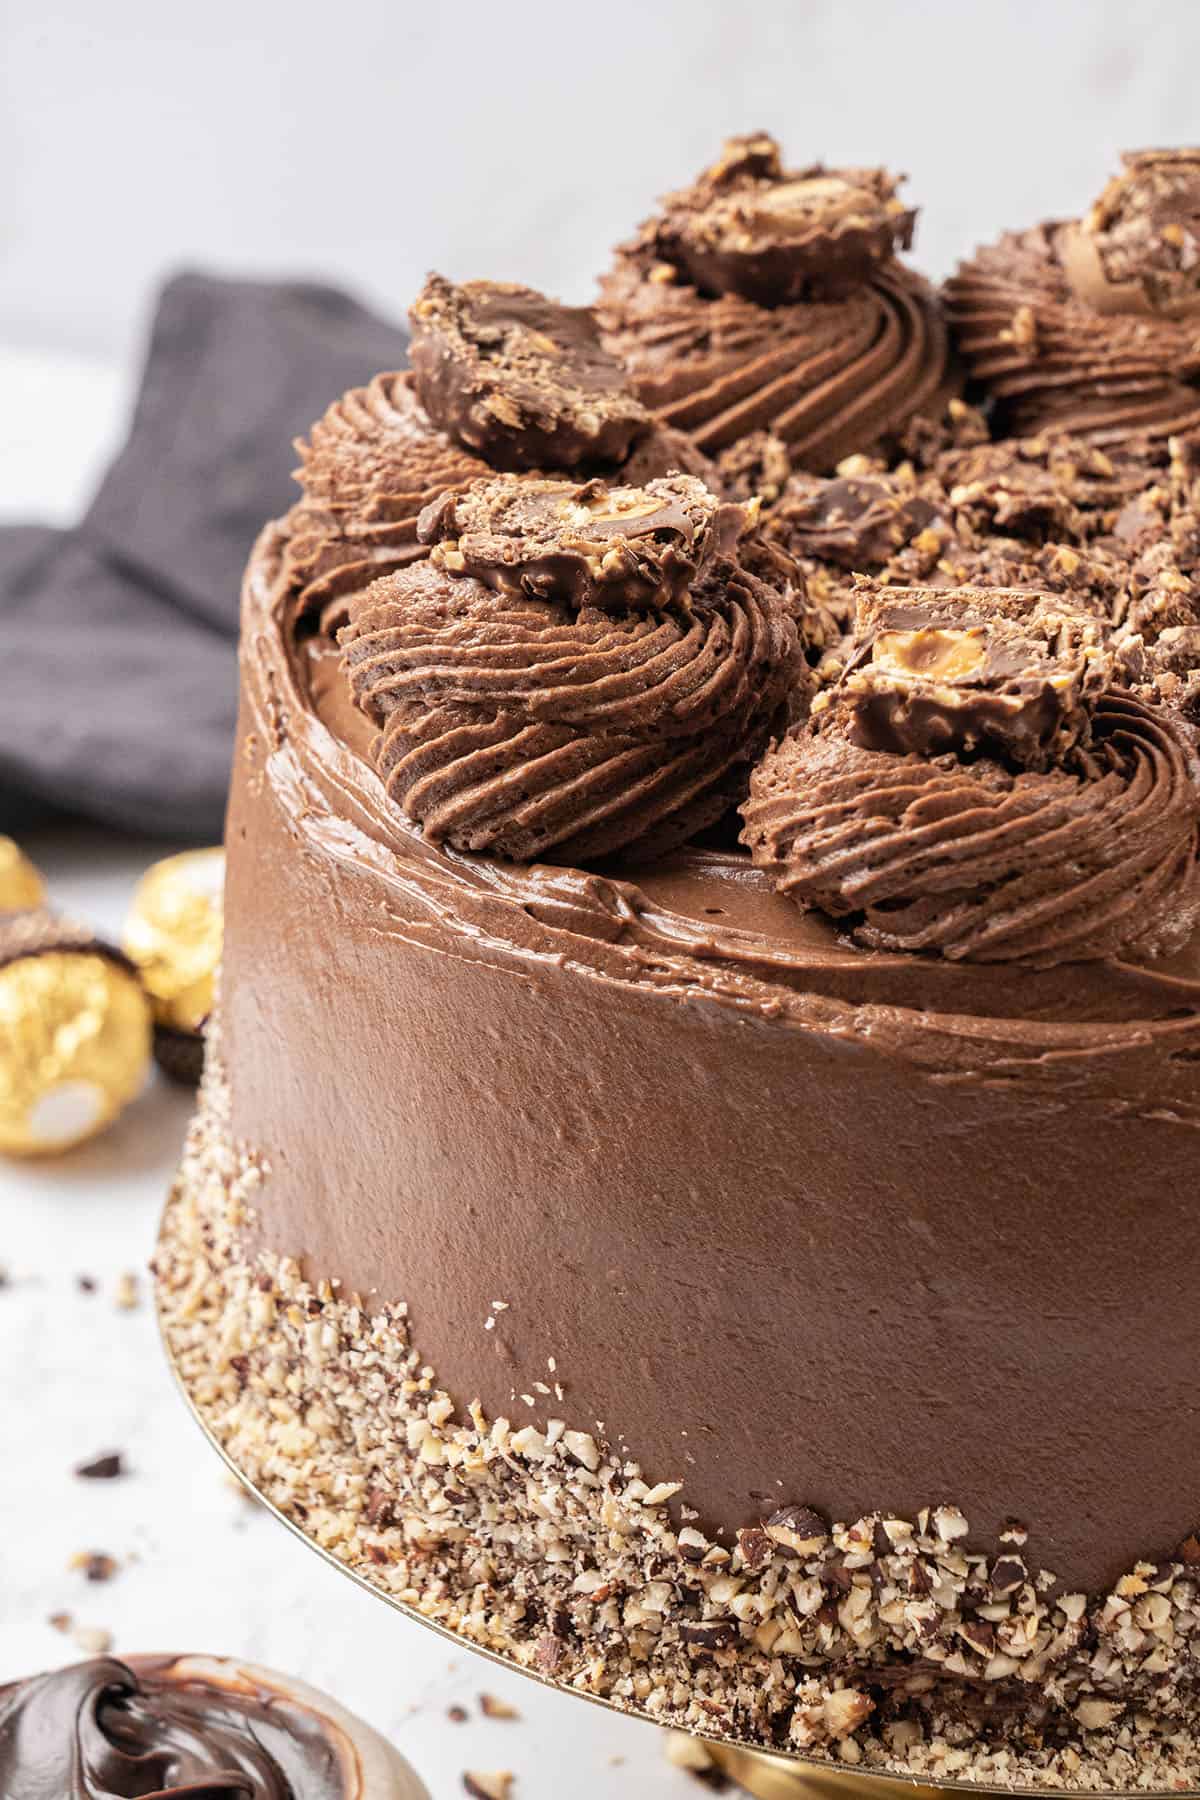
Once the frosted cake is firm, press chopped roasted hazelnuts onto the sides and top. Use the remaining mousseline cream in a piping bag fitted with a nozzle to pipe swirls around the top edge, then decorate with Ferrero Rocher candies.
Throughout the entire assembly process: if at any point the cream or sponge layers feel soft or warm, stop and return the cake to the fridge before continuing. Cold cake = clean, stable layers.
My expert tips
1. When cooking the pastry cream, it might look lumpy before it smooths out. This is completely normal. Keep whisking consistently, and it will come together into a glossy, thick custard.
2. The mousseline cream is the component people struggle with most, and almost every problem comes back to ingredients being too cold or too warm. Allow the pastry cream to come fully to room temperature before whipping. Also, make sure the butter is soft but not melted or shiny.
3. The mousseline cream goes from perfect to broken very quickly, and there is no way back once it breaks. Stop as soon as it looks fluffy, smooth, and pipeable. You can always give it a brief whip again if it is too soft, but an overshipped=broken mousseline needs to be started from scratch.
4. Chill the cake as you assemble it between every stage. This is non-negotiable for a clean, professional-looking result. Each rest allows the cream to firm up and stabilize the structure, making the next step significantly easier and neater.
5. Once a three-layer filled cake is assembled, it is extremely difficult to move cleanly without damaging the structure. Place the first sponge layer directly onto the plate or cake board you will serve from before you begin filling.
Make-ahead instructions
This cake is well-suited to being made in stages over 1–2 days, which makes it much more manageable for celebrations.
The chocolate pastry cream can be made up to 2 days ahead and stored in the fridge with plastic wrap pressed directly to the surface.
The chocolate hazelnut sponges can be baked 1–2 days ahead. Wrap each cooled sponge tightly in plastic wrap and refrigerate. Cold sponges are actually easier to handle during assembly. The baked, fully cooled sponge layers freeze very well for up to 2 months when wrapped tightly in plastic wrap and then foil. Defrost overnight in the fridge while still wrapped. The mousseline cream and the assembled cake should not be frozen.
The Nutella mousseline cream is best made fresh on the day of assembly, as it is easiest to work with when freshly prepared. However, once you have filled and frosted the assembled cake, it will keep beautifully in the fridge for up to 3–4 days. You need to bring it back to room temperature to pipe.
If you are making the cake for an event, assemble it the day before and refrigerate overnight. The flavors actually develop beautifully after a night in the fridge.
Some potential ingredient substitutes
Hazelnut flour — If you cannot find hazelnut flour, blend roasted hazelnuts together with the flour in a food processor, but always with the flour, never alone, or the hazelnuts will turn oily.
Coffee — Replace with the same quantity of lukewarm water. The coffee is completely undetectable in the final cake; it purely enhances the chocolate flavour.
Nutella — Any chocolate hazelnut spread will work. The quality of the spread affects the quality of the cream, so use one you enjoy eating on its own.
Ferrero Rocher candies — If Ferrero Rocher is unavailable, feuilletine wafer flakes (available from baking suppliers) provide a similar, delicate crunch between the layers.
I do not recommend substituting eggs, dairy, or flour with gluten-free alternatives unless you are comfortable entirely reformulating the recipe.
Helpful equipment
A digital scale is essential for accurate, consistent results, always measure by weight in grams. A digital oven thermometer is highly recommended, as most domestic ovens run hotter or cooler than their dials suggest.
Use an electric hand mixer for whipping the wet cake ingredients. A rubber spatula is essential for folding the sponge batter and stirring the pastry cream without deflating or scorching it.
You will need three 8 inch / 20 cm round cake pan (tall) for the sponge layers. An offset spatula makes frosting the outside of the cake much easier, and a cake turntable is a worthwhile investment if you bake layered cakes regularly.
Recipe FAQs
Can I make this in a different pan size? Yes. Use my cake pan sizes conversion guide for precise quantity adjustments.
Can I add a chocolate ganache drip to this cake? Yes. Once the cake is fully frosted and well chilled, prepare a simple ganache by combining dark or semi-sweet chocolate with warm heavy cream in a 1:1 ratio. Allow it to cool until thick but still pourable (around 35°C / 95°F), then spoon carefully around the top edge of the cake, letting it drip down the sides. Work quickly on a cold, firm cake to control where the drip lands. Allow the ganache to set before adding the hazelnut and Ferrero Rocher decoration on top.
Can I serve this cake at room temperature? Yes, and many people prefer it this way. The mousseline cream contains butter, so it is firmer straight from the fridge. Allowing the cake to sit at room temperature for 30 minutes before slicing lets the cream soften to a much creamier texture. Having said that, do not leave this cake out of the fridge for several hours, especially not on a hot summer day.
Why is my frosting runny? Almost always, the cream has been over-whipped. Once mousseline passes its peak, it breaks very quickly. The butter separates, and the cream becomes runny rather than firm. If the cream is soft but still looks uniform and smooth (not curdled or greasy), refrigerate it for 30–60 minutes to let the butter firm up.
Why is my cake dry? This is a very moist cake due to the high proportion of oil and liquid. Dryness is almost always caused by one of three things: too much flour (measured by cup rather than weight), overmixed batter, or overbaking.
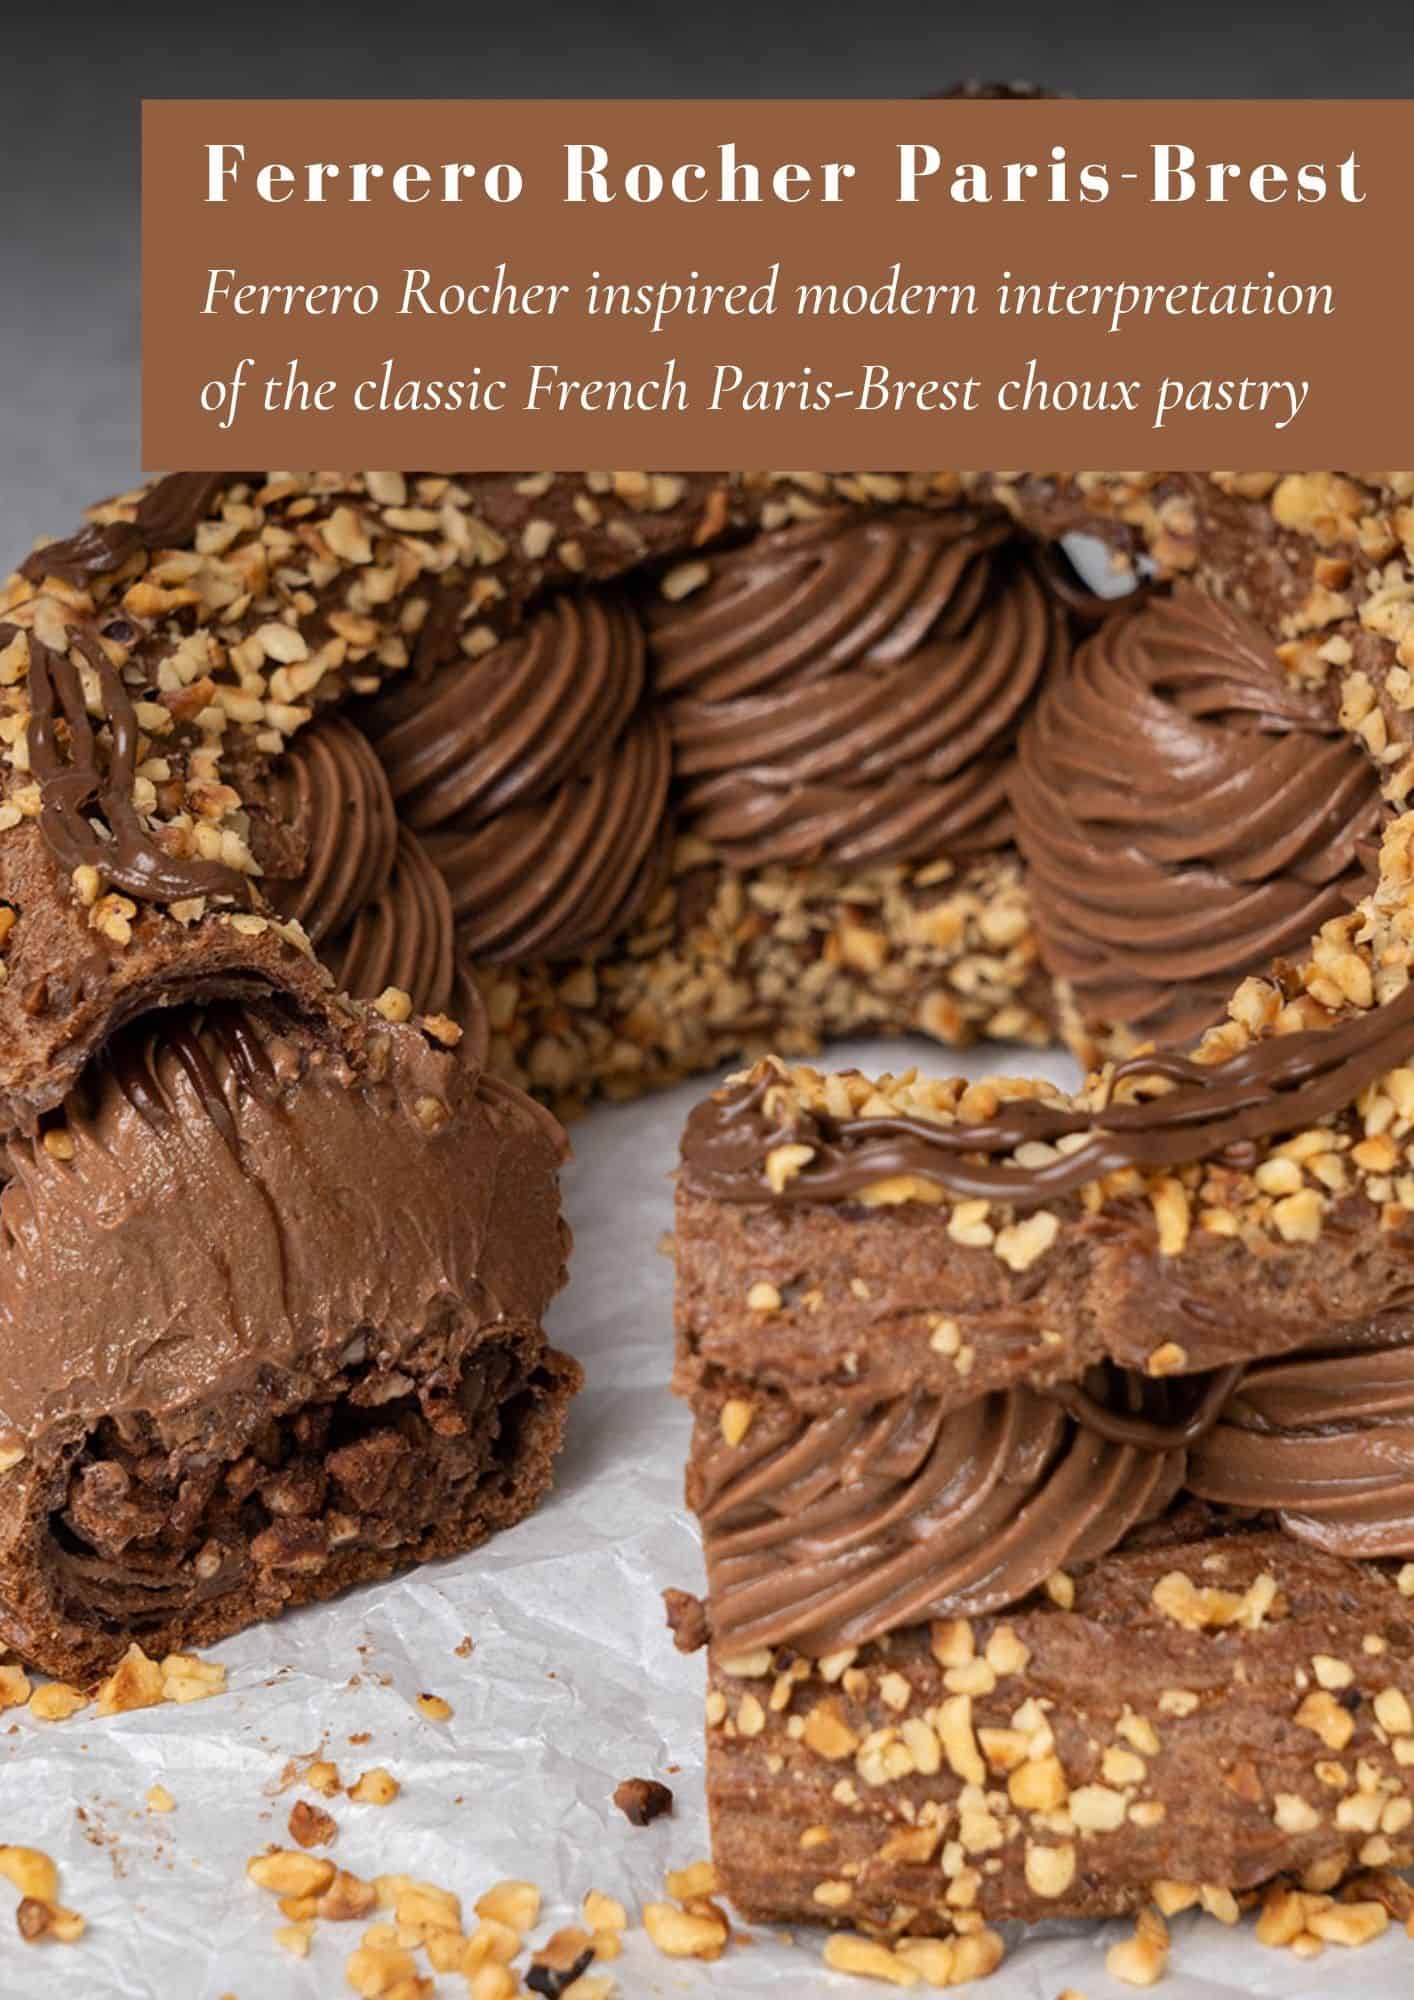
Join my Ferrero Rocher inspired Paris-Brest dessert Online Baking Class
If you want to try the most delicious combination of my Ferrero Rocher cake and Paris-Brest dessert, you must sign up for my Online baking class, where I will teach you how to make the most amazing Ferrero Rocher-inspired Paris-Brest dessert!
Have you tried this recipe?
Please leave a 5-star ⭐️⭐️⭐️⭐️⭐️ rating on the recipe card and consider leaving a comment as well!
Ferrero Rocher cake
Equipment
Ingredients
Chocolate Hazelnut Sponge Cakes for 3 x 8 inches (20cm)
- 3 Eggs room temperature
- 110 g (½ cup) Vegetable oil
- 240 g (1 cup) Milk room temperature
- 180 g (¾ cup) Coffee freshly brewed strong coffee, room temperature
- 150 g (¾ cup) Granulated sugar
- 150 g (¾ cup) Brown sugar
- 190 g (1½ cups) All purpose flour any low-protein-content flour, e.g., pastry flour, can work too.
- 90 g (¾ cup) Hazelnut flour You can either purchase it ready-made, or blend whole-roasted hazelnuts with the flour for a few seconds. Do not blend the hazelnuts on their own, or they will turn into a paste.
- 75 g (¾ cup) Cocoa powder unsweetened, dutch processed
- 1½ teaspoon Baking soda
- 1½ teaspoon Baking powder
- 1 teaspoon Salt
Mousseline cream
- 720 g (3 cups) Whole milk
- 150 g (¾ cups) Granulated sugar
- 120 g Egg yolk approx. 6 egg yolk
- 2 teaspoon Vanilla extract
- 37 g (⅓ cups) Corn starch
- 37 g (⅓ cups) Cocoa powder unsweetened, dutch processed
- 110 g (⅔ cup) Chocolate semi-sweet good-quality chocolate, finely chopped
- 75 g (⅓ cup) Unsalted butter soft, room temperature
- 225 g (1 cup) Unsalted butter soft, room temperature
- 25 g (¼ cup) Cocoa powder unsweetened, dutch processed
- ½ teaspoon Salt
- 250 g (1 cup) Nutella
- 90 g (¾ cup) roasted chopped hazelnut to decorate
- 16 piece Ferrero Rocher chopped for in between the layers + top to decorate
US customary cup measurement is an indicative figure only. Measure the ingredients with a digital scale by weight (gram). Baking is art but also science which requires precision and accuracy.
Instructions
Start with chocolate pastry cream
- In a mixing bowl, whisk together the sugar and egg yolks until slightly pale and fluffy, about 1–2 minutes. Add the cornstarch, cocoa powder, and vanilla, and whisk until smooth and lump-free.
- In a saucepan, bring the milk to a simmer over medium heat. Pour the warm milk into the egg yolk mixture very slowly while whisking constantly. The mixture will begin to thicken as the milk goes in.
- Pour the mixture back into the saucepan and cook over medium heat, whisking constantly, until it thickens, approximately 1 minute after the first boil. If it appears lumpy at first, keep whisking; it will smooth out.
- Remove from heat. Add the finely chopped chocolate in 3 stages, stirring well with a rubber spatula after each addition until fully incorporated.
- Then add the softened butter again, in 3 stages, and mix well until fully incorporated.
- Transfer to a shallow bowl, press plastic wrap directly onto the surface, and cool at room temperature. Then refrigerate until fully set.
Chocolate hazelnut sponges
- Preheat oven to 175°C / 345°F and prepare 3 × 20 cm (8-inch) round pans with parchment paper on the base and sides.
- In a large bowl, whip the wet ingredients together with an electric mixer for 1–2 minutes: room temperature eggs, oil, both sugars, milk, and coffee.
- In a separate bowl, sift together all dry ingredients: all-purpose flour, hazelnut flour, Dutch-processed cocoa powder, baking powder, baking soda, and salt.
- Pour the wet ingredients into the dry ingredients and fold gently with a rubber spatula until just combined. Do not overmix.
- Divide the batter equally between the three prepared pans using a digital scale.
- Bake at 175°C / 345°F for 25–30 minutes, without opening the oven door, until a toothpick inserted in the center comes out clean. Cool completely on a wire rack, then refrigerate the sponges before assembly.
Nutella mousseline cream
- Remove the pastry cream from the fridge well in advance and let it come to room temperature.
- Place the softened butter in a mixer bowl and beat on medium-high speed for 2–3 minutes, until pale and fluffy.
- Add the Dutch-processed cocoa powder and salt and whip for 1 minute. Add the Nutella and whip until fully combined.
- Then, add the room-temperature pastry cream in 4 equal additions, whipping between each until fully incorporated. Once all is added, whip for about 3 minutes until the cream is light, fluffy, and holds its shape. Stop whipping as soon as the cream is fluffy and pipeable; do not over-whip, or it will break. If the cream feels soft, refrigerate for 30–60 minutes to firm up before using.
Assembling the cake
- Place the first sponge on the serving plate. Pipe a border of mousseline cream around the edge, then fill the center. Scatter crushed Ferrero Rocher chocolates over the cream.
- Add the second sponge layer and repeat. Place the third sponge layer on top. Chill the assembled cake in the fridge for 1 hour (or freezer for 15 minutes) before frosting.
- Apply a thin crumb coat of mousseline cream over the entire cake. Chill for 30 minutes. Apply the final frosting layer smoothly with an offset spatula. Chill for another 30 minutes.
- Press chopped roasted hazelnuts onto the sides and top. Using a piping bag fitted with a nozzle, pipe swirls around the top edge. Place half Ferrero Rocher candies as decoration on top.
- Apply roasted chopped hazelnut all around and on the top of the cake and pipe some decoration on top using the same Nutella mousseline cream
- Store the assembled cake in an airtight container in the refrigerator for up to 3 days. For the best texture, take it out of the fridge 30 minutes before serving to allow the mousseline cream to soften slightly.
Notes
- All sponge ingredients must be at room temperature to emulsify properly — especially eggs, milk, and coffee.
- Do not skip the coffee in the sponge. It enhances chocolate flavor without making the cake taste like coffee. Replace with lukewarm water if needed.
- Blend hazelnut flour together with the all-purpose flour in a food processor if making from whole hazelnuts. Never blend hazelnuts alone.
- Use good-quality semi-sweet chocolate and Dutch-processed cocoa powder in the cream; they should balance the Nutella, not overpower it.
- The mousseline cream requires all components to be at room temperature; this is the most critical technique point in the recipe.
- Stop whipping the mousseline as soon as it is fluffy. Over-whipping breaks it.
- Chill the sponges before assembly, and chill the cake in between every frosting stage.
- Always assemble directly on the plate you will serve from.
- For this 3-layer 20 cm (8-inch) cake, divide the mousseline cream as follows:
- Filling layer 1 — 300g mousseline cream + 4 crushed Ferrero Rochers
- Filling layer 2 — 300g mousseline cream + 4 crushed Ferrero Rochers
- Crumb coat — 380g mousseline cream
- Final coat incl. piping— 570g mousseline cream
- Ferrero Rocher decoration on top — 4 ( 8 halves) + 4 crushed
Christina MacDonald
how long can refrigerate any extra mousseline buttercream?
Katalin Nagy
2-3 days should be fine.
petra
why 6 inches pans. why.
Kata
Bec a 6 inch cake is a perfect size cake and enough for a whole family of 4-6 people? 🙂 I have a cake pan conversion in my chocolate sponge cake recipe so you can make smaller or larger cakes as you wish.
Sherry
I really want to make this cake using 2 9 in cake pans but I don’t know from where to start. How do I adjust the measurements? Can you help me?
Kata
At my chocolate sponge cake recipe (that is the base for this cake) you can find a converter chart.
Anna
Absolutely fantastic! This is really the best Ferrero Rocher cake with the most delicious frosting. I have never made custard based frosting before but certainly will make it again because it is simply the best and way more delicious than butter cream. Thank you so much for sharing your recipe.
Marion
I have been requested for a 3kg cake - i am thinking of either a 12" pan to 14" square cake pan - how much of the recipe do you think I would need,
also, if 16in square, how much do you think of the recipe would i need to make
thanks
Kata
Hey, I have some ingredient calculators in this recipe:https://www.spatuladesserts.com/chocolate-cake-with-cream-cheese-frosting/ but I never made this cake so large. You will have to significantly increase the recipe ingredient quantities and probably the baking time as well.
Marion
Thank you 🙂
Christie
Can I replace the hazelnut flour with more all purpose flour ?
Kata
You can roast whole hazelnuts and food process it with the flour together to get a mix of flour & hazelnut flour, or you can skip the hazelnut and use more flour.
Whitney
Hello,
I made a huge mistake with the pastry cream. I ended up adding the the cocoa, Nutella and chocolate into it only to realise, those ingredients were meant to be whipped up with the butter. Is there a fix to this or have I completely stuffed the recipe? 😭
Shweta
Hi,
I am planning a 9 inch 3 layer cake. Will Doubling the recipe be enough?
This cake looks amazing. I have made this flavor with Nutella buttercream several times but this filling looks out of the world. I am so excited to try this!
Thanks,
Shweta
Kata
Hey, yes for a 9-inch cake you need to about double the 6inch ingredients. You will love this frosting, it is absolutely superior compared to buttercreams:) Let me know how it goes!
Shilpa
Love the recipe and the cake! Want to make this for my sons birthday next week.
Just one question: for the frosting, can I use hazelnut butter instead of store bought Nutella?
Kata
When you substitute the Nutella, you have to think about whether the product you want to use has similar qualities eg. thickness, fat content, sugar content, etc., and adjust the rest of the ingredients accordingly.
Arwa Badeeb
Loved it! Even though I am not a huge fan of hazelnut, but this was soo good..
Found a home made nutella recipe to substitute the store bought.. Turned out delish.
What I love about your recipes is that they aren’t overpoweringly sweat!
My dad was extremely happy with this one!
Kata
I am so happy for you! I truly believe in not overly sweet desserts and glad to hear that you enjoy it too!
Estefania
Hard to find a recipe that results not only in a beautiful but a tasty cake. I found this cake had both: the frosting is not made with only butter and sugar but a French creme patissiere which make a luxurious taste to the cake. Easy to apply and perfectly explained with a lot of practicality tips. This was my first cake here but won’t be the last. Thanks for sharing. I loved cooking this cake and learned a lot!
Kata
I am so happy for your success and that you appreciate this out-of-this-world delicious frosting I made!!:) Hope you will try some of my other recipes soon
Abrar
AMAZING!!!! Must try this recipe!!! The cake is sooooo moist .. full with flavors 😋😋😋😋😋😋😋😋😋😋😋 thank you for sharing with us such amazing cakes 🥰🥰🥰🥰🥰
Kata
I love this cake so much, and so happy that you experienced it:) Hope you will try some of my other recipes as well soon!
Mary
It says to mix in vanilla but it is not in the recipe. How much do you add? Maybe I am missing it somewhere🤷♀️
Kata
Good point! The initial cream for the Ferrero Rocher cake frosting is a vanilla bean pastry cream. Now for this recipe, you can leave out vanilla as the flavor will come from the chocolate and Nutella. Or, you can add 2 teaspoons of good quality vanilla bean paste or essence while making the pastry cream. I will adjust the recipe accordingly, thanks for your feedback:)
Antonella Falanga
This recipe is absolutely perfect! The Nutella mousseline cream is gorgeous, so smooth and tasty. The sponge is the best sponge ever!!
Sarah Alsulaiman
I made this cake and it was incredible!
All my family wanted another piece 😋
Thank you so much
Julia
Is it possible to make the cake in advance?? How do you store it??
Katalin Nagy
For me, a cake should be fresh = max a day old. You can store the frosted cake in the refrigerator. However, if you want to save time, you can actually bake the chocolate sponges ahead and freeze them, then assemble the cake the day before or the day of serving.