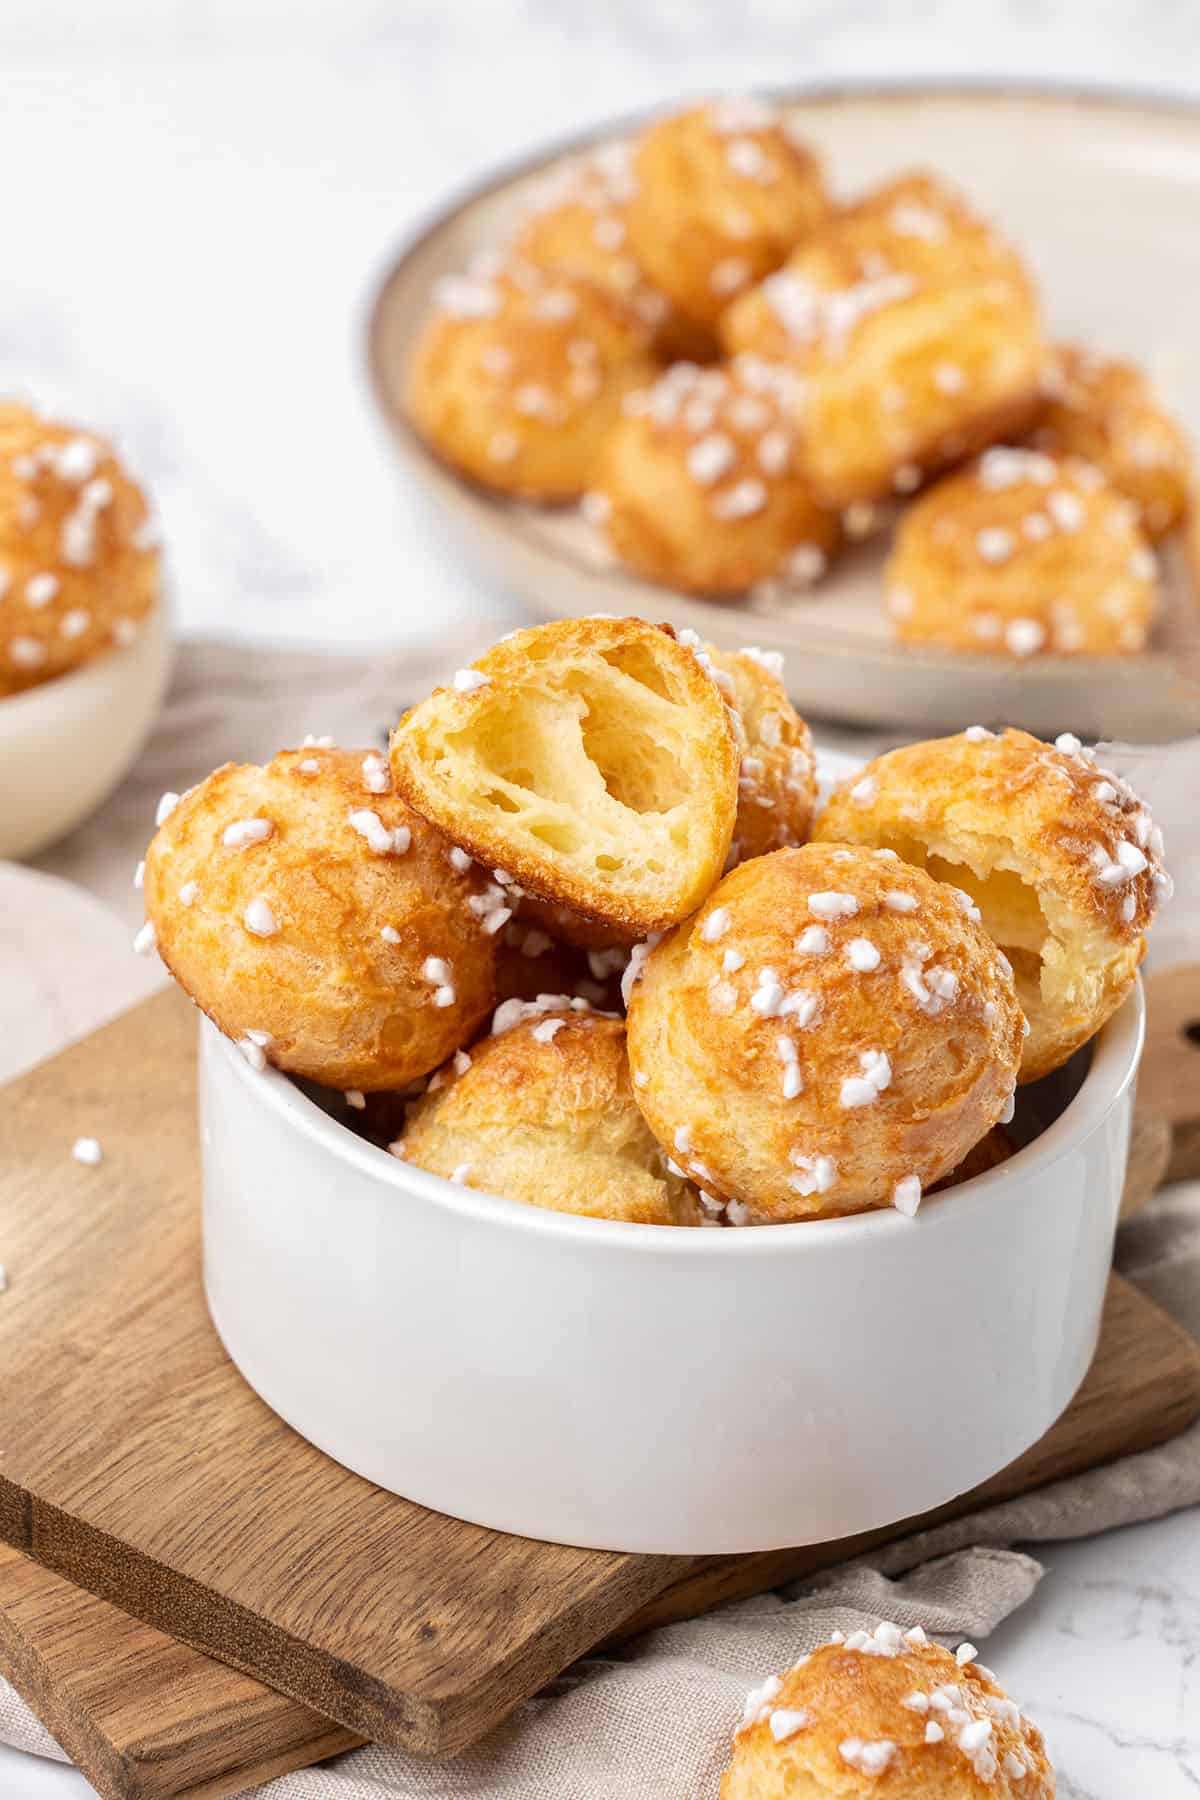
Made with fluffy choux pastry dough and sweet Swedish pearl sugar, these light and airy chouquettes may be only one or two bites, but they are absolutely irresistible! Serve these delicious French sugar puffs for breakfast with a hot cup of tea or coffee, enjoy a few as an afternoon snack, or after dinner. They also make perfect gifts for your loved ones on special occasions!
What Is a Chouquette?
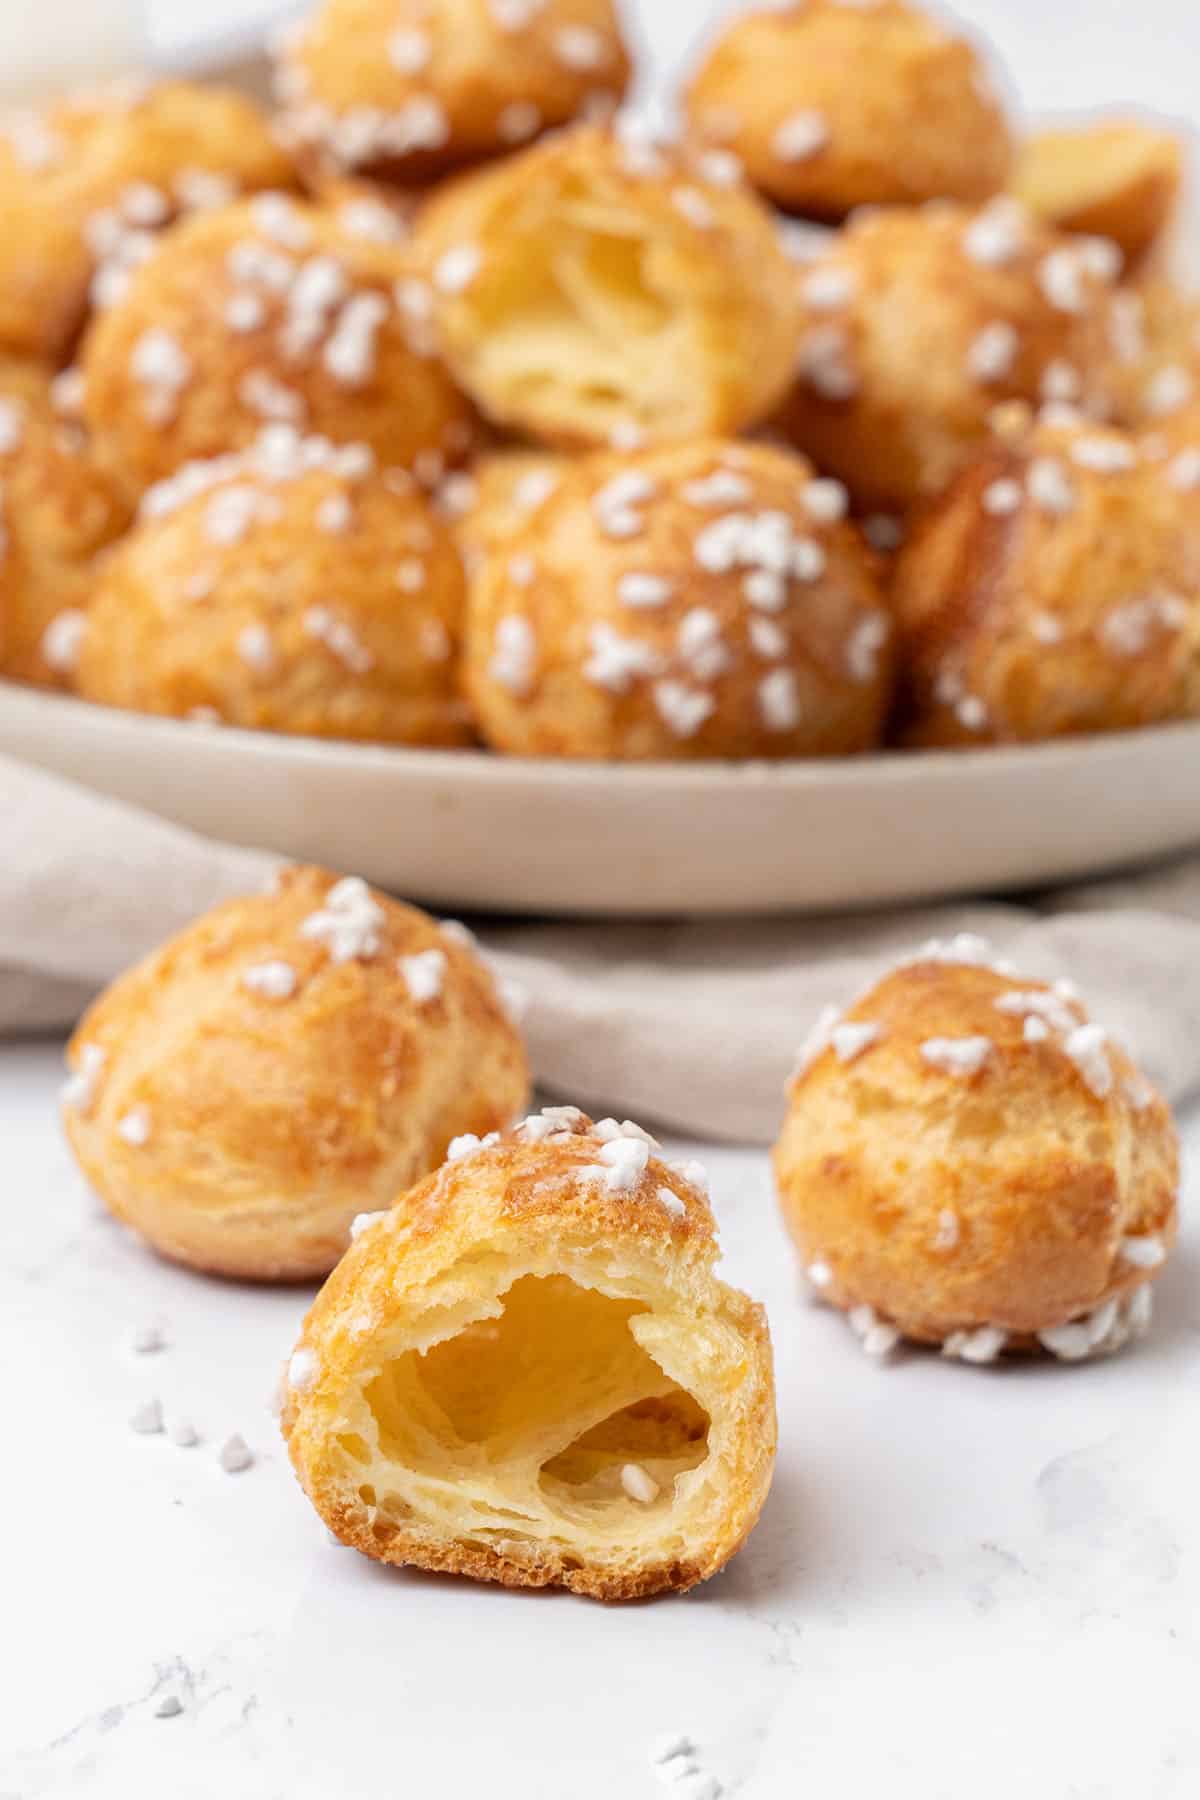
Chouquettes are round, bite-sized French choux pastry puffs covered in pearl sugar and baked to perfection. They use the same dough as my eclair, profiteroles, or Paris-Brest recipe and are similar to choux au craquelin, except they do not have a craquelin topping. Its small size makes these delicious treats perfect for a light dessert or a sweet snack to satisfy the sweet tooth.
Best Chouquette Recipe
Ready in just an hour and a half, these easy-to-make chouquettes are the perfect bite-sized desserts for parties and events. On one standard baking sheet, you can fit up to 25 chouquette balls, making it easy to whip up large portions without taking all day. The only downside is that they are hard to stop eating once you start!
I use only the highest-quality ingredients to give you the most delicious texture and flavor with the perfect balance of sweetness. There’s also no need to run around town searching for odd ingredients because everything you need is in your pantry or easily found in your favorite grocery store.
My chouquettes recipe is also super beginner-friendly and informative. It provides easy step-by-step instructions and expert tips that ensure flawless results the first time around!

Make The Choux Pastry Batter
Let’s start with the batter. Heat the butter, water, milk, salt (do not skip this!), and granulated sugar over medium heat in a saucepan. To avoid salty chouquettes, use unsalted butter (a must in baking)! You can also make your butter at home. Stir the mixture well so that the ingredients fully dissolve.
Once the mixture reaches a simmering boil, remove it from the heat and sift in the bread flour. Whisk the mixture vigorously using a rubber spatula or wooden spoon until it forms a smooth ball with no visible flour bits.
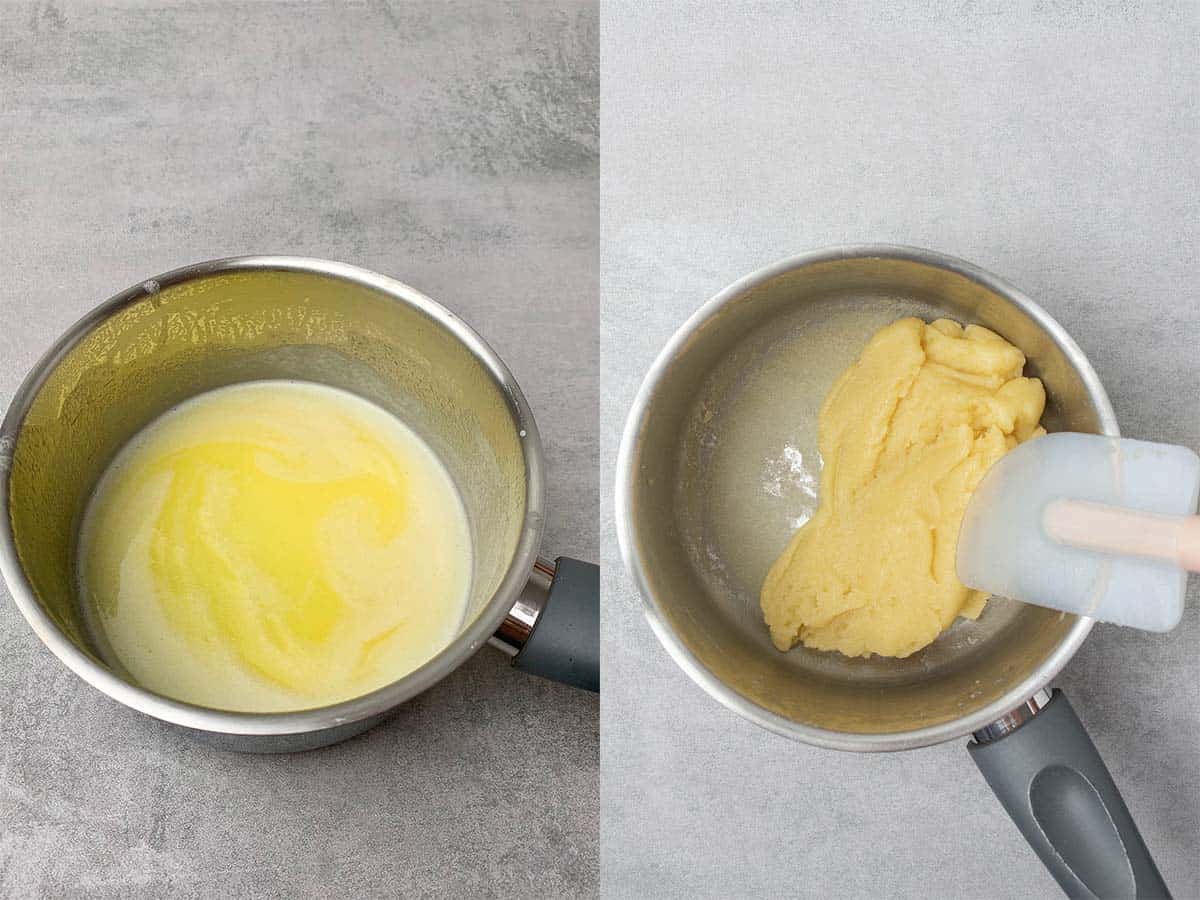
Return the saucepan to the stove and cook over medium heat for approximately three minutes while stirring constantly. The purpose of the cooking is to evaporate some water from the mixture. Once a skin forms on the bottom of the saucepan, it is ready for the mixer!
Transfer the dough to a bowl or a stand mixer fitted with a paddle attachment. Allow it to cool slightly, then, while the mixer is running, mix in a small amount of the lightly whisked egg at a time. The egg must be at room temperature to blend properly into the dough.
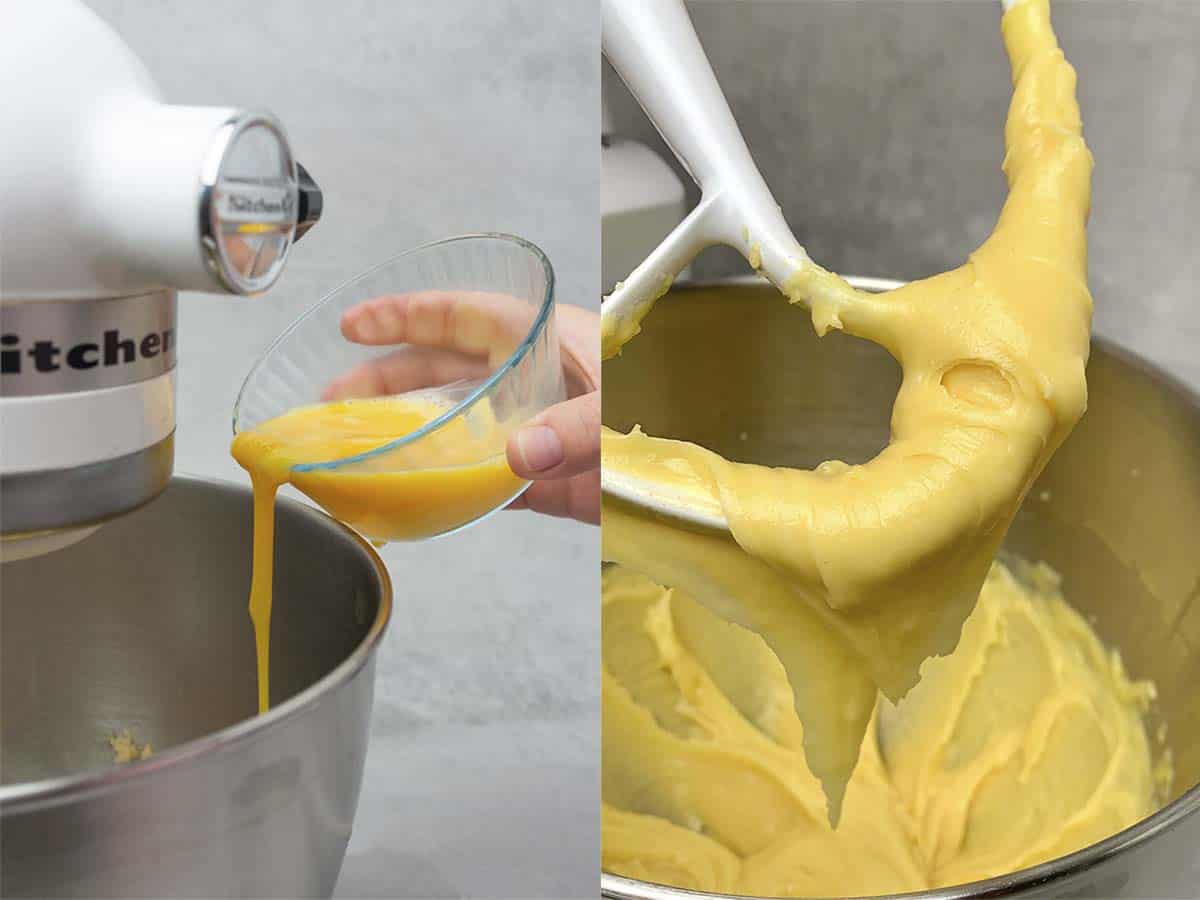
Stop mixing once the dough turns glossy and silky and forms a “V” shape as it drips off the whisk. Depending on the cooking and your flour, you might need more or less eggs. Aim for the V shape.
Then, prepare a baking sheet with a perforated baking mat or line a large tray with parchment paper.
This Is How To Pipe It
Take a piping bag fitted with a small, round nozzle tip and fill it with the dough. Then, pipe 20-25 equally sized buns onto the baking mat, leaving enough space between each (to give them space to rise when they bake). Once piped, gently flatten the tops of the piped dough with a wet finger.
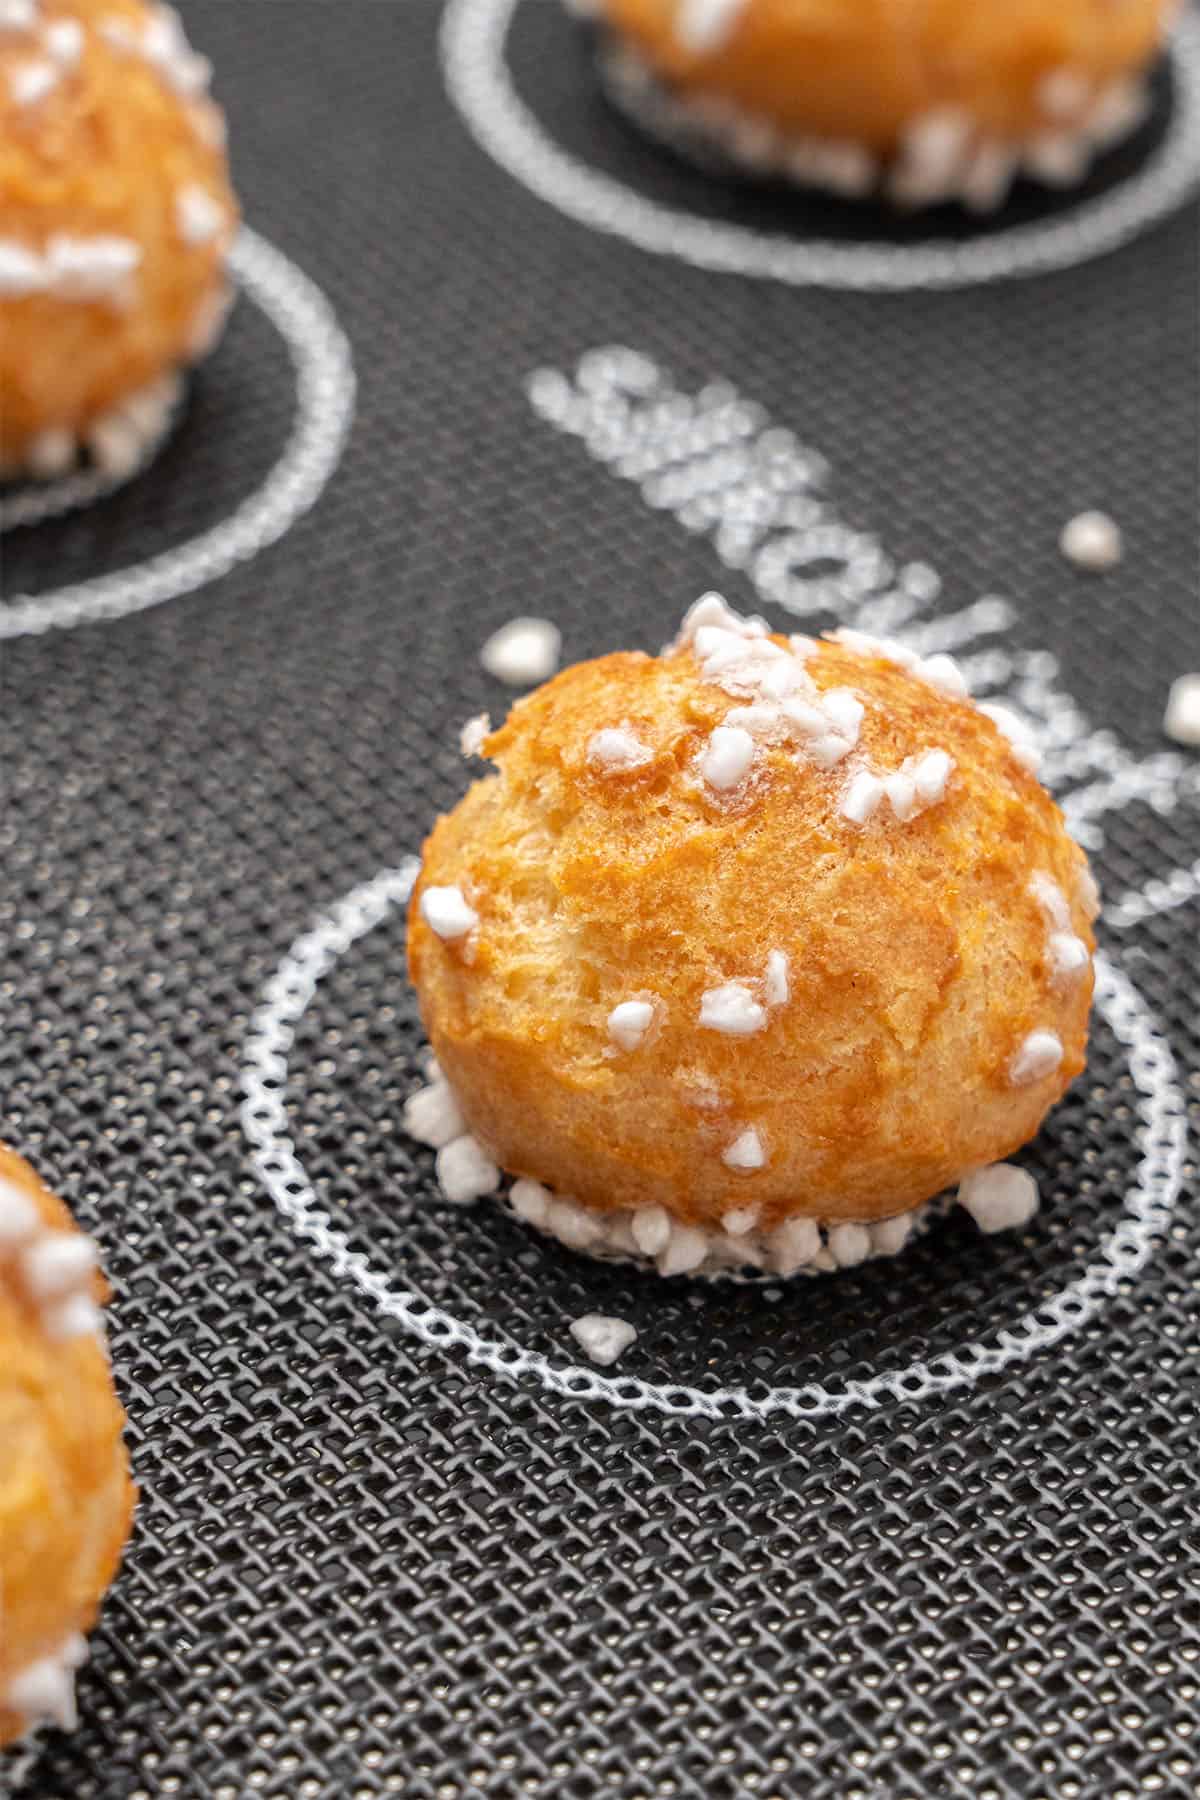
Next, sprinkle the piped dough generously with Swedish pearl sugar and gently press the sugar pearls into the dough.

Important: Do not attempt to substitute pearl sugar for other types! Unlike other sugars, Swedish pearl sugar has larger, round particles that will not melt or dissolve.
Place the baking tray in the freezer for at least 30 minutes. Do not skip this step; it ensures an even rise when the chouquettes bake! In the meantime, preheat the oven to 200C / 392F.
Bake It
After the tray has been in the freezer for at least 30 minutes and the oven has been preheated, lower the oven temperature to 170C / 338F. Then, bake the chouquettes for 20-25 minutes, ensuring the oven door remains closed for the first 15 minutes.

They are ready once the chouquettes are golden brown, puffed up, and do not deflate at room temperature!
If you baked them on a perforated mat, let them sit and cool completely. If you baked them on parchment paper, move them to a wire rack.
Since chouquettes do not require filling, you can serve and enjoy them after they have cooled!
Storing & Freezing
Chouquettes are best when fresh while they still have a crisp outer texture. However, if you have leftovers, you can store them in an airtight container at room temperature for 2-3 days or freeze them in a freezer-safe bag for up to a month. Wait until they come fully to room temperature before storing.
Flavor Variations
Although chouquettes are traditionally served hollow with a pearl sugar topping, you can use this same recipe to make French cream puffs filled with different flavors of pastry cream, mascarpone frosting, chocolate whipped cream, or chantilly cream.
You can also use this same recipe to make other variations of choux pastry puffs, such as choux au craquelin, Paris-Brest, or delicious French eclairs. See my other choux pastry recipes below for more examples.
You can swap out the pearl sugar with chopped nuts to give your chouquettes a nutty rather than sweet flavor. If you love chocolate, press in a few chocolate chips before baking!

Ingredient Substitutions
Chouquettes have a very precise recipe, which makes substitutions difficult. Any substitutions you do make will require adjustments to other parts of the recipe to maintain the same texture and flavor balance.
That said, it is possible to use rice flour instead of bread flour as a gluten-free alternative. You can also substitute the milk and butter with dairy-free options, but you must closely monitor the texture and make adjustments as necessary. Unfortunately, egg is an essential ingredient in the recipe that you can not substitute with other ingredients.
See my list of baking guides to learn more about the possible substitutions and how they may affect the recipe.
Expert Tips To Make The Chouquettes
- Always use high-fat, high-quality ingredients for the best flavor and texture. I recommend using whole milk with 3% fat and unsalted butter with 82% fat. For the bread flour, you want to use a high-protein bread flour. I use 13% protein-content flour in this recipe.
- The amount of egg in the recipe can vary depending on the type of flour you use and how much the mixture dried when cooking. Pay close attention to the consistency, adding more or less egg as necessary. The key is for the mixture to pass the “V-shape” test.
- If the choux dough becomes too runny, it likely that you mixed in too many eggs, and unfortunately, this cannot be fixed. You will need to start the recipe again and pay close attention to how much egg you add.
- If you do not have a piping bag and nozzle, you can create the dough balls using a cookie scoop or two large spoons. Even better, if you make a pastry bag by placing the dough into a large zipper-lock plastic bag and cutting a small hole in the corner to squeeze out the dough.
- It is a good idea to take one choux bun out of the oven after approximately 20 minutes to test whether or not it deflates. If it does not deflate after a minute, you can remove the other buns from the oven.
What Equipment To Use
Always use a digital scale to weigh your ingredients, as it will provide you with the most accurate and consistent results. A digital thermometer is also a helpful piece of equipment to ensure you have the correct oven temperature.
You will need a rubber spatula and a stand mixer fitted with a paddle attachment to combine and mix the ingredients.
While you can use parchment paper, a perforated “air” baking mat helps the heat to spread evenly throughout the baking sheet and guarantees a perfect, even bake.
A piping bag fitted with a French star nozzle tip makes applying the choux pastry dough balls to the baking sheet a breeze!
Try Some Of My Other Choux Pastry Recipes
If you enjoyed this French choux pastry recipe, you will want to try some of my other similar bite-sized desserts:
- Choux Au Craquelin
- Apple Pie Choux Au Craquelin
- Tiramisu Choux Au Craquelin
- Crème Brûlée Choux Au Craquelin
- Croquembouche
- Profiteroles
Also, don’t leave without checking out my Top 31 Best French Pastries roundup!
Have You Tried This Recipe?
Please leave a 5-star ⭐️⭐️⭐️⭐️⭐️ rating on the recipe card and consider leaving a comment as well!

Chouquettes
Equipment
Ingredients
Chouquettes
- 60 g (¼ cups) Unsalted butter 82% fat content
- 60 g (¼ cups) Water
- 60 g (¼ cups) Whole milk
- ¼ teaspoon salt
- 1 teaspoon Granulated sugar
- 70 g (½ cup + 1 tablespoon) Bread flour high protein content flour, eg. 13%
- 110 g Egg Approx 2 eggs. Room temperature. Might need slightly more or less, see tips
- 50 g (¼ cups) Pearl sugar
US customary cup measurement is an indicative figure only. Measure the ingredients with a digital scale by weight (gram). Baking is art but also science which requires precision and accuracy.
Instructions
Chouquettes
- Heat the butter, water, milk, salt, and sugar together in a saucepan over medium heat. Stir to dissolve, and bring to a simmering point.
- As soon as the mixture starts to boil, remove it from the heat, and add the sifted flour in one go. Whisk vigorously with a rubber spatula until it forms one smooth ball and flour bits are not visible.
- Place the saucepan back on the stove and cook the dough for about 3 minutes over medium heat, mixing constantly. It is ready when a skin forms on the bottom of the saucepan.
- Transfer the dough to a bowl or stand mixer fitted with the paddle attachment and let it cool slightly before starting to mix the egg in. Only add a small amount of egg at a time while the mixer is on. Stop when the mixture is glossy and silky and forms a V when slowly dropping off the whisk.
- Prepare a perforated baking sheet with a perforated baking mat. Alternatively, use a large tray with parchment paper.
- Transfer the mixture to a piping bag fitted with a round small nozzle tip, and pipe 20-25 equal-sized buns on the baking mat. Leave enough space between them as they will rise in the oven. Gently flatten the tips of the piped dough with a wet finger.
- Generously sprinkle the piped dough with Swedish pearl sugar. The sugar pearls should be gently pressed into the dough.
- Then, place the tray into the freezer for at least 30 minutes while pre-heating the oven to 200C/392F.
- Lower the oven temperature to 170C/338F and bake the Chouquettes for 20-25 minutes. Do not open the oven door in the first 15 minutes. They are ready when golden brown in color, nicely puffed up, and do not deflate at room temperature.
- Cool them on the perforated air mat or, if baked on parchment paper, cool them on a wire rack.
- Please note that the Chouquettes require no filling. Serve them fresh.
Notes
- Measure your ingredients with a digital scale for accuracy.
- Use high protein content bread flour for the best results. I use 13% protein content flour.
- Do not skip the salt; it has a special function while baking choux pastry.
- Use lightly whisked room-temperature eggs while preparing the dough.
- Use Swedish pearl sugar, which is made by compressing sugar crystals to form larger, round particles that won't dissolve in baked goods.
- While heating the milk, water, butter, salt, and sugar mixture, make sure that the sugar and salt fully dissolve.
- Do not skip sifting flour or the dough can be lumpy.
- Please note that you might need slightly more or less egg—and that is normal—depending on the flour you use and how much you dried the mixture while cooking it. Pay very close attention to the consistency while mixing the egg in and apply the V-shape test.
- Leave enough space in between each choux bun on the tray, as they will puff up.
- The freezing will ensure a more even rise on your choux pastry, do not skip this step.
- If you have never used a piping bag and piping nozzle before, it is worth practicing it before!
- I strongly advise using a digital oven thermometer to ensure you are baking at the correct oven temperature.
- It is a good idea to take one choux bun out of the oven at 20 minutes and check its consistency. If it does not deflate after one minute, the others will likely to be well-baked and done.
Sadaf Abdulla
They turned out really good 🤙