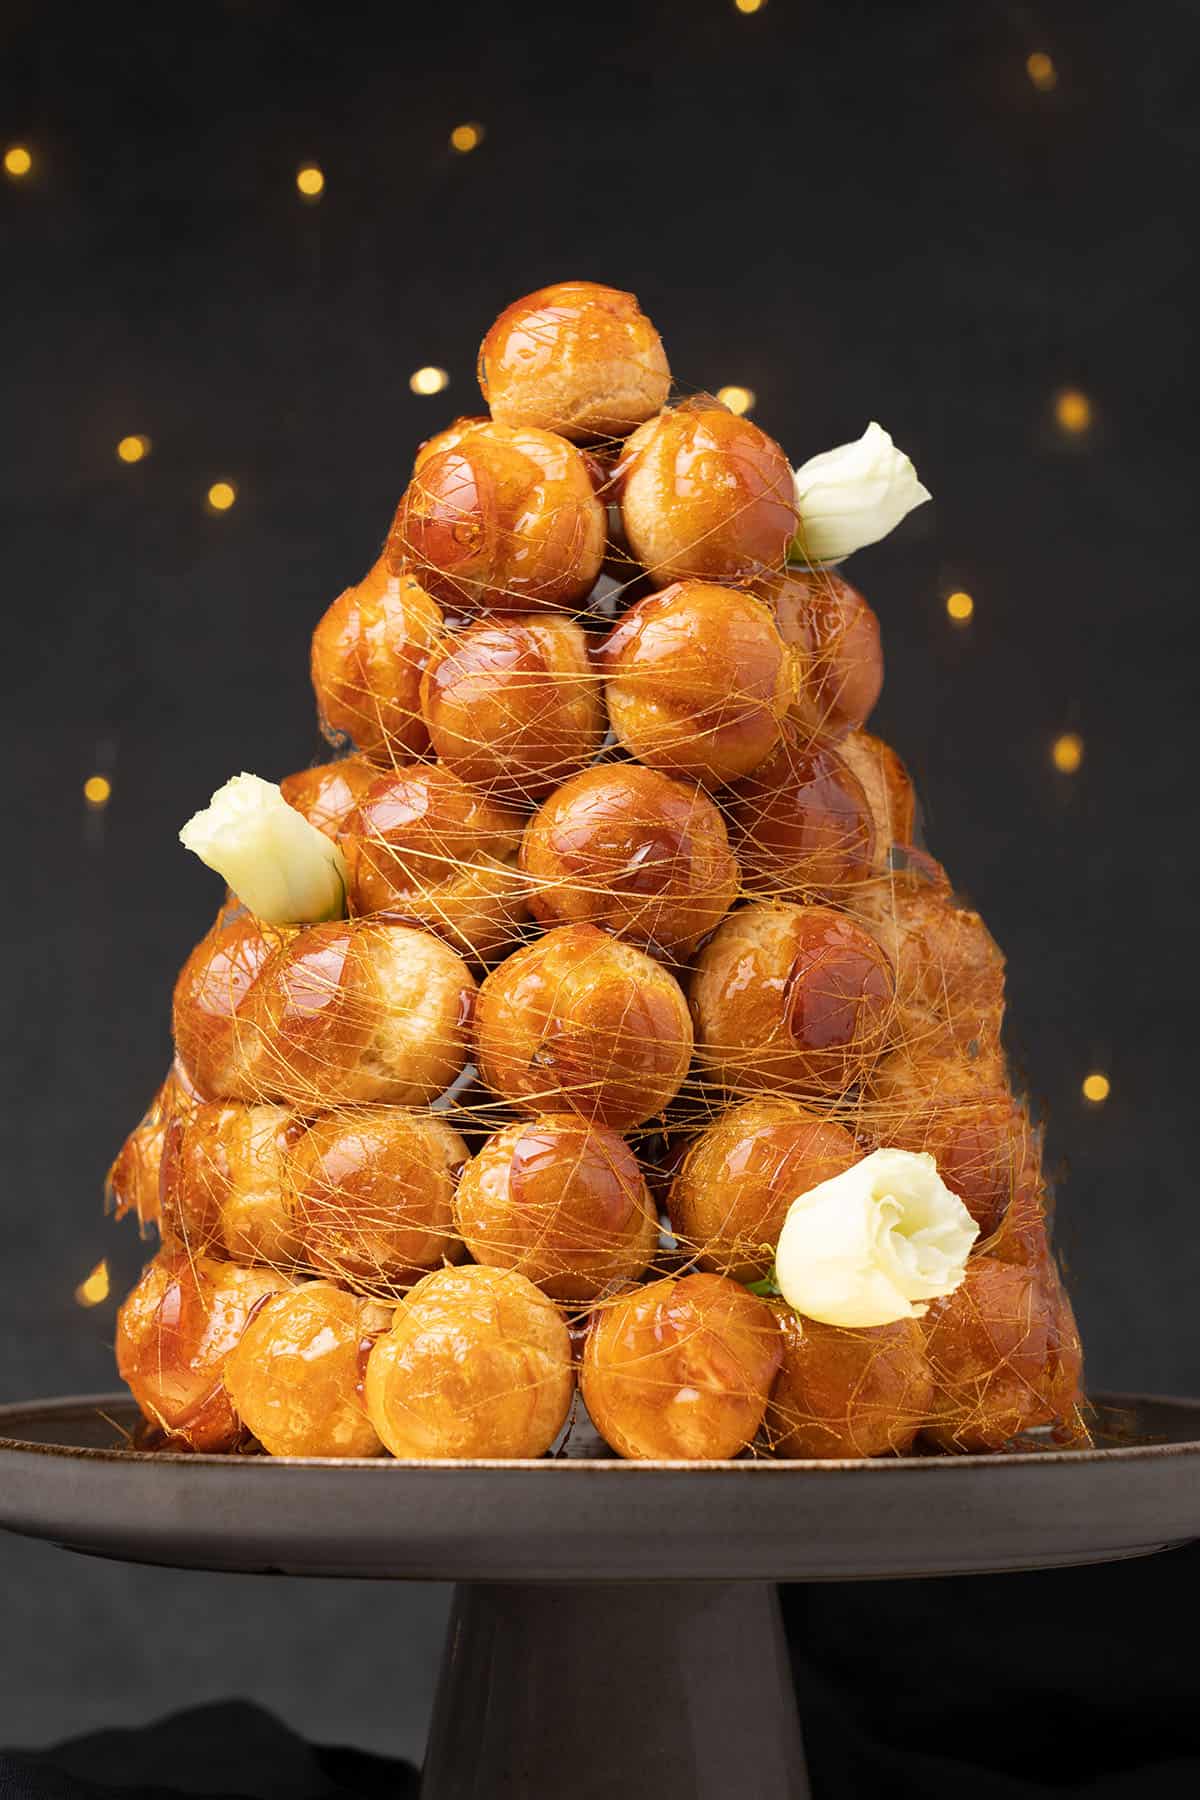
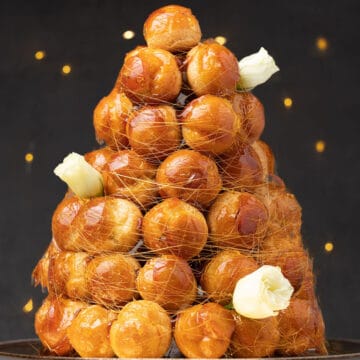
With a name that literally translates to "crunch in your mouth," Croquembouche is a mouthwatering, classic French pastry dessert made with diplomat cream-filled choux pastry puffs. Known for its towering cone shape bound together with crunchy caramel, this festive dessert isn't just eye-catching, but is also super decadent.
Jump to:
📖 What is Croquembouche
Croquembouche is a popular French dessert consisting of cream-filled (most commonly crème pâtissière or crème diplomate) choux pastry puffs bound together by caramel and assembled into a decorative profiterole tower.
Aside from its delicious combination of sweet flavors, the most impressive part of Croquembouche is its showstopping appearance. For this reason, it is an excellent cake alternative for fancy and notable events such as weddings, birthdays, and baptisms. You can even personalize and make it even more decorative by adding fruits, candies, macarons, and nuts!
If you love French desserts, make sure to check out my ultimate best French pastries list with recipes!
💡 Croquembouche Origin
You may be surprised to learn that Croquembouche has been around longer than you and I! French pastry chef Antoine Careme invented the dessert in the late 1700s, where it quickly became popular as a cake for French weddings. Its name is derived from the French word Croque-en-bouche, which in English translates to "crunch in your mouth."
There are often questions about the "correct" Croquembouche pronunciation, but in English, it most often sounds like "krow-kuhm-boosh."
🌟 Why this is the best recipe
- It breaks down every detail - Croquembouche has many steps, some of which require very close attention. In this recipe, I break down and go into detail about every single step so that you avoid any potential mishaps or oversights.
- It is easy to make - My detailed yet easy-to-follow recipe guide ensures that even first-timers can serve up a beautiful and delicious Croquembouche.
- It will stop you in your tracks - Croquembouche is naturally a jaw-dropping dessert (and by far one the most eye-catching I have ever made). By following the steps outlined in this recipe, you'll have the exact measurements and techniques to give you the best-looking result.
- It is the most delicious - Every ingredient I use in my recipe is fresh, rich, and full of flavor, yet not too overbearing for the palate as some Croquembouche can be.
- It gives the best result - The keys to a flawless Croquembouche are high-quality ingredients and the best equipment to do the job. My Croquembouche recipe uses both and dives into the expert techniques to use them optimally.
Note: In my recipe, I make 60 small choux buns that can feed at least 10 people. The tower is about 30-35cm / 12-13 inches tall. You can easily double or triple the recipe should you want to make a super huge tower for a large group of people.

💪 How hard it is to make this recipe
At first look, Croquembouche appears intimidating and very difficult to make. But in reality, it is a relatively simple dessert! There are multiple steps in the recipe, but the good news is that it can all be done with ingredients and tools that you probably already have in your kitchen. Some parts of the recipe require that you pay careful attention to the details and do not skip steps, but with this detailed guide, I help to make sure that won't happen!
📝 Ingredient notes
1. For the Choux Pastry
When done carefully and correctly, the ingredients and steps in this recipe should give you about 60 choux pastry balls to use for your Croquembouche.
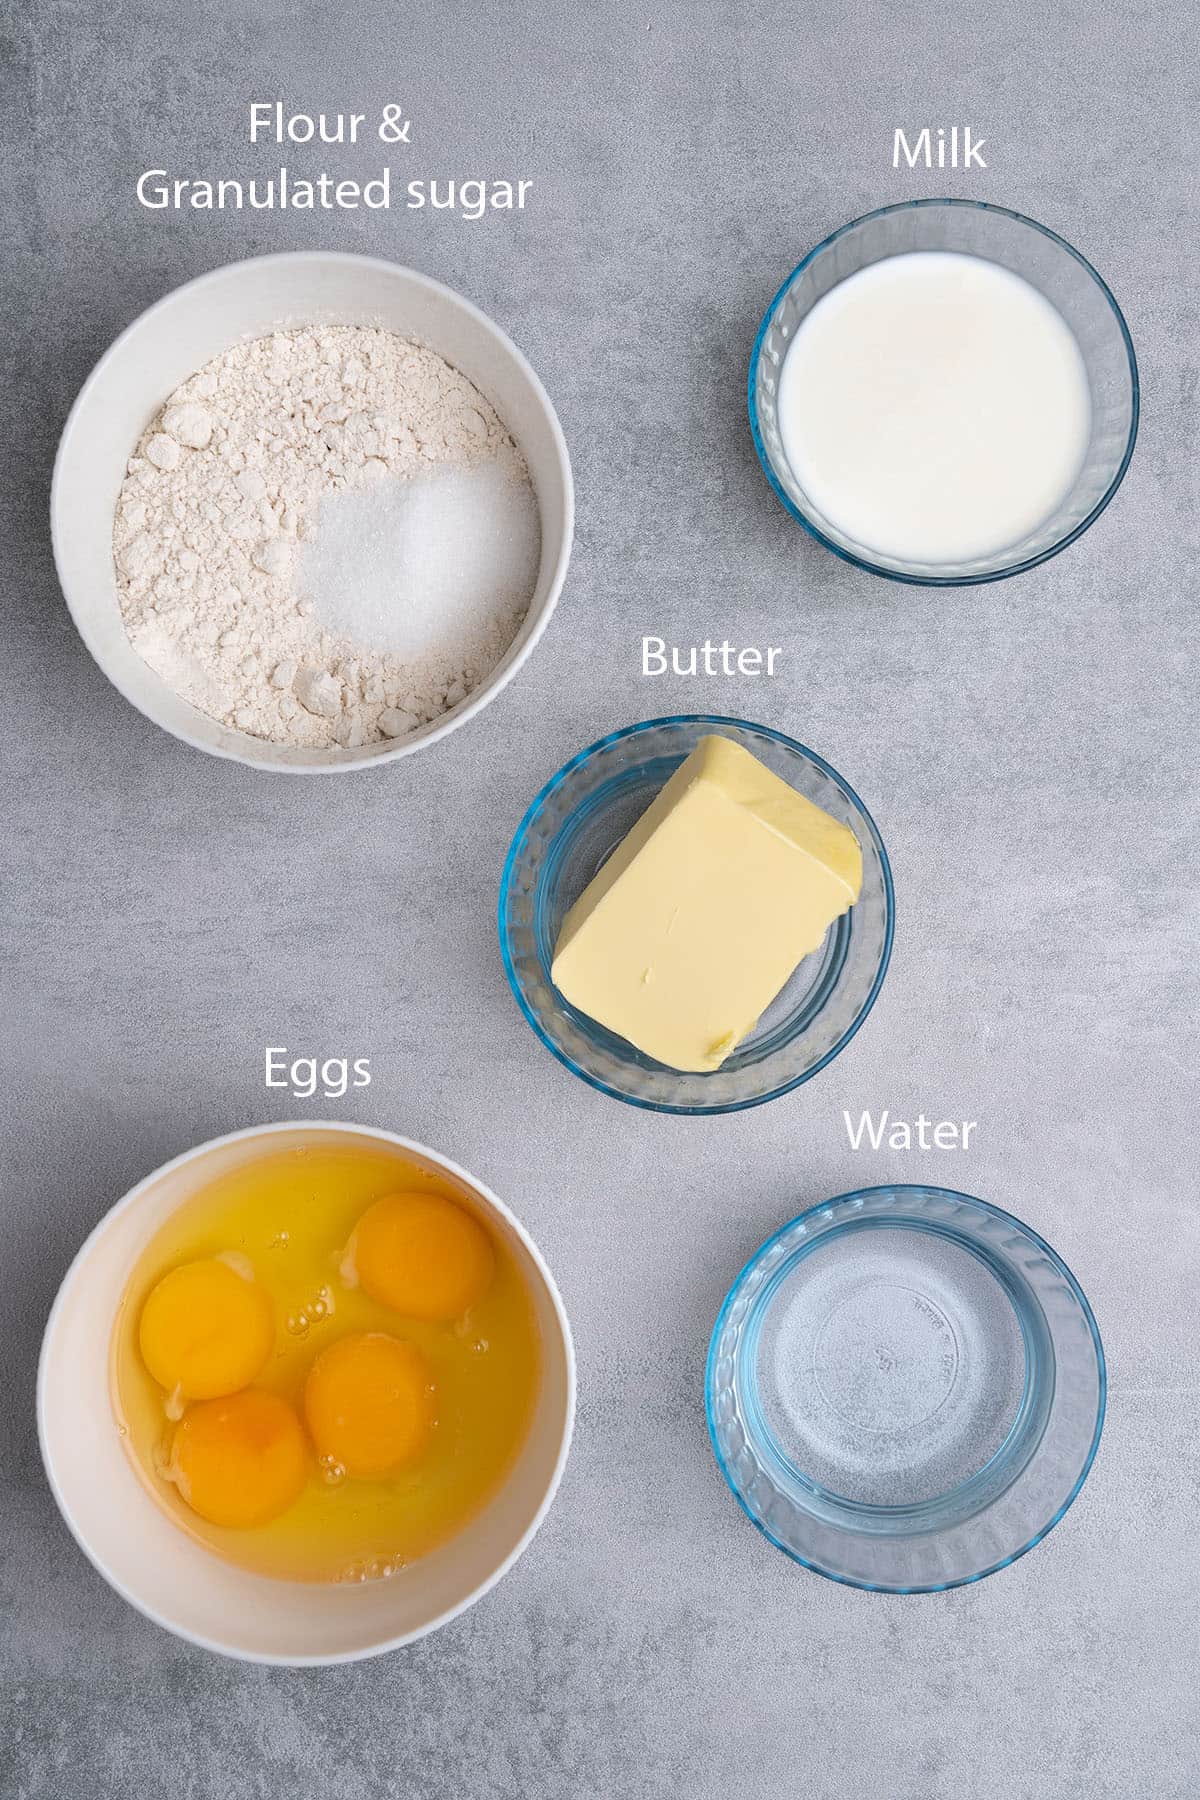
- Butter - I like to use butter with 82% fat content in all of my recipes. It is also important to use unsalted butter so that you have full control of the amount of salt. This is particularly important for Croquembouche, as salt plays a special role in making the choux pastry.
- Water - The milk-to-water ratio will be about 50-50%. However, you may choose to use different ratios if you're a more experienced baker and know what works best for you.
- Milk - It is best to use whole milk for this recipe. I would not recommend using a milk substitute if you want the best results.
- Salt - Salt is normally added to desserts to enhance ingredients and help to balance out the flavor. For the choux pastry, salt also plays a key part in creating the texture needed to hold its round shape. Do not skip it!
- Sugar - For this recipe, I use granulated sugar to make the dough (you can read about the various types of sugar in my sugar guide). It is important that the sugar fully dissolves when heating the mixture.
- Flour - For the best results, you want to use high-protein content bread flour. I like to use a 13% protein content flour for this recipe. You can learn more about the different types of flour and how to use them in my flour guide.
- Egg - You'll want your eggs to be at room temperature and just lightly whisked. Depending on the dryness and consistency of the mixture, you may need slightly more or less egg. Take a look at the Expert Tips section for more info on this!
🛒 You’ll find detailed measurements for all ingredients in the printable version of the Recipe Card at the bottom of this post
2. For the Diplomat Cream
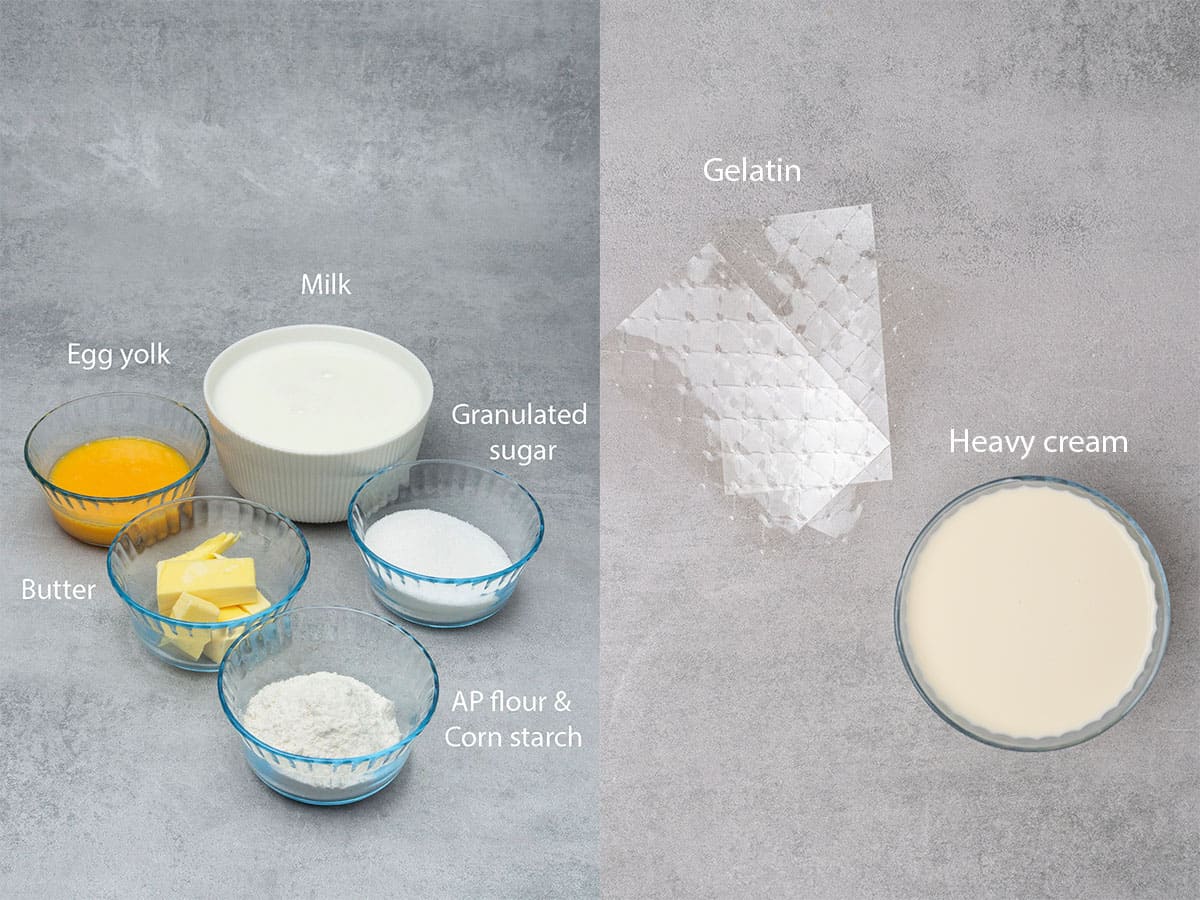
- Milk - For a rich, creamy, and flavorful cream, high-fat content whole milk is best. I like to use 3% fat whole milk.
- Sugar - Granulated white sugar works is all you need for this recipe. Remember to check my sugar guide for more information about the different types of sugar and how to use them!
- Egg - Only the egg yolks are required. There is no requirement for whether you use fresh farm eggs or supermarket eggs. However, there will be a difference in color (farm eggs give a bright yellow cream whereas supermarket eggs give a paler color cream).
- Corn Starch - Corn starch helps to thicken the cream.
- Flour - This recipe uses all-purpose flour, which also helps thicken the cream alongside the corn starch. Remember to sift the flour before you use it!
- Vanilla Bean Paste - Pure vanilla bean paste gives the best taste; however, you can also use vanilla extract as a substitute.
- Butter - Using unsalted butter will give you control over the saltiness of the cream. I prefer to use a European-style butter with 82% fat content. The butter should be at room temperature.
- Gelatin - You can use either gelatin sheets or gelatin powder for the recipe; however, I find using three 1.7g gelatin sheets much easier to handle. If using gelatin powder, use it at a 1:1 ratio (5g gelatin powder = 3 gelatin sheets of the same strength). Take a look at my article on gelatin substitutes for more alternatives and details on how to handle it.
- Heavy Cream - For the best consistency and taste, use heavy cream with 36% fat content. The heavy cream needs to be very cold for the proper results.
🛒 You’ll find detailed measurements for all ingredients in the printable version of the Recipe Card at the bottom of this post
3. For the Wet Caramel
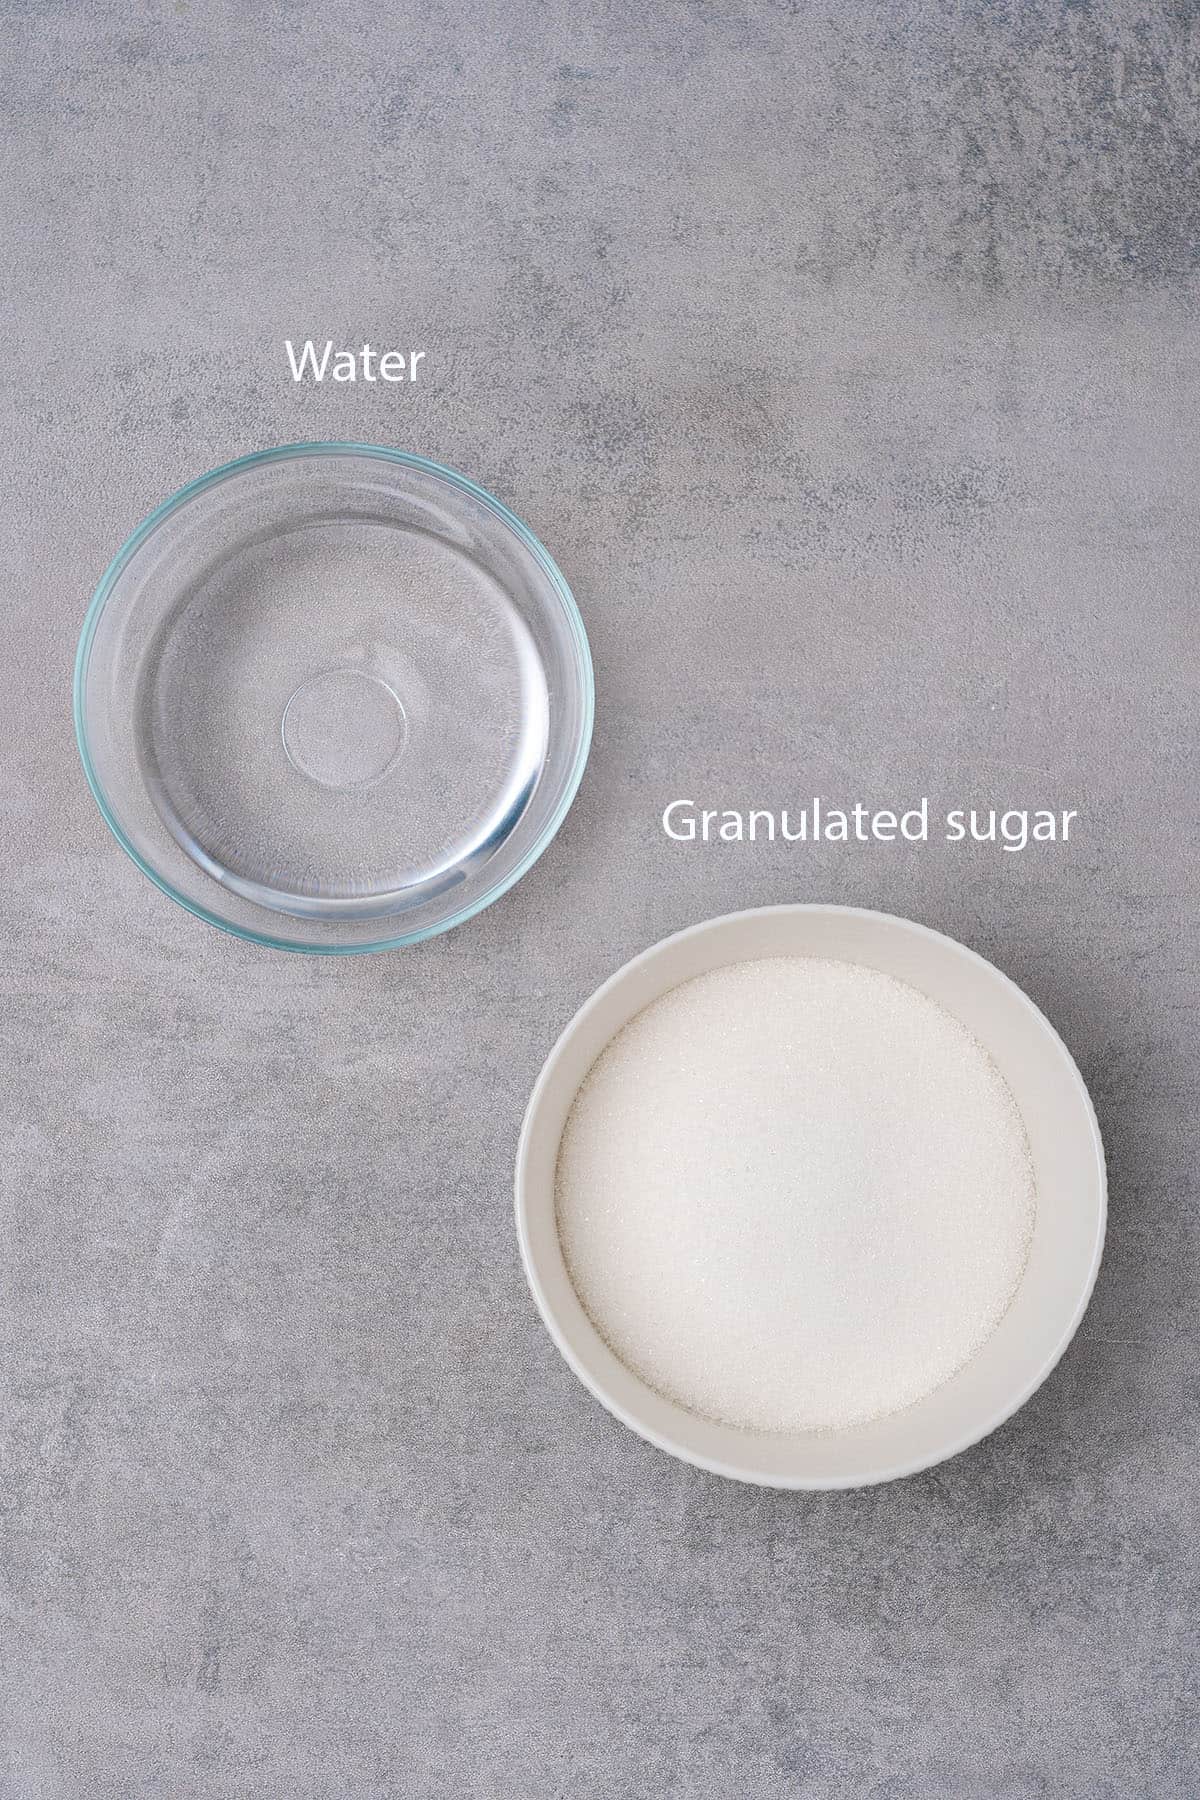
- Sugar - Regular, white granulated sugar is all that is required for the dry caramel. If you were to choose to make Choux Au Craquelin instead of a regular cream puff, you would want to use cane sugar.
- Water - Besides Sugar, wet caramel also contains water. Water helps avoid the caramel crystallising
- Glucose Syrup (optional) - Glucose syrup again helps avoid crystallization and soften up the texture of the caramel; however, it is an optional ingredient. Worth trying if you are new to making caramel syrup.
🛒 You’ll find detailed measurements for all ingredients in the printable version of the Recipe Card at the bottom of this post
👩🍳 How to make this recipe
1. How to make the choux pastry cream puffs
I have a choux au craquelin and eclair recipe where I explain in more detail the art and science of choux pastry. For the Croquembouche, we will make 60 smallish cream puffs which is the easiest choux pastry among these.
- Heat the butter, water, milk, salt, and sugar in a medium saucepan and cook over medium heat. Do NOT skip the salt as it plays a critical part in the recipe. Make sure that the sugar and salt fully dissolve.
- Bring the mixture to a simmer, then immediately remove it from the heat. Next, add all of the sifted flour and vigorously whisk it with a spatula or wooden spoon until it forms one smooth ball. You should not see any flour bits.
- Place the saucepan with the dough back on the stove and cook it over medium heat for about three minutes. You should be mixing the dough constantly while it cooks. Once a skin forms on the bottom of the saucepan, the dough is ready.
- Move the dough into a bowl (for your convenience, use the bowl of your Stand mixer) and let it cool slightly. Next, mix in small amounts of the room temperature egg at a time, consistently whisking the mix after each addition. You should end with a consistency appropriate for piping: Not too runny and not too firm.
- Pipe 60 equal-sized buns (roughly 3.5cm/1.5 inches each in diameter) onto perrforated “air” baking mats (or two trays with parchment paper). Be sure to leave sufficient space between each of them to give them room to expand. Next, place the trays into the freezer for at least ten minutes.
- Preheat the oven to 200 C/392 F. Do not use the oven fan.
- Place the choux buns in the oven, then lower the temperature to 170 C/ 338 F. Bake for 25 minutes. Do not open the oven door during the first 15-20 minutes!
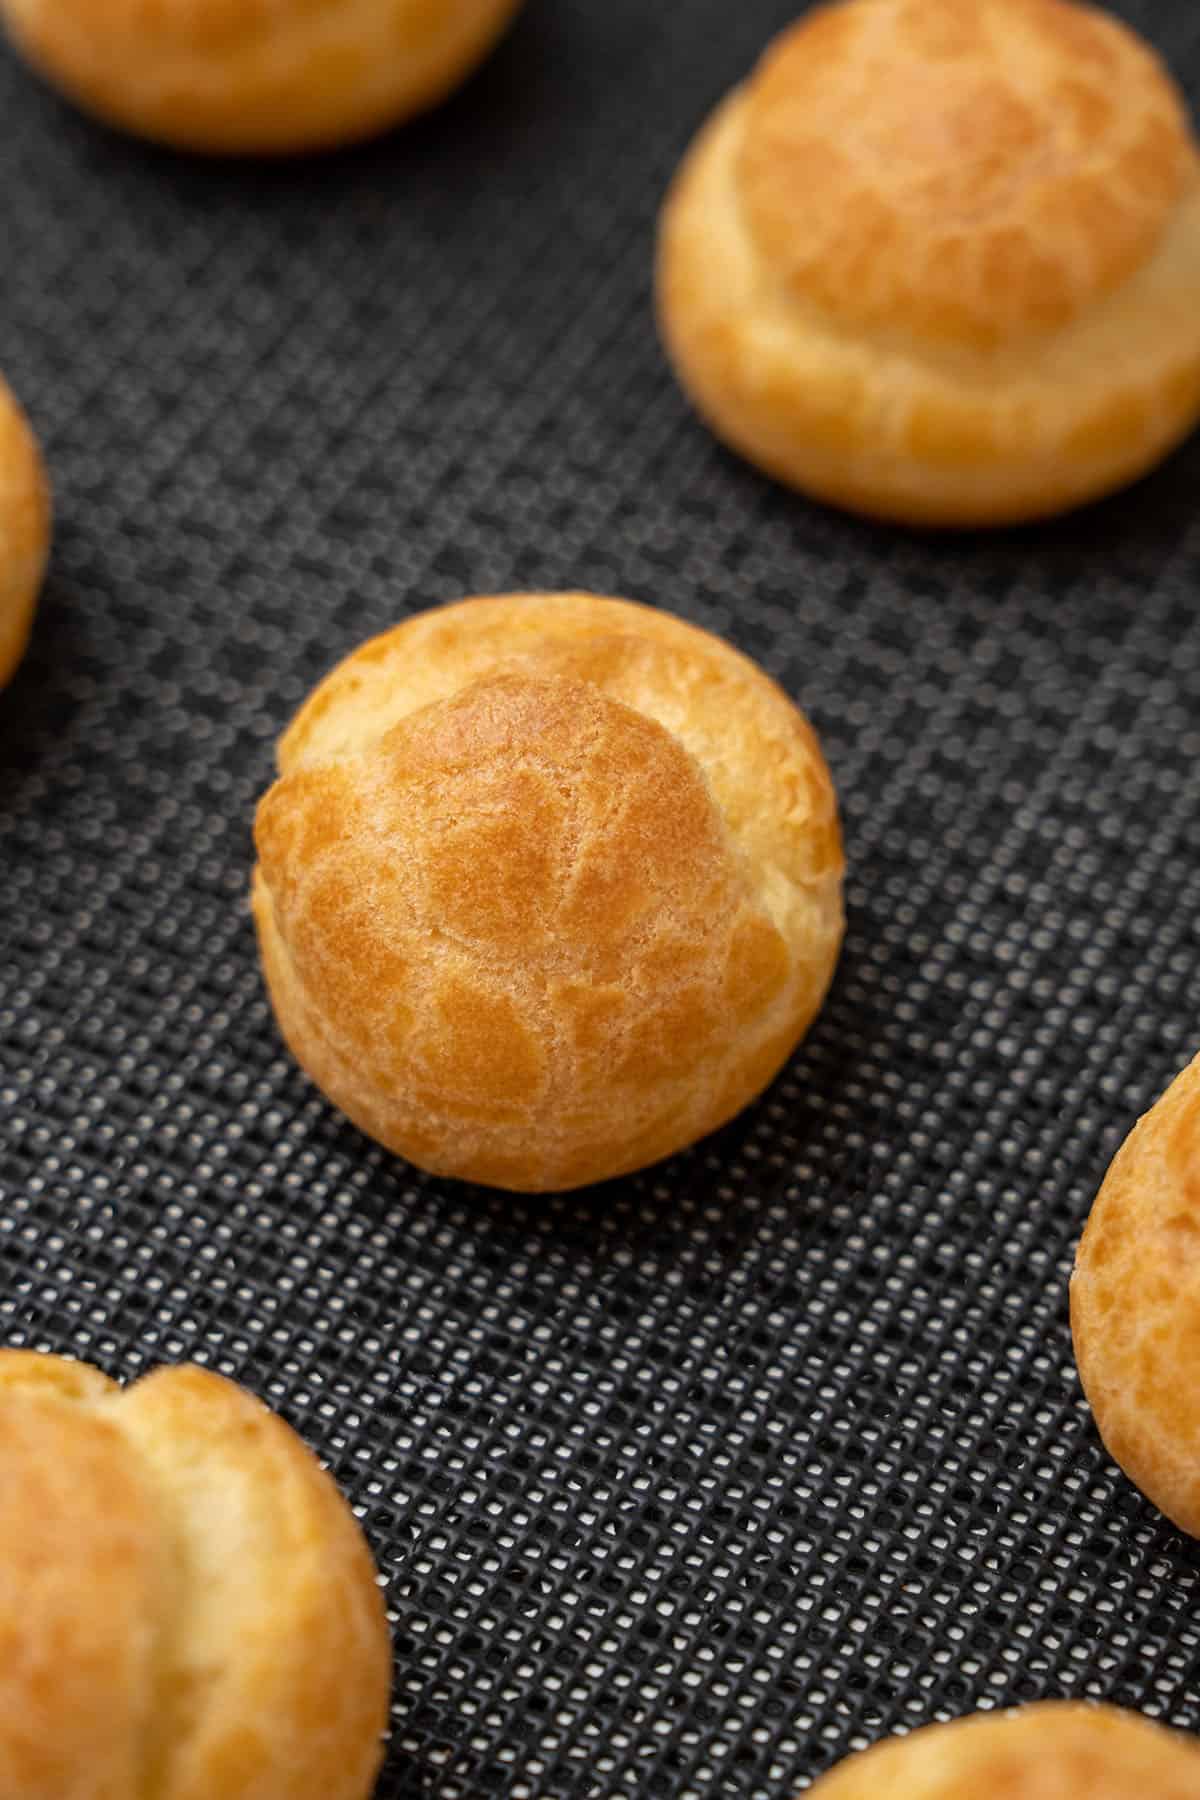
- Remove the choux buns and cool them on the same perforated mats. If you used parchment paper, cool them on a cooling rack. The choux buns need to be completely cooled prior to filling them with the diplomat cream.
💡 Top Tip: If baking the choux balls for the first time, it's a good idea to check the consistency of one of the Choux puffs after roughly 25 minutes of baking. If it has a golden color, a nice puffy shape and doesn't deflate at room temperature, and is not raw in the middle (a little wet is OK), consider it done.
2. How to make Diplomat Cream filling
If you want your Croquembouche filling to be a little softer, you can eliminate the gelatin from the recipe. Simply omit steps #1 and #6 below.
- If using gelatin sheets, start by soaking the sheets in cold water.
- Use a hand whisk to whisk together the sugar and egg yolk in a large bowl for 1-2 minutes until slightly fluffy.
- Next, thoroughly whisk in the corn starch, flour and vanilla until it turns into a smooth paste.
- In a saucepan, bring the milk to a simmer over medium heat. Remove it from the heat as soon as it starts to simmer. Next, pour the warm milk over the egg yolk mixture and use the hand whisk to mix it vigorously. You should see it begin to thicken.
- To further thicken the mixture, pour it back into the saucepan and cook it for a few minutes over medium heat. It should start to thicken approximately a minute after the first boil. Don't worry if you see it start to get lumpy. Continue whisking, and it will eventually get smooth and glossy.
- Remove the gelatin sheets from the water and squeeze them gently to get rid of the excess water. Then, stir them into the mixture one at a time to form the pastry cream. If lumps appear in the cream, you can always use a sifter or strainer for a smooth and lump-free result.
- With the help of a rubber spatula, mix the room-temperature soft butter into the pastry cream until it is well combined. It helps to add the butter in gradually (I like to do so in three stages) and mix it well after each addition.
- Cool the pastry cream by placing it into a shallow bowl or cake pan and covering the entire surface with plastic wrap (the wrap will help prevent skin from forming on the top). Let it sit until it reaches room temperature.
- Once the pastry cream has cooled, whisk it a few more times until it reaches a smooth texture. Stop whisking the cream once it is smooth. Otherwise, it will get too runny!
- Whip your cold heavy cream just until it reaches soft peak. If it starts to form lumps, you have whipped it too much.
- Fold your heavy cream into your pastry cream using a rubber spatula. For the best results, add the whipped heavy cream in stages, folding after each addition.
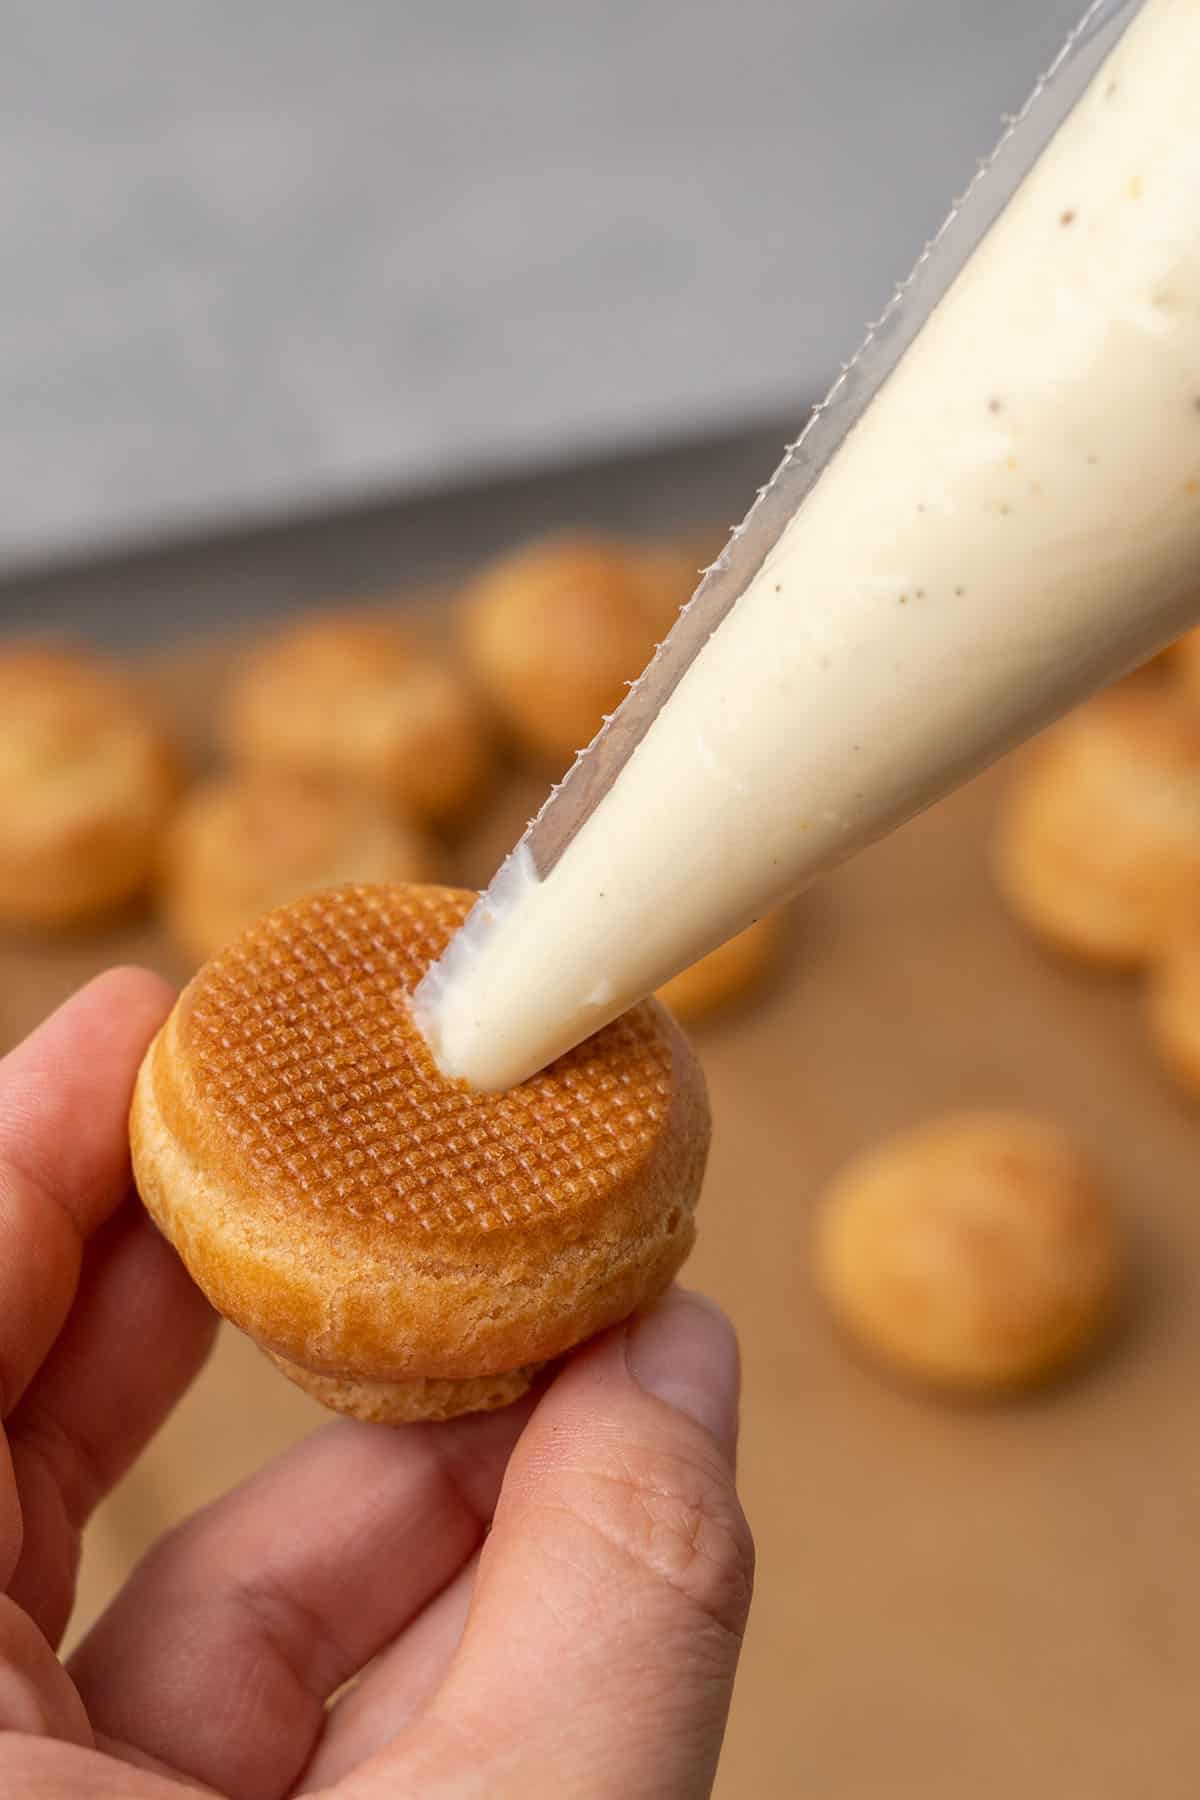
- Once complete, make a small hole on the bottom of the choux buns. If the cream is too soft, refrigerate it for a couple of hours before using it.
- Using the piping bag, fill each of the choux buns with the diplomat cream and set them aside.
💡 Top Tip: Naturally, the filling will eventually soften the choux (the firmer the filling, the fresher the choux buns will stay longer). Only fill the choux buns shortly before assembling the Croquembouche tower as choux pastry is not supposed to stay fresh for days.

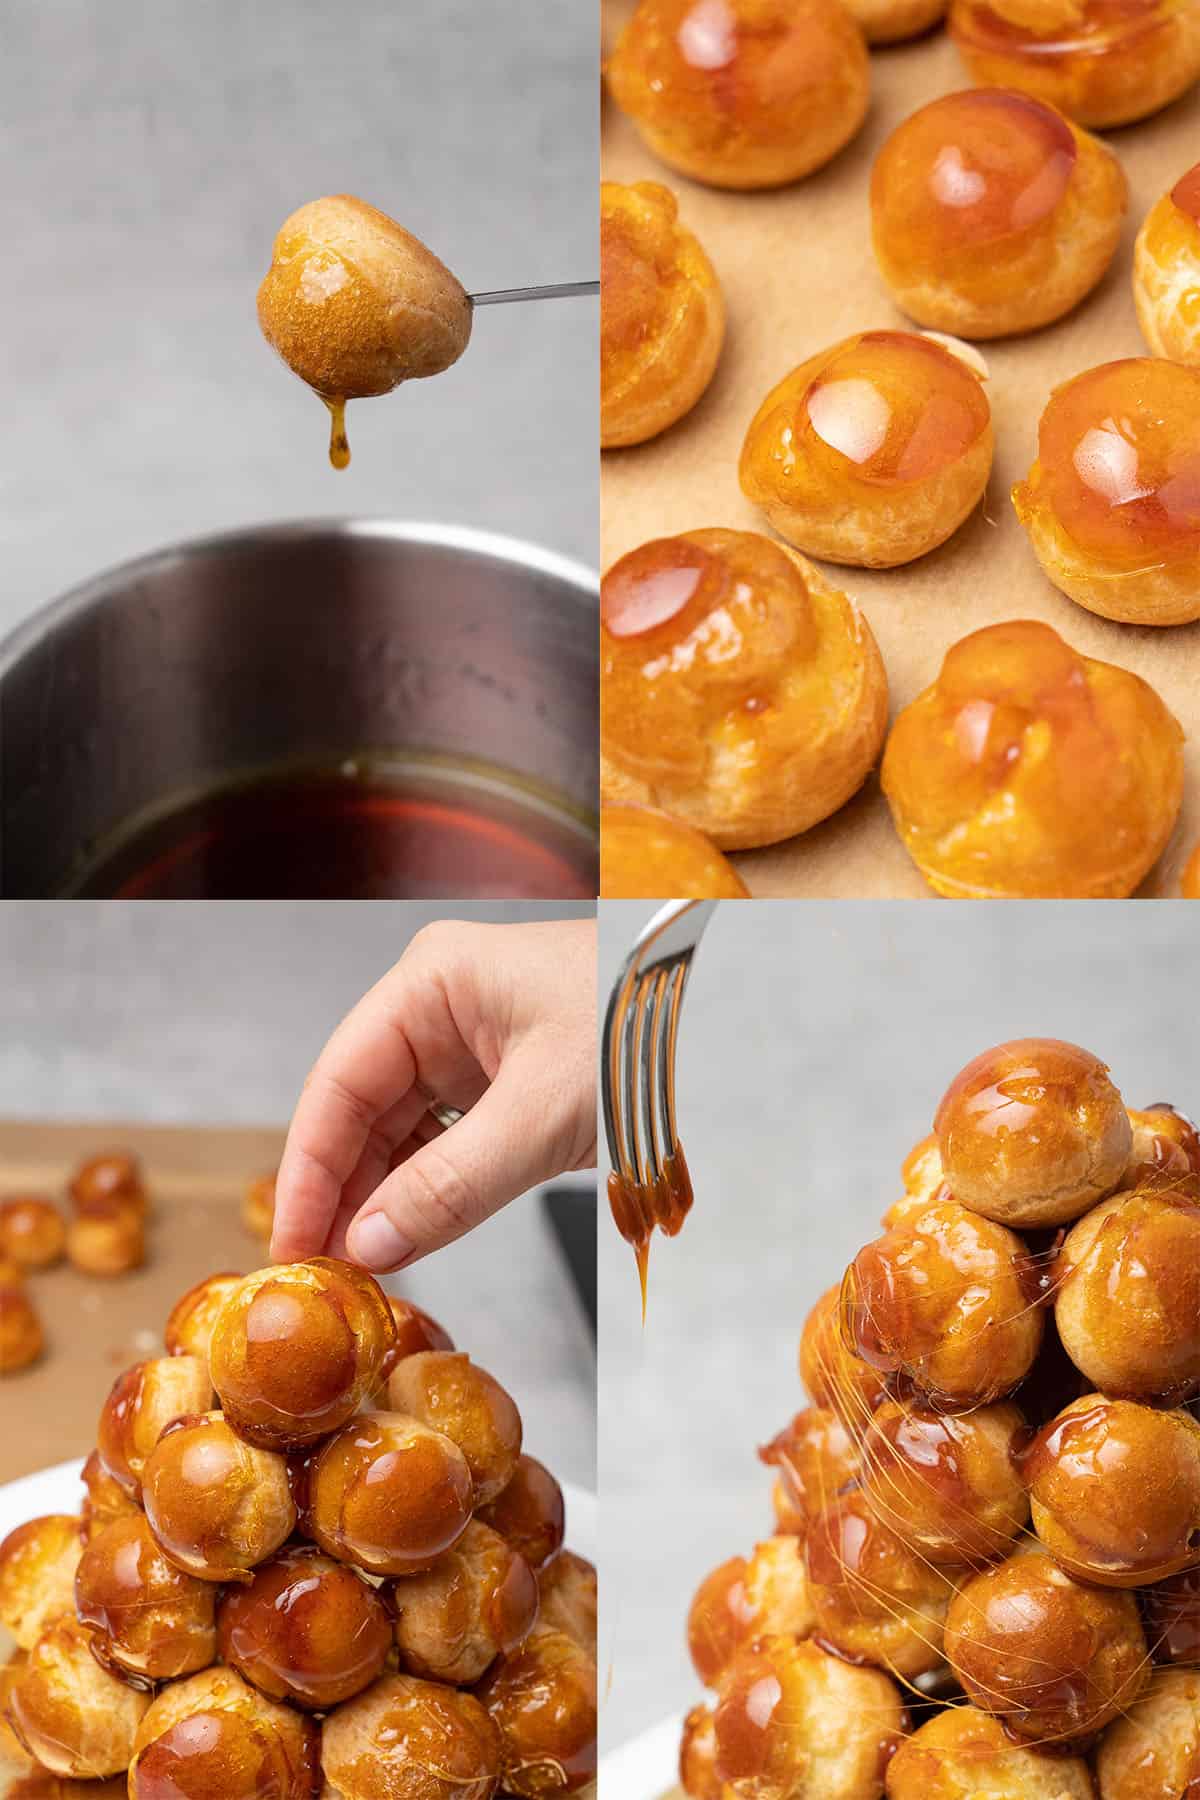
3. How to make the wet caramel
Take extra care when handling the ingredients so you won´t burn yourself while making caramel! Before you make your caramel sauce, make sure to have your choux buns filled, and at hand as you will have to start to assemble the tower immediately.
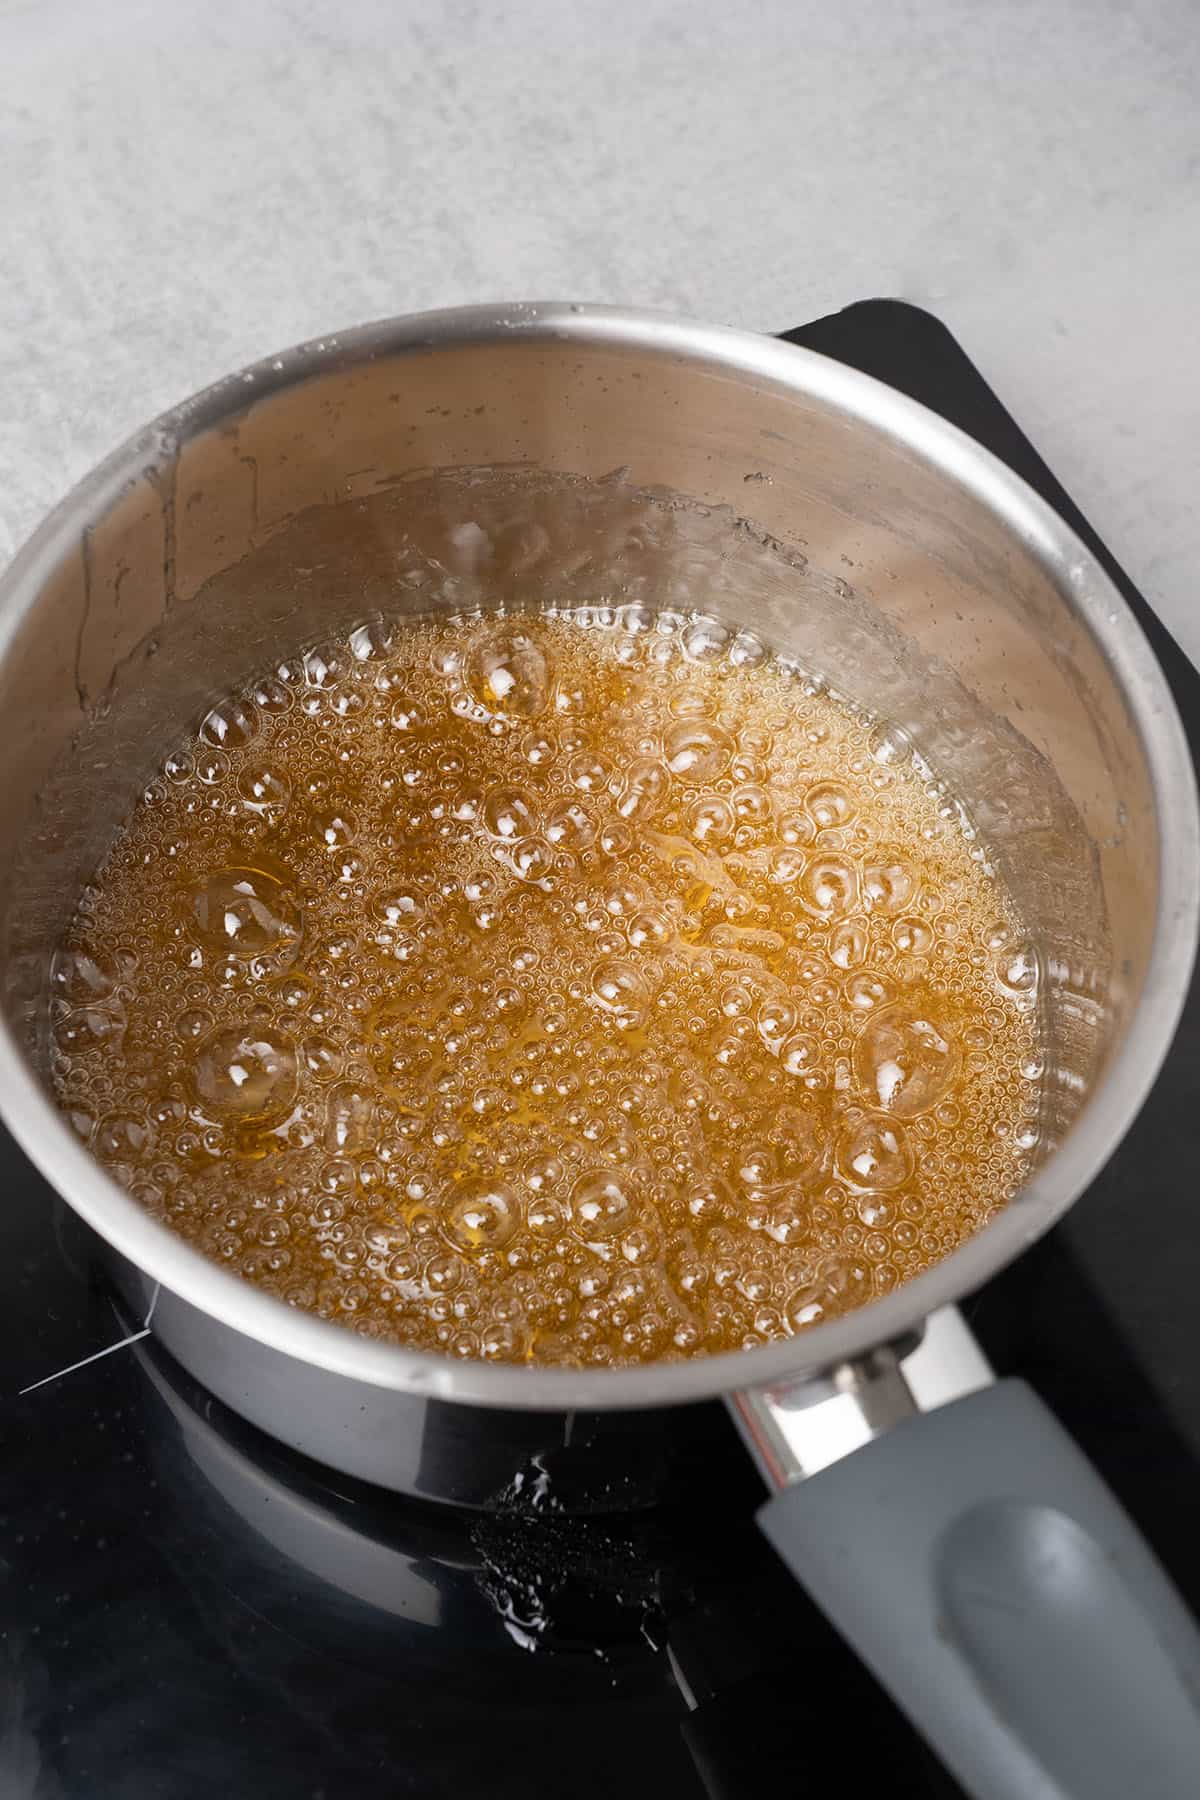
- In a large saucepan, heat the sugar, glucose syrup, and water over medium-high heat until the sugar and syrup melt.
- Once the sugar starts to caramelize (brown), reduce the temperature to medium heat.
- Immediately turn off the heat once the caramel reaches 160-180C/320-356F or turns golden brown.
💡 Top Tip: Before you make your caramel sauce, make sure to have your choux buns filled, and at hand as you will have to start to assemble the tower immediately.
5. How to assemble the Croquembouche tower
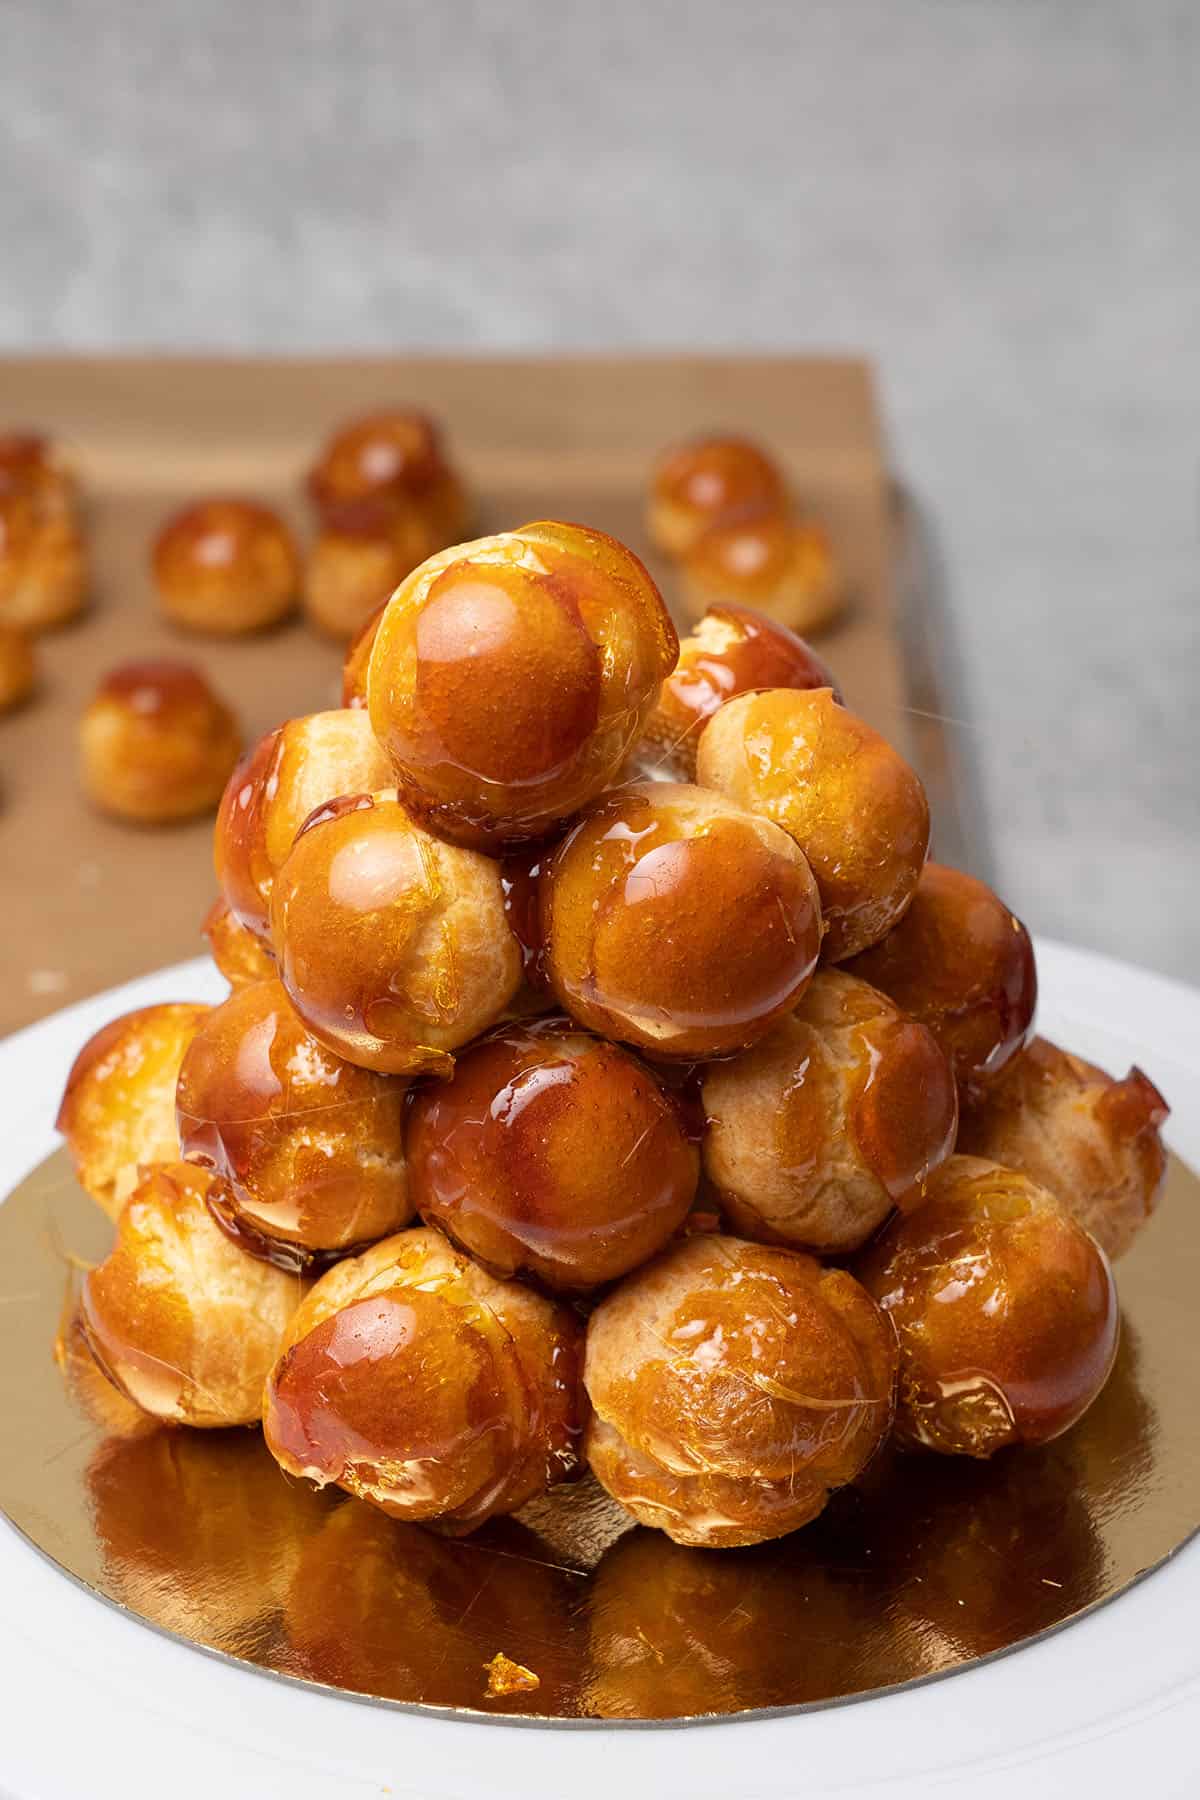
Before you start assembling the tower, it's a good idea to count how many completed choux buns you have and calculate the number of layers you'll be able to make. In this particular recipe, I used the following number of buns from bottom to top: 12-11-10-9-7-3-1.
The caramel will be extremely hot! I highly recommend using a fork, knife, or heatproof gloves during this stage to prevent burns.
- Dip each of the choux buns into the hot caramel and set them aside. The caramel should be very soft from the heat.
- Once the caramel has fully set, start building up the tower based on the number of choux buns you calculated at the start.
- Start gluing together the first layer of the tower with the caramel side facing out on the buns. Let the layer set before moving to the second layer.
- Glue together the second layer with the soft caramel, ensuring each choux bun is glued to each other as well as to the bottom layer.
- As the caramel starts to set and cool, it will thicken. To keep the caramel soft and prevent it from getting too hard, turn the stove back on to very low until the caramel softens. Repeat the reheating process as many times as necessary.
- Continuing building and gluing the layers together from the bottom to the top. Be mindful of the number of choux buns left as well as the overall symmetry of the tower!
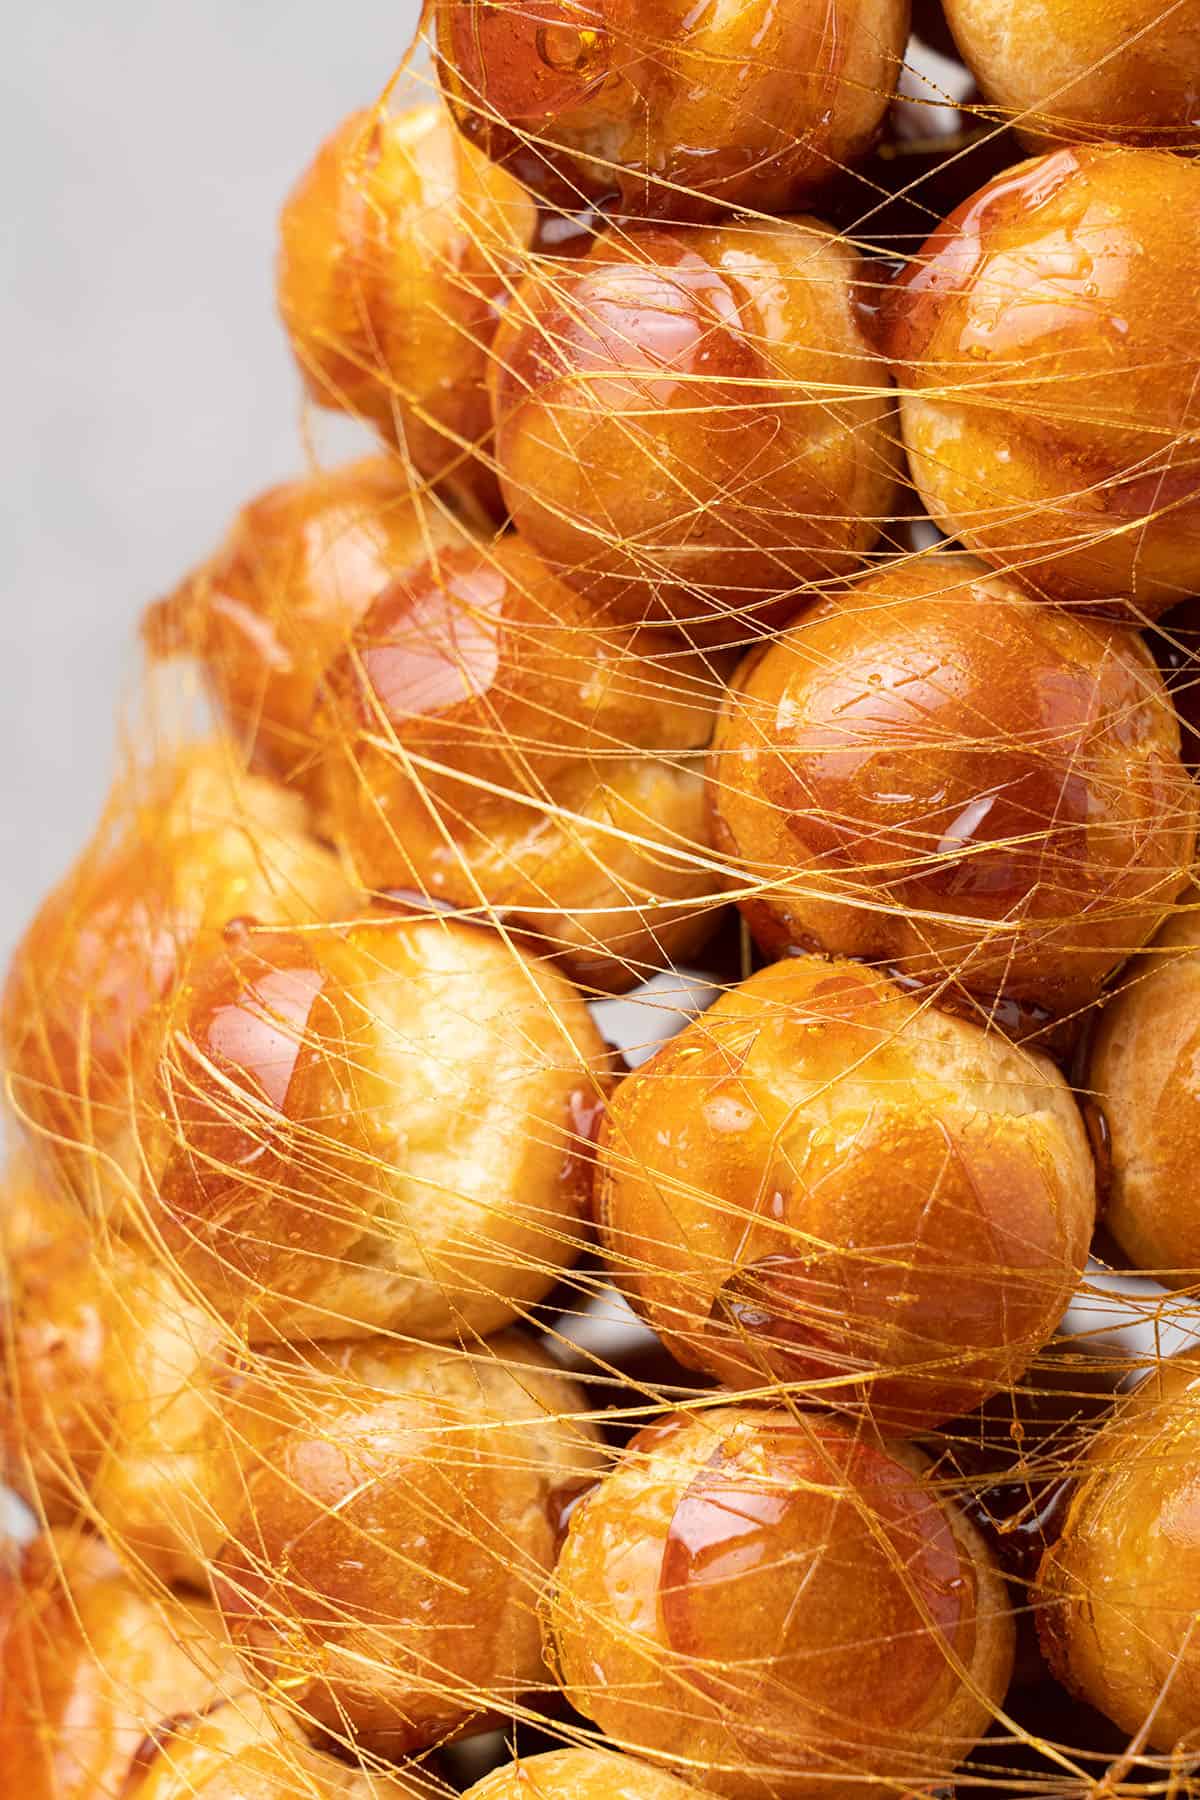
- Once the tower is built, it's time to decorate! Use a fork to swirl the remaining caramel around the Croquembouche tower, using as much as you'd like. You may also decorate and drizzle with sweet and savory treats such as macarons, almonds, candies, or flower.
Please note that the swirling stage might make a bit of a mess in the kitchen by the time you decently cover the choux tower, but it is so worth it!
💡 Top Tip: According to my experience the caramel will soften overnight in the fridge (due to its moisture) meaning the tower might collapse so serve the dessert within a few hours for the best appearance and taste!
🥣 Equipment Notes
A digital scale is necessary to get the most accurate measurements for all of your ingredients. For this recipe, you will want to set your scale to measure in grams. I also strongly advise using a digital oven thermometer to measure and follow the exact temperature in case your oven cooks above or below the marked temperature.
You'll need a hand whisk to whisk the choux pastry mixture and to help loosen and smooth the pastry cream. Your rubber spatula will help gently fold the ingredients together without over-mixing them. This is important when folding the whipped heavy cream into the pastry cream. The stand mixer will also come in handy whenever you need to whip the ingredients together.
I prefer to use a perforated "air" baking mat. The holes in the mat help evenly distribute the air, resulting in evenly baked buns. However, you may also use parchment paper as an alternative. A piping bag/pastry bag and nozzle will be necessary to pipe the choux pastry dough onto the perforated baking mat or the parchment paper lined baking sheet.
🎓 Expert tips
- Pre-whisk the room temperature egg before mixing it into the choux pastry dough, it helps the emulsification
- You may need more or less egg for the choux pastry dough depending on the flour you use and how much you dried the mixture while cooking it. Apply the "V test" to test its consistency: It will be ready when it slowly (slow is key) falls from your stand mixer paddle attachment in a V shape.
- While baking, do not use a fan in your oven as it can encourage cracks on your choux buns.
- When cooling the pastry cream, it should be cooled down just enough to reach room temperature but not overly cool to the point where the gelatin hardens.
- For the best results when assembling the tower, work with the caramel as quickly as possible to prevent it from cooling and hardening.
- Before you begin gluing the choux buns, make sure that you have enough caramel for the number of buns to be glued. Hold the two buns together while the glue sets.
- Pay attention to the no of choux balls you have and work your way upwards and inwards while assembling the tower. You want to be careful with leaving enough choux buns up till the end. It is better to leave some leftovers than run out of it
❓Recipe FAQs
Eating Croquembouche can be tricky, especially if the caramel is too hard. The last thing you want is to rip apart the buns while disassembling them! Once hardened, use a knife to gently crack the caramel glue and dismantle it into larger pieces.
Croquembouche consists of choux buns that are typically filled with diplomat cream or pastry cream and assembled into the signature tower shape with caramel.
The baked choux buns can be prepared the night prior. However, since the moisture from the fridge can cause the tower to fall apart, the dry caramel preparation and tower assembly should take place shortly before serving.
Croquembouche will last uncovered and refrigerated for a few hours. However, refrigeration isn't recommended as it will soften the buns and cause the caramel glue to soften and disassemble.
Both are in the Choux Puff family and can be used when making Croquembouche. However, with Choux Au Craquelin you take your choux cream puff and top it with a thin, crispy craquelin disk. The disk is made with butter, flour, and cane sugar. Check my choux au craquelin recipe if you want to try it
Croquembouche can be stored uncovered in the refrigerator for a few hours. However, over time the moisture from the fridge will cause the caramel to soften and disassemble the caramel glue. Therefore, it is best to serve it within hours of making.
An assembled Croquembouche should not be frozen, as the moisture from thawing would make the buns soggy and disassemble the glue. However, you can freeze the unbaked choux dough (after piping) in an airtight container for a few months and bake it when needed.
✨ More Choux pastry recipes
You must use the category name, not a URL, in the category field.
Have you tried this recipe?
Please leave a 5-star ⭐️⭐️⭐️⭐️⭐️ rating on the recipe card and consider leaving a comment as well! I would love to hear about how your dessert turned out and your feedback also helps other Readers!
Croquembouche (VIDEO)
Equipment
Ingredients
For the choux buns - makes about 60
- 120 g (½ cups) Unsalted butter Unsalted butter, 82% fat content
- 120 g (½ cups) Water
- 120 g (½ cups) Whole milk
- ½ teaspoon salt
- 2 teaspoon Granulated sugar
- 140 g (1 cups) Bread flour High protein content flour, eg. 13%
- 220 g (1 cups) Egg Room temperature. Might need slightly more or less, see tips
For the Diplomat cream filling
- 500 g (2 cups) Whole milk 3% fat
- 100 g (½ cups) Granulated sugar
- 80 g (⅓ cups) Egg yolk approx. yolk of 4-5 eggs
- 25 g (⅕ cups) Corn starch
- 25 g (⅕ cups) All purpose flour
- 2 teaspoons Vanilla bean paste or vanilla extract
- 50 g (¼ cups) Unsalted butter 82% fat, room temperature soft butter
- 3 Sheets of gelatin x1.7g=5g gelatin overall
- 200 g (¾ cups) Heavy Cream very cold. 36% fat
For the wet caramel
- 250 g (1¼ cups) Granulated sugar
- 100 g (½ cups) Water
- 30 g (⅕ cups) Glucose syrup optional
US customary cup measurement is an indicative figure only. Measure the ingredients with a digital scale by weight (gram). Baking is art but also science which requires precision and accuracy.
Instructions
Choux buns
- Place butter, water, milk, salt, and sugar into a saucepan over medium heat
- Place the saucepan back on the stove and cook the dough for about 3 min over medium heat mixing constantly. It is ready when a sort of skin forms on the bottom of the saucepan
- Transfer the dough into a bowl or the bowl of your Stand mixer and let it cool slightly before mixing the egg in. Only add a small amount of egg at a time, consistently whisking after each addition. You should reach a consistency which is not too runny, not too firm but just fine to pipe
- Prepare your perforated baking mats, or 2 trays with parchment paper. Pipe 30 equal-sized (3.5cm / 1.5 inches in diameter) buns on each of them. Leave enough space in between them, as they will puff, then place the tray into the freezer for 10 min at least
- Pre-heat oven to 200 C / 392 F (no fan)
- Lower oven temperature to 170 C / 338 F (no fan) and bake the choux for 25 min. Do not open the oven door in the first 15-20 min. If you are baking it the first time, it is a good idea to take one choux bun out of the oven at 25 min and check its consistency. If it is golden in colour, nicely puffed up, does not deflate at room temperature and the middle of the ball is not raw (it is ok if it's a bit wet, it will dry while cooling down) then it is considered to be done
- Cool them either on the perforated air mat or if baked on parchment paper, then cool them on cooling rack before filling them
Diplomat cream
- Soak gelatin sheets in cold water
- In a large enough bowl, with the help of a Hand whisk, whisk together sugar and egg yolk until slightly fluffy for about 1-2 minutes
- Whisk in corn starch, flour, and vanilla until thoroughly incorporated and have a smooth paste
- Bring milk to simmering in a saucepan on medium heat then remove it as soon as it starts simmering. Pour the warm milk over the egg yolk mixture slowly while whisking vigorously with a Hand whisk. This stage is effectively tempering the egg yolks and the mixture should already start to slightly thicken
- Pour the mixture back into the saucepan and cook on medium heat for a few minutes until it thickens. Concretely it is approximately 1 min after the first boil. It might get lumpy first, don't worry just keep whisking and the cream will get smooth and glossy
- Squeeze excess water from the gelatin sheets and stir them into the mixture one by one. If in doubt, strain the pastry cream for a lump free, creamy end result
- Add in room temperature soft butter and mix with a Rubber spatula until completely incorporated. It is worth adding the butter in 3 stages and mixing well after each addition.
- Pastry cream needs to completely cool before folding the heavy cream in. Place the cream into a shallow bowl or cake pan and cover the entire surface with plastic wrap to avoid skin forming on top. Let it come to room temperature
- Once cooled, whisk the pastry cream for 1-2 minutes to get a smooth texture. Make sure you do not over whisk it as it can get runny. Give it a few whisk only until smooth
- Whip very cold heavy cream until soft peak. Do not overwhip it to a point that it would form lumps.
- Carefully, with the help of a rubber spatula, fold heavy cream into the pastry cream. It is worth adding the whipped heavy cream in 3 stages and folding after each addition.
- The Diplomat Cream can be used immediately to fill the choux buns. If the cream is more on the soft side, refrigerate it for 1-2 hours before using it.
- Making a small hole on the bottom of the choux buns, fill each of them with the diplomat cream, and set them aside while making the dry carame
Wet Caramel
- First and foremost, be careful throughout the process not to burn yourself
- Melt the sugar and glucose syrup along with the water in a large saucepan over medium-high heat
- Once the sugar starts to turn golden brown, adjust the stove to medium heat. When caramel achieved the right temperature (160-180C / 320-356F) or color (golden brown), immediately turn the stove off and start the assembling process
Assembling
- Decide on a serving plate and assemble the dessert on it as you won´t be able to move it later
- Dip each choux bun into the hot(=soft) caramel and set them aside until set. While dipping, be careful not to burn yourself, I suggest using a knife to dip or heatproof gloves
- After a few minutes when caramel will start to cool(=thicken), turn on the stove again on very low heat to keep the caramel warm(=soft)
- Once the caramel has set on each choux bun, start building up the tower. Depending on how many choux buns you have, you will have to calculate the optimal no of layers you can make
- I used the following no of choux buns from bottom to top: 12-11-10-9-7-3-1
- Using the soft caramel, first glue together the first level of the tower from bottom to top. The caramel side should be facing out on the buns. Make sure that each layer is properly set before moving onto the next
- For the second layer, each choux bun should be glued to the first layer as well to each other with the help of the caramel sauce. Remember, if the caramel sauce starts to thicken, very gently heat it up on the stove on low heat
- Continue with each layer from bottom to top, paying attention to overall simmertry of the tower. Also, make sure that you have enough choux buns left to finish the tower.
- Once the tower is up, dip the fork into the caramel and quickly swirl around the croquembouche. Use as much caramel as you fancy at this point, the caramel web is more of a decoration element, than structural
- Serve the dessert shortly. If you want to make ahead, prepare the choux buns the night before, but only assemble the tower shorly before serving.
- Store in the fridge, however, please note that the caramel will soften over time in the fridge due to its moist environment. The caramel="glue" will melt in between the choux buns and the tower will very likely collapse, therefore serve the dessert a few hours after assembling.
Notes
- Measure your ingredients with a Digital scale for accuracy
- Use high protein content bread flour for the best results, I am using 12% protein content flour
- Do not skip the salt, it has a special function while baking choux pastry
- Use lightly whisked room temperature eggs while preparing the dough
- For the craquelin, use cane sugar
- Make sure you read my Expert tips section above to maximize your success. A short recipe alone is not able to cover all the necessary details, and science behind baking.
- While whipping up the choux dough, you might need slightly more or less egg - and that is normal - depending on the flour you use and how much you dried the mixture while cooking it. Pay very close attention to the consistency while mixing the egg in and apply the V shape test.
- Do not try to save time by skipping the freezing part before baking, it is an extremely important technical step for making choux pastry
- I strongly advise using a Digital oven thermometer to be able to measure your exact oven temperature
- While baking, do not use a fan in your oven, it can encourage cracks on your choux
- When making the diplomat cream, first ensure that you have a firm enough room temperature pastry cream
- For the diplomat cream only use very cold and high fat (36%) heavy cream
- When making the caramel, pay attention to its color and smell and do not burn it. Use an instant thermometer to read the exact temperature
- While assembling the choux tower, you will want to work quickly. You can only work with warm (runny) caramel, once it starts to cool, it will start to thicken. Use the stove to heat it back up gently on low heat
- Pay attention to the no of choux balls you have and work your way upwards and inwards while assembling the tower. You want to be careful with leaving enough choux buns up till the end. It is better to leave some leftover than run out of it
Naomi
I saw in the recipe that the Choux pastry can be made ahead of time, are there any problems that may arise if the creams were also made ahead of time (day before)?
Thanks
Katalin Nagy
One day is fine for the cream if refriger,aed however fill and assemble the dessert the day you are planning to serve.
Fae
Can I fully freeze the piped choux before baking? If yes, how long before I can open the oven door after I start baking?
Katalin Nagy
Yes you can fully freeze it.
Do not open the oven door before the choux is baked:) The same applies to almost all the other desserts.
Stephanie
First time doing a croquembouche and this step by step really did help. Give yourself about 3-4hours if you are new to it. the diplomat cream is soo good.