You have to try this creamy and tropical Mango Tart recipe with a homemade pâte sablée shell filled with silky pastry cream and elegant mango slices.

Jump to:
🌟 Why This Is The Best Recipe
- The tropical taste: Fresh, ripe mango gives the most intense mango tart taste. It is delicious when paired with a creamy vanilla custard.
- The amazing texture: This mini mango tart recipe has a crisp pastry shell, silky filling, and juicy fruit topping.
- The professional look: No one will believe this easy mango tart recipe isn't actually a French pastry that you bought in a fancy bakery.

📝 Ingredient Notes
For the tart crust

- Flour - I use pastry flour in the mango tart shells, but all-purpose flour (or plain flour) is fine. Learn more in my flour guide.
- Almond flour - Adding almond flour to pâte sablée gives a crispier pastry and marzipan taste. But you can replace it with the same amount of all-purpose flour.
- Powdered Sugar - This tart crust only needs a small amount of powdered sugar (icing sugar) as mango is so sweet and juicy. Learn more in my sugar guide.
- Salt - This is an essential ingredient in desserts. It balances the sweetness and enhances the flavors.
- Butter - Use chilled cubes of unsalted butter with a high-fat content (at least 82%).
- Egg - Make sure the eggs are at room temperature. Learn more about the roles eggs play in baking here.
🛒 You’ll find detailed measurements for all Ingredients in the printable version of the Recipe Card at the bottom of this post
For the pastry cream
 5")
- Milk: Use high-fat content whole milk. It makes all the difference in the world when it comes to the taste of the pastry cream.
- White granulated sugar: I prefer my pastry cream not overly sweet. If you want to learn about the different types of sugar and how to use them in baking, please read my article on sugar here.
- Egg: I use egg yolk only in pastry cream for the best texture and flavor. Try making my pavlova recipe or my macaron recipe if you want to use up your egg whites.
- All purpose flour: Flour is one of the thickening agents in this pastry cream recipe.
- Cornstarch: Corn starch is the other thickening agent in the recipe. Theoretically, you could only use flour or cornstarch, but I prefer a 50/50 ratio.
- Vanilla: Avoid using artificial vanilla. This is how you make your own vanilla extract.
- Butter: Use unsalted butter to remain in control of the quantity of the salt. I use 82% fat-content butter in all my recipes. It needs to be at room temperature.
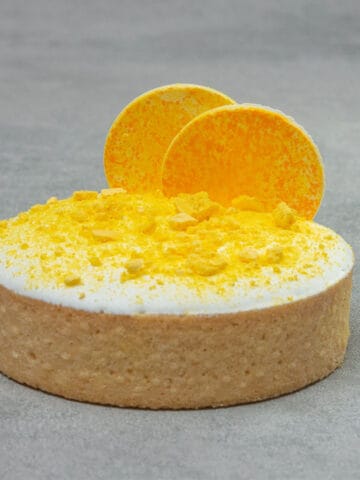
- Fresh Mango: This is the garnish for the tart, it doesn't go in the custard. Use the sweetest most fresh mango you can access and cut into julienne with a very sharp knife. If you love mango desserts, try my mango mousse cake.
🛒 You’ll find detailed measurements for all Ingredients in the printable version of the Recipe Card at the bottom of this post
👩🏼🍳 How To Make This Recipe
How to make tart crust
Read my Ultimate Pâte Sablée Guide, which goes through the recipe in detail and has a video.
- Sift the flour, icing sugar, and salt (the dry ingredients) into a large mixing bowl.
- Add cubes of very cold butter to the dry ingredients and rub between your hands until it forms a mixture with a sand-like consistency.
- Slowly add the egg and mix with your hands until a dough forms. Knead the dough for a minute or two with the palm of your hand until it becomes smooth and forms a disk. If it is warm and sticky, place it in the fridge for 15 minutes. Otherwise, continue.
- Place the dough disk between two Silicone baking mats and roll it out to 2mm thickness. Place the whole thing in the freezer for 10-15 minutes to chill.
- Take the dough sheet out and peel off the top mat. Cut out 8 circles to form the base of the tarts using one of the Perforated tart rings. Carefully move the tart bases into each of the rings.
- Cut 8 strips of dough to form the sides of the tarts and press them into the rings. Place the mango tart pastry shells into the freezer for one hour.
- Preheat the oven to 160C/320F.
- Trim the edges of the tarts with a sharp knife.
- Bake the tarts for 20 minutes, then carefully remove them from the rings and bake for a further 5-10 minutes until golden brown.
- Let the tart shells cool completely before filling.
💡 Top Tip: If the tart shells don't come out of the rings, wait a minute for the pastry to contract slightly. If they still won't come out, bake for another few minutes and try again.


How to make pastry cream
Read my in-depth guide to making pastry cream with all my pro tips.
- Use a hand whisk to whip half of the sugar with the egg yolk for a minute then mix in the cornstarch, flour, and vanilla until you have a smooth paste.
- Heat the milk and remaining sugar in a saucepan over medium heat and remove as soon as it simmers.
- Pour the simmering milk over the egg yolk mixture while whisking vigorously.
- Pour the mixture back into the saucepan and cook over medium heat for a few minutes until it thickens. This is usually 1 minute after it starts to boil.
- Allow the cream to cool for 5-10 minutes and then add in the room temperature butter in three stages. Mix with a rubber spatula after each addition until completely incorporated.
- Place the vanilla pastry cream into a shallow bowl and cover the entire surface with plastic wrap to avoid skin forming on top. Refrigerate for a few hours to let it set.
💡 Top Tip: If the pastry cream seems lumpy when cooking it, just keep whisking. Strain the pastry cream through a sieve before whisking in the butter for an unbelievably smooth and creamy finish.

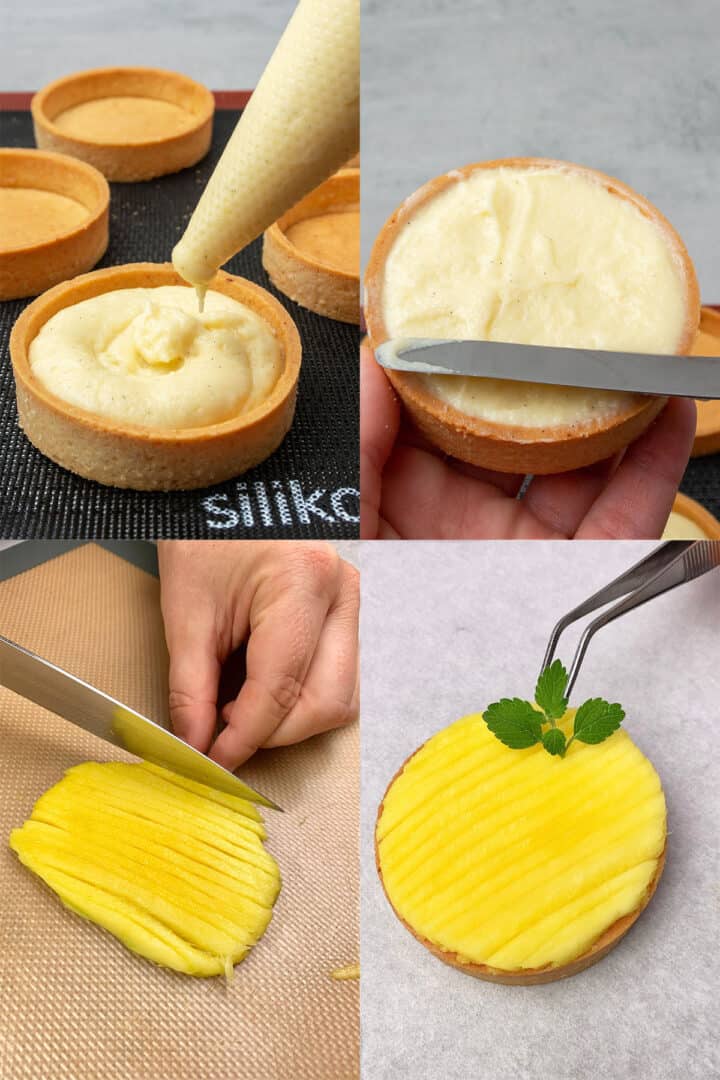
How to assemble the mango tart
- Fill the sweet pastry shells with custard cream and smooth off the top with an offset spatula. You may need to whisk it a few times briefly first.
- Slice mango into thin strips (a julienne cut) and dab off excess moisture with paper towels.
- Decorate the mango tart with the fresh mango slices.
💡 Top Tip: Use a cookie cutter to slice a circle out of the mango before making the julienne cuts.
📖 Flavor Variations & Substitutions
Once you have mastered this easy recipe for mango tart, you can adapt it. If you like mango and chocolate together, try making a chocolate pastry crust instead. Or, add other tropical fruits like pineapple.
Serve this delicious mango tart with some chantilly cream and some coconut sprinkles to make it extra decadent.
If you are baking around a dietary restriction, check out my substitution guides section. And try some of my other tarts and pies recipes, too!
❄️ Storage & Freezing
Store unfilled mango tart cases in an airtight container. Once filled, store mango custard tarts in the fridge. They taste best when served within 24 hours.
You can also freeze mini tart shells before baking them. Whilst it is also possible to freeze tart cases after baking, they can lose some of their crisp texture after defrosting. I do not recommend freezing individual mango tarts once they are filled.

✨ Expert Tips To Make Mango Tart
- Place the butter for the tart shells into the freezer for 5-10 minutes before starting. The butter for the pastry cream needs to be at room temperature.
- Always use room-temperature eggs in baking.
- Do not over-knead the dough, and do not use a stand mixer or food processor.
- When rolling out the dough disc, start from the center and work your way out.
- Alternatively, roll the dough out on a lightly floured surface or between two pieces of parchment paper.
- All ovens vary, so use a digital oven thermometer to bake at the right temperature.
- The color of pastry cream depends on the the egg. Free-range eggs will have a deeper yellow/orange yolk.
- When you fill the mango tarts with pastry cream, whisk it a few times. But do not overdo it, or it can go runny.
🥣 Equipment notes
Weigh ingredients for this mango tartlets recipe by the gram using a Digital scale.
Roll out pastry with a Rolling pin between two Silicone baking mats. It reduces the amount you need to handle the dough, and stops it from getting warm and sticky. It also means you don't need any dusting flour.
Make the pastry cream using a Hand whisk and a Rubber spatula to combine ingredients. Smooth off the top of the mango vanilla custard tart filling with an Offset spatula.
Bake the tart shells on a Perforated “air” baking mat inside Perforated tart rings for best results. I use 8cm/3.14-inch diameter rings for mango tart recipes.
❓Recipe FAQ
Usually, a pastry shell is filled with custard (sometimes flavored with a teaspoon of vanilla extract) and topped with fresh fruit like mangoes or strawberries.
Yes, peel the skin off the mango and cut the flesh off of the large stone in the middle.
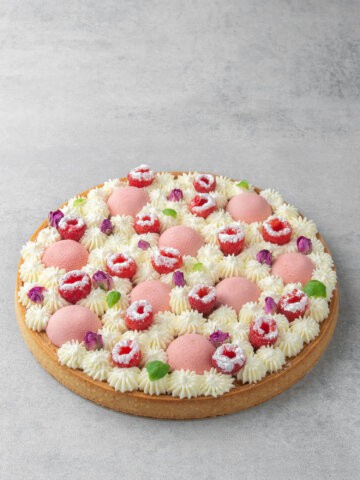
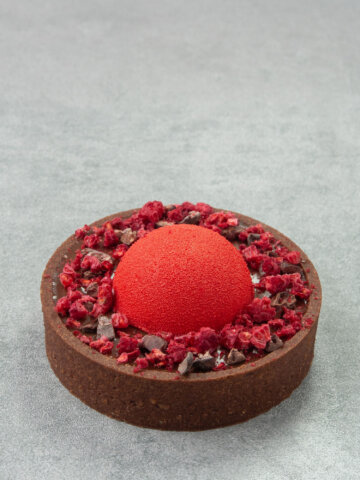
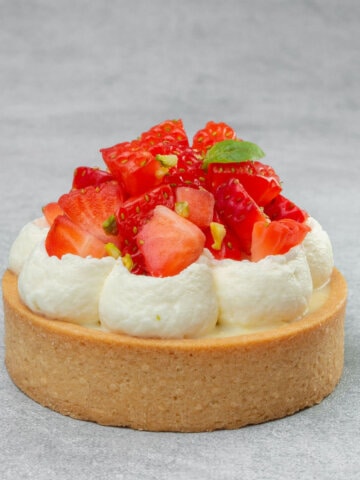
🥭 More tart recipes

Have you tried this recipe?
Please leave a 5-star ⭐️⭐️⭐️⭐️⭐️ rating on the recipe card and consider leaving a comment as well! I would love to hear about how your dessert turned out and your feedback also helps other Readers!

Mango Tart
Equipment
Ingredients
Pastry cream
- 500 g (2 cups + 2 tablespoons) Whole milk
- 100 g (½ cups) Granulated sugar
- 80 g (⅓ cups) Egg yolk approximately the yolk of 4-5 eggs
- 25 g (⅕ cups) Corn starch
- 25 g (⅕ cups) All purpose flour
- 2 teaspoon Vanilla bean paste
- 50 g (⅕ cups) Unsalted butter at room temperature
Tart crust
- 230 g (2 cups - 2 tablespoons) Pastry flour or All Purpose flour
- 90 g (¾ cups) Powdered sugar
- 30 g (⅓ cups) Almond flour
- Pinch of salt
- 110 g (½ cups) Unsalted butter very cold, and cut into cubes
- 50 g (⅕ cups) Egg approximately 1 egg
Mango topping
- 2 Mango cut into julienne slices
US customary cup measurement is an indicative figure only. Measure the ingredients with a digital scale by weight (gram). Baking is art but also science which requires precision and accuracy.
Instructions
How to make pastry cream
- Use a Hand whisk to mix together half of the sugar with the egg yolk in a mixing bowl until it is slightly fluffy.
- Mix in the cornstarch, flour, and vanilla until thoroughly incorporated into a smooth paste. If it is too thick, mix in a very small amount of milk.
- Heat the milk with the remaining sugar until simmering. Then pour the warm milk over the egg yolk mixture slowly while whisking vigorously by hand with a Hand whisk.
- Pour the mixture back into the saucepan and cook over medium heat for a few minutes until it thickens (usually 1 minute after it starts to boil).
- Take the pastry cream off the heat and strain through a sieve for a lump-free end result. Then add in the soft butter in 3 stages, mixing well after each addition with a rubber spatula.
- Place the cream into a shallow bowl and cover the entire surface with plastic wrap to avoid skin forming on top. Move it to the fridge to set properly for a few hours.
How to make tart crust
- Sift together the flour, icing sugar, almond flour, and salt into a mixing bowl.
- Add cubes of very cold butter and rub the mixture between your hands so it forms a sand-like consistency.
- Slowly add the egg and mix with your hands just until the dough comes together. Then knead with the palm of your hand for a minute until it becomes smooth and form it into a disk.
- If the dough is warm and sticky, place it into the fridge for 10-15 minutes first. Otherwise, roll it out to 2mm thickness between two Silicone baking mats.
- Place the dough into the freezer for 15 minutes still in between the Silicone baking mats.
- Prepare your oven rack with the Perforated "air" baking mat and Perforated tart rings on top.
- Take the dough out from the freezer, remove the top silicone mat, and use one of the Perforated tart rings to cut out 8 circles and form the bases of your mango tarts. Use an Offset spatula to move the circles into the rings.
- Cut 8 long stripes out of the dough to make the sides of the tarts, and press each one into the sides of the rings. Place the tart shells into the freezer for one hour.
- Pre-heat oven to 160℃ / 320℉
- Trim the tart shells with a sharp knife and bake for 20 minutes.
- Carefully remove the rings and bake for a further 5-10 minutes until golden brown. Let them cool completely on the Perforated "air" baking mat before filling.
How to assemble the mango tart
- Fill the cooled tart shells up to the edge with pastry cream and smooth off the top with an offset spatula.
- Cut the mango in a julienne style (thin strips) and soak up the juice using paper kitchen towels. Arrange the mango on top of the custard tarts.
Notes
- Always weigh ingredients by the gram using a digital scale. Baking is about precision.
- Make sure the butter for the pastry is very cold. Cut it into cubes and place it in the freezer for 15 minutes before use.
- The butter for the pastry cream needs to be at room temperature/slightly softened.
- Always use room-temperature eggs in baking.
- Do not over-knead the pastry dough, and do not use a mixer.
- If the pastry ever gets too warm to work with, place it in the freezer for 5 minutes and then continue.
- The pastry cream mixture might get lumpy at first when you are cooking it, but just keep whisking, and the cream will get smooth and glossy.
- When you come to filling the mango tarts with pastry cream, you may need to whisk it a few times after taking it from the fridge. But do not overdo it, as it can get runny. Just give it a few quick whisks until smooth.
- Soak up some of the juice from the mango once you have sliced it so that the filling underneath doesn't get wet or soggy.
- I like to garnish my mango tart with some gold leaf and some sprigs of herbs to give a splash of color.
Leave a Reply