
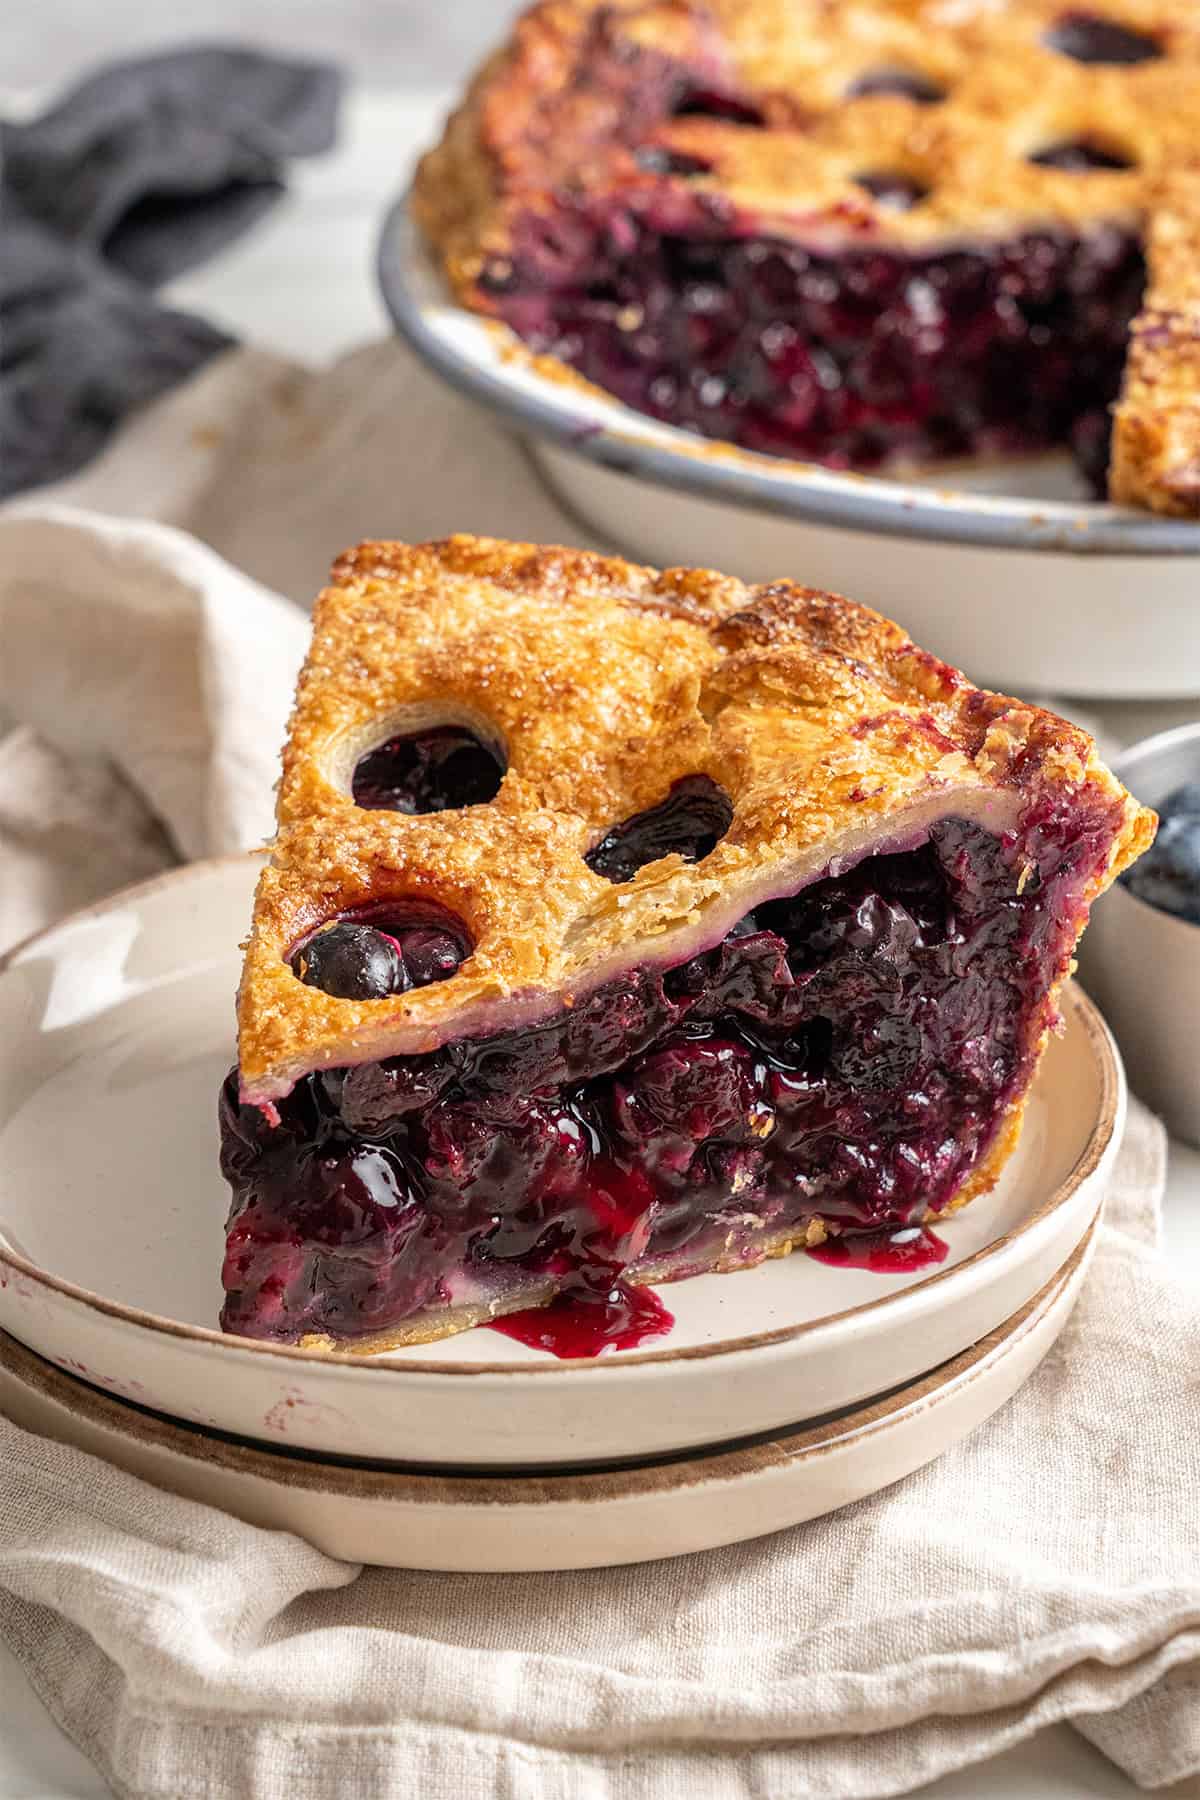
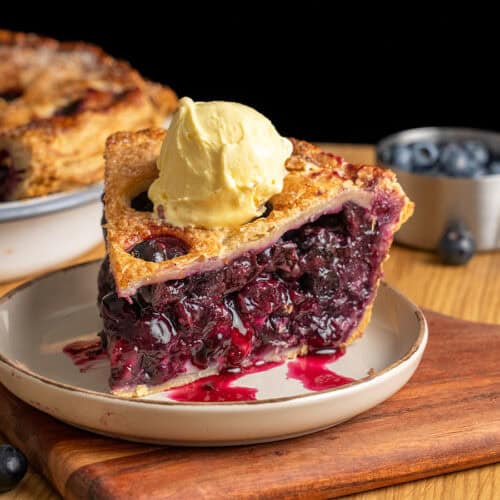
This classic homemade blueberry pie is filled with a thick, jammy fresh blueberry filling packed into a double layer of the flakiest, most buttery homemade pie crust. It slices cleanly, stands mile-high, and looks just as beautiful as it tastes.
Best Blueberry Pie Recipe
Most blueberry pie recipes online have two simultaneous problems: the bottom is soggy, and the filling is runny. In fact, these two issues are really one issue: the fruit filling isn't thick enough.
Most recipes undershoot the amount of cornstarch. I have tested this pie until I found the exact ratio that gives you a filling that is thick, glossy, and jammy, yet still moist and intensely blueberry. A clean, intact slice every single time.
The other thing that sets this pie apart is the crust. I use my flaky pie crust with a quick lamination technique that creates eight layers of butter in the dough. It takes only a few minutes of extra folding, but the result is the most shatteringly flaky crust you can make at home without professional equipment.
I have also borrowed a trick from classic apple pie making: before adding the top crust, I dome the filling in the center. Blueberries shrink significantly as they bake, and without that dome, you end up with a gap between the filling and the top crust once the pie cools. With the dome, the shrinkage levels everything out to a perfectly full pie.
Katalin's Key Take on what's the secret to a perfect blueberry pie?
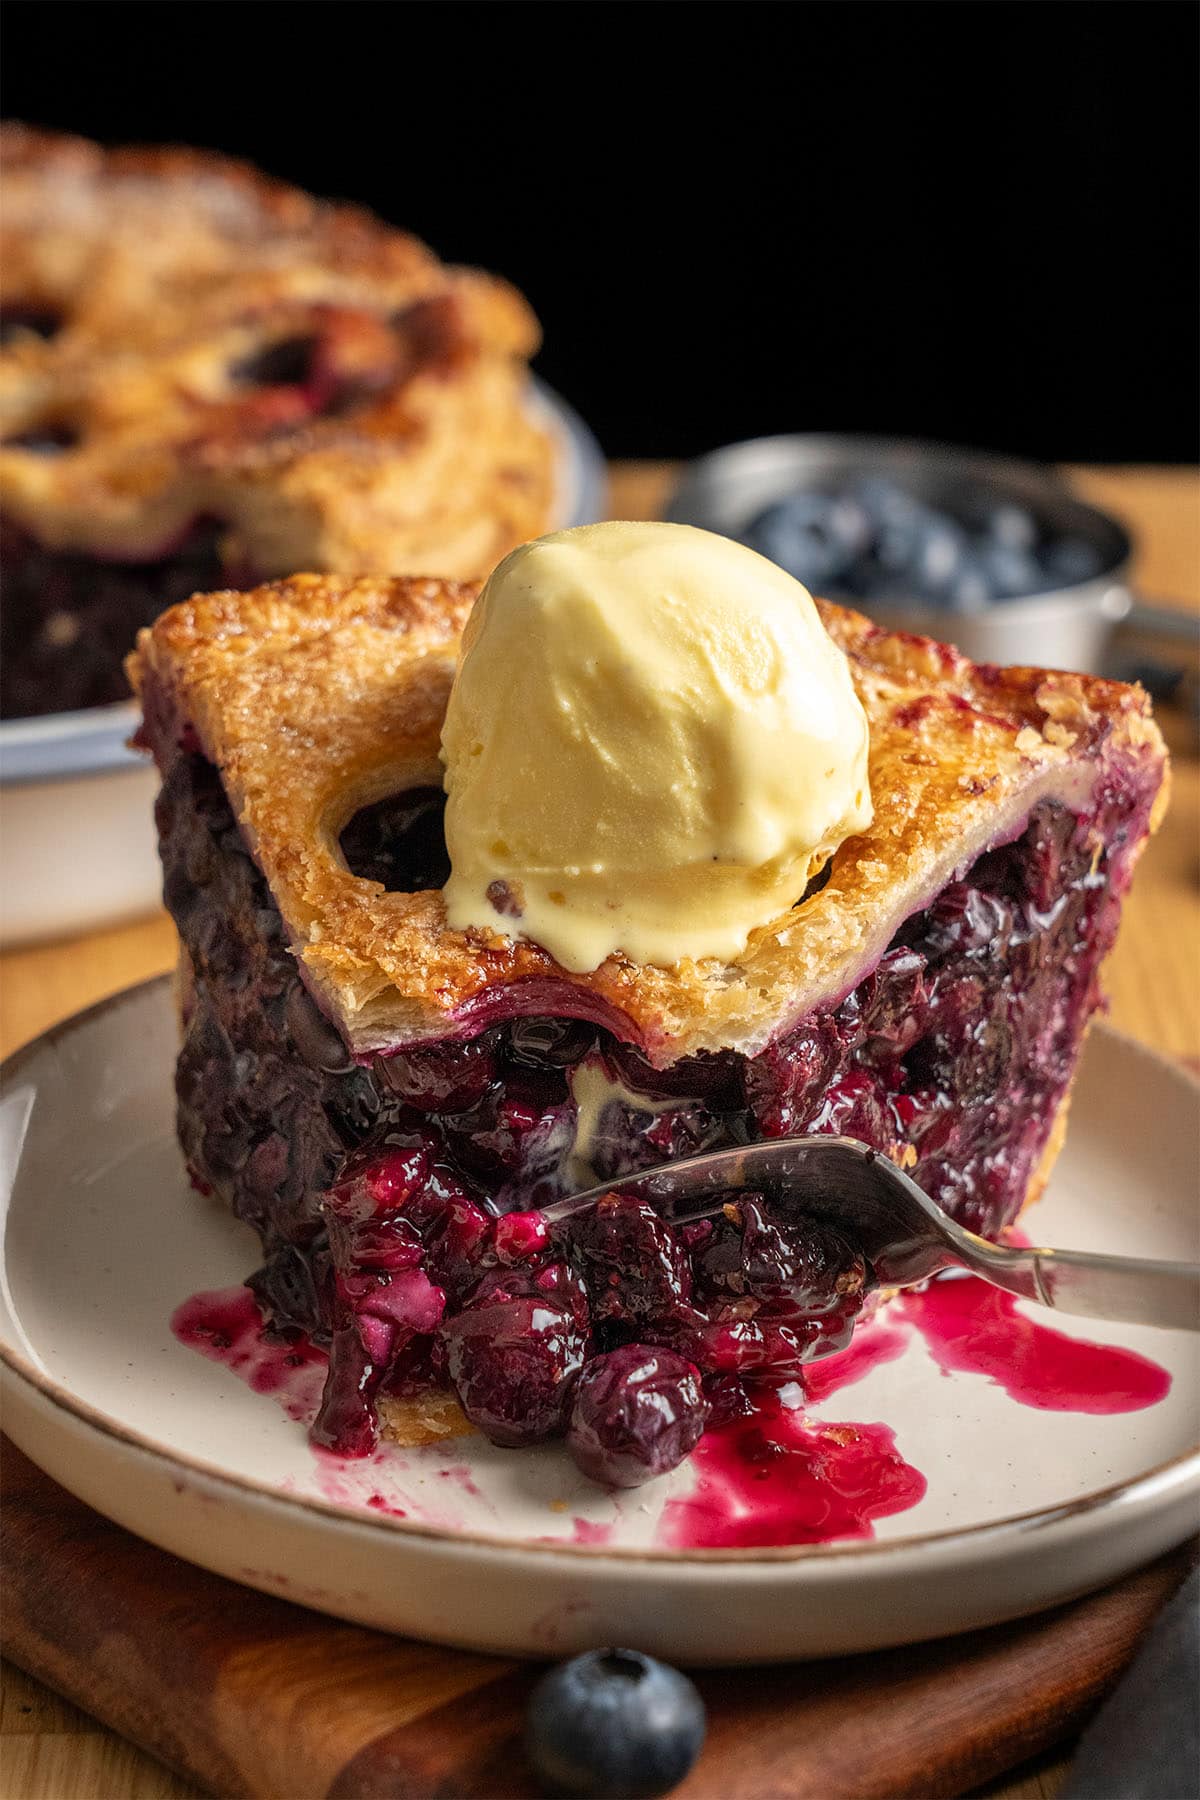
The right cornstarch ratio! Blueberries release a lot of juice as they cook, and cornstarch has to absorb it all and set it. Use too little and the filling is runny no matter how long you bake it. Use the right amount, and you get a glossy, sliceable filling that holds its shape even after you lift a slice from the dish.
Through testing, I found that most published blueberry pie recipes, even popular ones, use less cornstarch than fresh blueberries actually need. My recipe uses slightly more than you will typically see, and that is deliberate. It is the single adjustment that makes the difference between a pie that photographs beautifully and one that becomes a puddle the moment you cut it.
Start with the Pie Dough
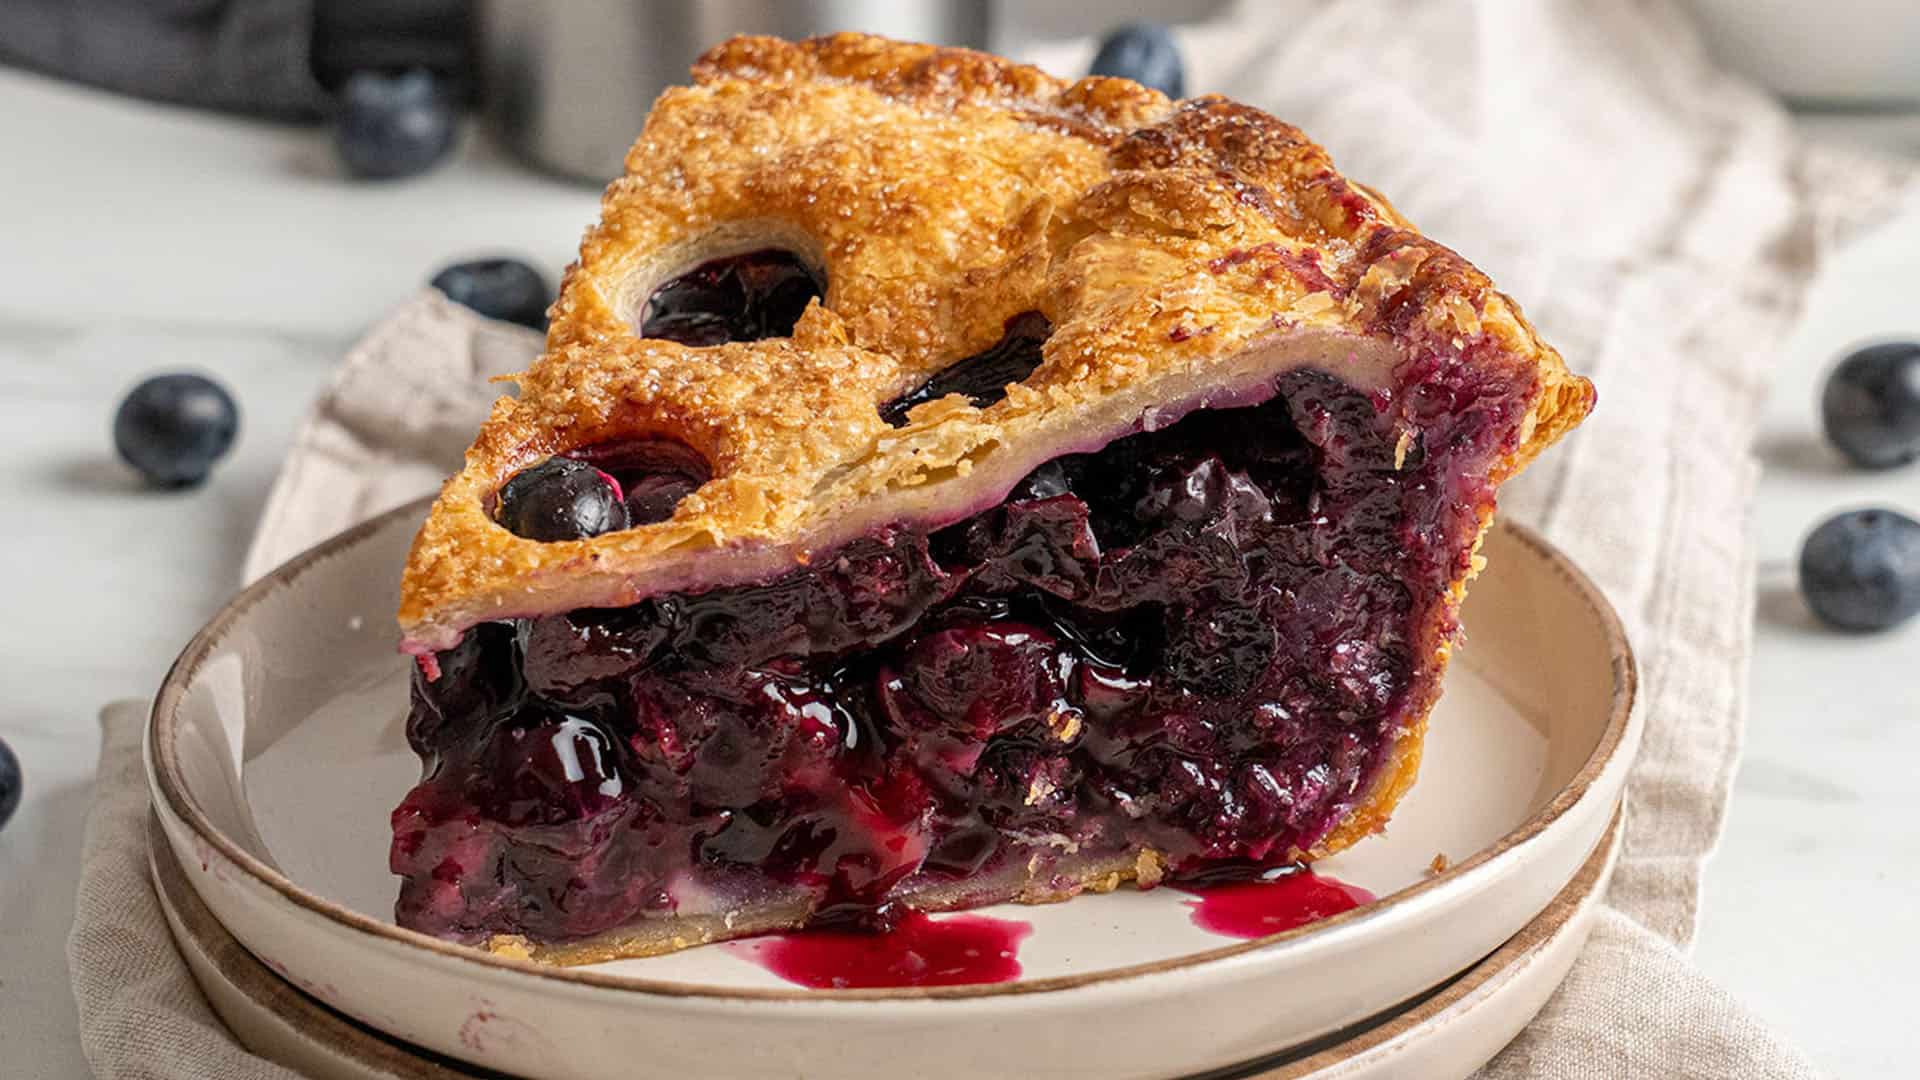
This pie uses a full all-butter double crust, top and bottom. It is the flakiest pie crust you will find, thanks to a lamination step that takes just a few minutes and adds eight distinct layers of butter to the dough. The difference is visible and dramatic.
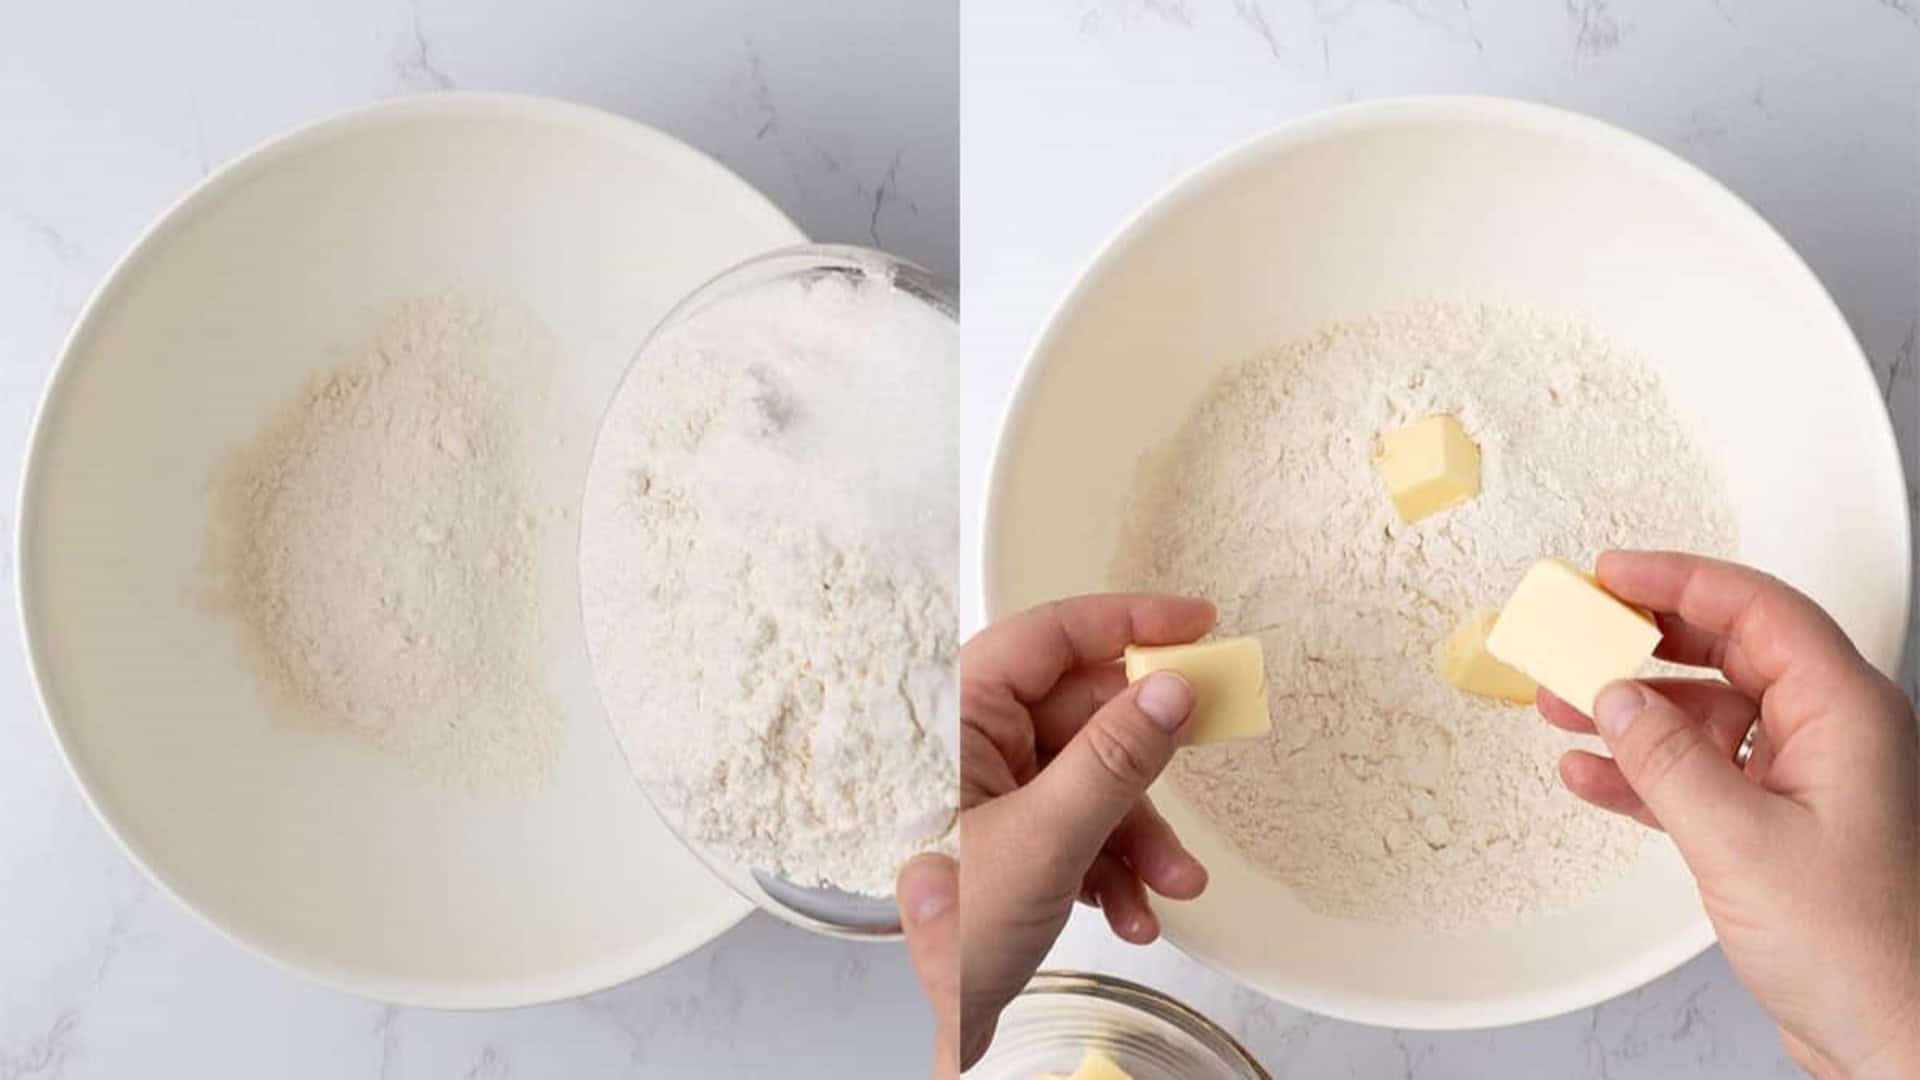
Start by combining the dry ingredients (sifted flour, sugar, and salt) in a large bowl and chill everything in the freezer for five to ten minutes. Cut the cold unsalted butter into small cubes and refrigerate those too, along with your measured ice water and apple cider vinegar. Cold ingredients are not optional.
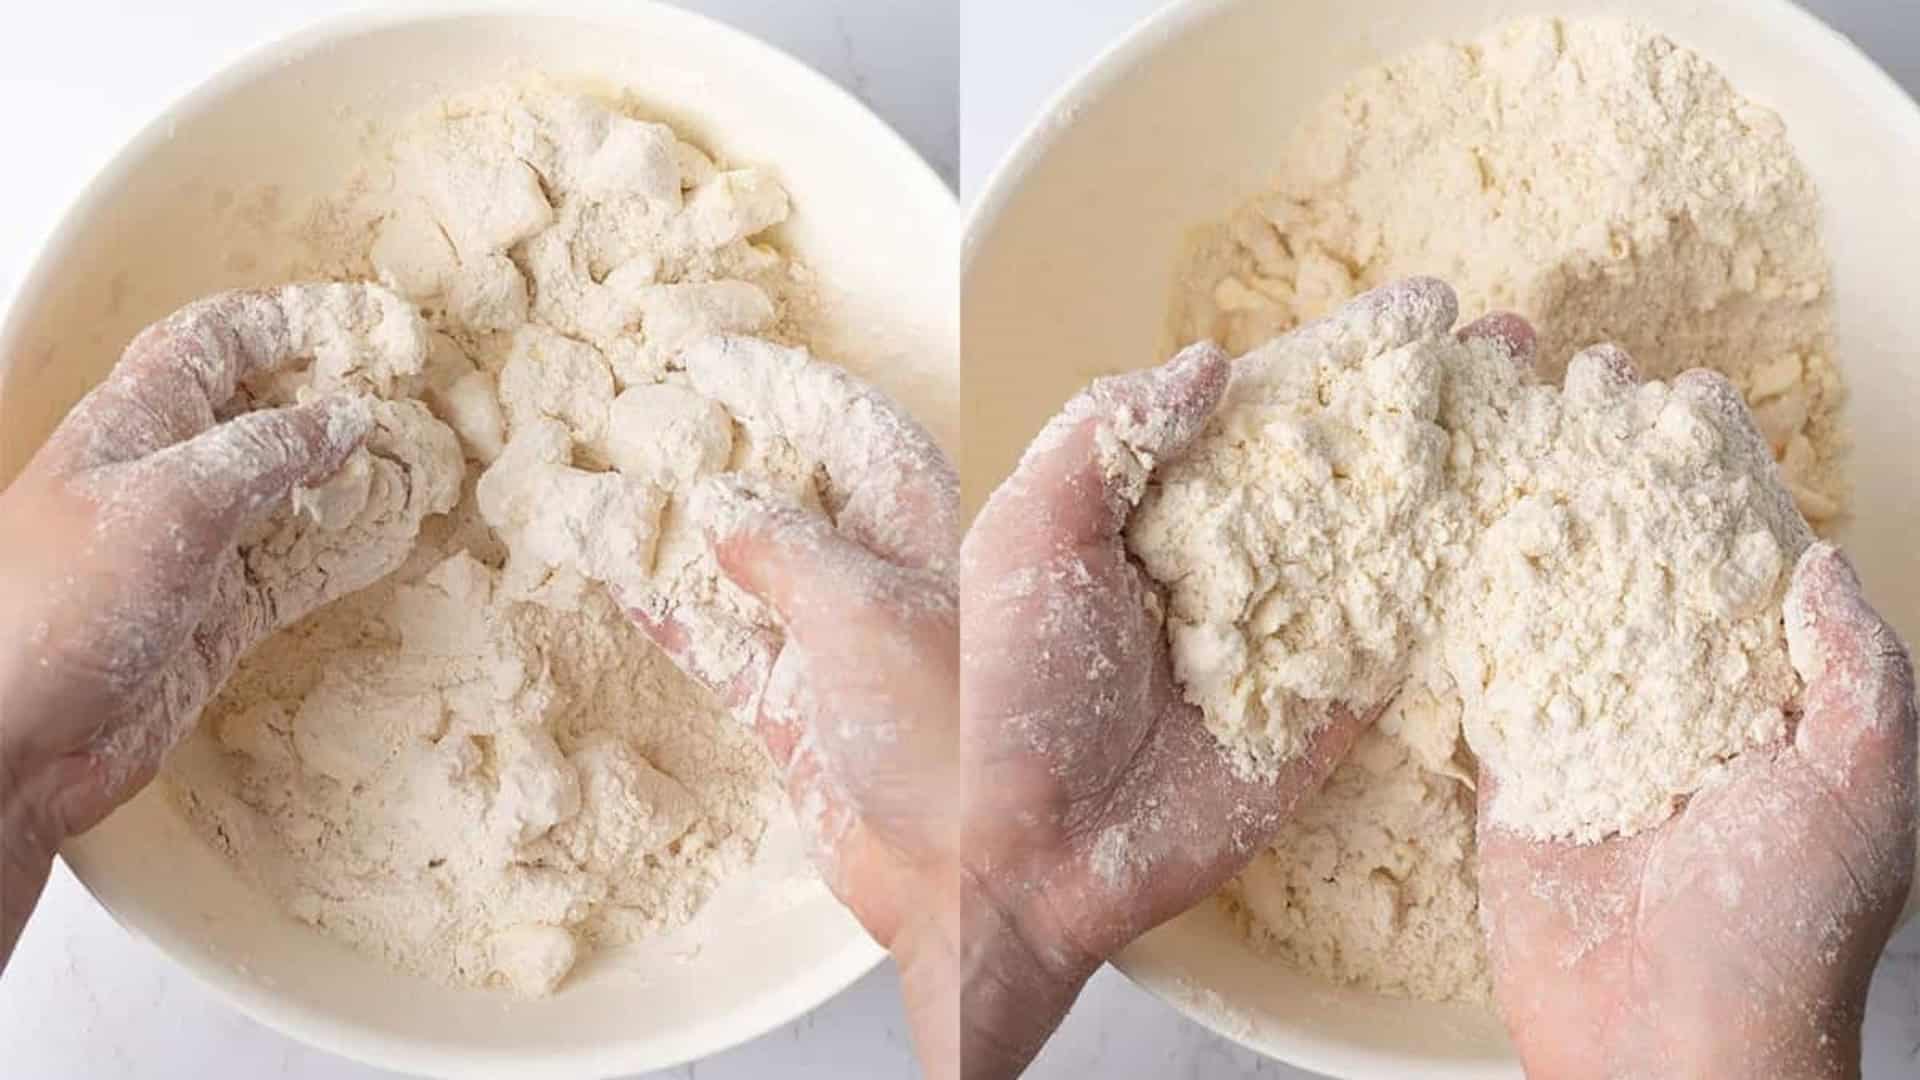
Once everything is well chilled, rub the butter into the flour mixture with your fingers until it resembles coarse sand with a few small butter pieces remaining. Add the ice water and vinegar gradually and mix until the dough just comes together. Think of this step as "hydrating" the dough rather than "adding the wet ingredient," meaning you stop as soon as the dough is hydrated enough and no longer crumbly. You might not need all the wet ingredients.
Do not knead the dough. Press it into a disk, wrap in plastic wrap, and refrigerate for at least two hours.
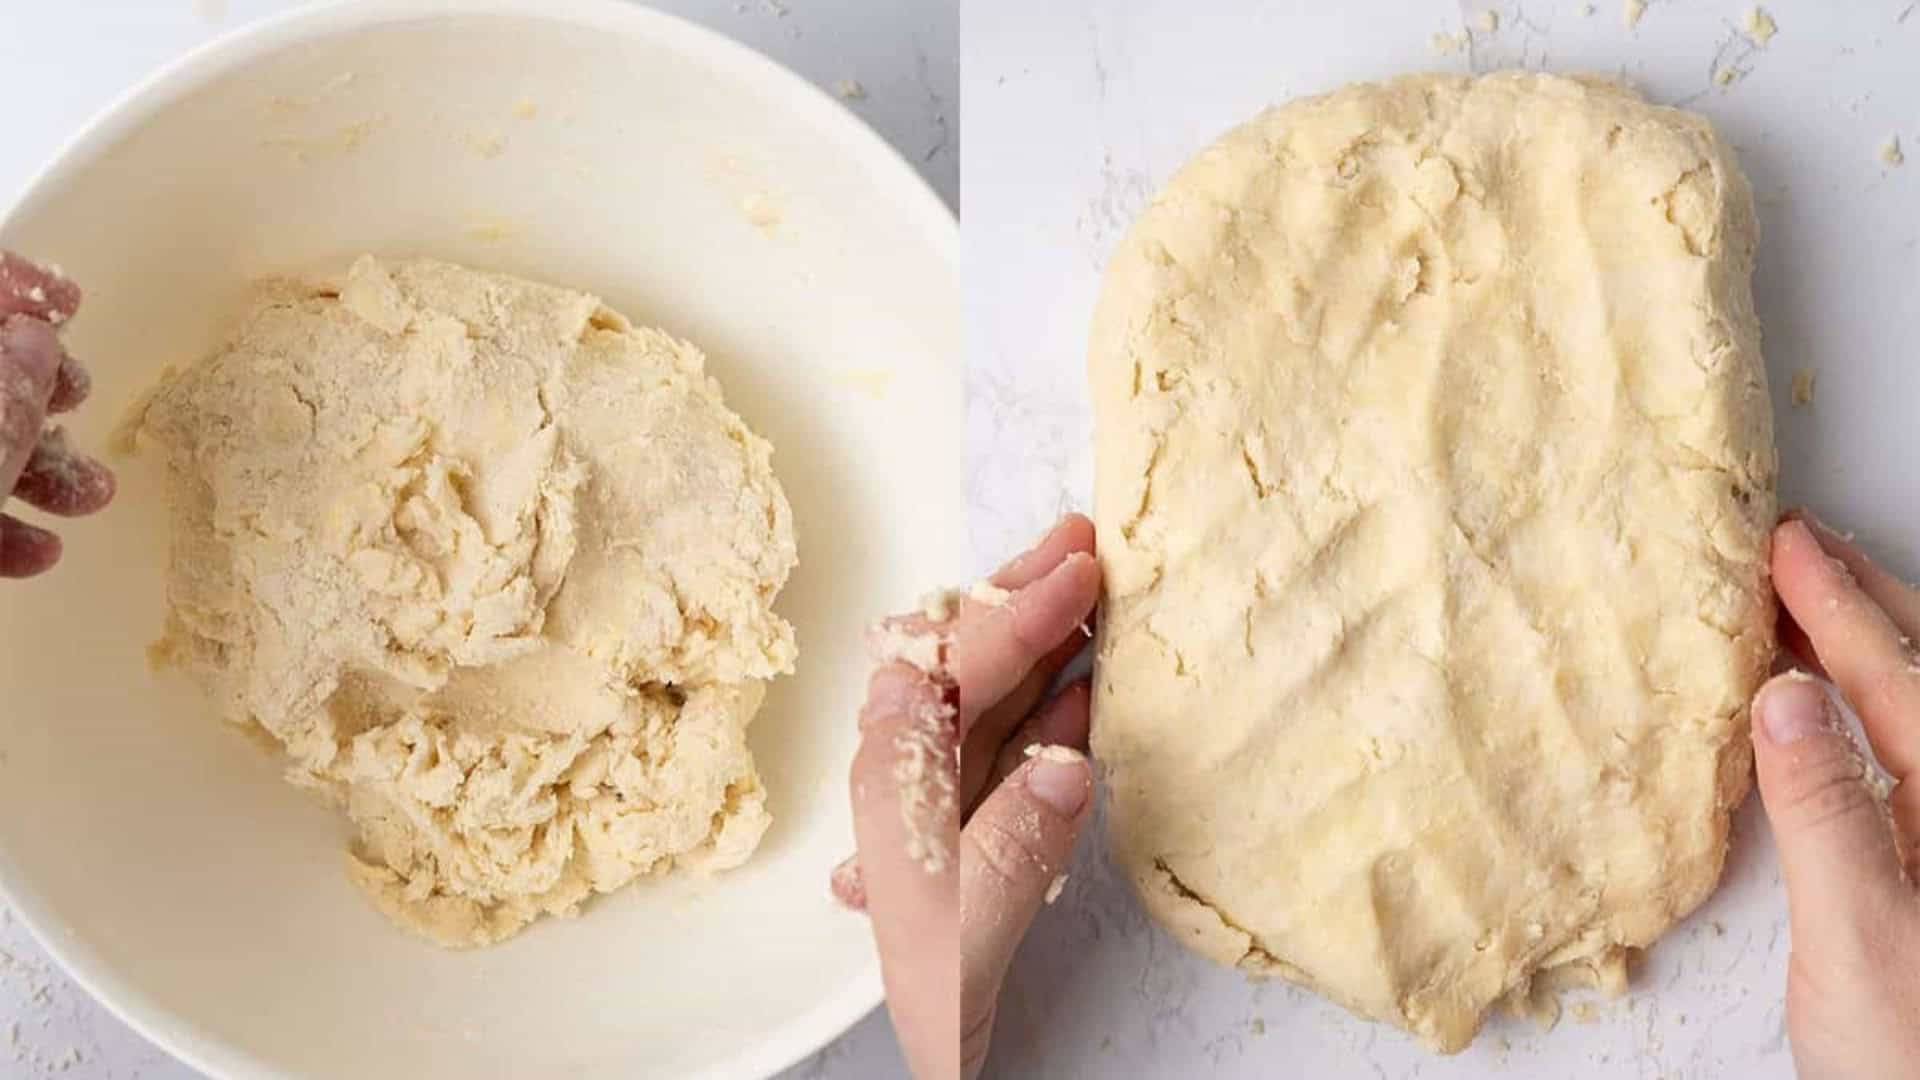
Apply a quick lamination for extra flakiness
We will laminate the dough for extra flakiness, just like when making puff pastry.
After the dough has rested in the fridge for at least two hours, remove it and let it rest on the kitchen counter. Pay attention to the temperature– it should stay cold but warm up just enough to roll out without breaking.
Once the dough has been rolled into a rectangle of approximately 11x17 inches / 28x43 cm, fold the left half over the right half (reducing the size of one side in half and creating a double crust).
Then, fold the bottom half over the top half (reducing the other side in half).
Fold the bottom half over the top half one more time to form a 5.5x4 inches / 14x11 cm eight-layer crust pie.
Cover the laminated dough with plastic wrap and return it to the fridge to rest for at least two more hours.

Make the Blueberry Filling
This pie filling uses fresh blueberries only. Frozen blueberries release too much water during baking, making it hard to achieve the right consistency no matter how much cornstarch you add. If you only have frozen berries, cook them down using my homemade blueberry pie filling recipe and use that as your filling instead of the raw berry method here.
Start by measuring the sugar into a large bowl, then add the lemon zest. Use your fingertips to rub the zest into the sugar for about one minute until the mixture smells fragrant and looks slightly damp. This step extracts the essential oils from the zest far more effectively than stirring it in, and it lifts the filling's overall flavor.
Add the fresh blueberries, cornstarch, lemon juice, and vanilla extract to the bowl, then toss until the berries are evenly coated. There is no cooking needed. The filling goes in raw, and the oven does the work.
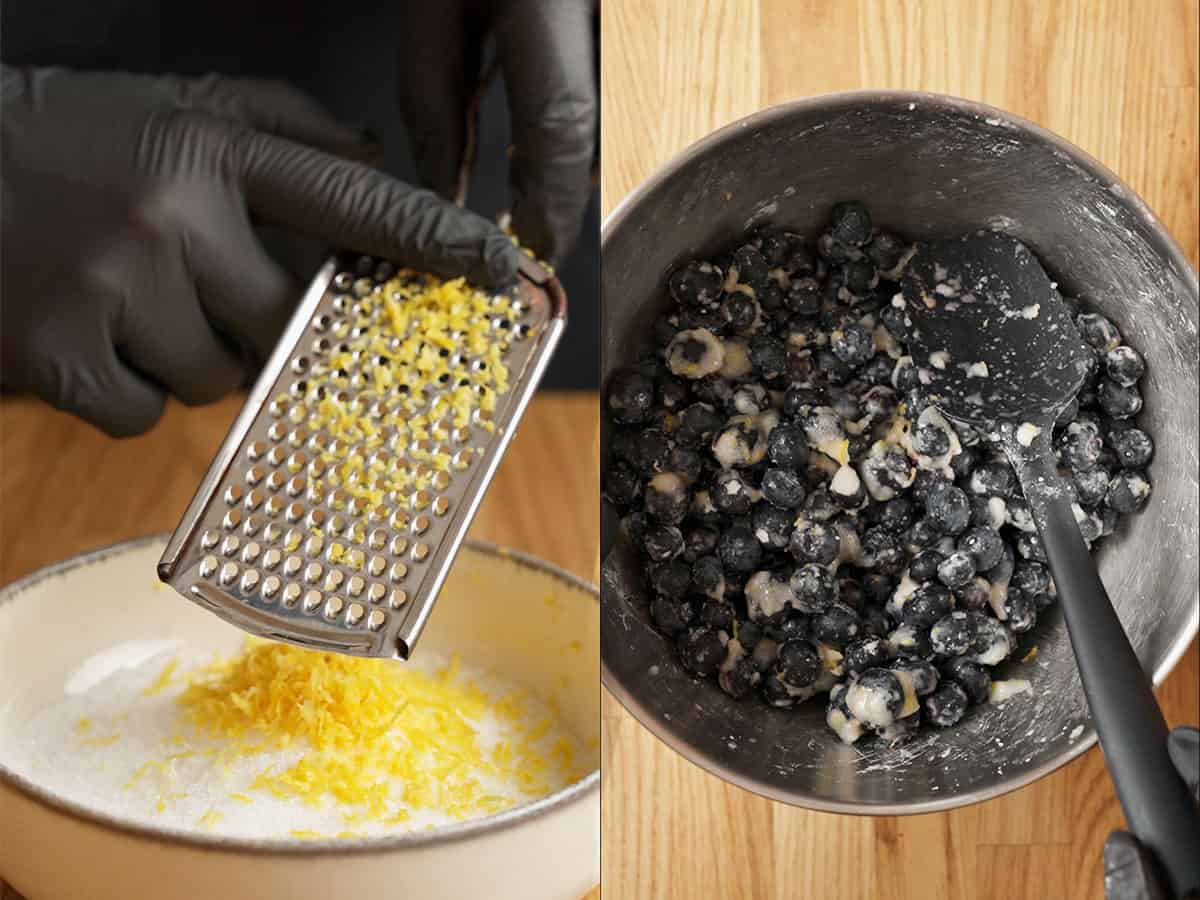
Assemble the Blueberry Pie
Divide the rested dough in half. Keep one half in the fridge while you roll the other out to 11 inches (28 cm) in diameter on a lightly floured surface. Drape it into a 9-inch pie plate, gently pressing it into the base and up the sides without stretching it. Trim the overhang with scissors, then refrigerate for 15 minutes or freeze for 5 minutes.
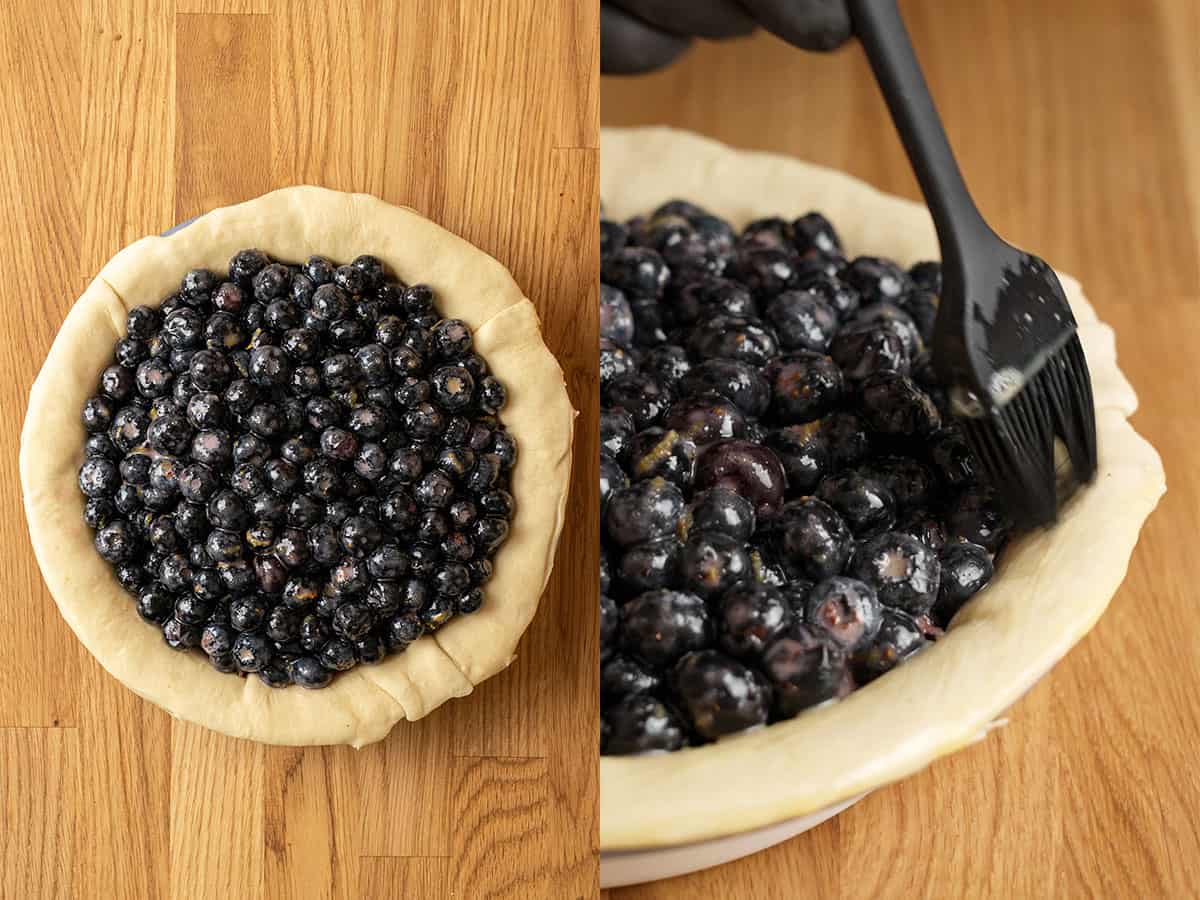
Once the bottom crust is nice and cold, spoon the blueberry filling into the chilled crust. As you add the filling, pile it slightly higher in the center to form a dome. Blueberries shrink as they bake, and without the dome, the filling sinks away from the top crust, leaving an air gap. The dome compensates exactly for that shrinkage. Again, refrigerate for 15 minutes or pop it in the freezer for 5 minutes.
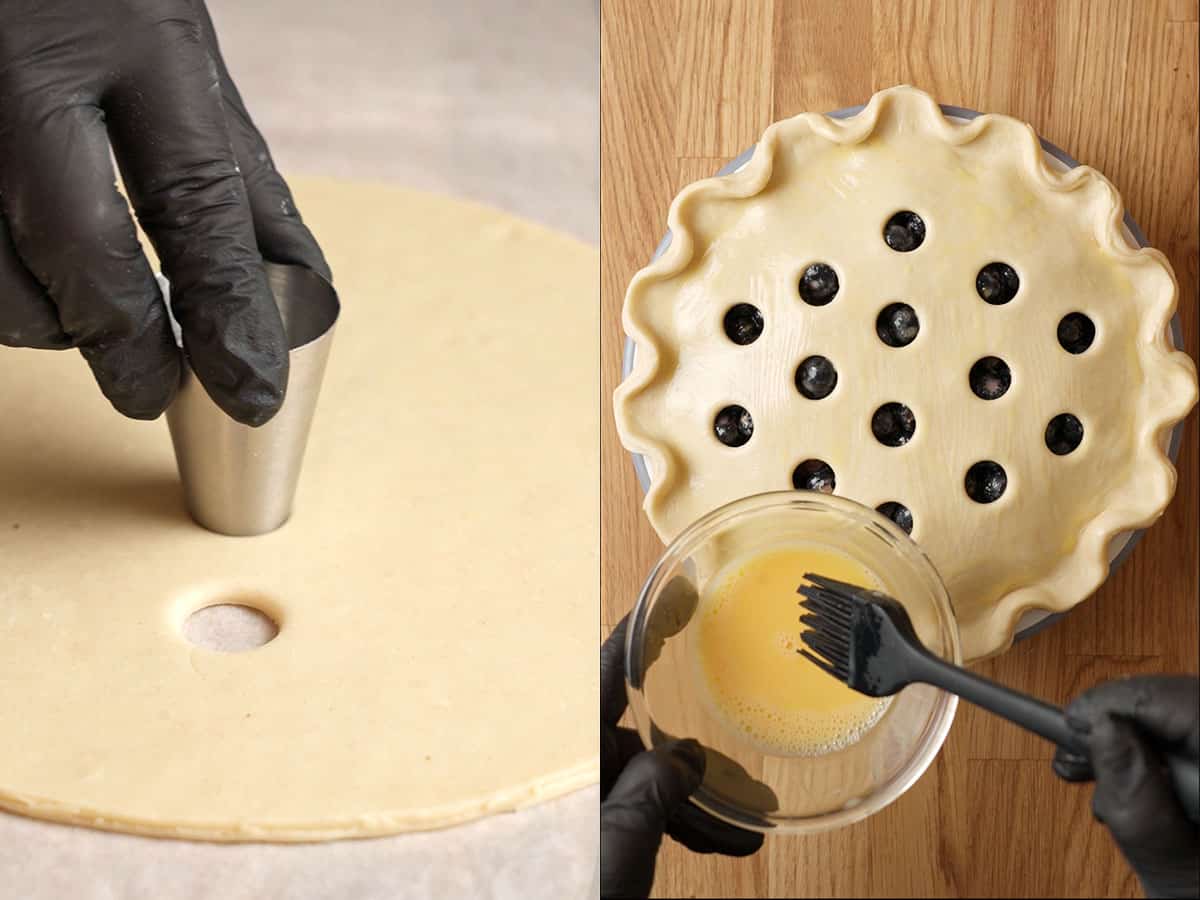
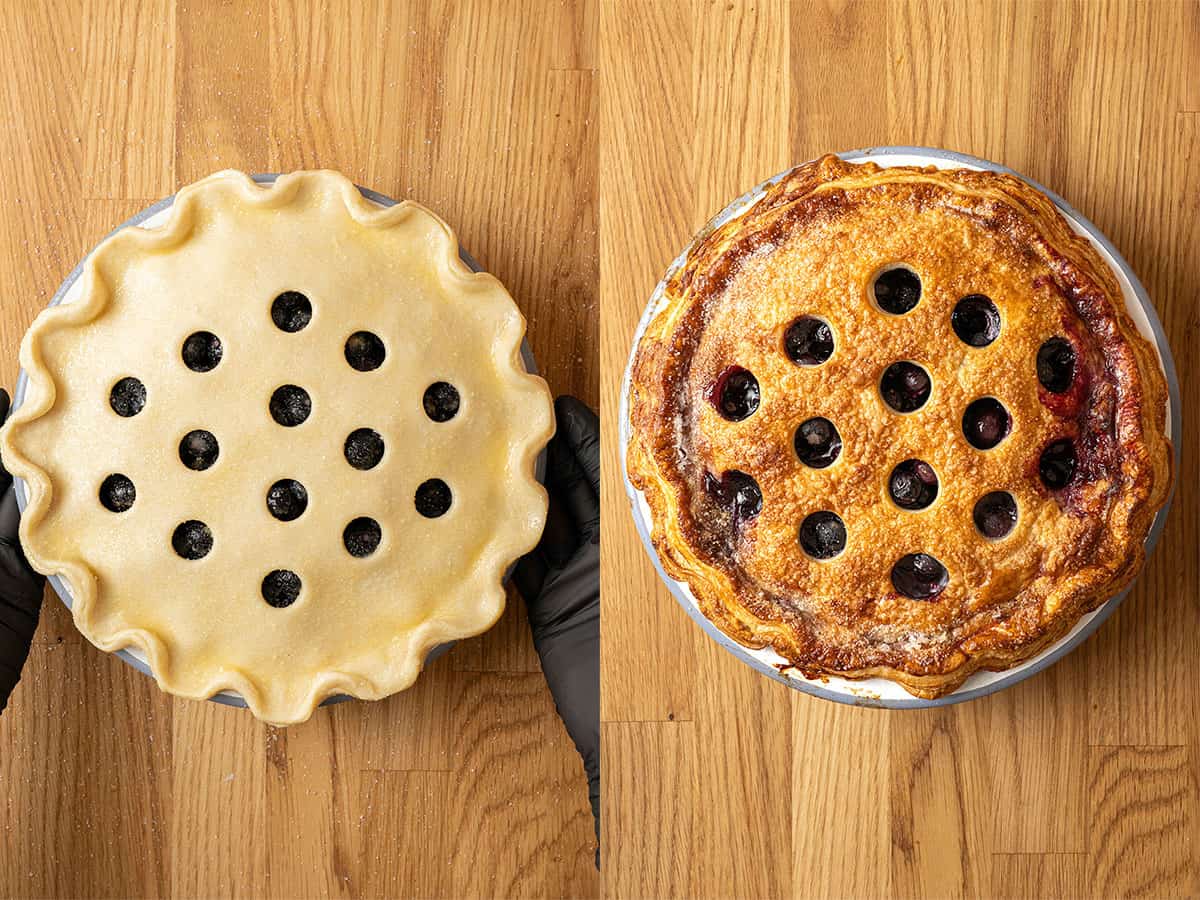
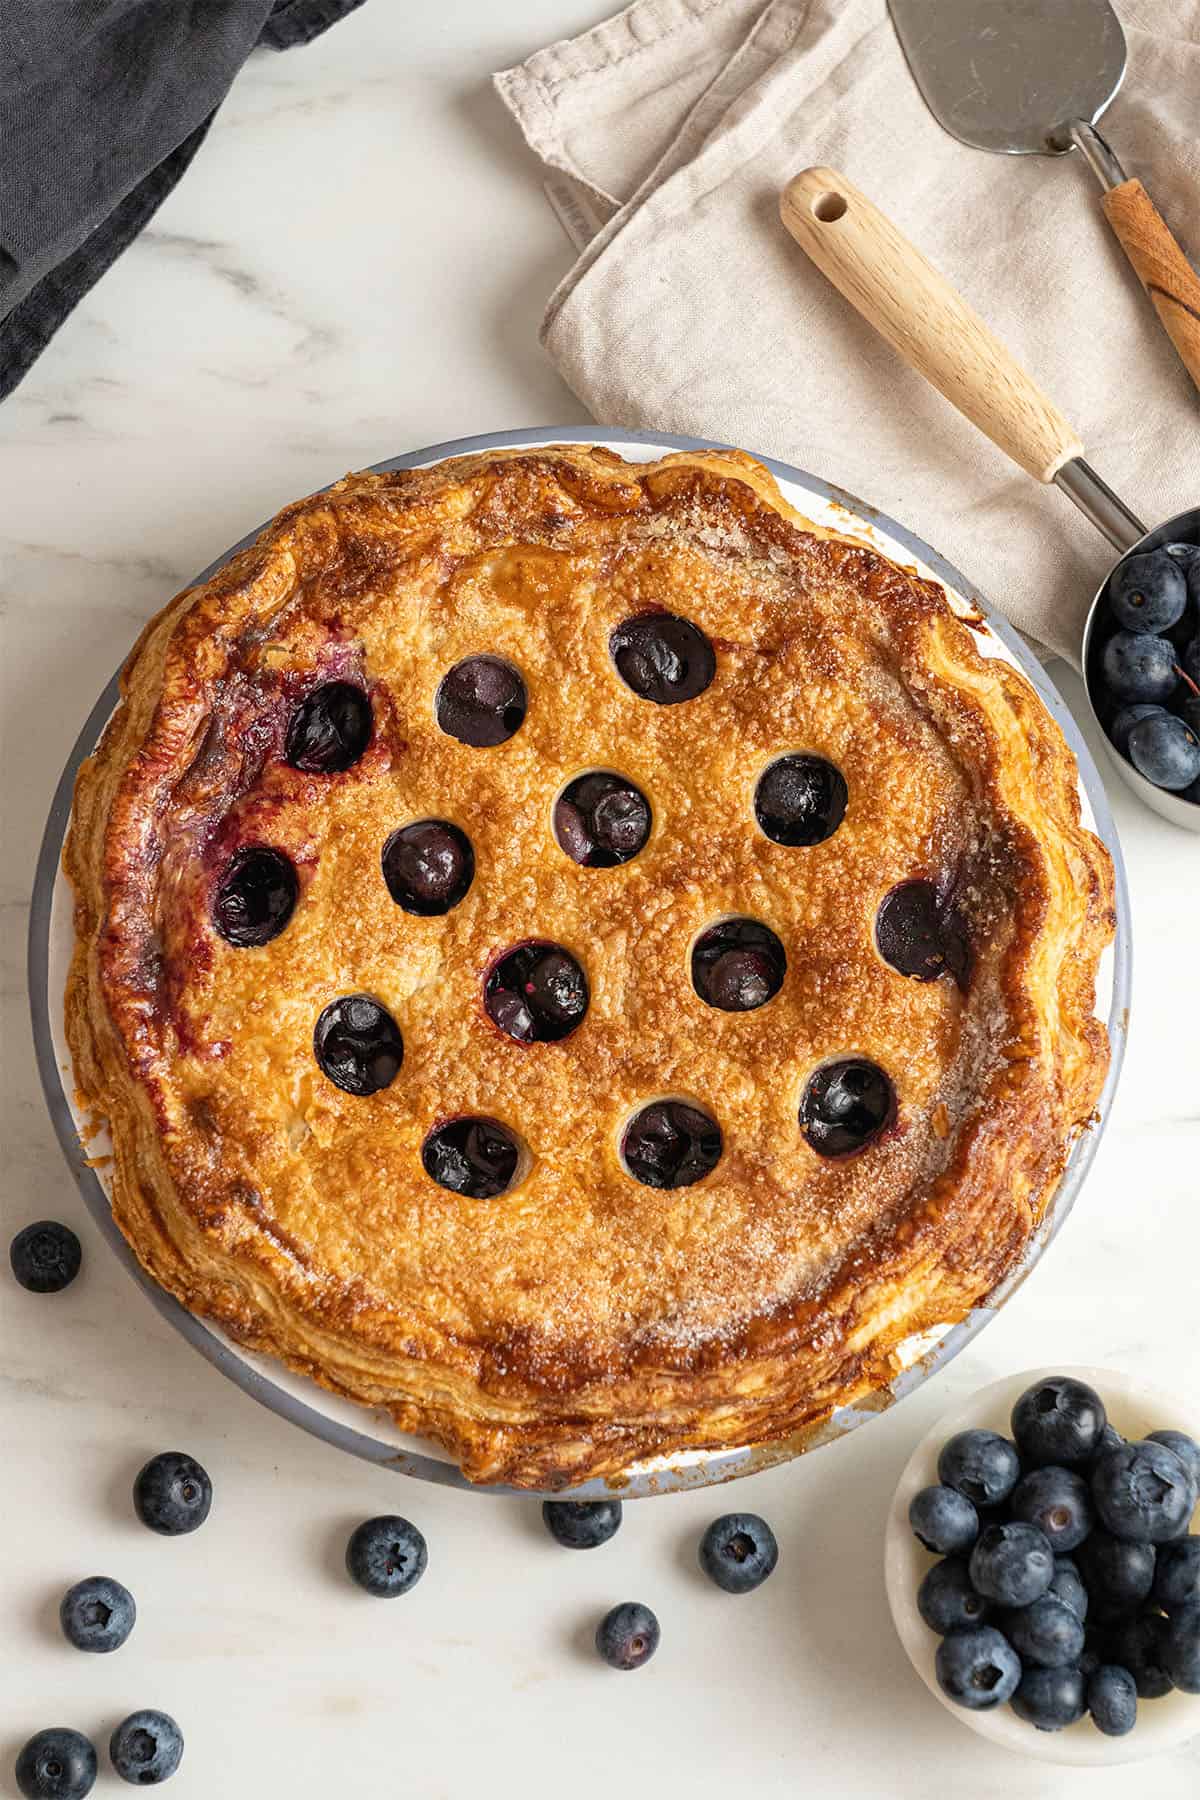
Roll out the second piece of dough to about 10 inches (25 cm) in diameter for the top crust. Instead of cutting plain slits or weaving a lattice crust, I used the base of a round piping nozzle to punch small circular holes across the top crust. The holes create a pattern that resembles the blueberries themselves; they look beautiful and do exactly what slits and a lattice top do: let steam escape during baking. You can, of course, create a lattice pattern as well, as I do on my apple pie.
Take the bottom of the pie out of the fridge or freezer and lightly brush the edges with egg wash . This will help to "glue" the top crust.
Then lay the top crust over, press the crust edges together firmly all the way around, and trim the edges.
Now, brush the surface generously with egg wash and sprinkle with coarse sugar for a golden, caramelized finish.
Bake it - longer than you think
Once assembled, place the pie on a baking sheet and slide it directly into the freezer while the oven preheats to 200°C (390°F). Freezing the assembled pie for 15 to 20 minutes is what prevents a soggy bottom. The cold crust hitting a hot oven starts to set immediately, forming a crisp base before the filling has a chance to seep through.
Place the pie on a rimmed baking sheet lined to catch any filling that bubbles over, and bake at 200°C (390°F) for 25 minutes. The high starting temperature is critical: it develops those flaky crust layers and begins baking the bottom quickly.
After 25 minutes, reduce the temperature to 175°C (350°F) and bake for 50 more minutes. Once the crust turns golden, cover the top loosely with aluminum foil for the rest of the baking time. For me, this was practically the entire second phase. The foil prevents the top from burning before the filling is fully cooked through.
Do not take the pie out until the filling is bubbling actively in the center, not just at the edges. Edge bubbling is not enough. The center must bubble too, which is how you know the cornstarch has fully activated and the filling will set. An underbaked pie will be runny when sliced regardless of how much cornstarch it contains.
Cool the pie completely before slicing
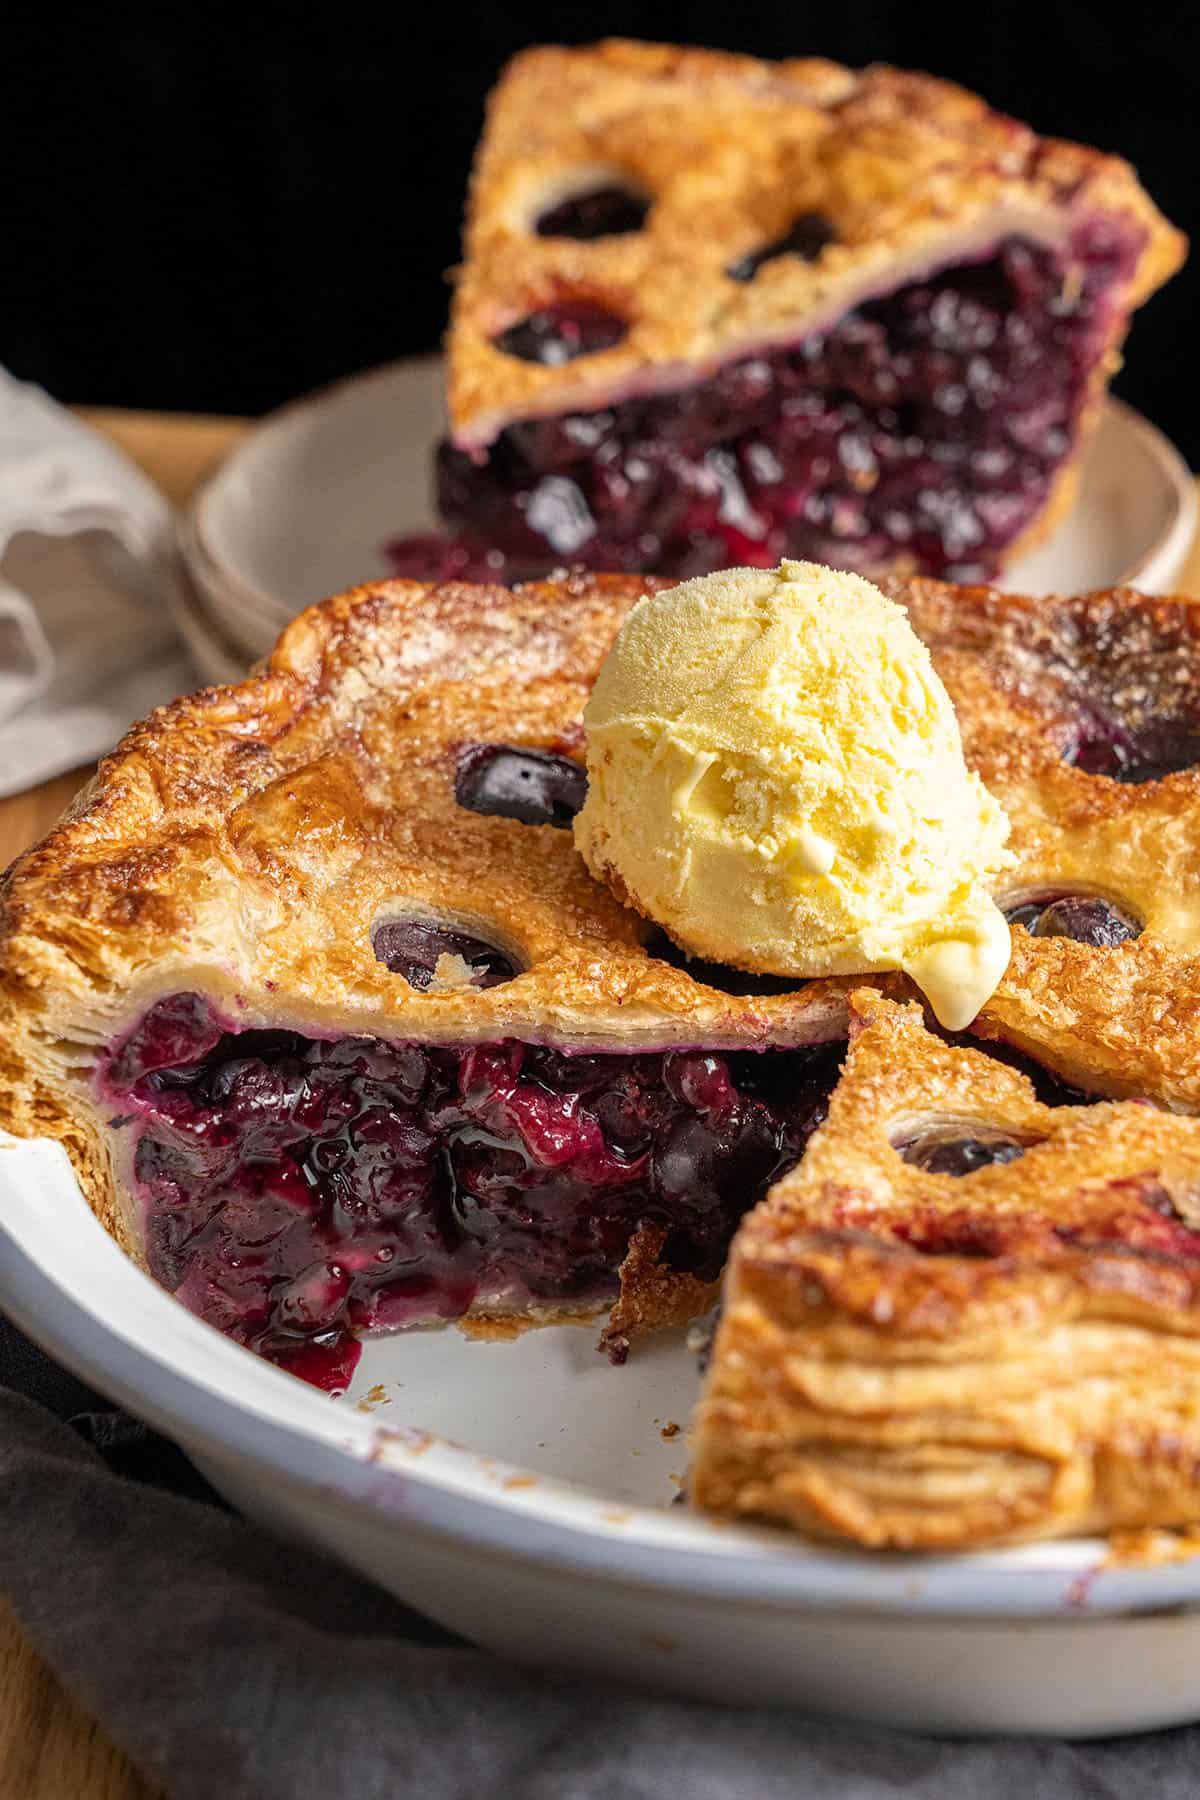
This step is non-negotiable. Once the pie is out of the oven, let it cool to room temperature first. Then refrigerate until fully cold, at least four hours. I strongly recommend overnight. The filling needs to be fully cold before you slice it.
Cold gives you a clean, intact, picture-perfect slice.
Storing & Freezing
Store the pie in an airtight container or covered tightly with plastic wrap in the refrigerator for up to three days. It actually holds together even better on day two as the filling continues to firm up.
To freeze, fully assemble the pie, but do not bake it. Wrap tightly in plastic wrap, then in aluminum foil, and freeze for up to two months. Bake directly from frozen as instructed, adding approximately 15 minutes to the baking time and monitoring the crust color carefully.
Flavor Variations
This filling works equally well with other berries. Blackberries, raspberries, or a mixed combination of blueberries, blackberries, and a handful of raspberries makes a lovely variation.
Cherry pie is another beautiful option using this exact method. Swap the blueberries for pitted sweet or sour cherries and adjust the sugar accordingly.
Peach pie is wonderful in summer, made with the same double-crust approach, sliced ripe peaches, a little cinnamon, and lemon juice.
If you would like a crumble topping instead of a pastry top crust, check my apple crumble pie for the technique. The crumble method translates well to blueberry pie too, and it is a great option if you want something a little more casual and quick to assemble.
If you prefer a spiced version, cinnamon is the classic choice and works well here. A small amount of cardamom adds a more unusual floral warmth. Nutmeg, used very sparingly, gives the filling subtle depth. Start with a small amount of any spice and taste as you go.
Ingredient Substitutions
For the crust, all butter is non-negotiable for both flavor and flakiness. Margarine at a comparable fat content is an acceptable substitute if needed. You can replace the apple cider vinegar in the dough with plain white vinegar or omit it, though it contributes to a more tender, elastic texture.
For the filling, I strongly recommend fresh blueberries. If you're using frozen berries, cook them first with my homemade blueberry pie filling recipe and use that as the filling instead of the raw-berry method here.
For egg wash options and vegan alternatives, see my full egg wash guide.
Expert Tips to Make Blueberry Pie
- Unlike what other recipes suggest, you don't need a food processor to make pie dough; your hands are the right tool here.
- The type of blueberry matters. Large, firm blueberries hold their shape during baking and give the filling a beautiful, intact texture. Smaller wild blueberries have a more intense flavor but release more juice and break down more during baking, so you may need to increase the cornstarch slightly.
- When placing the dough into the pie dough, push rather than stretch. Stretching the dough causes it to shrink during baking.
- You can add a few small dots of cold butter directly on top of the filling before you close the top crust. It melts into the blueberries as they bake, adding richness.
- Use a serrated knife to cut each slice rather than a chef's knife. A straight blade crushes the flaky crust layers on the way down. A serrated knife cuts through them cleanly without pressing them flat.
- Let each slice sit at room temperature for 10 to 15 minutes before eating. Straight from the fridge, the flavors are muted and the filling feels dense. A short rest brings everything back to life.
What Equipment to Use
A digital scale is essential for measuring ingredients accurately. A rolling pin is needed to roll both crusts.
This recipe uses a standard 9-inch pie plate, and a pastry brush is useful for the egg wash.
Try Some of My Other Blueberry Desserts
If you loved this blueberry pie, here are more blueberry recipes to try next:
Have You Tried This Recipe?
Please leave a 5-star ⭐️⭐️⭐️⭐️⭐️ rating on the recipe card and consider leaving a comment as well!
Blueberry Pie
Ingredients
Pie crust
- 375 g (3 cups) All purpose flour
- ½ teaspoon Salt
- 1 tablespoon Granulated sugar
- 225 g (1 cup) Unsalted butter 82% fat, use it very cold
- 120 g (½ cup) Water very cold
- 30 g (2 tablespoon) Apple Cider vinegar
Blueberry filling
- 900 g (6 cups) Blueberries fresh
- 150 g (¾ cup) Granulated sugar more or less depends on sweetness of the blueberries
- 50 g (5 tablespoons) Cornstarch
- 2 tablespoons Lemon juice freshly squeezed
- Zest of one lemon
- 2 teaspoons Vanilla extract
Egg wash
- One egg whisked with a drop of milk or water
US customary cup measurement is an indicative figure only. Measure the ingredients with a digital scale by weight (gram). Baking is art but also science which requires precision and accuracy.
Instructions
All butter pie crust
- This dough yields a double crust (bottom + top) for a 9-inch (23 cm) pie, exactly what this recipe needs.
- Combine the sifted flour, sugar, and salt in a large bowl, then chill in the freezer for 5–10 minutes. Cut the butter into small cubes and refrigerate it, as well as, the measured water and vinegar.
- Rub cold butter into the flour until it's sandy, leaving some small butter chunks. Gradually add ice water and vinegar, mixing until the dough just holds together. Stop as soon as it is hydrated; do not add more liquid than needed.
- Press the dough into a disk on a lightly floured surface without kneading. Wrap in plastic and refrigerate for at least 2 hours.
- For extra flakiness, try this simple lamination technique: Roll the chilled dough into an 11x17 inch (28x43 cm) rectangle. Fold the left half over the right, then the bottom half over the top, then fold in half once more to create 8 layers.Wrap the dough in plastic and refrigerate for at least 2 hours before using.
Blueberry filling
- Combine sugar and lemon zest in a bowl, then rub with your fingers for 1 minute, until fragrant. Add blueberries, cornstarch, lemon juice, and vanilla. Toss until evenly coated.
Assemble
- Divide dough in half. Roll one half to 11 inches (28 cm) and fit into the 9-inch pie plate without stretching. Trim the overhang with scissors. Chill for 15 minutes in the fridge or 5 minutes in the freezer.
- Spoon in the filling, doming it slightly higher in the center. Chill again for 15 minutes or 5 minutes in the freezer.
- Roll the top dough to 10 inches (25 cm). Use the base of a round piping nozzle to press circular holes across the surface for venting and decoration. Alternatively, cut slits or make a lattice.
- Remove the pie base from the fridge. Brush the crust's edges with egg wash, lay the top crust over, press the edges firmly together, and trim. Brush the entire top with egg wash and sprinkle with coarse sugar. P
- Place the assembled pie on a baking sheet and freeze for 15 to 20 minutes while the oven preheats to 200°C (390°F).
Baking
- Bake at 200°C (390°F) for 25 minutes, then reduce the temperature to 175°C (350°F) and bake for 50 minutes more. Cover with foil once golden to prevent over-browning.
- The pie is ready when the filling bubbles actively in the center. Do not remove early.
- Cool to room temperature, then refrigerate for at least 4 hours before slicing.
Storage and freezing
- Store in an airtight container or covered with plastic wrap in the refrigerator for up to 3 days. To freeze unbaked, wrap tightly in plastic wrap, then foil, and freeze for up to 2 months. Bake from frozen, adding 15 minutes to the baking time.
Notes
- Measure your ingredients with a digital scale for accuracy.
- For the pie crust, all ingredients, including butter, flour, and water, should be very cold.
- Use fresh blueberries — frozen release too much liquid and prevent a clean set.
- The cornstarch amount is slightly higher than in most recipes. This is intentional and is what makes the pie sliceable.
- Do not skip the lemon juice. It will bring out the blueberries' flavor.
- For the blueberry pie filling, adjust the sweetness by adding more or less sugar.
- Do not knead or overwork the dough — stop as soon as it comes together.
- Keep everything cold at every stage. If the dough softens at any point, return it to the fridge before continuing.
- Dome the filling before closing the pie — the fruit shrinks during baking and the dome levels it out.
- Freeze the assembled pie before baking to set the bottom crust and prevent sogginess.
- Four hours minimum in the fridge before slicing — overnight is better.
Jane
I couldn't believe how good this is.