
Make this super easy homemade crème brûlée recipe with a smooth, silky texture and a crunchy caramel top, just like in restaurants. Homemade crème brûlée comes together in just 5 minutes with 4 simple ingredients and tastes elegant and professional. You have to try it.
Read what others said about this recipe

"Thank you so much for this wonderful recipe! Came out exactly as good as a fine dining experience! Kwanying L
"Amazing, foolproof recipe! Makes the best creme brulee I’ve ever eaten - will only use this recipe from now on, thank you!" Malin

What can you expect from this Crème Brûlée recipe
This Crème Brûlée recipe has been on Spatula Desserts since 2024. Since its publication, it has been widely shared online and has surprised thousands of readers with just how easy it is to make at home.
Despite its elegant appearance and reputation as a restaurant-only dessert, this recipe breaks the process down into simple, approachable steps, delivering silky custard and a perfectly crisp, caramelized sugar topping everyone loves.
Over the years, the recipe itself has stayed true to the original, but the post has been updated with new photos, additional baking tips, and several flavor variations, all added in response to your questions and feedback in the comments.
Making Crème brûlée at home might seem difficult, but it is almost too easy not to try. I include all my pro tips and tricks to get it right every time.
What is Crème Brûlée exactly?
Crème brûlée (which translates as burnt cream) is an incredibly popular French dessert that consists of a rich custard base cream topped with a layer of hardened caramelized sugar.
The custard is closely related to pastry cream, as both are built on the same classic French foundation of egg yolks, dairy, sugar, and vanilla. The main difference is that crème brûlée is gently baked until just set, while pastry cream is cooked on the stovetop and thickened with starch, making it sturdy enough to fill cakes, pastries, and tarts.
Crème brûlée's combination of silky-smooth vanilla custard and a crunchy caramelized sugar topping will blow your mind! A classic Crème brûlée recipe is naturally gluten-free, making it a great crowd-pleaser and a real winner at dinner parties.
How to make creme brulee
Making custard is actually very similar to making pastry cream. You will need to temper the egg yolk so the mixture thickens slightly, and then fully bake it in the oven.
First, preheat the oven to 150°C / 300°F (no fan). Baking crème brûlée at a low temperature is essential, as it allows the custard to cook gently and evenly without overheating, curdling, or developing a burnt flavor.
Then prepare your water bath as you would when baking cheesecake. Using a water bath to make Crème brûlée adds moisture to the oven, helping prevent cracks from forming during baking and supporting the dessert's creamy consistency. Otherwise, you can end up with a rubbery crème brûlée texture and a cracked crème brûlée surface.
Prepare a water bath by filling a deep-sided baking tray with warm water. Then, place the ramekins in the water, ensuring the water only covers half their height.
Now, continue with the recipe ingredients. Heat heavy cream (36% fat), vanilla extract, and half of the sugar in a saucepan over medium heat, and bring it to a simmering point. In the meantime, whisk the egg yolks with the remaining sugar.

As the cream mixture starts simmering, immediately pour it slowly into the egg yolk mixture while whisking constantly.

Then, divide the custard evenly among 4 standard 6-ounce (180 ml) ramekins, filling each about three-quarters full. Depending on the size and shape of your ramekins, you may end up with slightly more or fewer servings using the same amount of custard.
Place the filled ramekins in a deep baking dish or roasting pan, leaving a little space between each.

How to bake the Creme Brulee
Bake the creme brûlée at 150°C / 300°F (no fan) for 30-45 minutes, until the edges are set, but the centers are still slightly jiggly when you very gently nudge them. The cooking time will depend on the size of your ramekins. In my oven with my ramekins, it is about 45 minutes, but I suggest checking after 30 minutes.
Don’t be tempted to dig in right away once they come out of the oven. The crème brûlée needs time to fully set and develop its signature creamy texture. Let the ramekins cool to room temperature, then refrigerate for at least 4 hours, or preferably overnight, before adding the caramelized sugar topping.

How to caramelize the Creme brulee
Sprinkle around a tablespoon of demerara sugar or light brown sugar over the surface of each ramekin. Alternatively, use granulated sugar. Make sure the entire custard is evenly coated with sugar.
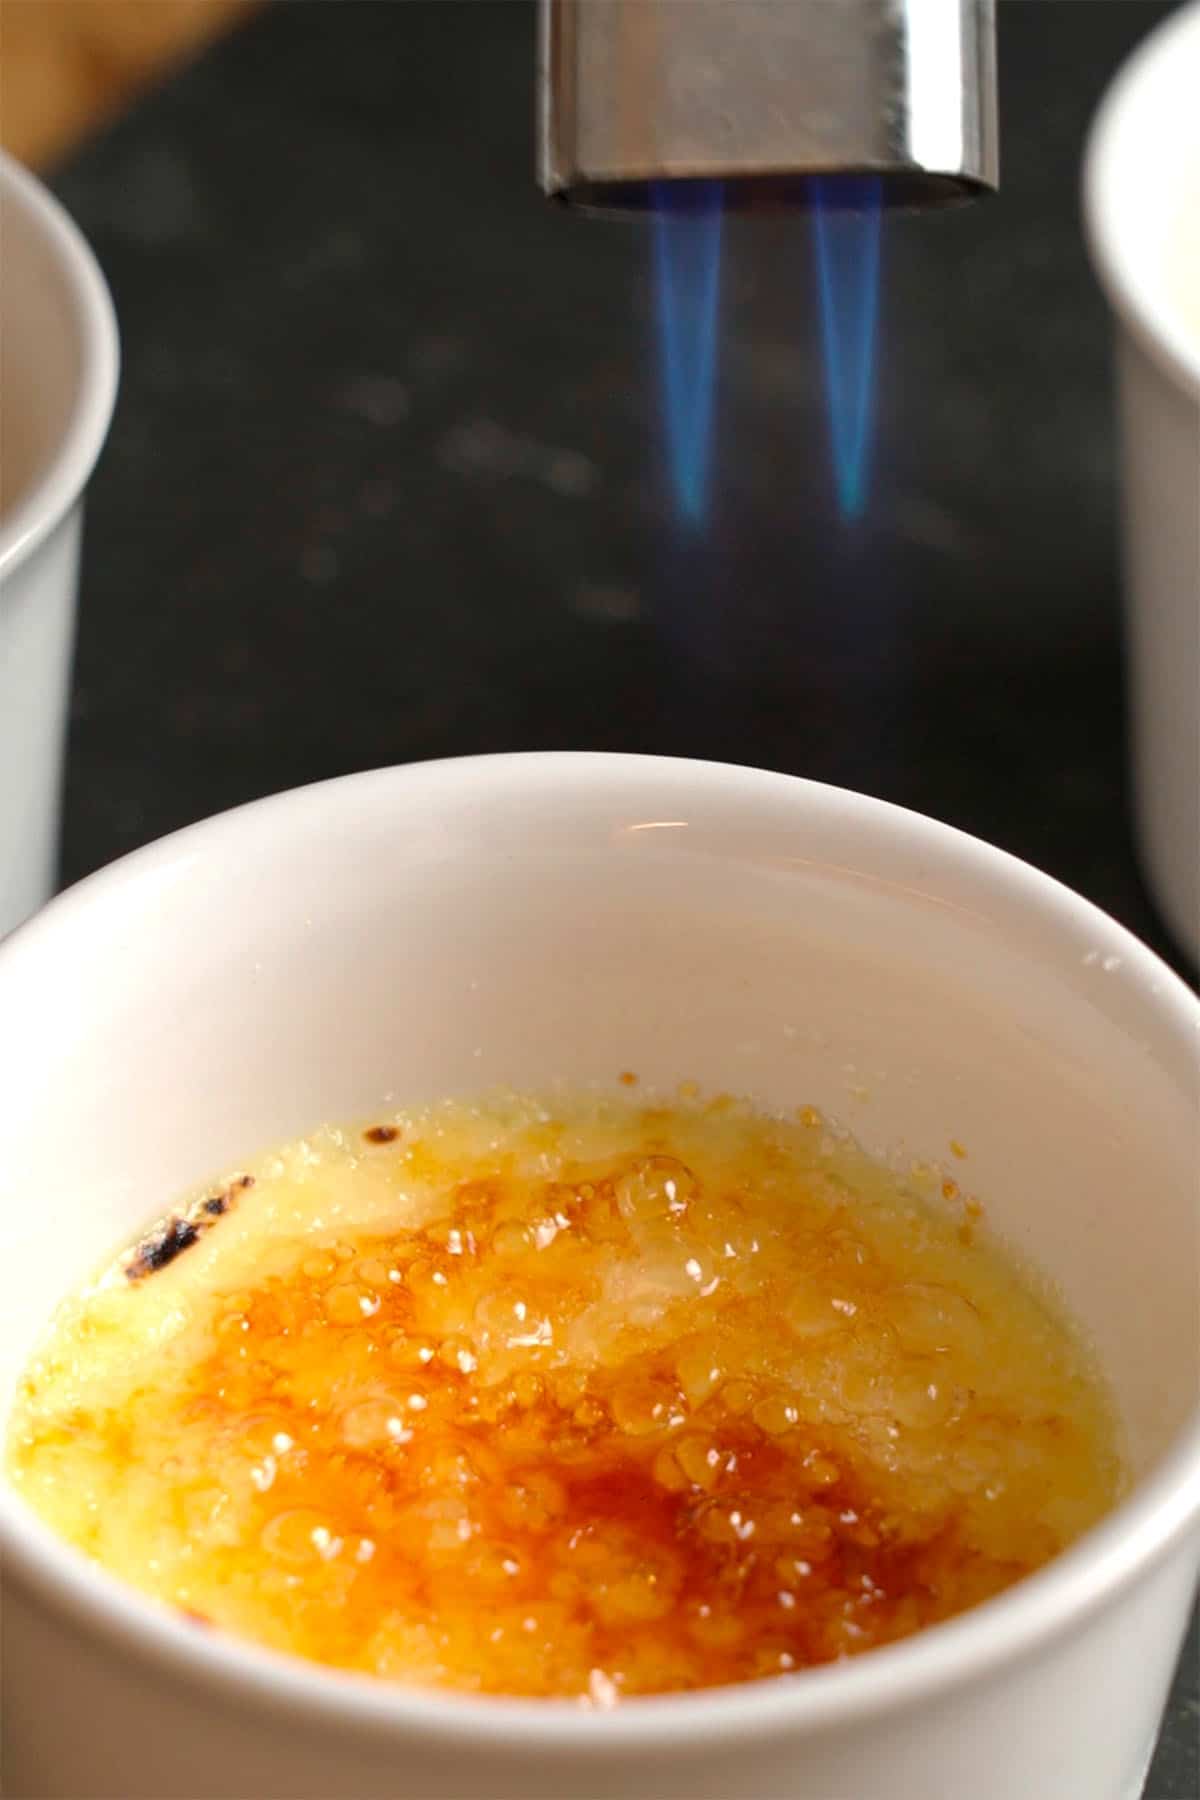
Then comes the fun part! Use your kitchen torch to gently caramelize the sugar all over the cream until it melts into a shiny, golden, bubbling layer. I suggest slowly waving the blowtorch all over the surface in a zig-zag pattern to avoid burning specific spots, as the sugar can burn very quickly.
Then carefully place the homemade caramelized Crème Brûlées back in the fridge (be careful, as the sugar on top will be very hot) to let the crunchy caramel layer set for a few minutes before serving.
How to make Crème Brûlée without a torch? I found a recipe online for Creme Brulee without a torch. The baked custard base is sprinkled with sugar and broiled in the oven. It can burn very easily, so you need to watch it. I haven't tried it, but the creator seems to have a lot of good reviews for the recipe.
Storage & freezing & make ahead
Crème brûlée is a great make-ahead dessert because the custard needs time to chill and set. You can prepare the baked custards up to 3 days in advance and store them covered in the refrigerator.
For the best texture, add the sugar topping and caramelize it just before serving, as the caramelized layer will soften over time due to the moisture in the custard. This is how it is done in restaurants.
I do not recommend freezing crème brûlée, as the delicate custard texture can become grainy and watery after thawing. If you need to prepare it ahead, simply make the custard a day or two in advance, keep it chilled, and finish with the caramelized sugar topping when ready to serve.

What equipment to use
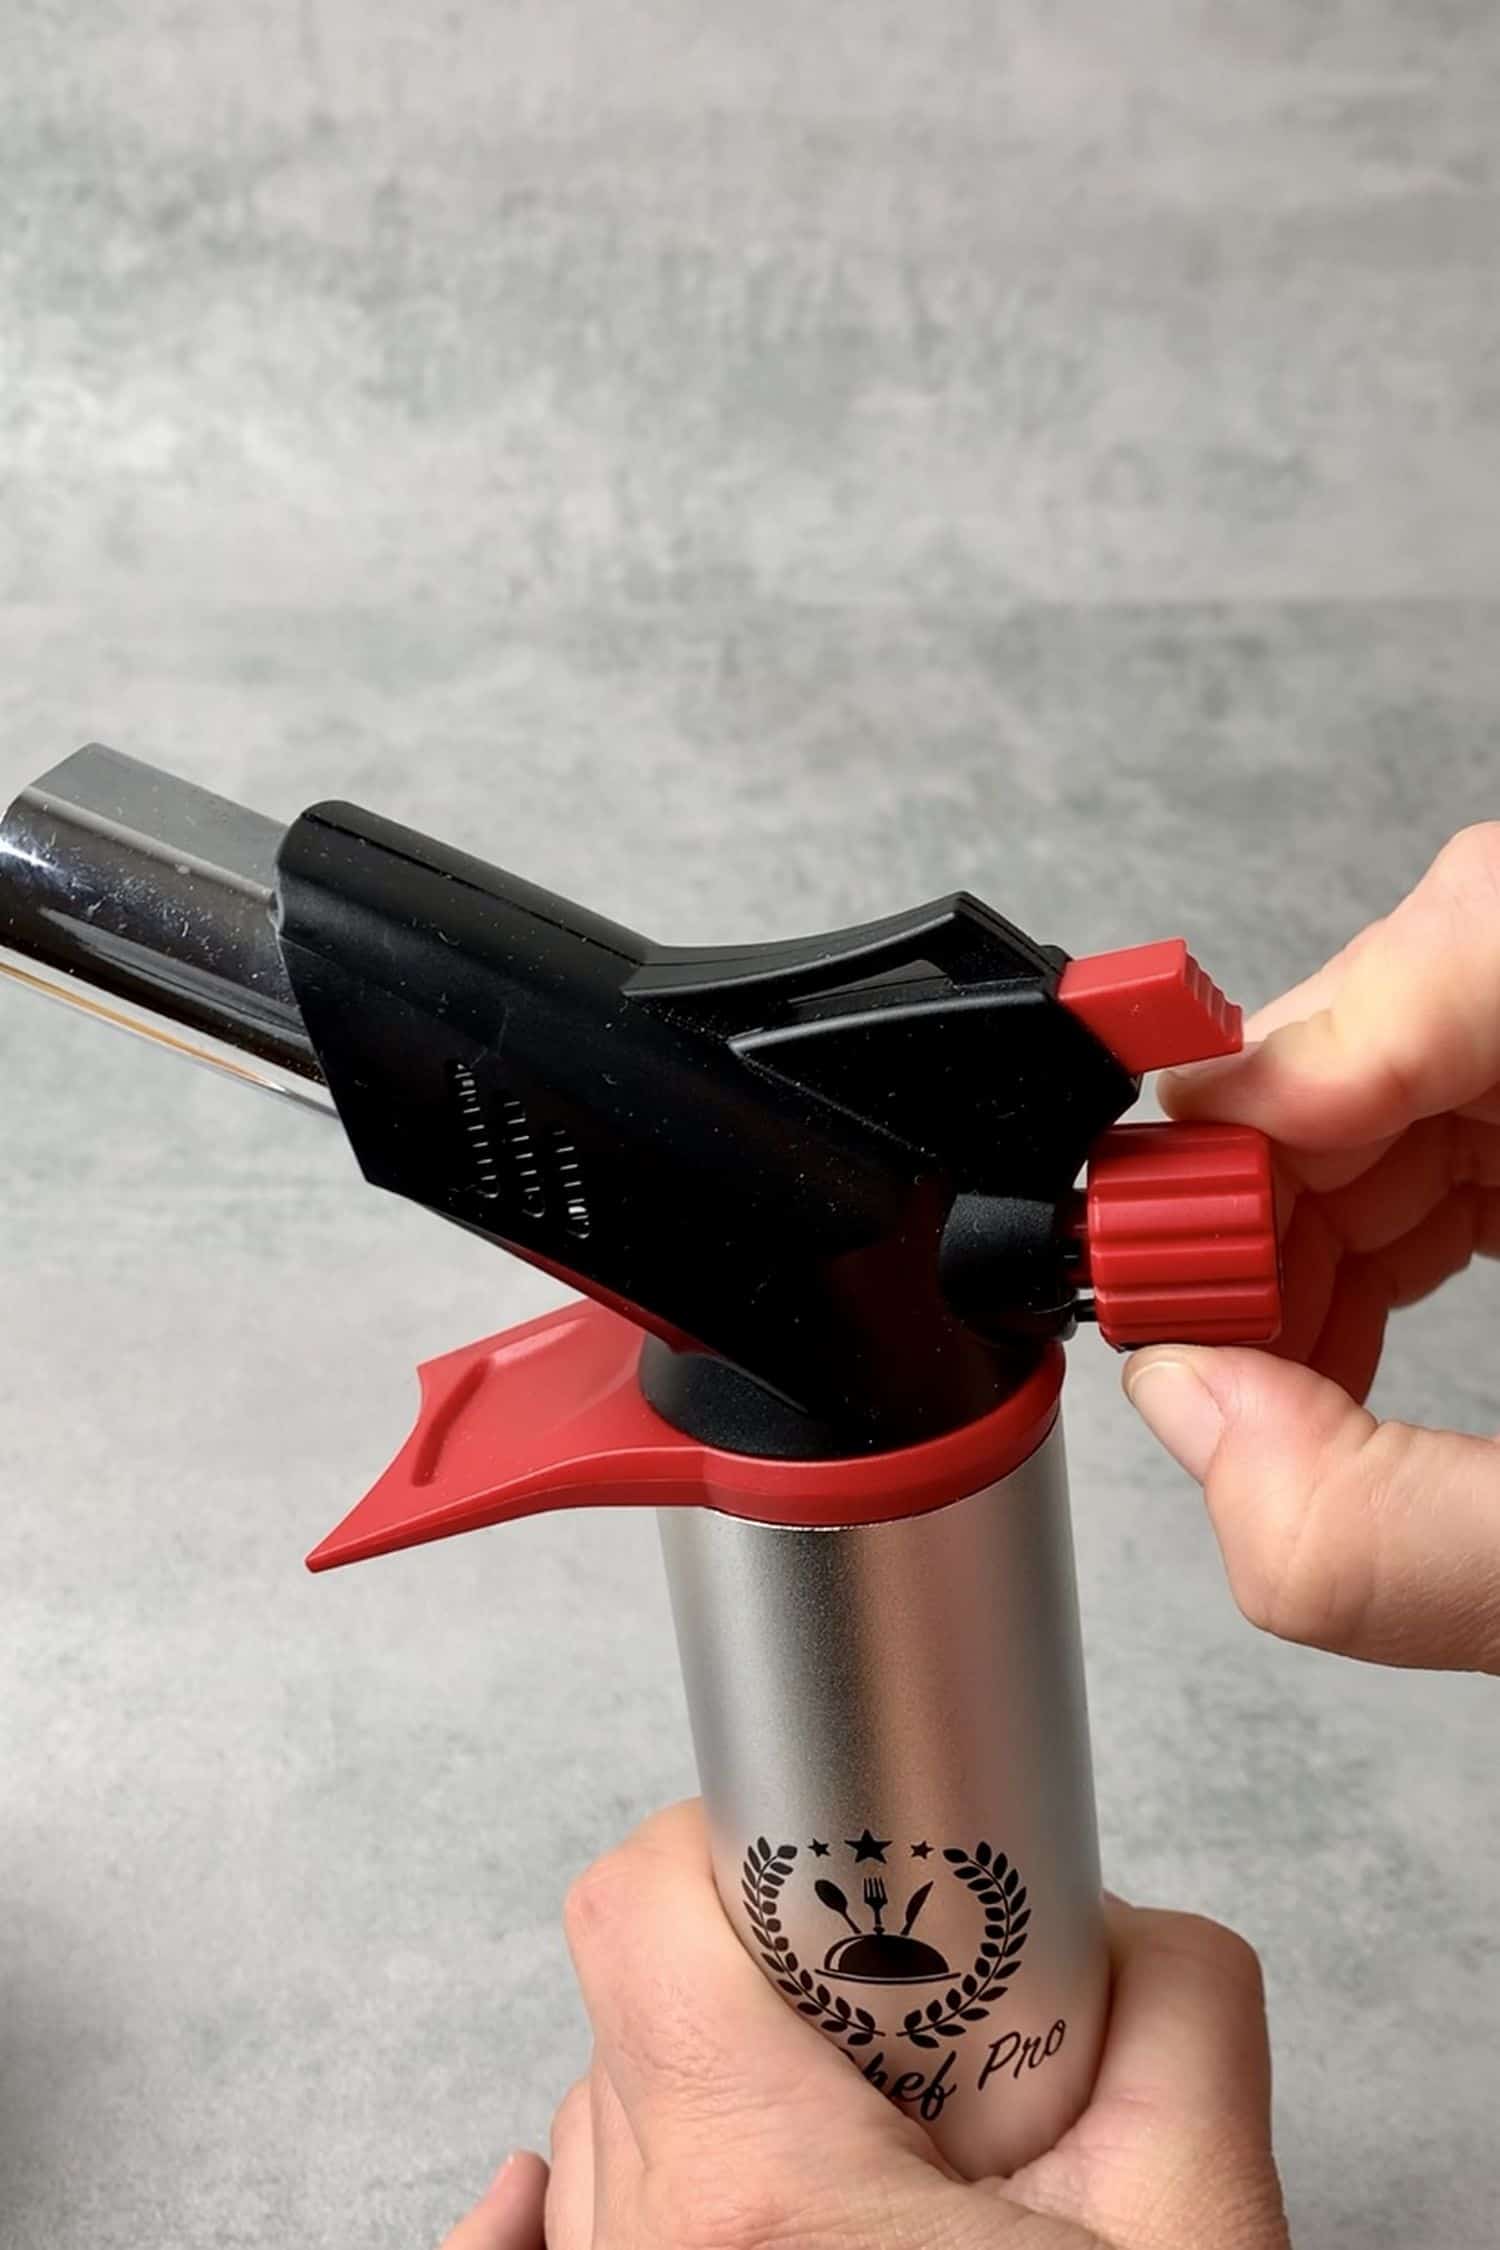
Making crème brûlée at home does not require much equipment. You will need a saucepan, a deep-sided oven tray, a mixing bowl, some oven-safe 6-ounce (180 ml) ramekins, and a kitchen blow torch.
A blow torch is an inexpensive piece of baking equipment that can be used in so many ways. I use it to caramelize meringue on lemon meringue tarts, on my creme brulee cake, or even to caramelize cheese in savory recipes. It is really fun to use it and so handy!
Flavor variations
While classic vanilla crème brûlée is a timeless favorite, this dessert is also a wonderful base for experimenting with different flavors.
For a chocolate version, add finely chopped dark chocolate to the warm cream mixture and stir until melted for a deeper, more indulgent flavor. Coffee lovers can infuse the cream with espresso powder or strong espresso to create a bold coffee crème brûlée that pairs beautifully with the caramelized sugar topping.
For a fresher variation, add lemon, orange, or lime zest to the cream while heating, then strain before combining it with the egg yolks. Lavender can also be gently infused into the cream for a delicate floral note. For a nutty twist, add pistachio paste to the custard.
To give the creme brulee a citrus spike, add lemon, orange, or lime zest to the custard mixture along with the vanilla. For a festive twist, you could also add a pinch of cinnamon and nutmeg or even some pumpkin spice.
Since you will only be using egg yolks, why not try some of my other recipes to use leftover egg whites, like my macaron recipe or pavlova?
Ingredient substitutions
It is difficult to substitute ingredients in a classic French dessert recipe like creme brulee. It relies on eggs and dairy. You can experiment with egg substitutes and dairy-free creams, but this will impact the taste and texture.
If you ever substitute ingredients in baking, you will also need to adjust the quantities and ratios of the other ingredients in the recipe. Unfortunately, I cannot accommodate all dietary needs or allergies.

Expert tips to make Crème Brûlée
- The 3 secrets behind the best crème brûlée are using heavy cream with a high fat content, using only egg yolks, not whole eggs, and baking it in a water bath.
- Always weigh ingredients by the gram using a digital scale for accuracy. Baking is a science that requires precision.
- Use high-quality vanilla extract and not vanilla essence, which can taste synthetic. Make sure your eggs are at room temperature before you begin.
- Do not boil the cream, or it can scramble the eggs. Heat it just to a simmering point. You have to wait until it starts simmering so that the cream reaches a high enough temperature to temper the egg yolk, but no hotter than this.
- The depth of the ramekins will affect the cook time. If you make this easy crème brûlée recipe in a shallower ramekin, you'll need to adjust the baking time, as it may cook faster.
- Crème brûlée will only achieve its creamy, silky texture once it sets in the fridge. Don't skip the chilling time.
Try some of my other French desserts
If you loved this homemade creme brulee recipe, try some other classic French desserts.
Have you tried this recipe?
Please leave a 5-star ⭐️⭐️⭐️⭐️⭐️ rating on the recipe card and consider leaving a comment as well!

Easy Homemade Crème Brûlée Recipe
Ingredients
- 460 grams (2 cups) Heavy Cream 36% fat content
- 65 grams (⅓ cups) Granulated sugar
- 2 teaspoons Vanilla extract or vanilla bean paste
- 6 Egg yolks room temperature
- 3-4 tablespoons Demerara sugar to caramelize the top, can be substituted with caster sugar
US customary cup measurement is an indicative figure only. Measure the ingredients with a digital scale by weight (gram). Baking is art but also science which requires precision and accuracy.
Instructions
- Pre-heat the oven to 150℃ / 300°F, no fan, and prepare your ramekins. The recipe makes enough to fill 4 x 6-ounce (180 ml) ramekins.
- Prepare the water bath: Fill a baking tray with warm water, then place the ramekins in the water. Make sure the water does not rise above half of the ramekins.
- Heat the cream and half the sugar in a saucepan over medium heat, stirring, until it comes to a simmer. Do not boil the mixture; only heat it to a simmer.
- In the meantime, whisk the egg yolks with the remaining sugar and vanilla for 1 to 2 minutes.
- As the cream mixture starts to simmer, slowly pour it into the egg yolk mixture while whisking continuously. Add the hot cream gradually to temper the egg yolks and prevent them from curdling. Keep whisking until the mixture is smooth and fully combined.
- Pour the custard mixture through a fine-mesh sieve to remove any bits of cooked egg or bubbles, creating a smoother final texture. Divide the mixture evenly between the 4 prepared ramekins, filling each one about three-quarters full. The exact amount may vary slightly depending on the size and shape of your ramekins, so adjust as needed.
- Bake the custard in the water bath for about 45 min. The baking time depends on your oven and the size of the ramekins. Deeper ramekins need longer baking time.
- To check if the crème brûlée is baked, gently nudge one of the ramekins. The edges should look set, while the center should still have a slight wobble. The custard will continue to set as it cools.
- Once baked, remove the ramekins from the oven and let them cool to room temperature. Then cover them and refrigerate for at least 4 hours, preferably overnight, to allow the custard to fully set.
- Right before serving, sprinkle each crème brûlée evenly with approximately 1 tablespoon of demerara sugar, creating a thin, even layer over the surface. Use a kitchen blowtorch to caramelize the sugar for a few seconds until it melts and turns golden brown, forming a crisp caramel crust. Move the flame continuously to avoid overheating one spot and melting the custard underneath. Serve immediately while the sugar topping is still crisp.
- Place the ramekins back in the fridge for a few minutes so the caramel can harden properly on top, and serve shortly afterward.
- Any leftovers can be stored covered in the refrigerator for 2–3 days. For the best texture, wait to caramelize the sugar topping until just before serving, as the caramel will soften over time when stored in the fridge.
Notes
- Measure your ingredients with a Digital scale for accuracy
- Good quality pure vanilla is the heart of making this dessert; do not use artificial vanilla flavoring.
- Fresh, farm eggs and heavy cream with a high-fat content (36% minimum) provide the best, creamiest results.
- Demerara sugar is often used for crème brûlée because its larger crystals and slightly higher moisture content create a thicker, more textured caramel crust when torched. It melts gradually, giving you a beautiful golden, crackly topping. But you can also make the recipe with caster sugar or granulated sugar.
- A digital oven thermometer, along with the water bath, will ensure that your creme brulee doesn't burn or bake greasily.
- Let the custard fully set in the fridge before caramelizing.
- If you do not have a blow torch, you can caramelize the creme brulee topping under the broiler/grill. Do not leave it unattended, as the sugar can burn very easily.
Sarah Alsulaiman
The best cream brulee I ever made !
Thank you so much Katalin 💕
Seriously, I made dozens of time a cream brulee recipes but after this recipe I don't need to search at all to another recipe.
Minoo
Hello,
Recipe looks amazing, I just wanted to ask if I wanted to make this in one big Pyrex instead of individual ramekins. How should I adjust the quantities and baking time? Thank you
Kata
Hard to say as baking custard is a rather delicate matter to get the perfect creamy texture.
Fathima Moolla
Excellent!
Melanie
You need a clear 'jump to recipe' option on this thing, the ads and the sheer length of the post are infuriating.
Kata
Hey, I appreciate your feedback, and believe me, I have been considering a jump to recipe button for a while now. However, I strongly believe that baking is science and unless you are a professional and/or very experienced, a recipe card cannot cover all the necessary details one needs to know in order to successfully make the dessert. I can proudly say that most of my Readers appreciate the depth of information is given in the recipes and that information is greatly contributing to their baking successes. Yet, I will take your feedback into consideration as you are right, there is a lot of information to take in and if you are a professional, it might just be easier to jump to the recipe.
Dan
This is a free recipe, you had to scroll for 20 seconds to get to the recipe card. Lol, okay.
A.L
I halved this recipe as there were only 3 of us! The mixture was enough for four ramekins. It turned out amazing! Crackly on top and smooth and silky underneath! Defo recommend to anyone who wants to try make it. It’s so so easy and end result is 🤩
Lucia
One of the best recipes I’ve tried so far🤩
A
Very good recipe.
Margarita Salazar
I love it ! One my favorite Desserts. Thank you for teaching us.
Monika
👌 Diliscouse
Bojana
Love to watch you in action, great baker.
Amanda Perumal
Love it!!!!
Sanela+Jovovic
Love the way you explaine everything in details! No mistakes with your inputs. Thanks for sharing! The recipe is great!
Rianka
Easy to follow and tasted amazing!!
Georgina
I made these and they turned out fab. I’ve got visitors this weekend and I’m going to make them again, how far in advance can they be made?
Kata
Hey glad you like my recipe. I would keep custard-like desserts like this no more than 2 days in the fridge.
Saira chopra
Loved this reciepe. Came out very well. Will be trying some more reciepes soon! Thanks alot
Mariya
Turned out amazing!!
Leila
Easy, quick and delicious! It literally takes 5 mins to put it together.
In case you don't have a blow torch, use the grilling option of your oven for a couple mins - in that case sprinkle only a thin layer of sugar on top so it would be grilled quick and nicely.
Linda
I tried making my first creme brulee using this recipe and I loved it! Definitely making it a second time.
admin
Thanks for your feedback, it just remind me how much I love creme brulee ahh I might make it today:)