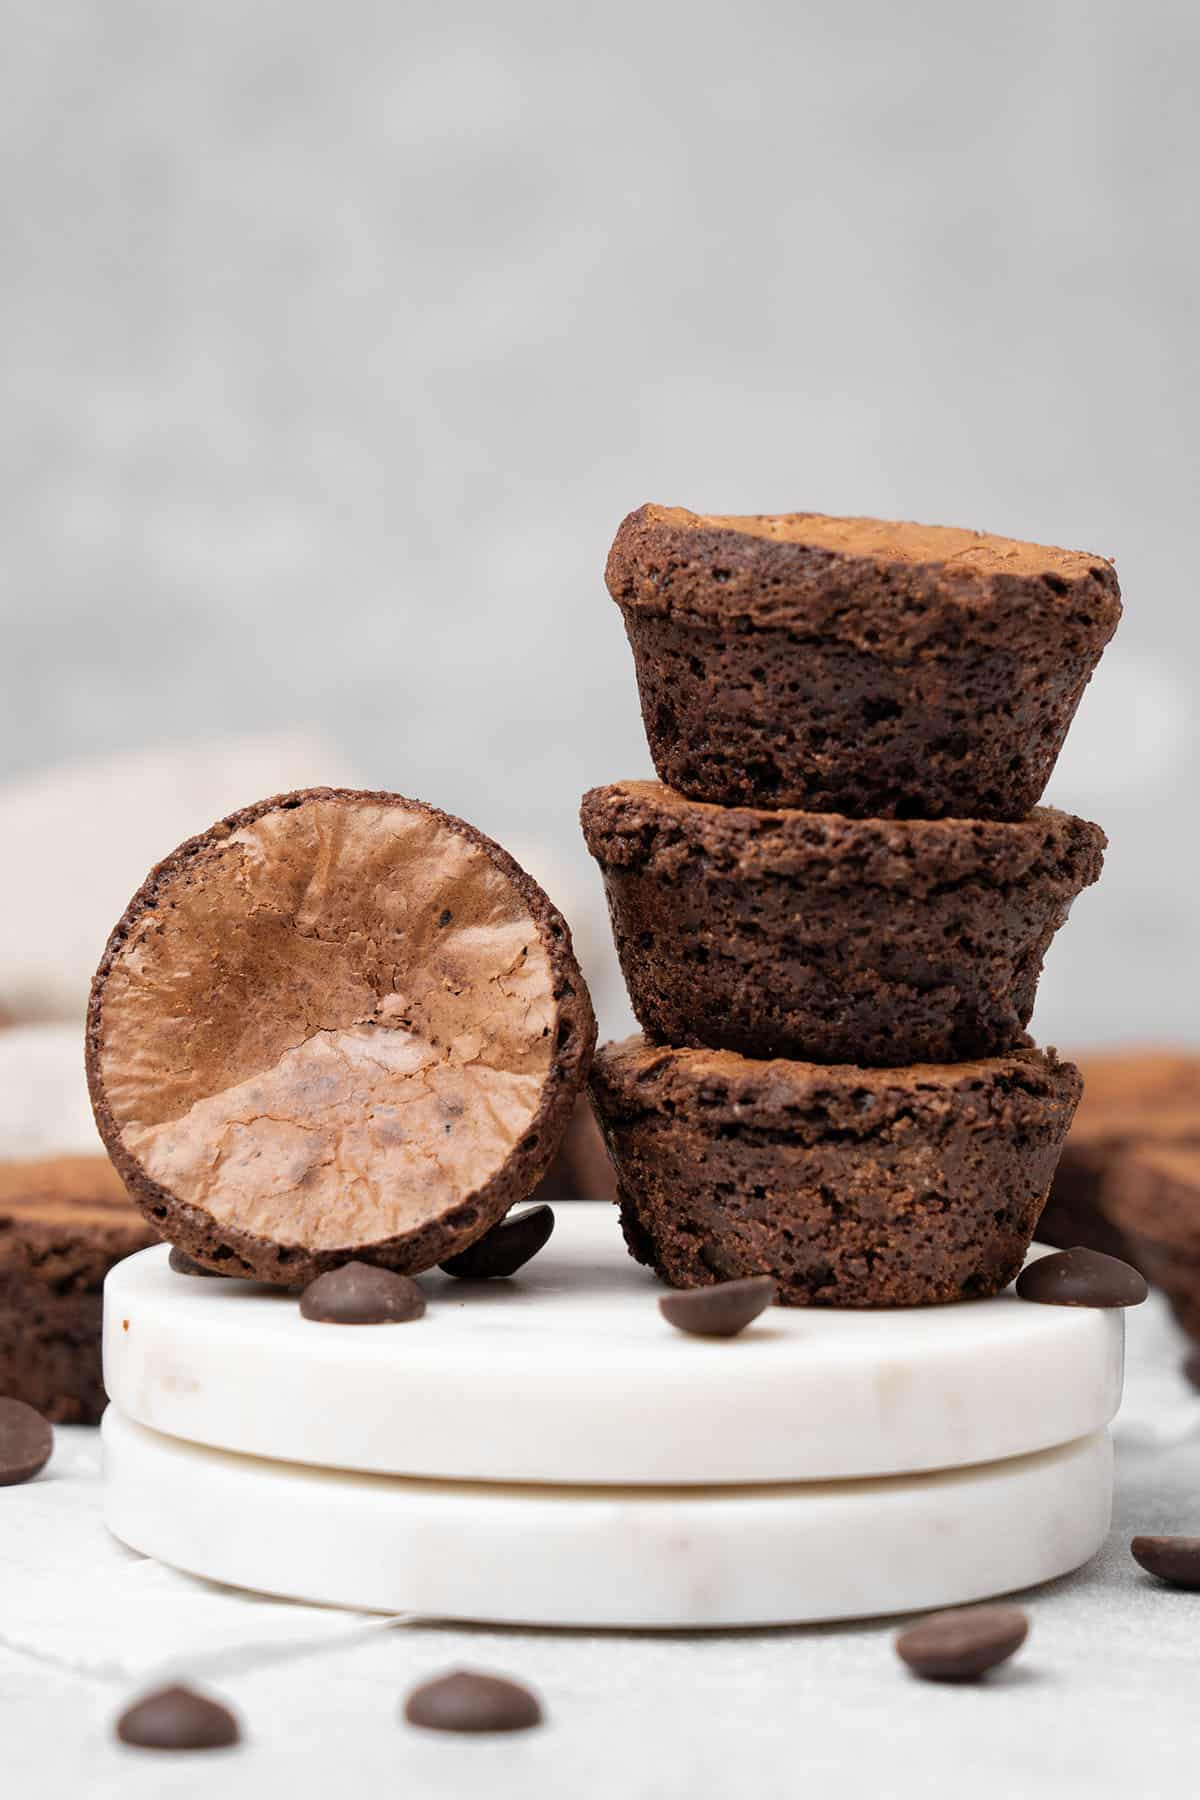
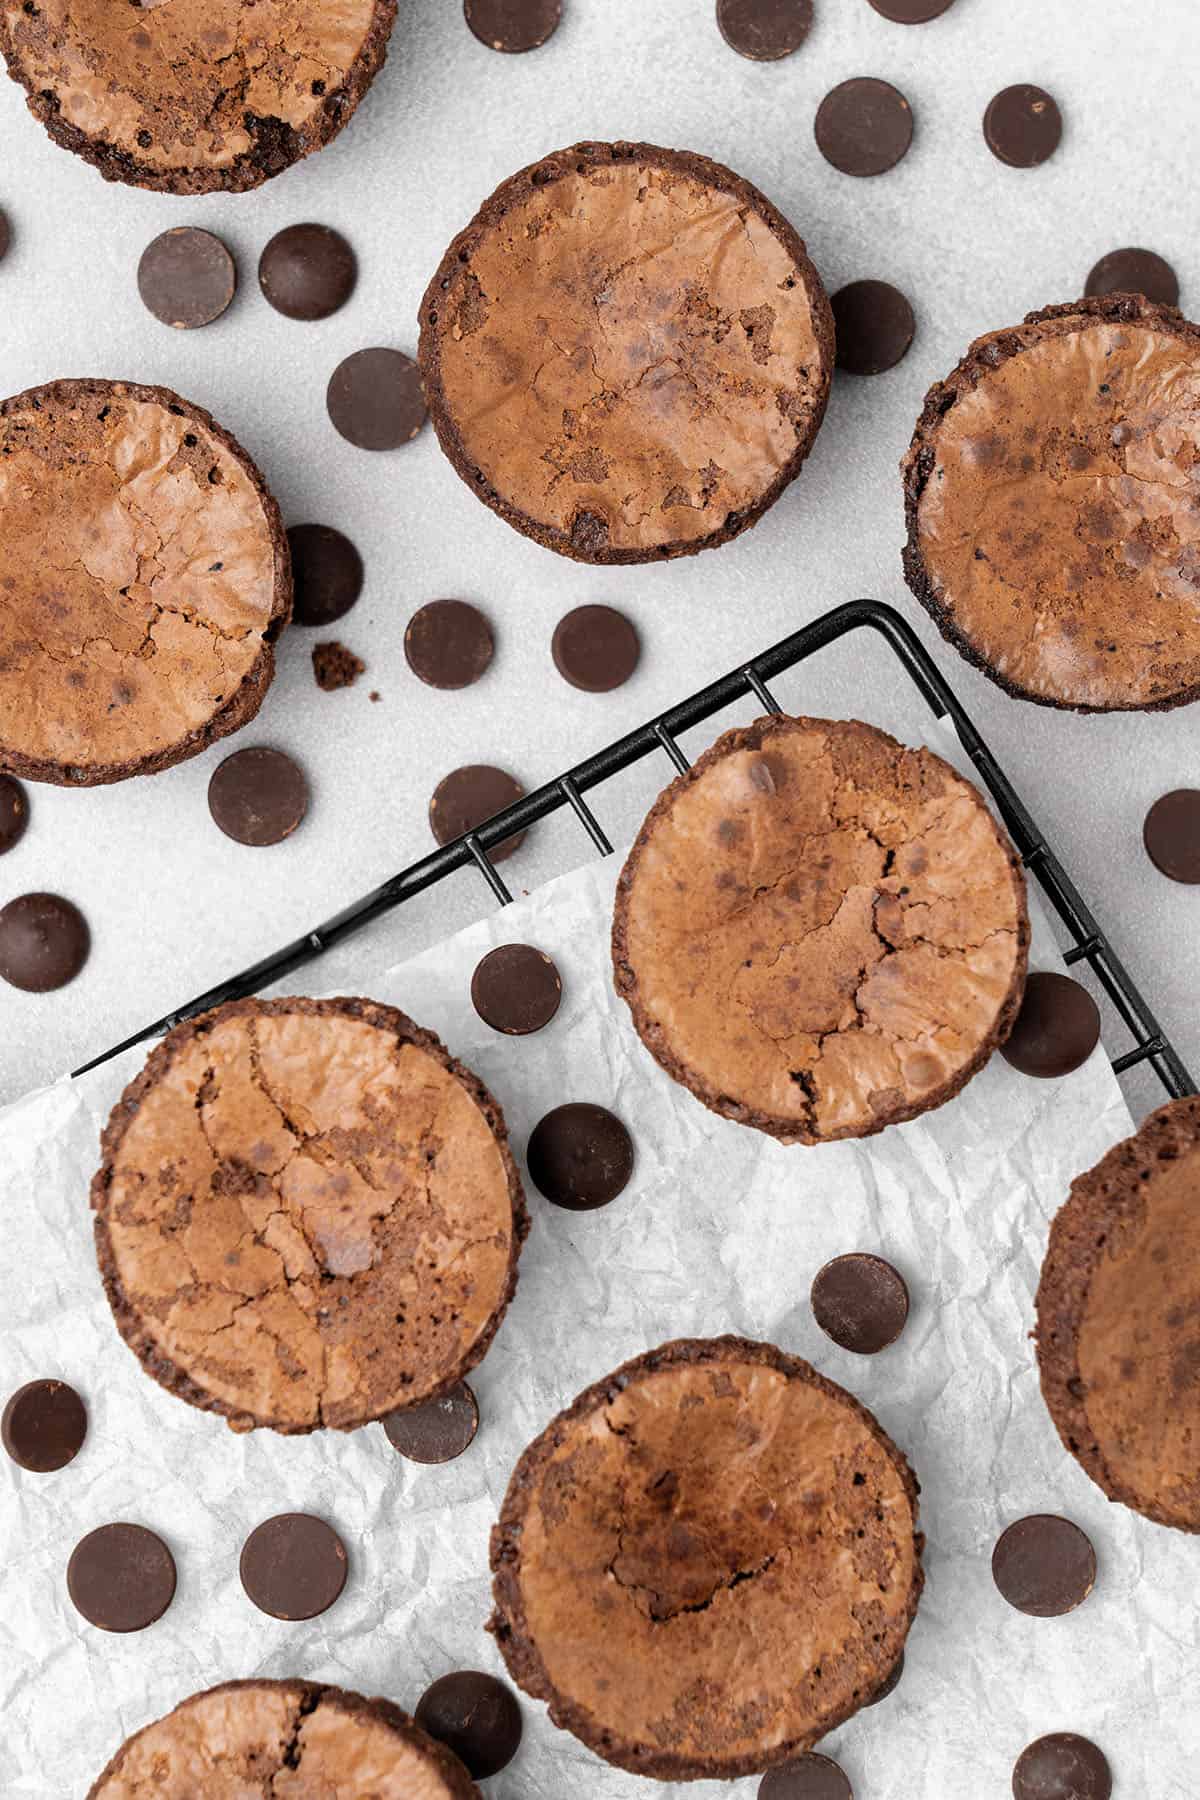
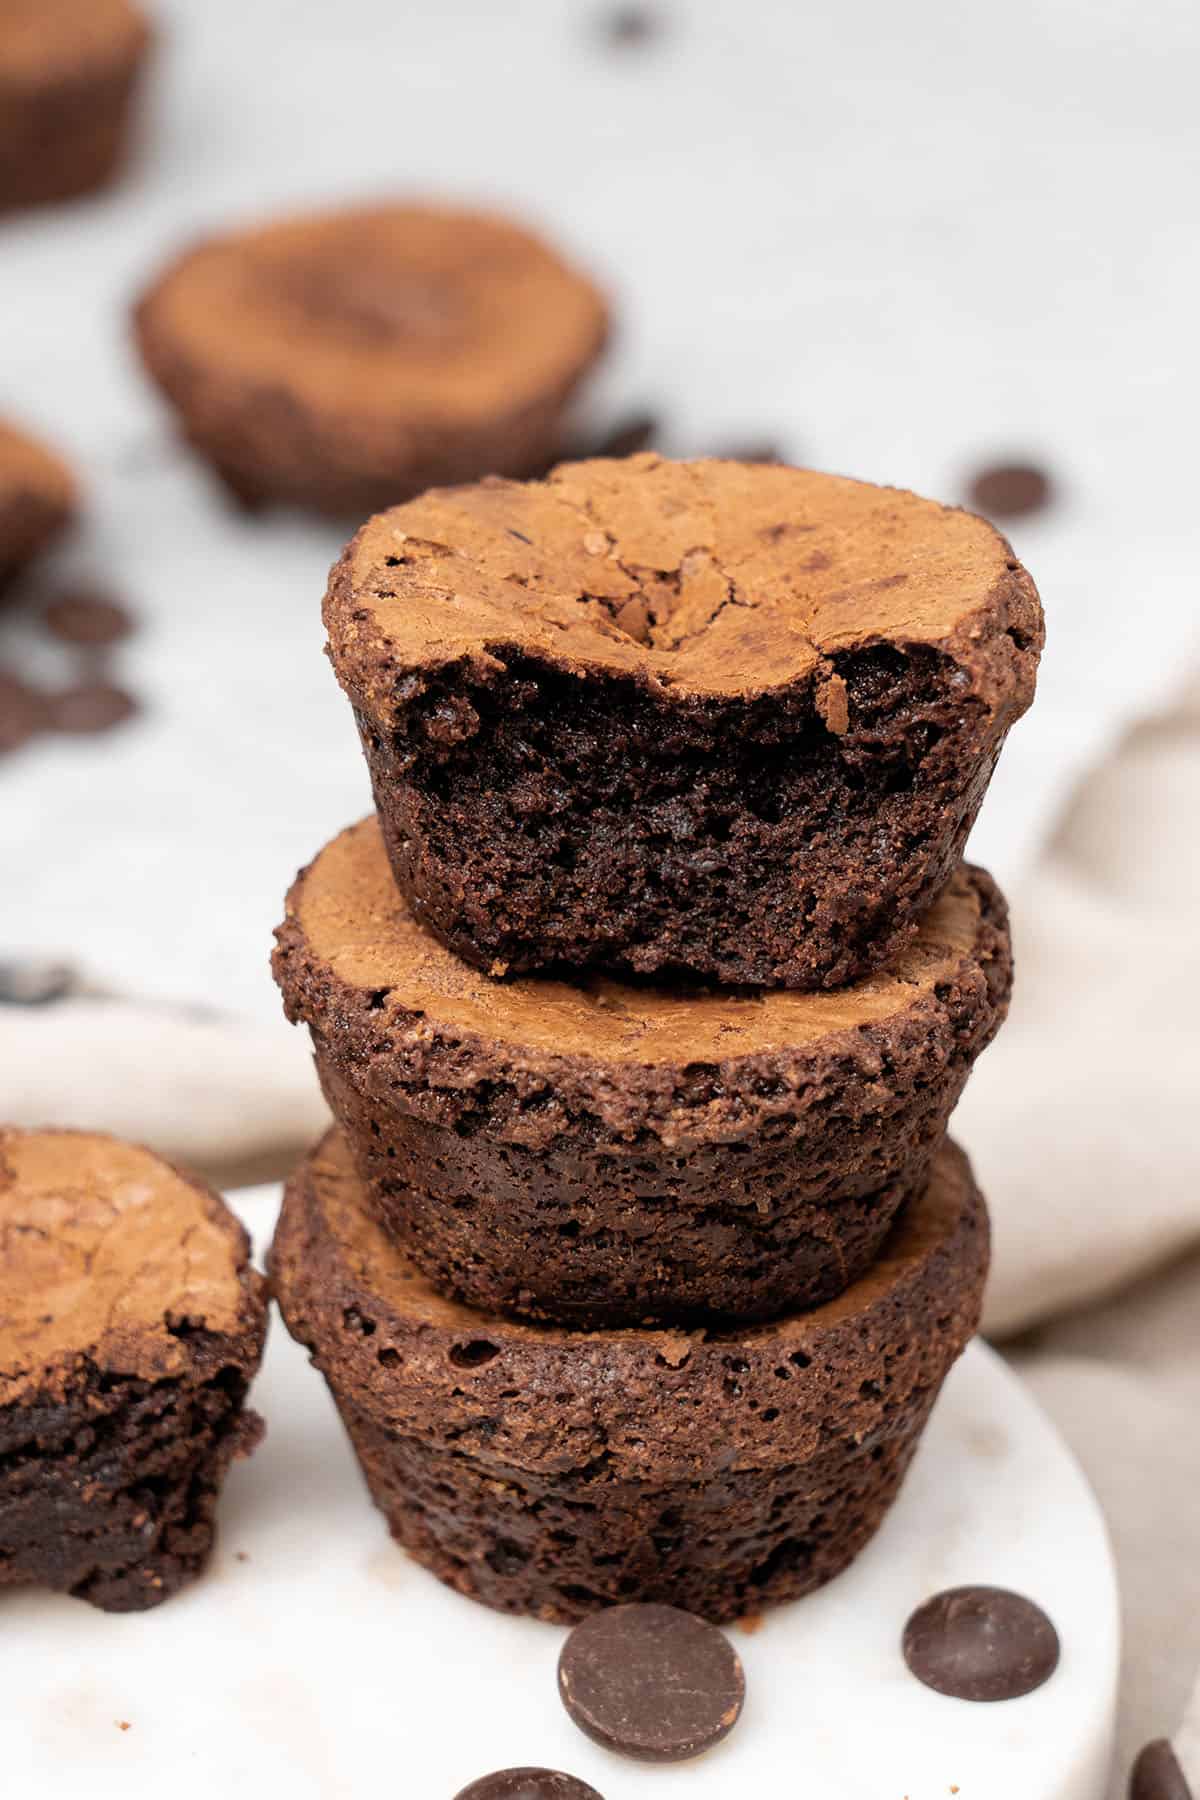
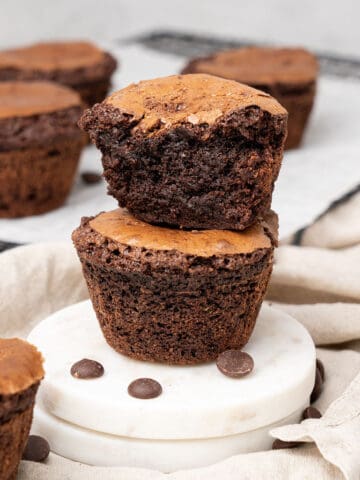
With crackly tops and super fudgy centers, these Mini Brownie Bites are the perfect delectable sweet treat that pops right into your mouth! Baked in a mini muffin pan, it's a super easy recipe that comes together in just a matter of minutes. In just two bites, or even one if you're a true chocolate lover, these gooey good mini brownies are pure heaven!
Jump to:
📖 What are two bite brownies?
Who invented two bite brownies? Created by the Two-Bite bakery, if you've never heard of Two-Bite Brownies then you are in for a real chocolate surprise! They are super fudgy mini brownies that you can devour in just 2 bites, which makes them the perfect indulgent tiny sweet treat that you can just pop in your mouth!
Then what are brownie bites? It is a divinely rich and perfectly gooey homemade version of the noteworthy fudgy little bites of heaven. This is the best brownie bites recipe, very similar to two-bite brownies, if not better!
🌟 Why this is the best recipe
- It's really easy – How to make mini brownie bites? In fac, it is super easy! No fancy ingredients, special baking equipment, or expert knowledge is needed. You only need 7 basic ingredients and a mini muffin pan.
- Super quick - The batter comes together in minutes which makes these brownie bites with mini muffin pan quick! You can have ready to eat bite size brownies in under an hour without needing any brownie mix.
- Fudgy gooey bites - Perfectly chewy on the edges but oh so moist and gooey good on the inside, these sweet treats are the top brownie bite experience.
- Versatile recipe – This recipe is easy to customize by mixing spices, nuts, or chocolate chips into the batter. Or, you can spread them with a lovely glaze or yummy frosting as mini brownie bites toppings.
📝 Ingredient notes
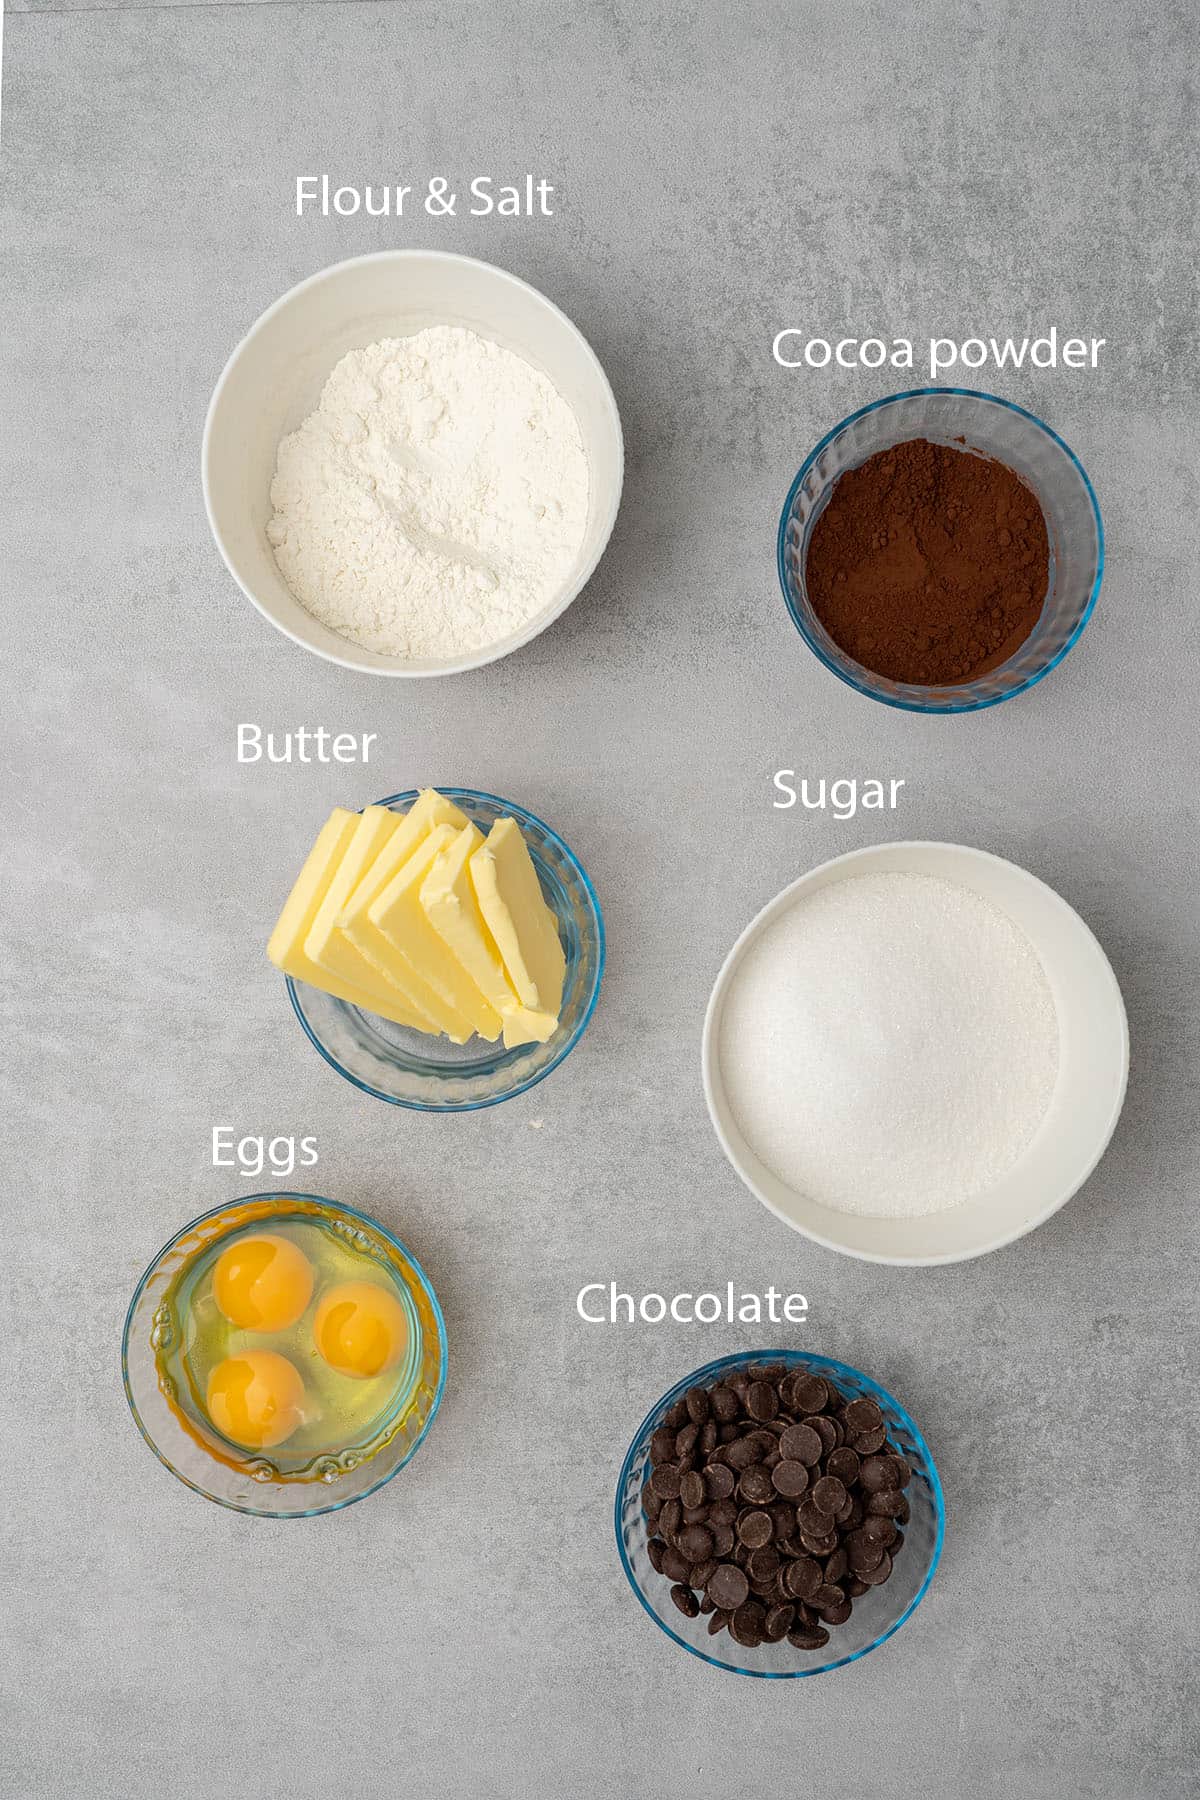
- Chocolate: Use high-quality semi-sweet chocolate for the best fudgy flavor on your brownie mini muffins. I recommend eg. Callebaut chocolate.
- Butter: Always use unsalted butter in baking to control the level of added salt. I prefer one with a fat content of 82%.
- Eggs: The eggs must be at room-temperature to bind the batter and give the bites a little bit of rise.
- Sugars: Granulated white sugar and brown sugar are used to sweeten the bites and add to their gooey texture. To learn more about how to use sugar in baking, check out my sugar guide.
- Unsweetened Cocoa Powder: Use unsweetened Dutch processed 100% cocoa powder for the best flavor.
- Flour: All-purpose flour works perfectly. Check out my flour guide if you'd like to learn more about different types of flour including gluten free varieties.
- Salt: Salt helps to balance the sweetness of the mini brownie bites.
🛒 You’ll find detailed measurements for all ingredients in the printable version of the Recipe Card at the bottom of this post
👩🍳 How to make this recipe
1. Step-by-step process
- Preheat your oven to 175 C / 347 F (no fan) and grease a mini muffin pan with butter or oil.
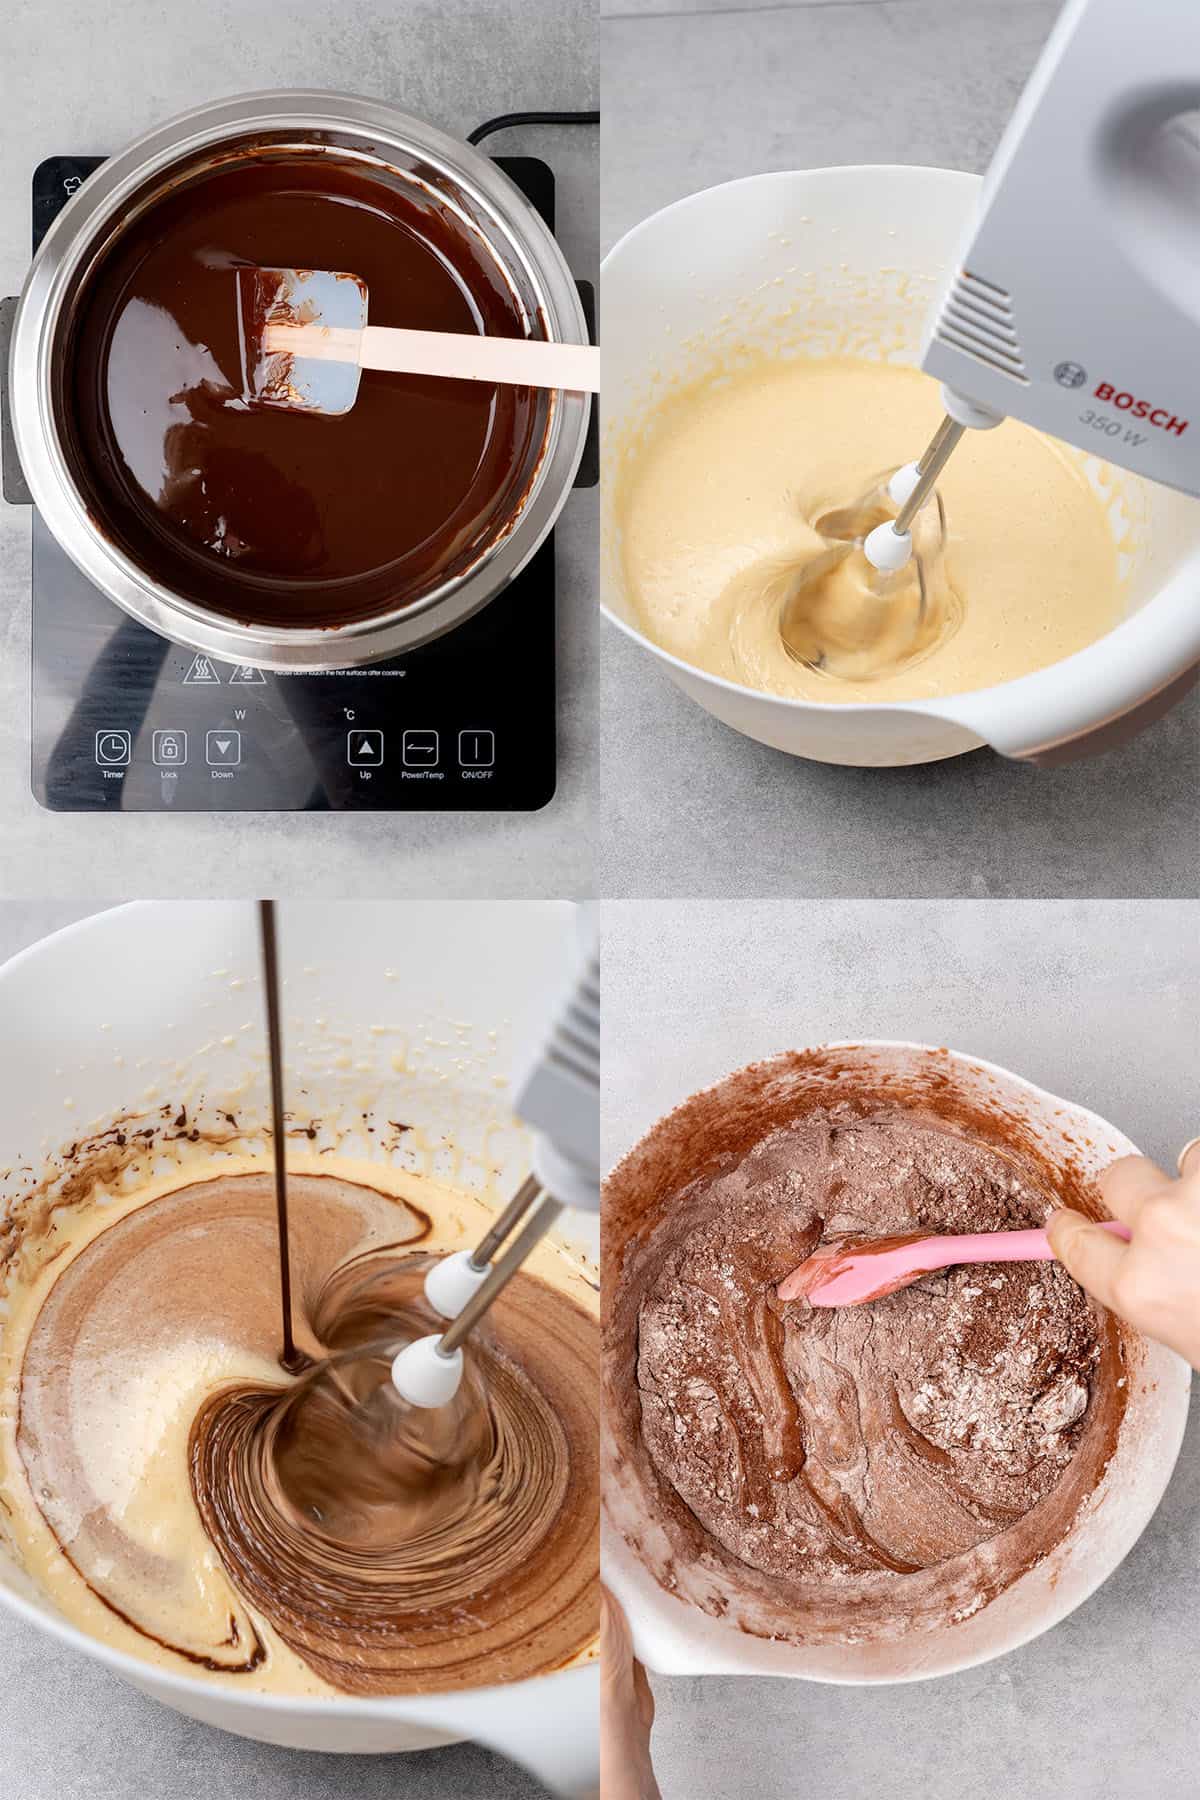
- Melt the butter and chocolate in a bowl over a saucepan filled with a few inches of simmering water. Scrape down the sides of the bowl with a rubber spatula as the chocolate melts to prevent it from burning. For more details, read my how to melt chocolate chips article.
- Use an electric hand mixer to whip the room-temperature eggs together with the sugars in a large bowl for about 5 to 7 minutes until the mixture is pale.
- Pour the melted chocolate into the egg mixture and combine them using a rubber spatula. Do not use a mixer for the remainder of the recipe.
- Sift the all-purpose flour, salt, and cocoa powder together and then fold into the wet ingredients being careful not to overmix the batter.
💡 Top Tip: Once the chocolate is melted immediately remove it from the heat to prevent it from seizing up or burning.
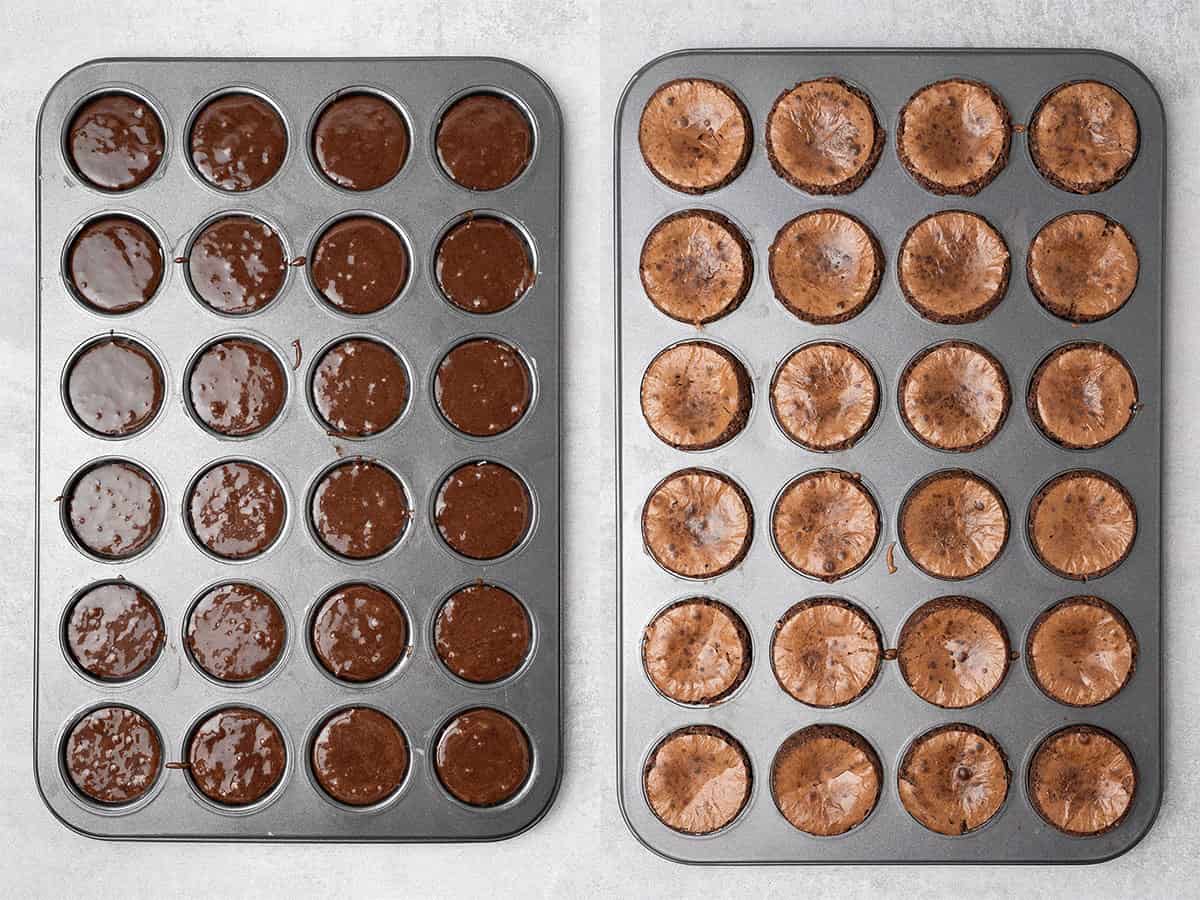
2. How to bake the mini brownies
- Evenly distribute the batter into the greased mini muffin pan.
- Transfer the brownie bites to the preheated oven and bake them for 15 minutes at 175 C / 347 F (no fan)
- When ready, the edges will look baked and the middles will look gooey yet not raw. They will also continue to set more as they cool.
- Allow the baked mini brownie bites to cool in the pan to set before removing. You might find it difficult to remove the mini brownie cups while they are still warm, so wait until they set.
- Serve them fresh or store them at room temperature for up to 3 days in an airtight container.
💡 Top Tip: Use a piping bag or small cookie scoop to distribute the batter evenly among the mini muffin pan cavities.
✨ Flavor variations and substitutions
How to decorate brownie bites? This mini brownie bites recipe is really flexible!
- Chocolate Chips - Fold some mini chocolate chips into the batter
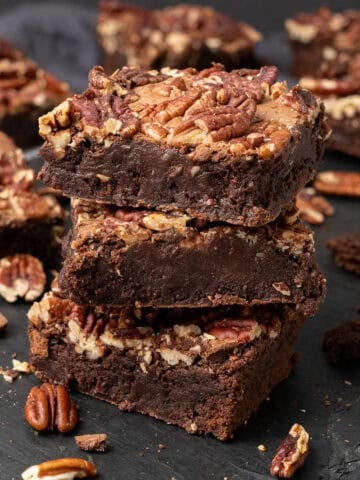
- Chopped Nuts - Finely chopped nuts can be added to the batter. My favorites are walnuts, roasted hazelnuts, or pecans similar to my Pecan Brownies.
- Spices - A dash of ground cinnamon or cardamom is a great way to add some spice. Add a pinch of cayenne pepper for heat!
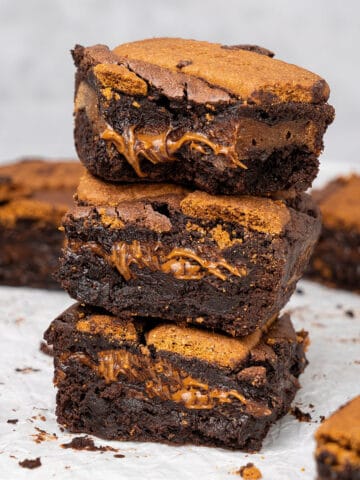
- Peanut butter, Biscoff spread, or Nutella - Like my Biscoff Brownies adding a layer of Peanut butter, Biscoff spread or Nutella in the middle is a delicious surprise.
- Dried Fruit - Finely diced crystallized ginger, dried cranberries, or dried orange peel will add a yummy flavor. You can also dust them with a bit of crushed freeze-dried fruit like my Raspberry Brownies.
- Frosting - Spread the bites with Cream Cheese Frosting, Nutella frosting, or super chocolatey Namelaka.
- Glaze - Use this coffee glaze from my Cardamom Cake to top the bites. Or, this chocolate glaze from my Baked Chocolate Donuts recipe.
- Caramel - Finish or fill the chocolate brownie cups with a drizzle of my amazing Homemade Caramel.
- Egg Replacements - You can easily make this fudgy brownie bites recipe egg-free by using different suggestions you'll find in my guide on how to use egg substitutions.
- Butter Replacements - There are a number of ways to omit traditional butter by using different alternatives. Check out my butter substitution guide to learn how.
🎓 Expert tips
- For the best flavor, use high-quality semi sweet chocolate chips and unsweetened cocoa powder. Lower quality chocolate can also seize up or break.
- No baking powder or baking soda is needed. They were both purposely not included in the recipe to produce one bite brownies that turn out super gooey.
- Use room temperature eggs to ensure that the batter emulsifies and comes together properly.
- Don't skip the salt. Because the brownie bite recipe calls for unsalted butter, the added salt is needed.
- Check the brownies after the minimum baking time. Mini muffin pans can vary in size so the mini brownie bites cook time can sometimes differ by a few minutes.
- Do not overbake. Brownies in mini muffin pan will quickly dry out if left in the oven too long.
- Grease the mini muffin pan well to prevent the fudgy brownie cups from sticking. Yet, if they do stick, you can run a knife along the edges to loosen them from the tin.
- Let the bite size brownies cool completely in the pan before removing them. This allows them time to set a little more and makes them easier to remove.
🥣 Equipment Notes
As with all brownie recipes, you always want to use a digital scale to measure all your ingredients properly. As well as, a digital oven thermometer so that you can make any needed temperature adjustments to your oven. These two tools are the secret key to all baking.
For the brownie batter, you need an electric hand mixer to whip the eggs and sugars together. And a rubber spatula is the best tool to gently fold the wet and dry ingredients together without overmixing. Then once the batter is ready, a mini muffin tin is used for baking the fudgy brownie bites.
❓Recipe FAQs
Grease the mini muffin pan well with butter or oil to prevent the mini brownie bites from sticking. A nonstick pan alone is not enough.
They should pop out easily if the pan was properly greased and you allowed the bites time to cool. However, if they do stick just run a knife along the edges to loosen them up a bit.
They can be kept at room temperature or in the fridge for 3 to 4 days in an airtight container.
You can store them in the freezer for up to 3 months in an airtight container or tightly wrapped in plastic.
🍫 More Chocolate recipes


Have you tried this recipe?
Please leave a 5-star ⭐️⭐️⭐️⭐️⭐️ rating on the recipe card and consider leaving a comment as well! I would love to hear about how your dessert turned out and your feedback also helps other Readers!

Mini Brownie Bites (VIDEO)
Ingredients
- 100 g (⅔ cups) Chocolate use semi-sweet quality chocolate eg. Callebaut Dark Chocolate (callets)
- 100 g (½ cups) Unsalted butter
- 2 Eggs room temperature
- 100 g (½ cups) Granulated sugar
- 100 g (½ cups) Brown sugar
- 20 g (¼ cups) Cocoa powder unsweetened Dutch processed
- 75 g (⅔ cups) All purpose
- ⅓ teaspoon salt
US customary cup measurement is an indicative figure only. Measure the ingredients with a digital scale by weight (gram). Baking is art but also science which requires precision and accuracy.
Instructions
- Melt butter and chocolate in a bowl over simmering water over medium heat
- In another bowl, whip together the eggs with sugar with the help of an Electric hand mixer until pale, for about 5-7 minutes
- Pour the melted butter and chocolate mixture into the egg-sugar mixture, and combine with a Rubber spatula. Do not use a mixer at this point
- Sift in flour, salt, and cocoa powder and fold the mixture together. Do not overmix
- Pour or pipe the batter into the prepared mini muffin tin and bake for 15 minutes
- The mini brownie bites are ready when the edge looks baked and the middle looks slightly gooey but not raw. Do not over-bake!
- Let the brownie bites cool in the tin (They will further set as they cool), then serve the muffins fresh or store them at room temperature for 2-3 days in an air-tight container
Notes
- Use always unsalted butter in dessert recipes, but make sure you add the salt stated in the recipe as that will balance the sweetness
- Use a combination of white and (light or dark) brown sugar for the best texture and beautiful butterscotch flavor
- The egg should be used at room temp
- Baking powder is not included in this recipe intentionally, so ýour Brownie bites will turn out wonderfully fudge and gooey just like brownies
- The quality of the chocolate chips along with the quality of cocoa powder will define the taste of your brownies so try to use high-quality ingredients
- Digital scale is required for a consistent, happy baking experience:)
- Melt chocolate over a double boiler or in the microwave so you won´t burn it
- Always pre-heat your oven and consider using a digital oven thermometer for the best results
- Make sure that you precisely grease your mini muffin thin with butter throughout as the fudge brownie bites otherwise might stuck into the tin.
- Each oven is different (and you might work with a slightly larger or smaller mini muffin tin) so you might need to adjust the baking time slightly. Check the texture and take them out as soon as the edge looks baked.
- Do not over bake these brownie bites, they will be done fairly quickly and can easily dry out if over baked.
- Let the brownie cups cool in the tin as they will further set as they cool. Then, once cooled, if the tin was greased properly, they should pop out easily, if not, gently loosen up the brownie bites within the tin using a sharp knife
Tracy Bartsch
Recipe was great! Have one question though — in the pic of ingredients you show 3 eggs, but written recipe is 2 eggs. I used 2 but wondering if they would be slightly chewier/fudgier if I had used 3?
Maria do Carmo Giannini Balekjian
Why did you lock your recipes for printing?
I print them because it is easier for me to read them. If it is necessary I'll sign a paper where I am committed not to publish them. Is that fair ?
Katalin Nagy
You can still print the recipe, the system just asks your email address. Enjoy baking:)
M
where is the Video?
Katalin Nagy
Below the table of content.
Eliza
Hey, I wanted to say that I looooove your recipes and how honest they are, and I am about to try this one. Could you please elaborate on how to check if they are done? My muffin tray is 4*3 and maybe they won't be ready within 15'. I thought about trying the same way we do for a cake with the wooden stick, but they are supposed to be gooey, so would it work?
thank you in advance for your time and help!
☺️
Katalin Nagy
It is a bit of a test and learn and impossible to make exact instruction for all sort of different tins and as you say it supposed to be gooey:) Try with 20min if your tin cavities are larger then adjust, if necessary.
Jeane Garcia
I made it!! It is perfect and delicious!!