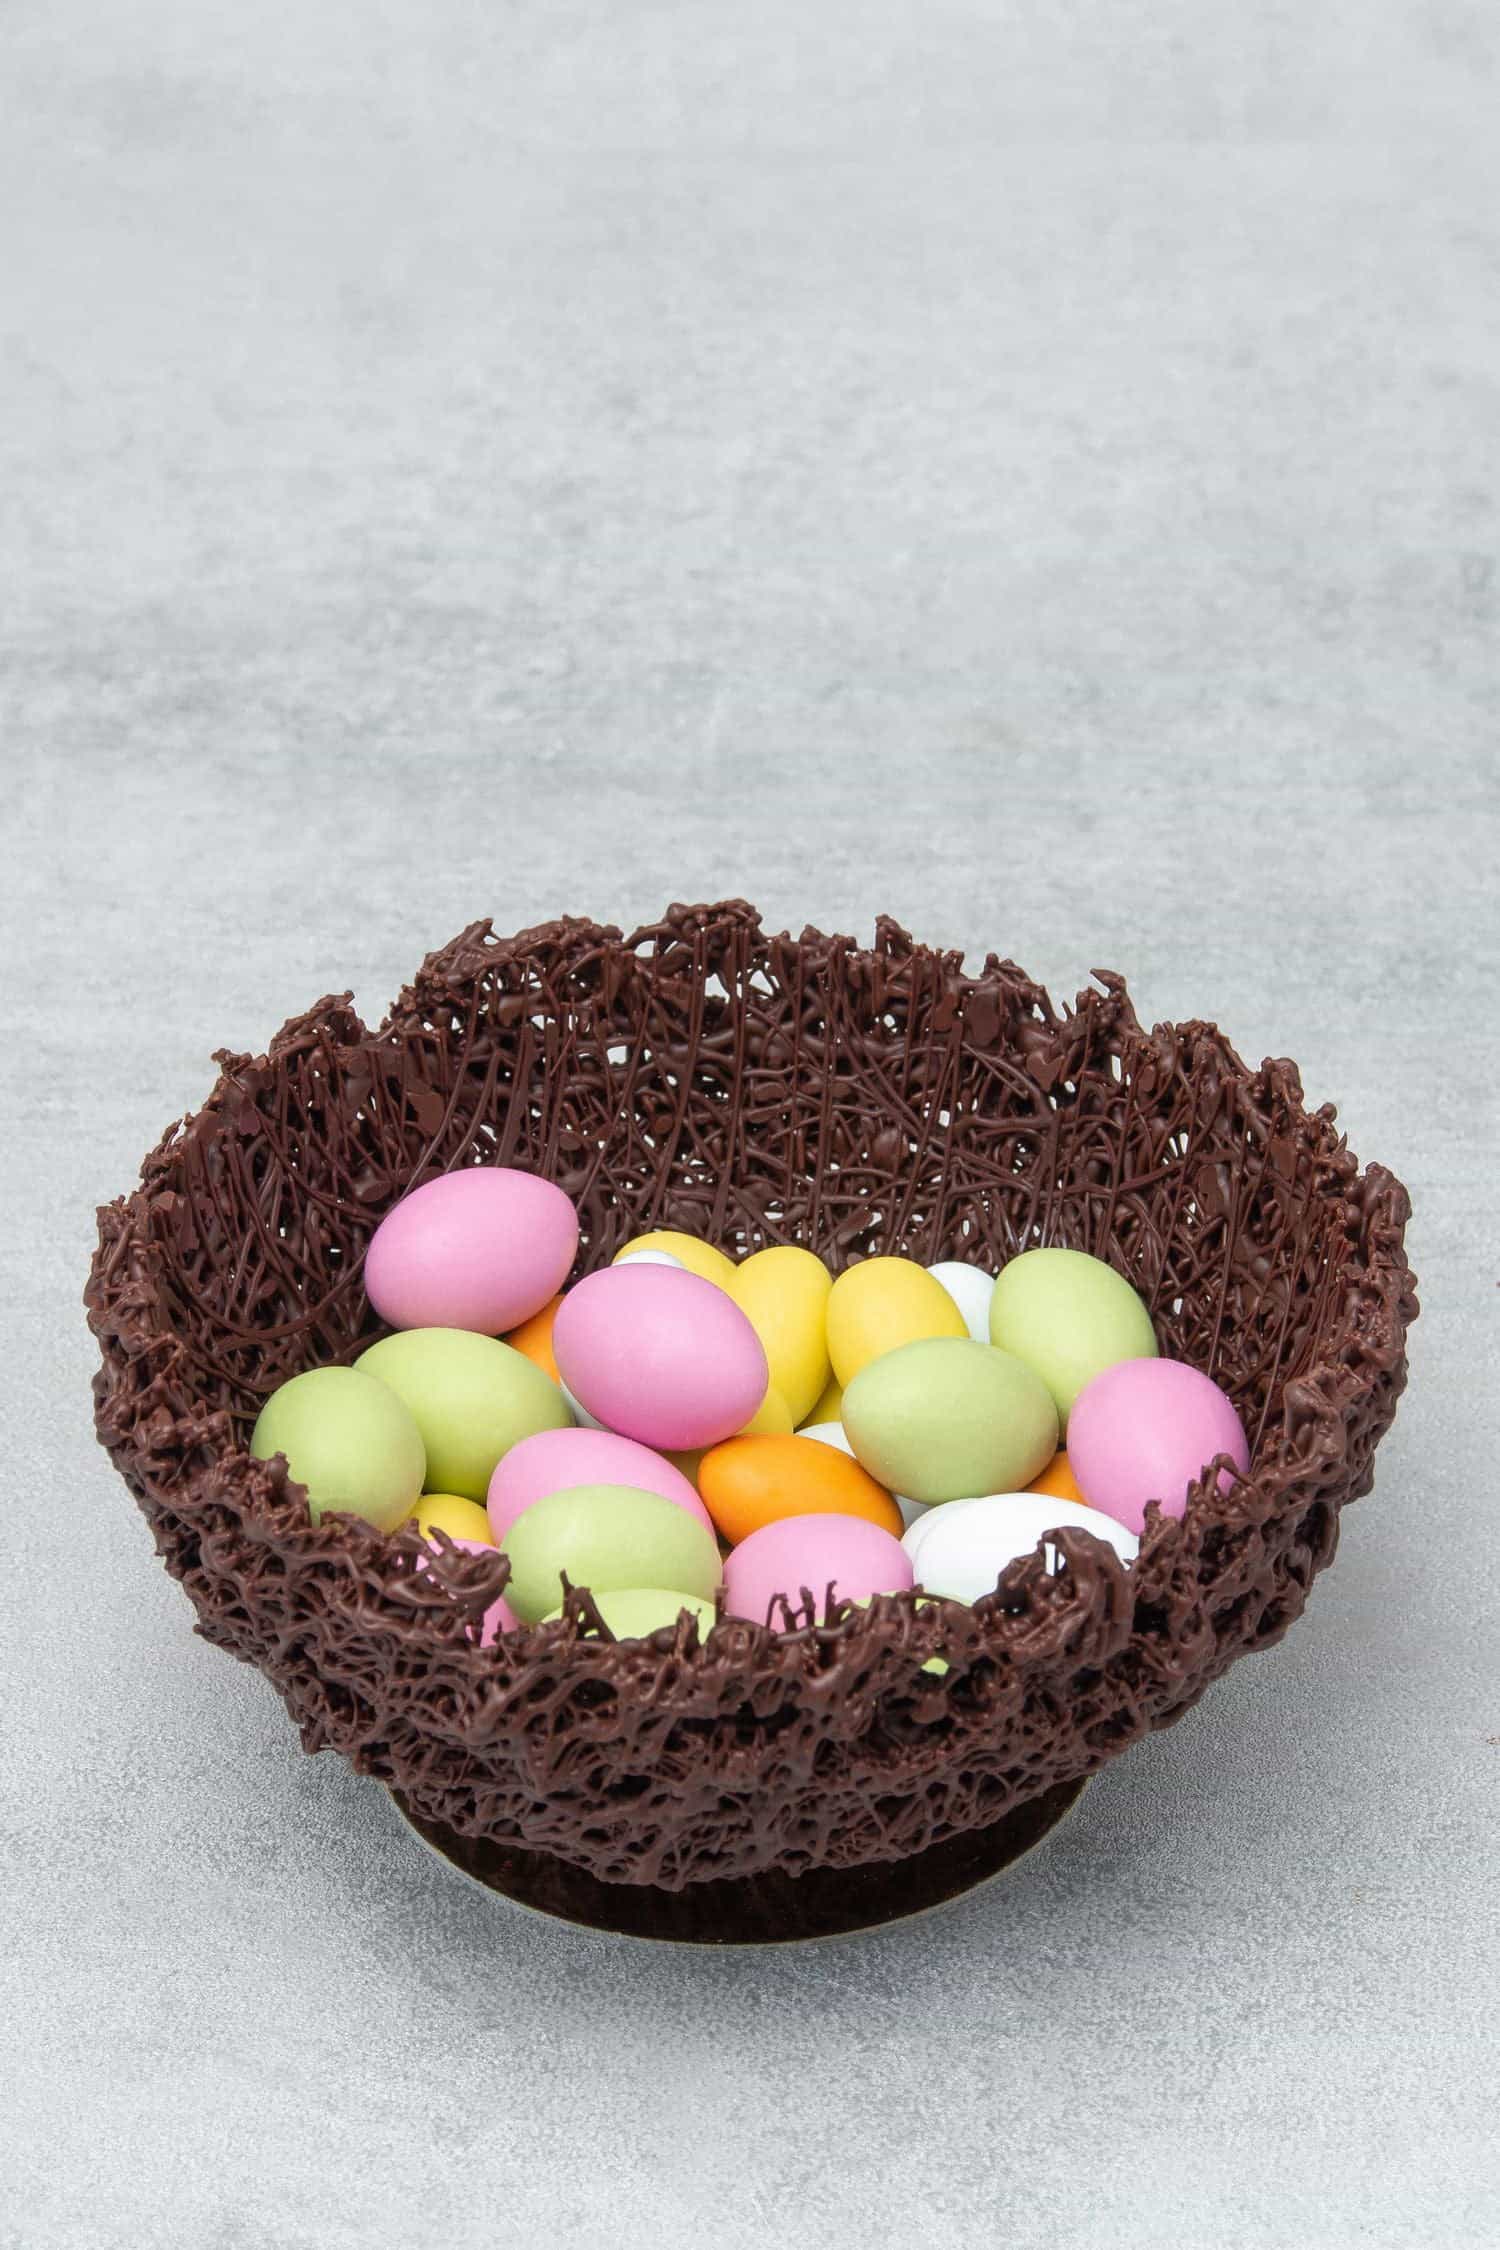
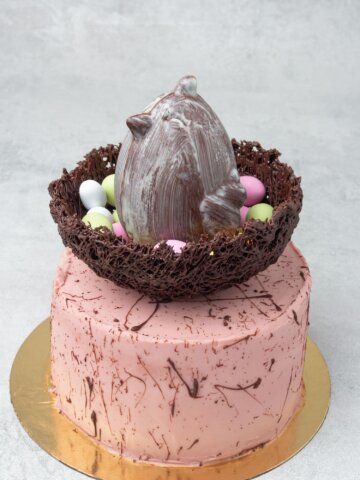
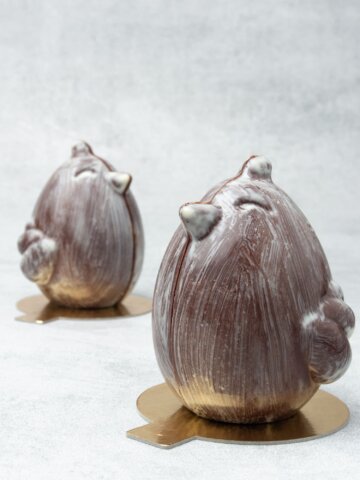
This Easy Chocolate Nest can be one of the highlights of your Easter table; can function as a bowl-shaped edible decoration filled with mini chocolate eggs, can be the perfect hand-made edible gift, or can be used to decorate an Easter cake.
Jump to:
Why this is the best recipe
My step-by-step tutorial will take you through all the necessary details you need to know about how to make this Chocolate nest for Easter! This is a professional Chocolate birds nest recipe using chocolate work techniques like chocolate tempering. We will use chocolate only, so no rice vermicelli noodles, no cornflakes, or other funny ingredients are needed.
The process is actually much easier than it might look, all you need is a bowl, good quality chocolate, and some patience to create 3 layers of chocolate overall!

Ingredient notes
- Chocolate: Obviously you will need some chocolate to make a Chocolate nest bowl however not all chocolate is created equal. In general, worth remembering that in the case of recipes that require chocolate decoration or chocolate work, the quality of the chocolate goes way beyond taste. You might have recognized that by simply melting chocolate and then waiting to set, you won´t achieve shiny results. You need couverture chocolate if you want to replicate those beautifully shiny chocolate bonbons or decorations you see in pastry shops. In this recipe, I am using Callebaut Dark Chocolate (callets). This is high-quality chocolate (yet affordable) that contains a higher percentage of cocoa butter than the average supermarket chocolate. Couverture type of chocolate is used by professionals and by home bakers who want to take their chocolate work to the next level. I order mine from Amazon and surprisingly the price/kg is not even so much more expensive than low-quality supermarket chocolate.
- Cocoa butter powder (optional): There are a few ways to temper chocolate and since in my Hot chocolate Bomb post earlier I shared the seeding method, I thought it is useful if I share another method this time which is called the cocoa butter powder method. If you can´t access cocoa butter powder, no problem, please read my earlier post about the seeding method in which case no cocoa butter is needed. If you would like to purchase cocoa butter, I recommend Callebaut Mycryo
Exact ingredient quantities can be found at the bottom of this page in the RECIPE CARD!
3 Expert Tips
1. What is the difference between melting and tempering chocolate
Both involve melting chocolate…but they are very different, indeed.
In short, when chocolate is melted, the molecules separate. When you temper the chocolate, you bond those molecules back together so your chocolate will harden with a glossy shine and fine “snap”. With simply melting chocolate, without tempering, the chocolate will somewhat harden but will lose its initial shine, and will be matt with an unpleasant texture. There is no need to temper chocolate when you use chocolate IN a recipe like when you make brownies, however when chocolate IS the recipe, for example, chocolate decoration, chocolate bonbon, etc. you need to apply proper pre-crystallizing / tempering. Without appropriate chocolate tempering, it is likely that you simply won´t be able to unmould these Raspberry Ruby chocolate bonbons from the mold because they stay will crystallize unevenly and stay somewhat too soft and unpleasant.
The good news is that as fancy as it sounds, chocolate tempering is actually rather easy and quick, really nothing to be worried about! There is one easy step between melted and tempered chocolate… Continue reading!
2. How to temper chocolate
From the Callebaut website I think you might find this piece of learning material below useful:
Each variety or type of chocolate should be tempered before you use it to mold chocolates and hollow figures or to enrobe cakes and chocolates. In short, whenever chocolate needs to have a beautiful satin gloss and a hard snap, tempering is absolutely crucial.
When you add chocolate to dishes as a flavor component (e.g. chocolate mousses), it suffices to simply melt it without tempering.
What is tempering / pre-crystallizing?
The purpose of tempering chocolate is to pre-crystallize the cocoa butter in it, which is important to make your chocolate ready for processing. During tempering, the cocoa butter in the chocolate takes on a stable crystalline form. This guarantees a perfect finished product with a satin gloss and a hard snap. It also makes the chocolate contract during cooling, which makes it easier to unmould. If chocolate is simply melted and then left to cool down, the finished product will not be glossy. If you make the small effort to bring your chocolate to the right working temperature properly, you are guaranteed to get the desired end result. And that’s what we mean by tempering: bringing chocolate up to the right working temperature while making sure that the crystalline structure of the cocoa butter in it is stable.
There are various methods to temper chocolate, earlier I made a blog post about the seeding method. With the seeding method, you basically temper the chocolate using the chocolate itself, no need for cocoa butter, so if you can´t access cocoa butter please temper your chocolate with the seeding method.
For this Chocolate nest for Easter, I used a different method, I tempered the chocolate with cocoa butter powder. Compared to the seeding method I find the cocoa butter method even easier and more stable, with less opportunity for mistakes.
For the exact melting, working, and set temp of your chocolate follow the instructions on the bag of chocolate you are working with, as per below:

Please note, that I am tempering 50g chocolate with ¼ teaspoon of cocoa butter powder at once and repeating this process 3 times overall to create 3 different layers on our Chocolate nest
Step 1
Melt your chocolate to 45-50°C / 113-122F (in case of dark chocolate). I recommend using a microwave, however, check and stir the chocolate every 30 seconds. Or, you can use a double boiler, in this case, do the process over low heat so you don´t burn the chocolate and make sure the chocolate won´t get wet from the steam
Step 2
Allow the chocolate to cool at room temperature to 34.5°C / 94F (for dark chocolate) by stirring with a spoon
Step 3
Add 1% cocoa butter powder to your melted chocolate, i.e. ¼ teaspoon for 50g of chocolate. I am using a product from Callebaut called Mycryo. Buy any cocoa butter powder if Mycryo is not available for you
Step 4
Mix well cocoa butter powder with chocolate
Step 5
Use chocolate filled in a piping bag bearing in mind the chocolate “working temp” and “set temp”. Once cocoa butter powder is well mixed into the chocolate, let it cool to around 30C / 86F then apply the chocolate streams. The basic rule is that the warmer the chocolate temp the runnier the chocolate is. Chocolate will harden at "set temp" (27C / 80F in our case) and you won't be able to work with it. Meaning, you have to work with a chocolate that is approx. between 27-30C / 80-86F.
That´s it, easy peasy! What happens if you don´t want to temper chocolate? The chocolate won´t set, will stay matt, somewhat soft, and most probably won´t come off the bowl.

3. Step-by-step process of making Chocolate nest for Easter
Please note, that I am tempering 50g chocolate with ¼ teaspoon of cocoa butter powder at once and repeating this process 3 times to create overall 3 different layers on the chocolate nest
After tempering the chocolate, making the Chocolate nest is super easy!
1. Make sure first that you properly clean the outside of your bowl (I am using vinegar and a paper towel) as any residue will be seen on the chocolate. Place the bowl into the freezer (so the chocolate will set easier)
2. Place clean parchment paper on the table or use Silicone baking mat . In this way, any chocolate that will end up on the table can be re-used
3. Temper the first batch of chocolate (50g) then fill a piping bag with chocolate and make a very very small hole in the piping bag. Take the bowl out of the freezer and start applying the chocolate on the bowl in a very skinny stream paying attention to all sides. Make sure you use the chocolate on the "working temp" that is between 27-30C / 80-86F - see notes above at the chocolate tempering section.

4. Once you are finished with the first layer, place the bowl (with chocolate side up) back in the freezer and start tempering the 2nd batch of chocolate (50g). Assuming that the tempering will take 2-4 minutes, the chocolate will set in the freezer, however, you must check that it is "dry" as you touch and matt before applying the second layer. Do not apply the next layer of chocolate unless the previous layer is fully set!
5. After tempering, apply the second layer of chocolate to the bowl, then again put the bowl back in the freezer (with chocolate side up) and start tempering the 3rd batch of chocolate (50g)

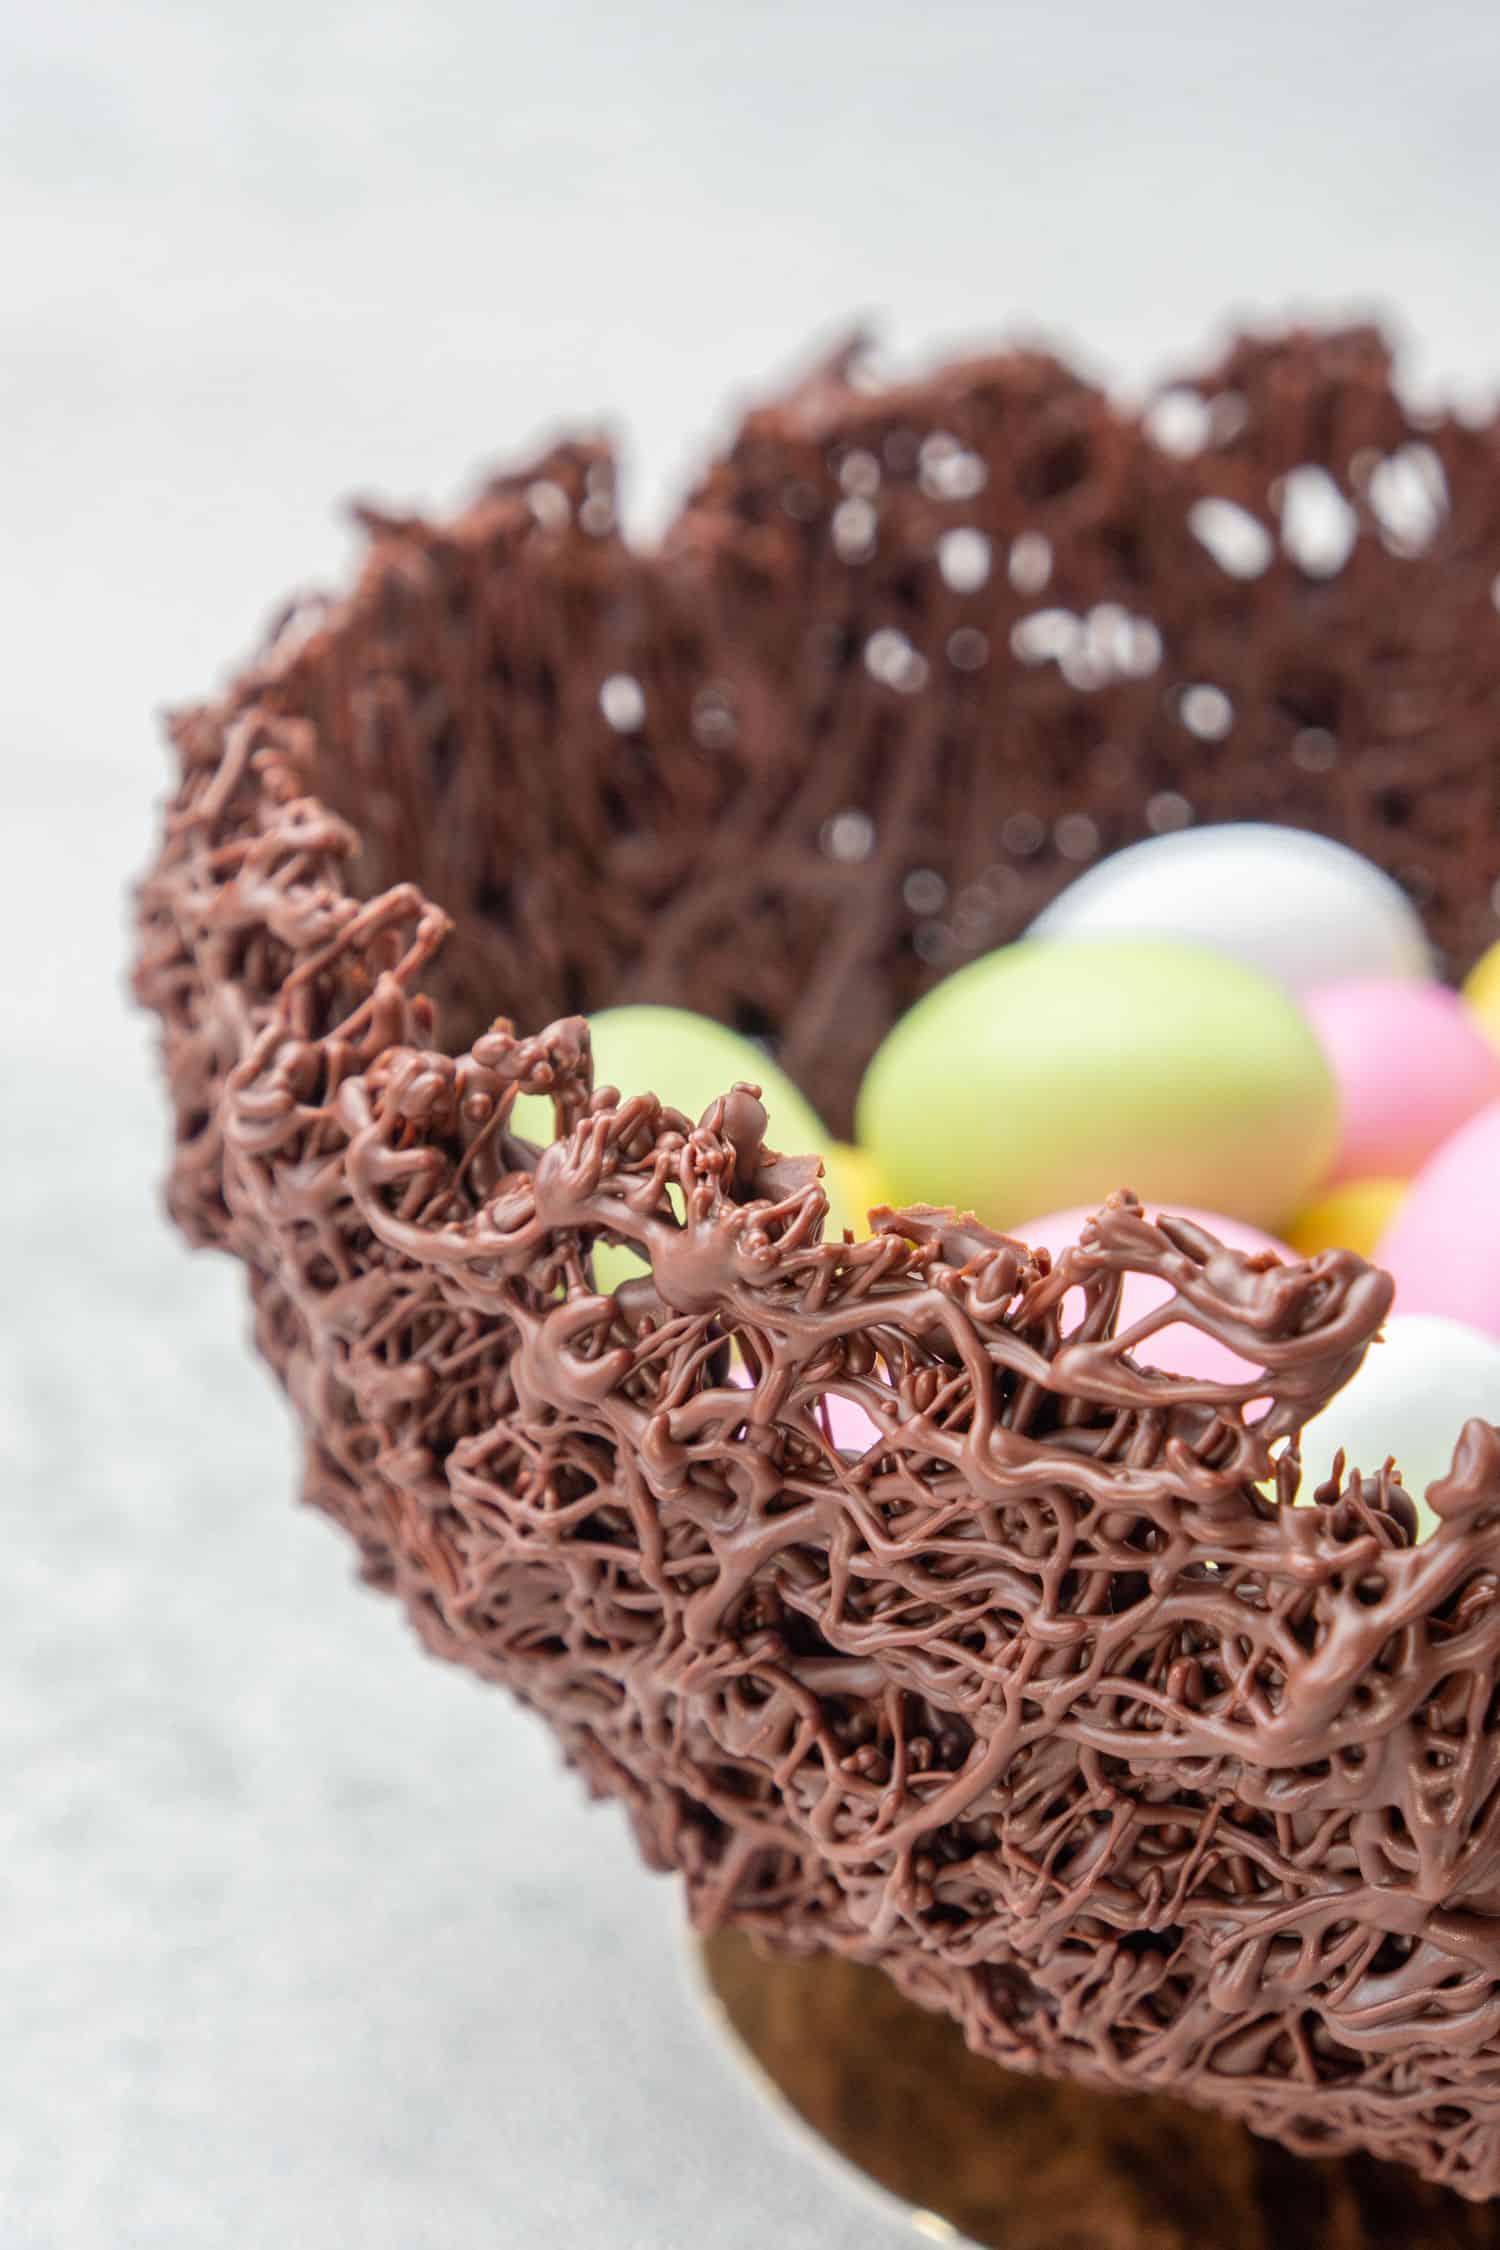
6. Apply the last layer of chocolate on the bowl, and make sure at this point that the bowl is well covered all around. Tip: place the bowl on a glass and turn the bowl on the side slightly - if you can - in this way the edge of the bowl is more accessible

7. Pop the bowl back into the freezer (with chocolate side up) for 15 min for the chocolate to set
8. Take the bowl out of the freezer and either with a hairdryer or with a blow torch very carefully heat the inside of the bowl for 2-3 seconds. If chocolate is tempered correctly, the Chocolate nest should be easily removed from the bowl

9. The Chocolate bowl can be stored at room temp (20c / 68F) or if your home is warmer, store it in the fridge
Tip.: Use gloves while unmolding the Chocolate nest as the gloves can prevent leaving fingerprints on the surface of the nest, and also ensures that you do not melt the chocolate with your warm fingers
Equipment notes
For making Bonbons and molded chocolate you usually need a mold, good news is that for making a Chocolate nest for Easter you will only need a bowl! When choosing the bowl, pay attention to the design and size of the bowl as your Easter nest will turn out exactly just like your bowl!
For a consistent happy baking experience always measure your ingredients with the help of a Digital scale. Cup measurement is an indicative figure only and not appropriate for tempering chocolate!
For the chocolate tempering, you will need a thermometer. I purchased an Infrared thermometer gun last year and absolutely love it, it is the most accurate and convenient way to check the temperate whether I am making curd, cream, or tempering chocolate! You can also measure the choc temp with other kinds of cheaper thermometers, choose according to your preference. One important thing is that for tempering you have to measure the temp so “guessing” is not an option and will lead to a best-in-class kitchen disaster.
And last but not least you will need some Piping bags, as the nest will be made "piping" tempered chocolate in a very thin stream.

More Easter recipes


Make sure to also check out my Spring Desserts recipe collection!

Have you tried this recipe?
Please leave a 5-star ⭐️⭐️⭐️⭐️⭐️ rating on the recipe card and consider leaving a comment as well! I would love to hear about how your dessert turned out and your feedback also helps other Readers!

Chocolate Nest for Easter
Ingredients
- 150 g (1 cups) Dark Chocolate eg. Callebaut Dark Chocolate (callets)
- ¾ teaspoon Cocoa butter powder for tempering, optional
US customary cup measurement is an indicative figure only. Measure the ingredients with a digital scale by weight (gram). Baking is art but also science which requires precision and accuracy.
Instructions
Temper the chocolate
- Please note, that I am tempering 50g chocolate with ¼ teaspoon of cocoa butter powder at once and repeat this process 3 times overall to create 3 different layers on the Chocolate nest
- Use a thermometer, eg. Infrared thermometer gun to measure the chocolate temperature while tempering. Do not guess the temperature
- Check my detailed instructions above regarding different tempering methods. For the cocoa butter powder method: Melt chocolate to 45-50°C / 113-122F, then allow it to cool at room temperature to 34.5°C / 94F stirring. Then, add cocoa butter powder to your melted chocolate, i.e. ¼ teaspoon to 50 g chocolate. I am using a product from Callebaut called Mycryo, use any cocoa butter powder you can access. Mix cocoa butter powder well with the chocolate. Let the chocolate cool to 30C / 86F, then use it.
Make the chocolate nest
- Clean the outside of the bowl to get rid of any potential residue, then place the bowl into the freezer
- Temper the first batch of chocolate (50g) and apply the first layer of chocolate in a very very thin stream using a piping bag. Place the bowl back to the freezer while tempering the second batch of chocolate (50g)
- Apply the second layer of chocolate onto the bowl. Place the bowl back in the freezer while tempering the third batch of chocolate (50g)
- Apply the last, third layer of chocolate onto the bowl. Place the bowl back to the freezer for another 10-15 minutes
- Take the bowl out of freezer and either with a hair dryer or with a blow torch very carefully heat the inside of the bowl for 2-3 seconds. If chocolate is tempered correctly, the chocolate nest should be easily removed from the bow
Leave a Reply