Understanding the basics of how to bake with yeast is essential for home bakers regardless of skill level. Whether you’re using yeast for dinner rolls or baking up a batch of cinnamon rolls, it’s beneficial to understand the function of yeast in bread making to ensure successful recipes.
This guide will teach you everything you need to know about the different types of yeast and how to use them when preparing your baked goods.
Jump to:
- How to bake with yeast?
- What is Yeast?
- Different Types of Yeast for Baking
- How much yeast do I need for 1 cup of flour?
- How to bake with yeast step-by-step
- 1. Activate the yeast
- 2. Combine the yeast with the remaining ingredients
- 3. First rise
- 4. Shape the dough
- 5. Second Rise
- 6. Bake the dough
- How do I activate yeast?
- What is proofing yeast?
- How do I know if my yeast is dead?
- How should I add yeast to the dough?
- How to knead the dough?
- Where should dough rise?
- How do I know if my bread dough has risen enough?
- What if my dough isn't rising?
- How long should bread rise the second time?
- Is yeast better than baking powder?
- How to replace active dry yeast with instant yeast?
- How to replace instant yeast with active dry yeast
- How to replace fresh yeast with instant yeast?
- How to replace fresh yeast with active dry yeast?
- Baking with Yeast FAQ
- Sweet bread recipes made with yeast
- How to Bake with Yeast
How to bake with yeast?
You might ask yourself, what are the uses of yeast in baking? Besides imparting a delicious flavor, the function of yeast in bread making is to create rise, so you’ll need to activate the yeast carefully.
Yeast creates carbon dioxide bubbles, which leavens the dough during baking and ensures that the recipe remains light and airy. This is the purpose of yeast in baking.
There are two main ways to bake with yeast. You can either mix the dry yeast directly into your flour mixture or rehydrate the yeast before mixing.
When using the rehydration method, place the amount of yeast you need into a small amount of lukewarm liquid, such as water or milk, and allow the yeast a few minutes to activate. After the yeast bubbles, signaling its strength, you will add the liquid mixture to the dry ingredients to finish forming the dough.
What is Yeast?
Yeast is a single-celled living organism that is part of the fungus kingdom. Baker’s yeast is the commercially produced variety, in brands like Red Star Yeast, that is used when making a wide range of baked goods. This type of yeast is the focus of this guide. Alternatively, there is also natural yeast, which is the naturally occurring yeast that gives rise to sourdough recipes, and brewer’s yeast, which aids in the fermentation process of alcohol.
Baker’s yeast, known as Saccharomyces cerevisiae, is specially formulated for bread making. It sells commercially in yeast packets, jars, and compressed packs. It comes in three varieties, including active dry yeast, instant yeast, also known as rapid rise, and fresh yeast.
Yeasted dough creates a light and fluffy texture that develops during the baking process. Yeast also imparts the distinct, classic yeast taste that makes baked goods, especially bread, so irresistible.
Different Types of Yeast for Baking
There are three main types of yeast that are most commonly used in baking; dry active yeast, quick rise instant yeast, and fresh yeast. While very similar overall, each variety has slight differences that affect how they are used in recipes as well as how they taste.
It’s important to always refer to your recipe for the type of yeast you should use. For example, bread machine yeast is a type of instant yeast that could be specifically required for your recipe.
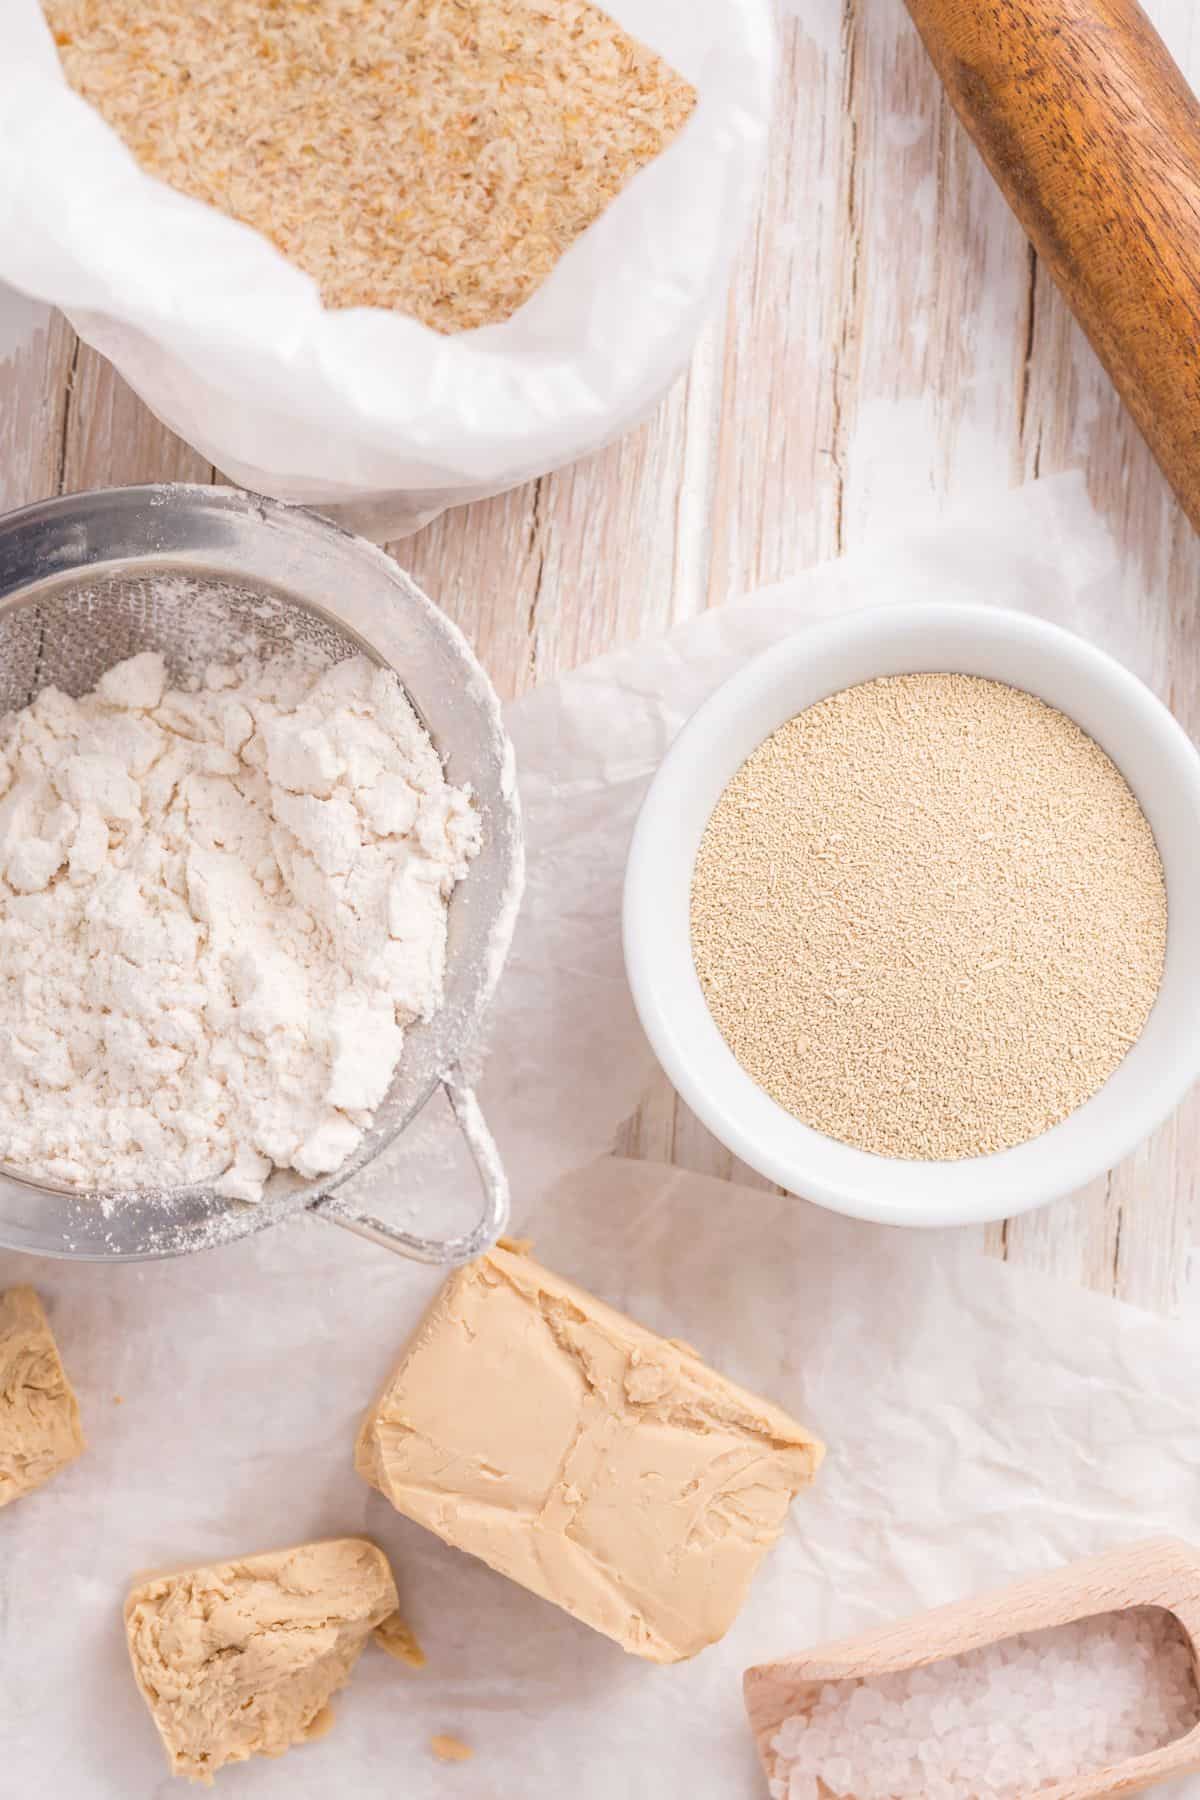
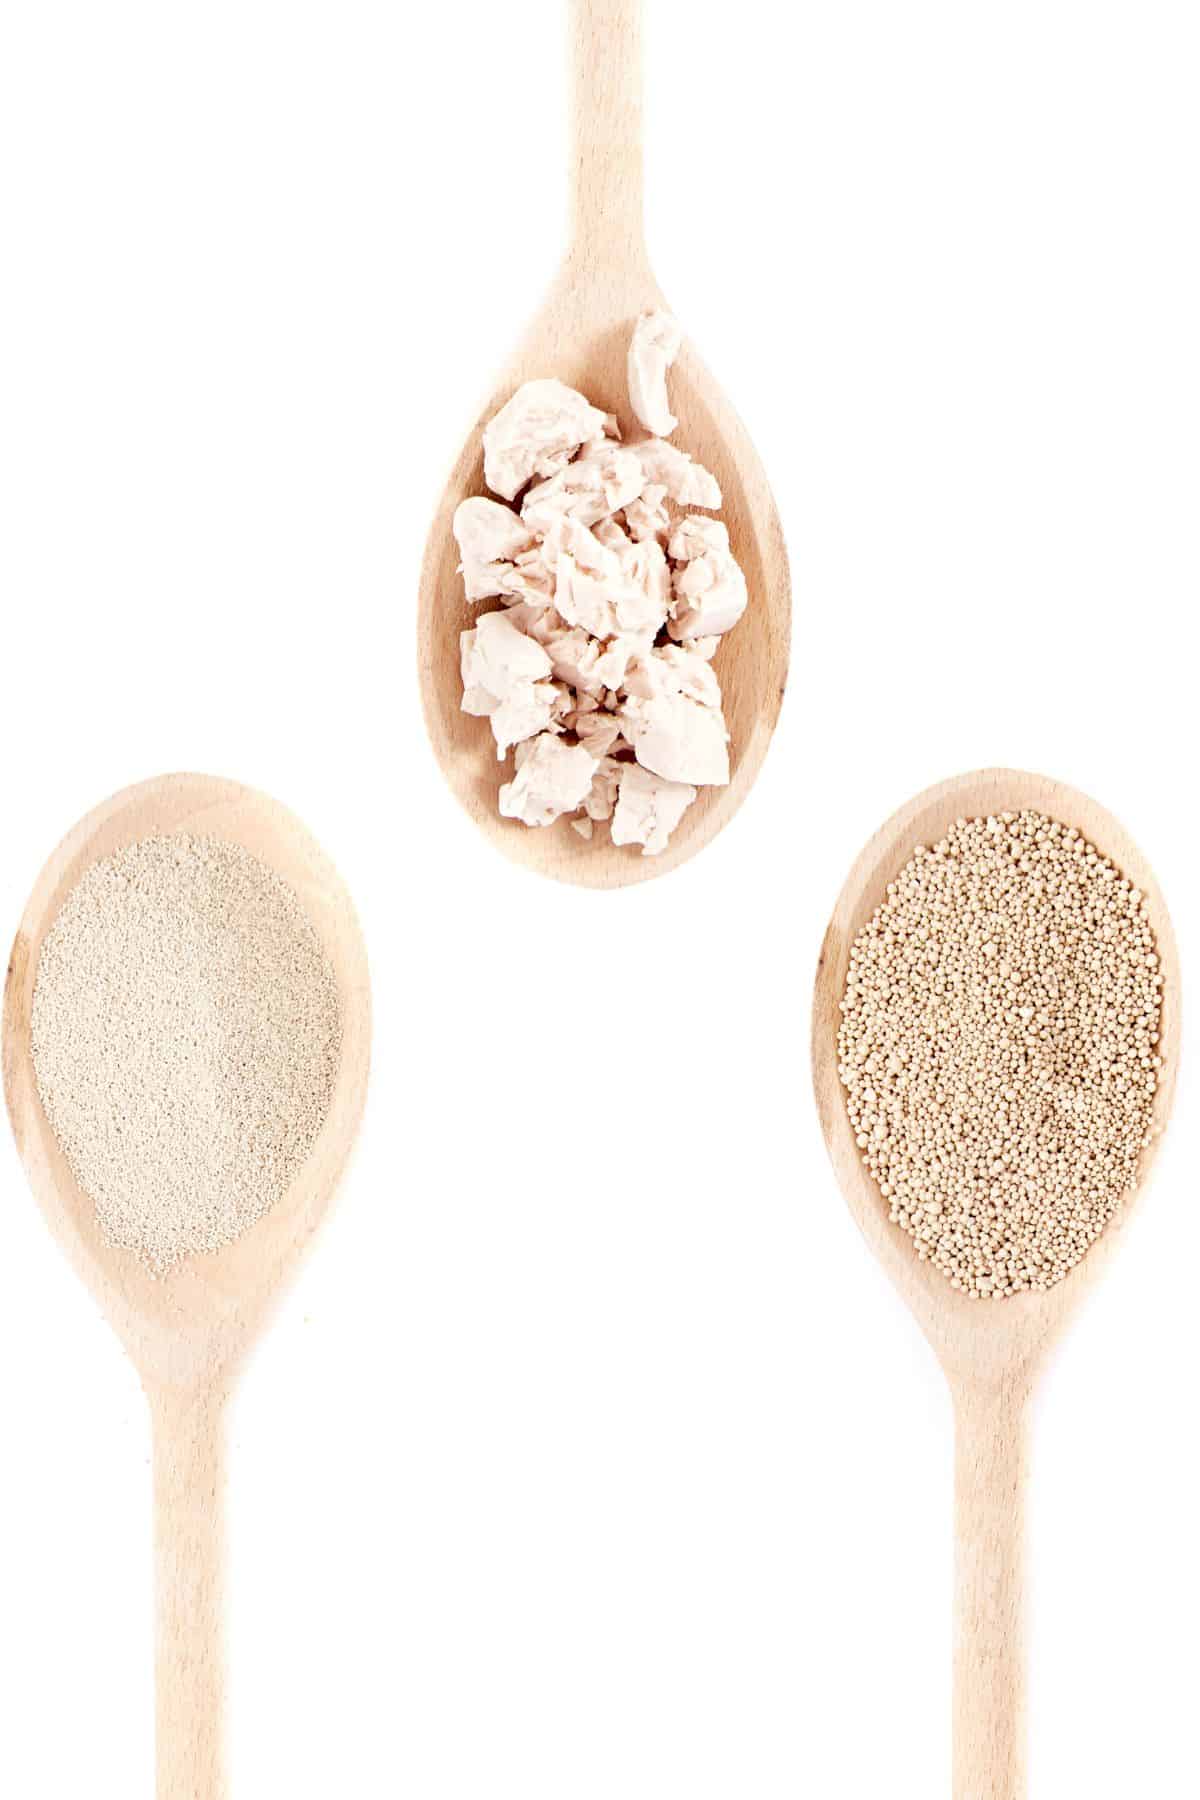
Dry active yeast: This type of bread making yeast is most commonly used in baking. It comes in small granules that must be hydrated in liquid in order to be activated. This type of yeast can be stored for long periods of time, making it ideal for the casual baker.
Instant yeast: Also known as “rapid-rise yeast,” this variety is comprised of smaller granules than active dry yeast. Typically, you mix Instant yeast directly into the dry ingredients of a recipe rather than separately hydrating it. A quick-rise instant yeast can be useful in helping your dough rise faster.
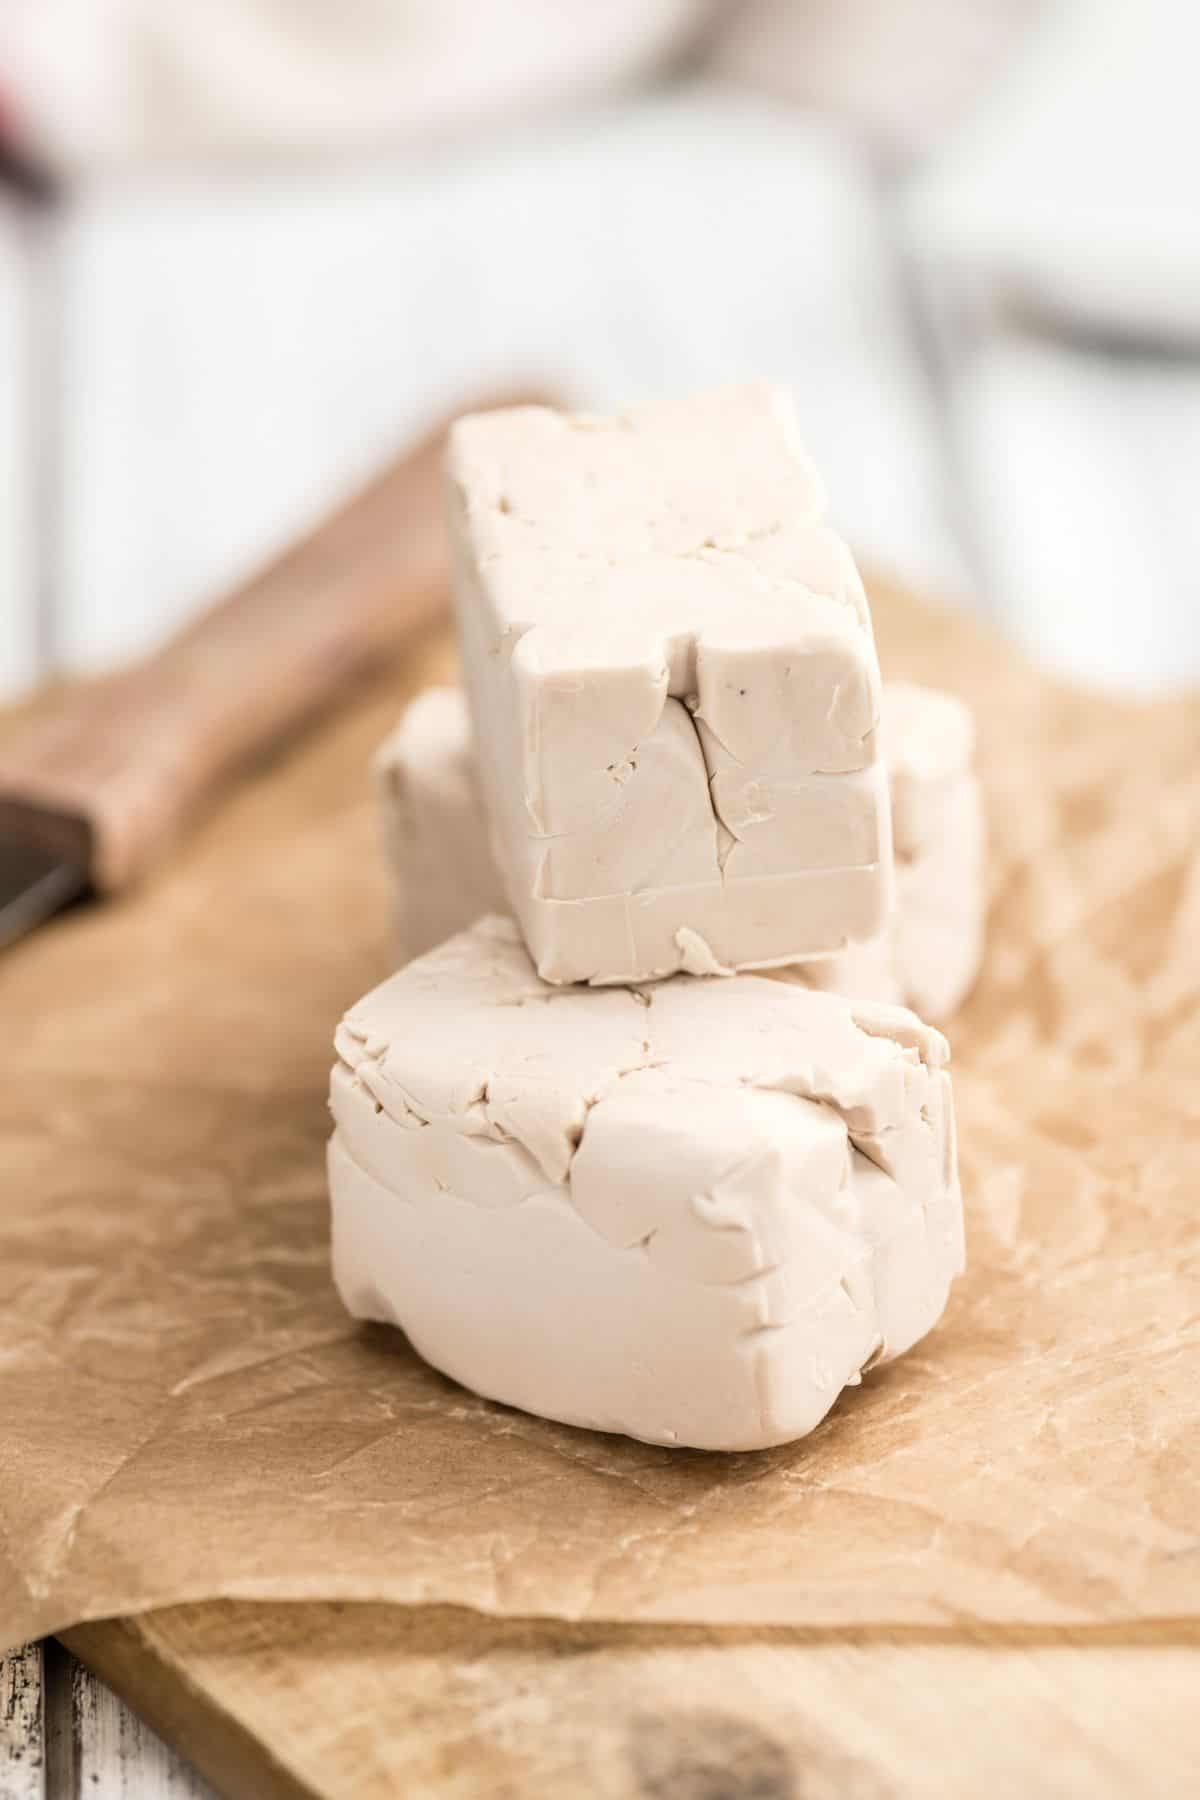
Fresh yeast: Fresh cake yeast, also known as fresh yeast for baking, comes in small blocks and can be crumbled and dissolved before use. It has a short shelf life making it better for those who bake frequently and on a large scale. It’s not as easy to find as dry yeast, but you can order it online or in some specialty markets.
How much yeast do I need for 1 cup of flour?
How much yeast for 1 cup of flour greatly depends on the type of recipe. In general, however, you can assume that the flour yeast ratio is 1 packet of dry active yeast to 500g (4 cups) of flour. Scaled down, it’s about ½ teaspoons of dry yeast per 125g (1 cup) of flour.
This general rule can help you determine how much dry yeast per cup of flour, however, it’s best to always refer to the original recipe for instructions.
Additionally, the type of rise your recipe calls for can affect how much yeast you will need in your recipe. Slow overnight rises, or quick 2-hour rises may call for different amounts of yeast as well as if the recipe contains milk, butter, etc.
How to bake with yeast step-by-step
The specifics of baking with yeast will vary based on what you're baking and which recipe you're following. However, the concept of these basic instructions can be applied to most baked goods using yeast.
1. Activate the yeast
In a small bowl, begin by activating the yeast in lukewarm milk and sugar. You can sprinkle the yeast on top of the mixture or gently stir it together. Within 10 minutes, the yeast should turn light brown and look very foam-like.
2. Combine the yeast with the remaining ingredients
In a stand mixer with the dough hook attached, add the yeast mixture, then any wet ingredients the recipe calls for (milk, water, egg, etc.) Mix until combined. Then, add the remaining dry ingredients until a soft yeast bread dough forms.
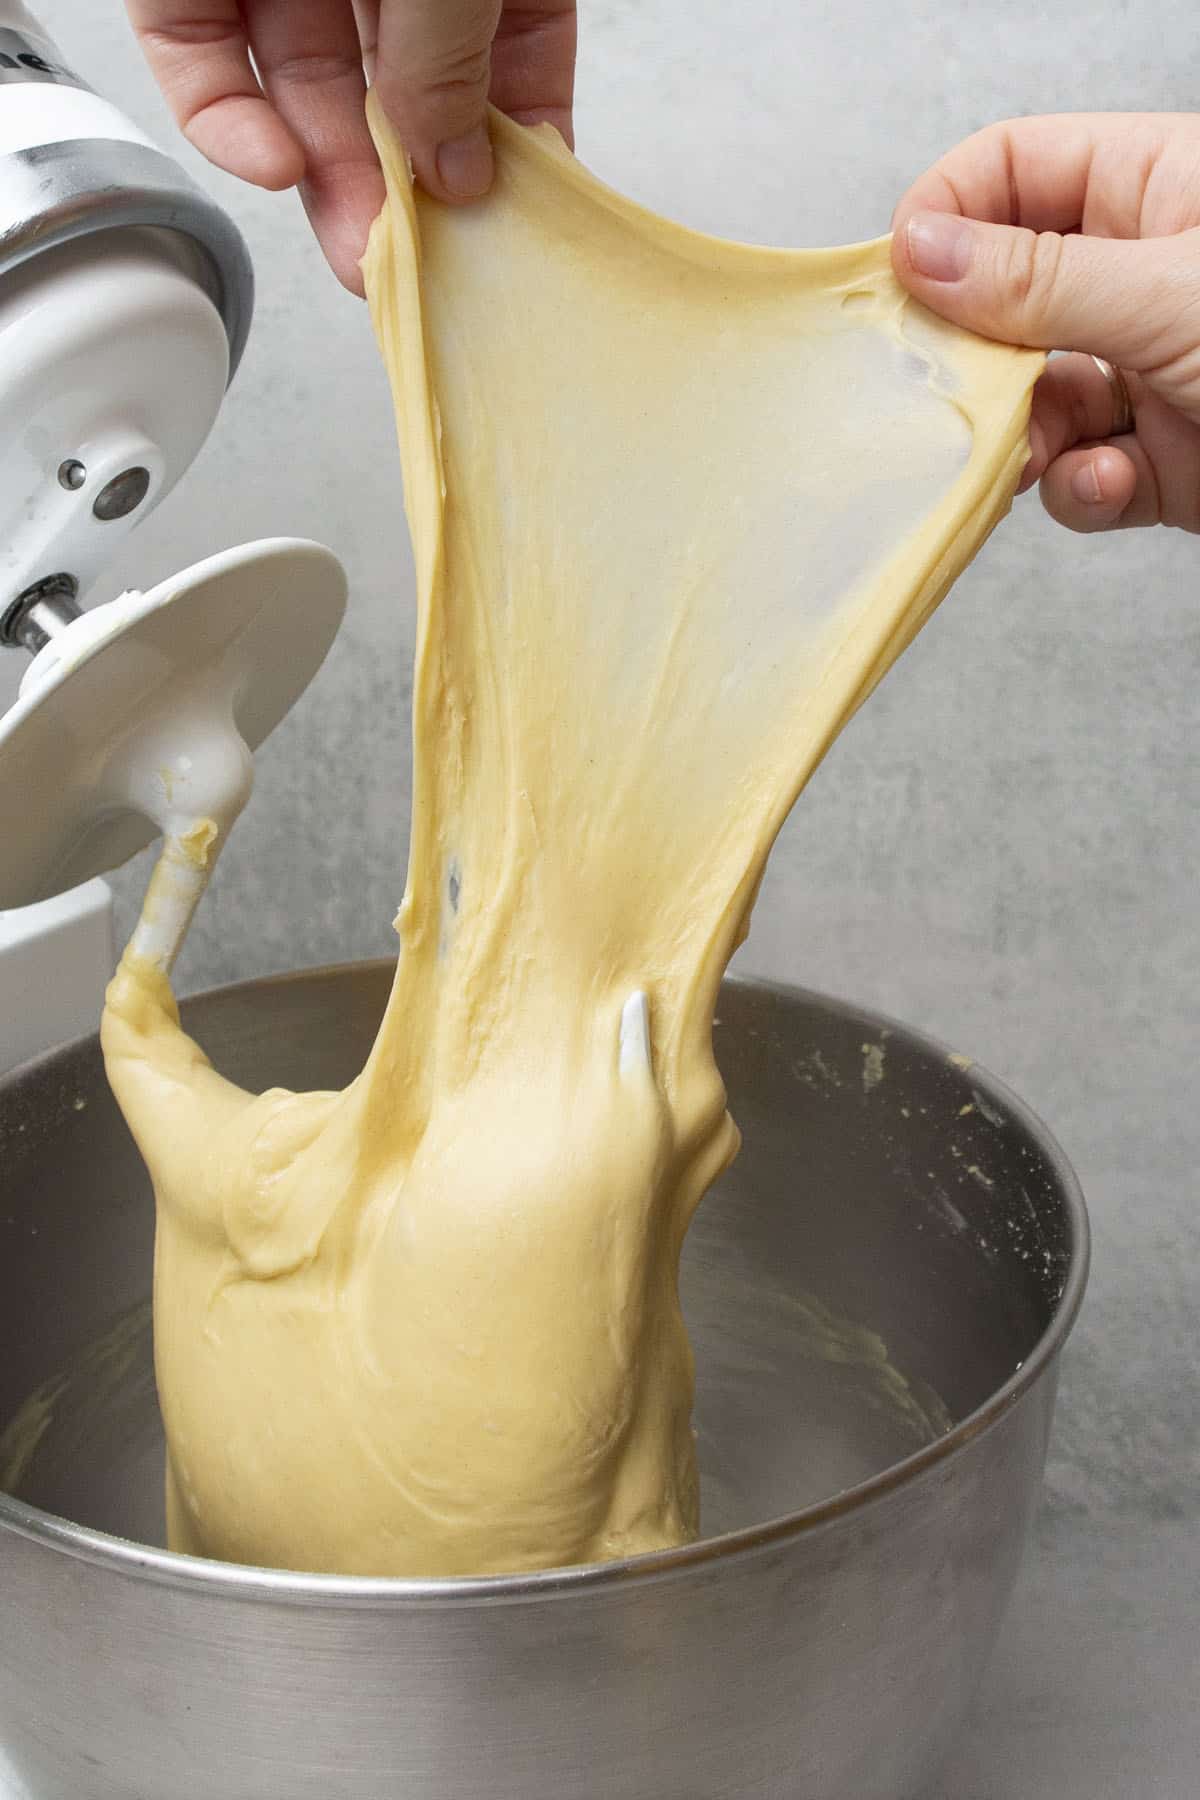
Finally, for example, if baking brioche or babka, add small pieces of softened butter to the mixer and knead on medium speed for about 10 minutes until the gluten develops. The dough will be elastic and no longer sticks to the sides of the bowl.
3. First rise
Place the dough into a bowl large enough to accommodate the dough’s rise and cover it with plastic wrap. Place it in the fridge to rise overnight or leave it on the kitchen counter to rise for about 2 hours or until doubled in size.
4. Shape the dough
After the dough has doubled in size, punch it down to release its trapped air. On a lightly floured surface, roll out the dough and shape it. Always refer to the recipe for how to shape the dough.
5. Second Rise
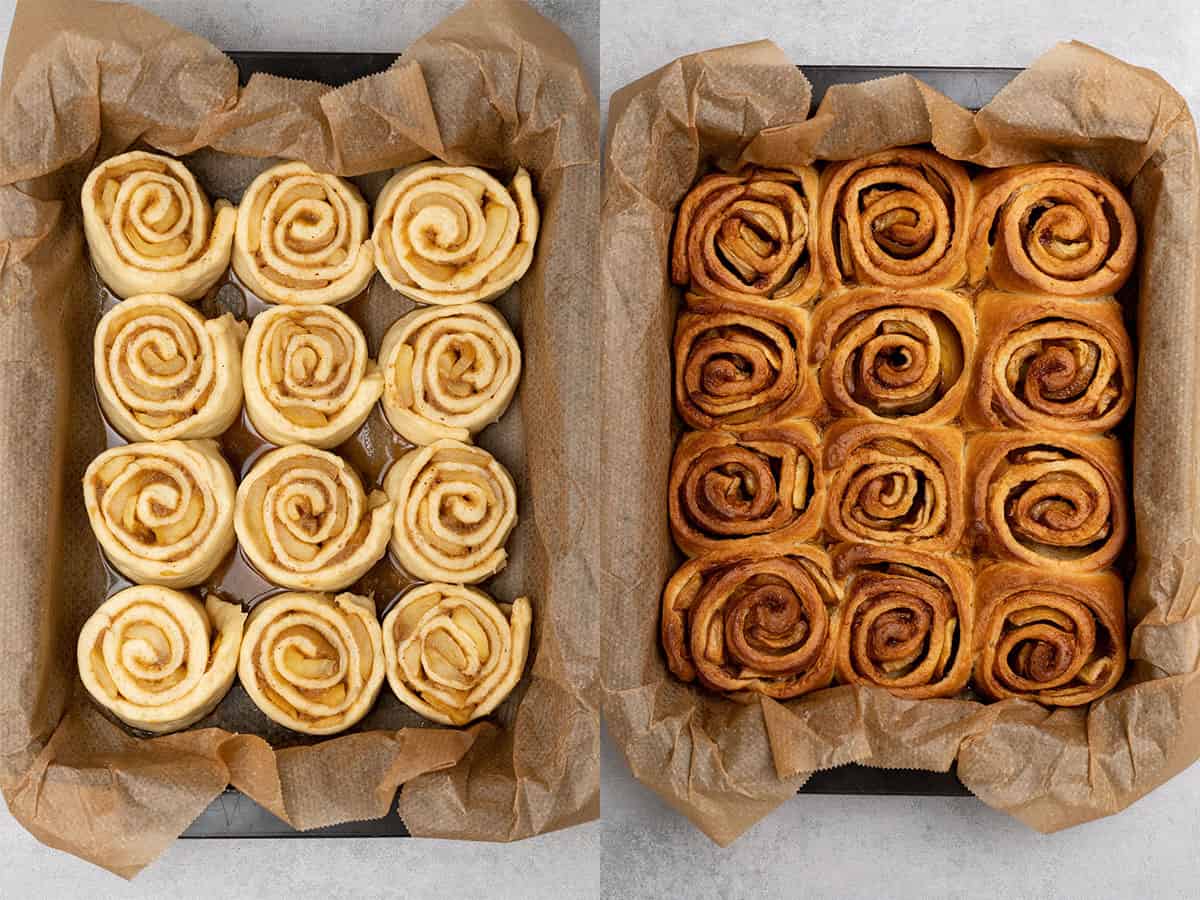
Gently cover the dough with a kitchen towel or plastic wrap that has been lightly oiled to keep the dough from drying out. Allow the dough to double in size again at room temperature. Depending on the recipe, this can take anywhere from an additional 30 minutes up to 1-2 hours.
6. Bake the dough
After the second rise of yeast, bake the bread according to the recipe’s instructions. Be sure to reference the recipe frequently for notes about temperature changes during cooking, egg washes, or any final instructions about the baking process.
Now that we covered the step-by-step process of how to bake with yeast, let´s go through in detail some of the critical steps and questions I often get about baking with yeast.
How do I activate yeast?
For some recipes, you will need to activate yeast prior to mixing, but not for others. It’s important to follow the recipe's directions closely to ensure success with that particular baked good. In general, activating yeast is very easy to do.
First, you’ll need to gently mix the yeast in a small bowl of warm water that’s typically around 38C/100F. In addition to the water and yeast, you need to add sugar for the yeast to consume. You can use granulated white sugar, but honey and brown sugar will also work.
When you bake with yeast, it will consume the sugar and begin releasing carbon dioxide, which causes a tan mound of bubbles to appear on the surface of the water. Most home taps produce water that is warm enough for your yeast to activate properly. Be careful, though, because significantly overheated or underheated water can cause your yeast to fail.

What is proofing yeast?
The term proofing, sometimes called “proving” yeast, means ensuring the yeast will activate. This is the term for the process of mixing yeast with water and sugar. It’s a helpful step because it allows you to gauge your yeast’s strength before adding it to your dough.
Adding dull or dead yeast to a recipe can make for a poor rise. This can cause the recipe not to turn out properly or to require a longer rise time. If your yeast doesn’t bloom after 10-15 minutes when added to sweetened water, you can assume that the yeast is dead and should not be used. At that point, you will need to start the proofing process from the beginning with a fresh batch packet or jar of yeast.
How do I know if my yeast is dead?
You can tell if the bread yeast is dead by its reaction during the proofing stage. When you bake with yeast and it doesn’t activate and bubble after 15 minutes, then you can assume that the yeast is dead and should not be used in your recipe.
In some cases, yeast can die from improper storage or being past its expiration date. If you have had your yeast for a long time, it’s best to open a fresh package before making your recipe.
If you’re using a fresh supply of yeast, and it still isn’t activating, you can always try proofing it again. Water that is too hot (60C/140F) can kill the yeast and prevent it from activating. Try again with a portion of yeast from the same package, and carefully monitor the water’s temperature. If it continues not to work, discard the package and begin with a fresh supply.
How should I add yeast to the dough?
How you add yeast to your dough depends on how you activate the yeast. When you add instant yeast, you mix it in directly with the other dry ingredients before adding any other liquids. When you add activated dry yeast, on the other hand, you pour the liquid mixture in after all of the dry ingredients.
Alternatively, you can crumble compressed fresh yeast directly on top of your flour and knead it in or activate it in a small bowl with water before adding it to your dough.
How to knead the dough?
To knead yeasted dough, it’s important to refer to the recipe’s instructions as the kneading time varies. For cinnamon apple babka, cinnamon rolls, and brioche, for example, there’s a specific amount of time that you must knead. These recipes often rely on time and visual cues that indicate when you have adequately kneaded the dough.
It can also happen when you bake with yeast that the recipe calls for little to no kneading. This could be because the recipe doesn’t need it, or because there’s an extended rise time.
Without a stand mixer to properly knead the dough, turn the dough out onto a clean, lightly floured surface. Then, use your palm to press the dough down and outward. Gently fold it back towards you, folding the dough in half. Repeat this process, then turn the dough 45 degrees and continue to repeat the process for the remaining amount of kneading time.
Where should dough rise?
Yeasted dough should rise in a warm place that is not directly in the sun. The optimal temperature for rising is at least 24C/75F, but it should not exceed 32C/90F; otherwise, it could adversely affect the dough. Room temperature is considered sufficient for rising dough, and your kitchen counter is an excellent place to let it rest.
If your house temperature is much cooler, it may be useful to invest in a dough proofer or warmth pad specifically made for rising dough.
It’s helpful to remember that the longer dough takes to expand, the more flavor develops. If your dough is rising slowly, just be patient with the process and always give yourself adequate time for it to rise.
Never rise the dough in your oven or extreme heat conditions for a 'quick fix' as it will have the opposite impact and you might need to start the process all over again.
How do I know if my bread dough has risen enough?
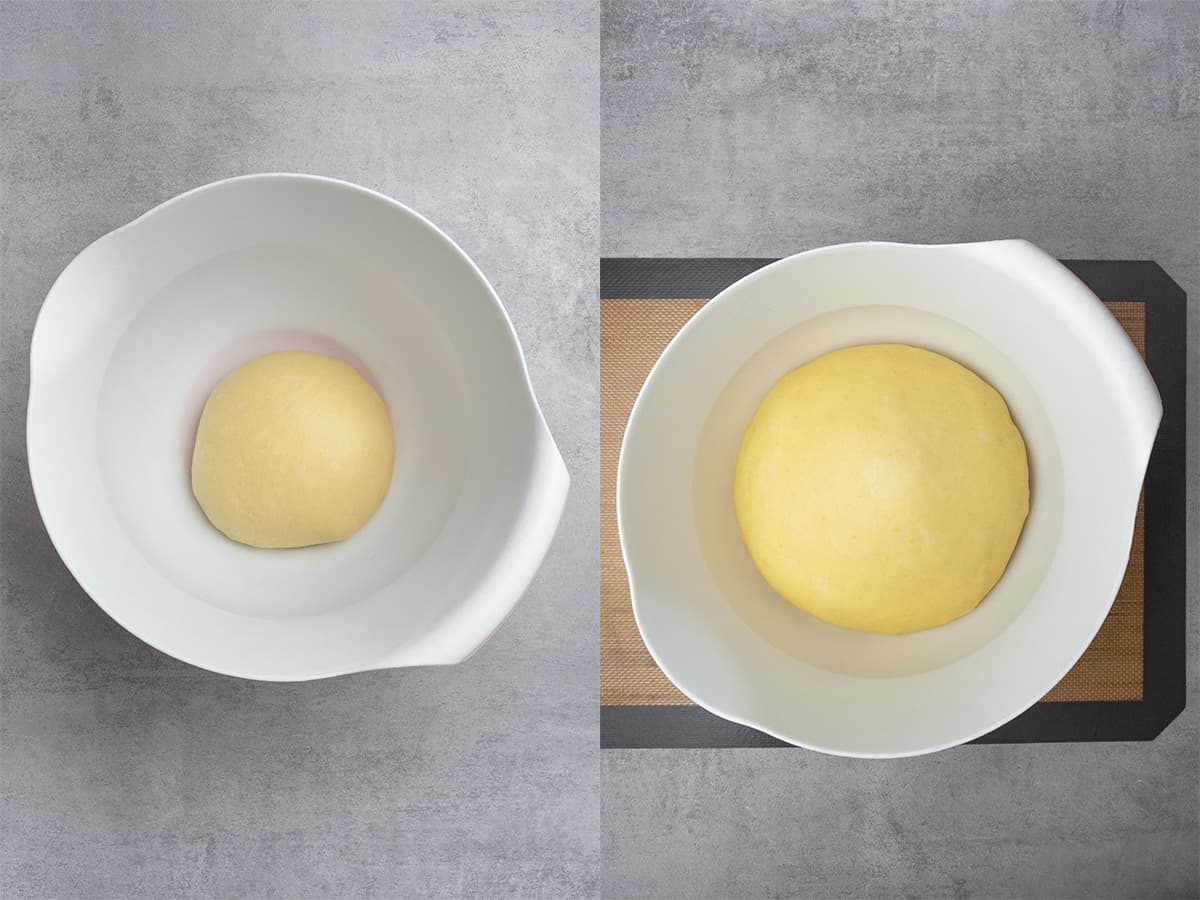
Typically, there is a 1-2 hour rising time when you bake with yeast. You can expect dough to double in volume after two hours, though some recipes will require a rise of only 45-60 minutes. Refer to the recipe to be sure.
Cooler environments can slow the rising process, so be sure to not only rely on time but also observe the size of the dough’s rise. Some bread-making bowls and dough-rising buckets have measurements on the side so you can tell how much it has risen with a quick glance.
Finally, you can do a poke test to determine if it’s ready. If you poke into the dough and the indent remains, your dough is generally ready to bake. If the dough immediately bounces back, it may still need time to rise.
What if my dough isn't rising?
From cool temperatures to yeast failure, it’s not always clear immediately why your dough is failing. However, if the dough is not rising, your options are to wait longer to see if it does increase in size or start again from the beginning of the recipe.
If your dough has been trying to rise for one hour and still has not changed in size despite optimal temperatures, it may be beneficial to start over. Improperly-proofed yeast or overworking the dough may have contributed to the lack of rising.
Additionally, if the dough does seem to be rising, but it’s happening slower than expected, try to find a warmer spot or wait a little while to measure the rise before deciding whether to start over completely.
How long should bread rise the second time?
If you’re wondering how long should the second rise be, it’s important to reference what your specific recipe says. Some recipes only require one rise, while others may call for two. Depending on the type of recipe, the second rise may need anywhere from 10 minutes to over an hour. The second rise gives the dough a lighter, chewier texture.
Baked goods without a second rise, such as pizza crusts, still taste great but are more dense in texture.
Is yeast better than baking powder?
Though yeast and baking powder both give rise to baked goods, you should not compare them. They serve different purposes. Yeast is ideal for baking bread, but you wouldn't traditionally use yeast for baking cake. When it comes to recipes like pancakes, muffins, and biscuits, baking powder is the go-to leavening agent.
Yeast makes baked goods rise by fermentation and causes small carbon dioxide bubbles. Baking powder does not need fermentation to create carbon dioxide bubbles. It simply needs to interact with a liquid and heat in order to activate.
How to replace active dry yeast with instant yeast?
The conversion of active dry yeast to instant yeast is 5:4.
To substitute active dry yeast with instant yeast, you will need to decrease the amount called for by 20 percent. For example, if your recipe calls for one tablespoon of active dry yeast, you can replace it with ¾ tablespoons of instant yeast.
Instant yeast works faster than active dry yeast, and you can add it directly to the dry ingredients, so when making this substitution, you can also skip the proofing.
How to replace instant yeast with active dry yeast
As the conversion of active dry yeast to instant yeast is 5:4. To replace instant yeast with active dry yeast, you will need to use 25 percent more than the recipe calls for. For example, if the recipe calls for 1 teaspoon of instant yeast, you’ll need to use 1 ¼ teaspoons of active dry yeast. Additionally, you should proof the active dry yeast before adding it to your dough.
How to replace fresh yeast with instant yeast?
To replace fresh yeast with instant yeast, you should swap in 40 percent of its weight for the same results. For example, if a recipe calls for 10g of fresh yeast, you’ll need to use 4g of instant yeast to replace it.
How to replace fresh yeast with active dry yeast?
To replace fresh yeast with active dry yeast, you will need to use 50 percent of its weight as a replacement. If a recipe calls for 10g of fresh yeast, replace it with 5g of active dry yeast. Additionally, you should proof the active dry yeast before adding it to your dough.
Baking with Yeast FAQ
Yes, yeast can go bad and it has an expiration date. Additionally, when not stored properly, yeast may even lose its potency before its expiration date.
However, if stored in optimal conditions, it may also remain strong beyond its expiration date. To determine if yeast is bad, try proofing a small amount. If there is no response when adding yeast to water and sugar, the yeast has likely gone bad.
Yes, freezing yeast is an excellent way to extend its life. Store yeast in an airtight bag with as much air removed as possible. Dry yeast can remain in the freezer for up to 2 years if unopened and 5-6 months if opened. Fresh yeast should be used or discarded within 3 months.
If the yeast cells are dead, they will not create the carbon dioxide that causes the bread to rise. Your bread will not rise as intended, and you will have to start the recipe from the beginning.
Yeast baking is very versatile. Besides bread recipes, you can make donuts, cinnamon rolls, and even pretzels using yeast dough as the base.
Sweet bread recipes made with yeast
How to Bake with Yeast
Equipment
- Digital scale
Ingredients
Dough
- 110 g (½ cups) Whole milk lukewarm
- 30 g (2 tablespoon) Granulated sugar
- 12,5 g Fresh Yeast
- 1 Egg yolk room temperature
- 1 Egg room temperature
- 250 g (2 cups) Bread flour high protein content flour
- ¼ teaspoon Salt
- 80 g (⅓ cups) Unsalted butter room temperature, 82% fat content
US customary cup measurement is an indicative figure only. Measure the ingredients with a digital scale by weight (gram). Baking is art but also science which requires precision and accuracy.
Instructions
- How to bake with yeast depends on baked goods eg. bread vs. brioche or pretzels all have a different process. The recipe and process below is a typical yeast- based sweet bread that is enriched with milk and butter.
First day - first proofing
- Start with mixing half of the sugar with lukewarm milk then sprinkle yeast on top. Make sure that the kitchen is nice and warm, and in 10 minutes the yeast should foam
- Mix in dry ingredients; bread flour, rest of the sugar, and salt, and start kneading until the dough until it comes together
- Slowly start to add room temp (soft) butter chunks by piece to the dough. Knead the dough for another 10 minutes on medium high speed until it becomes elastic and shiny and not sticky any longer
- Move the dough into a bowl, cover it with plastic wrap and let it rest and rise in the fridge overnight for 12 hours. Alternatively, rise the dough for 1-2hours at room temperature in a warm but not hot (avoid direct heat) spot in your kitchen
Second day
Second proofing
- After the dough has risen overnight, pop the air out, roll it out then shape it according to the recipe.
- Proof the dough now the second time now at room temp. Proofing might take 1-2h depending on your kitchen temp, wait until the dough doubled in size
- Bake the bread according to your recipe.




Nicole
This is excellent advice! When you replace fresh yeast with active dry yeast and proof the yeast before adding to the recipe, should you alter the moisture content of the recipe to adjust for the liquid used to proof the yeast? Thanks!
Katalin Nagy
When you use fresh yeast, you usually have to proof the yeast IN the actual wet ingredient that is mentioned in the recipe e.g. milk in case of brioche. Hope this helps.