This easy Basque Burnt Cheesecake has an unbelievable texture and taste and a beautifully rustic appearance. It is the perfect choice if you feel intimidated by making traditional cheesecakes; it is the easiest cheesecake of all!

Best Basque Burnt cheesecake recipe
This has to be the easiest type of cheesecake. There are no fancy ingredients or pieces of equipment, and don't worry about any advanced baking techniques or the hassle of using a water bath. The mixing and baking processes for this recipe are very simple, even if you are a beginner in the kitchen.
You only have to mix 5 simple ingredients together and then bake. The entire process is done in one bowl!
Normally, we want a neat side, a neat top, no burning, and a perfect appearance. But the Basque cheesecake recipe is meant to look rustic and is all the more attractive and tasty!

Katalin's key take on why Basque burnt cheesecake is so special
I honestly think a Basque burnt cheesecake is the most delicious cheesecake ever. It tastes like caramelized cheesecake with a super creamy custard-like texture similar to Crème brûlée. You will love it!
If I only have a few minutes to prepare a dessert and have almost nothing at home, this cheesecake is always my first choice and the one that gets the most compliments. The technique is so simple that it is practically a dump-and-bake dessert but with the most exceptional delicate results.
I intentionally don't include vanilla extract or provide any sauce recommendations. This is because the Basque burnt cheesecake has a unique texture and taste, and I think the depth of flavors should be enjoyed on their own. It is incredibly delicious, with a caramelized top, rich yet balanced flavors, and a hint of smokiness.
Ingredients
- 670 g (3 cups) Cream cheese, e.g., full-fat Philadelphia, at room temperature
- 200 g (1 cup) Granulated sugar
- 4 Eggs at room temperature
- 300 g (1⅓ cups) Heavy Cream at room temperature, 36% fat
- 30 g (¼ cups) All purpose flour
Make the cheesecake batter
Preheat the oven to 220C / 445F (no fan) and loosely line an 8-inch / 20 cm spring form pan with 2 square pieces of parchment paper. The papers must stick out around 2 inches / 5 cm above the edges to hold the cheesecake in as it rises.
Put the room-temperature cream cheese into a bowl and slowly add the sugar and flour while mixing on low with an electric hand mixer. Alternatively, place the ingredients in a stand mixer fitted with the whisk attachment, but do not whip the ingredients.
Slowly add the room-temperature eggs to the mixture, one by one. Keep the mixer set to low speed, as we do not want to whip the ingredients.
Finally, slowly pour in the heavy cream (this also needs to be at room temperature).
Pour the cheesecake batter into the prepared springform pan.

Bake and don't be afraid to burn it
Bake the cheesecake for about 40 minutes 220C / 445F (no fan), checking after 30 minutes of baking time. It is ready when the top part is puffed up, the edge looks baked, and the middle is jiggly but not raw.
Cover it with aluminum foil if it browns too fast; however, it should be very caramelized on the top, so don't be afraid of it if this is your first time.
Remove the cheesecake from the oven and let it cool completely in the pan. Then, cover it with plastic food wrap (still in the pan) and transfer it to the fridge for at least 4 hours.
Carefully remove the baked Basque cheesecake from the springform pan and serve.

Storing & Freezing
After baking, the cheesecake should be covered and stored in the fridge until it sets. Store any leftovers in the fridge for 1-2 days in an airtight container. It is important to keep it well covered, or it can absorb other smells and flavors from the fridge.
I do not recommend freezing this cheesecake. The creaminess of the cheesecake might be spoiled by the process of freezing, so it is best enjoyed fresh.

Expert Tips To Make Basque Cheesecake
- Take the cream cheese, eggs, and cream out of the fridge before you make this recipe so that they are all at room temperature. This allows for proper emulsification, and you'll get better results.
- I always use full-fat Philadelphia cream cheese, but you can use any high-quality substitute. Avoid using low-fat cream cheese in this recipe. Similarly, use high-quality, high-fat heavy cream with between 36% and 40% fat.
- I use less sugar than most other Basque burnt cheesecake recipes so that it is not overly sweet. Avoid reducing it further, as this will impact how the burnt cheesecake will caramelize in the oven.
- The small quantity of flour is not a typo! It is just there to add some structure. I used to add the flour at the end (like most other burnt cheesecake recipes) but found upon further testing that the batter was too liquid at that stage to incorporate the flour smoothly.
- Don't smooth the parchment papers while lining the springform pan, as a slightly wrinkled appearance looks even more charming and rustic!
- Cover the cheesecake with aluminum foil if it caramelizes too fast in the oven. But remember that it is a 'burnt' cheesecake, so be brave and don't cover too soon.
- Slightly underbaked (but not raw) cheesecake will have the best final texture as it then sets completely in the fridge.
- The cheesecake's center should still be slightly jiggly when you take it out of the oven. Aim for slightly underbaked (but not raw) cheesecake for best results. Your cheesecake might taste eggy if overbaked.
- Do not remove the cheesecake from the cake pan while it is still warm, or it might collapse. I recommend chilling the cheesecake for at least 4 hours first before releasing it and serving your baked Basque cheesecake.

More Cheesecakes

This jiggly Japanese cheesecake is a unique dessert that stands out for its soft, jiggly texture and delicate flavor. Made primarily with cream cheese and eggs, this sponge-like cheesecake has a souffle-like consistency that's both jiggly and fluffy.
Go to the recipe: Jiggly Japanese Cheesecake
Baklava Cheesecake
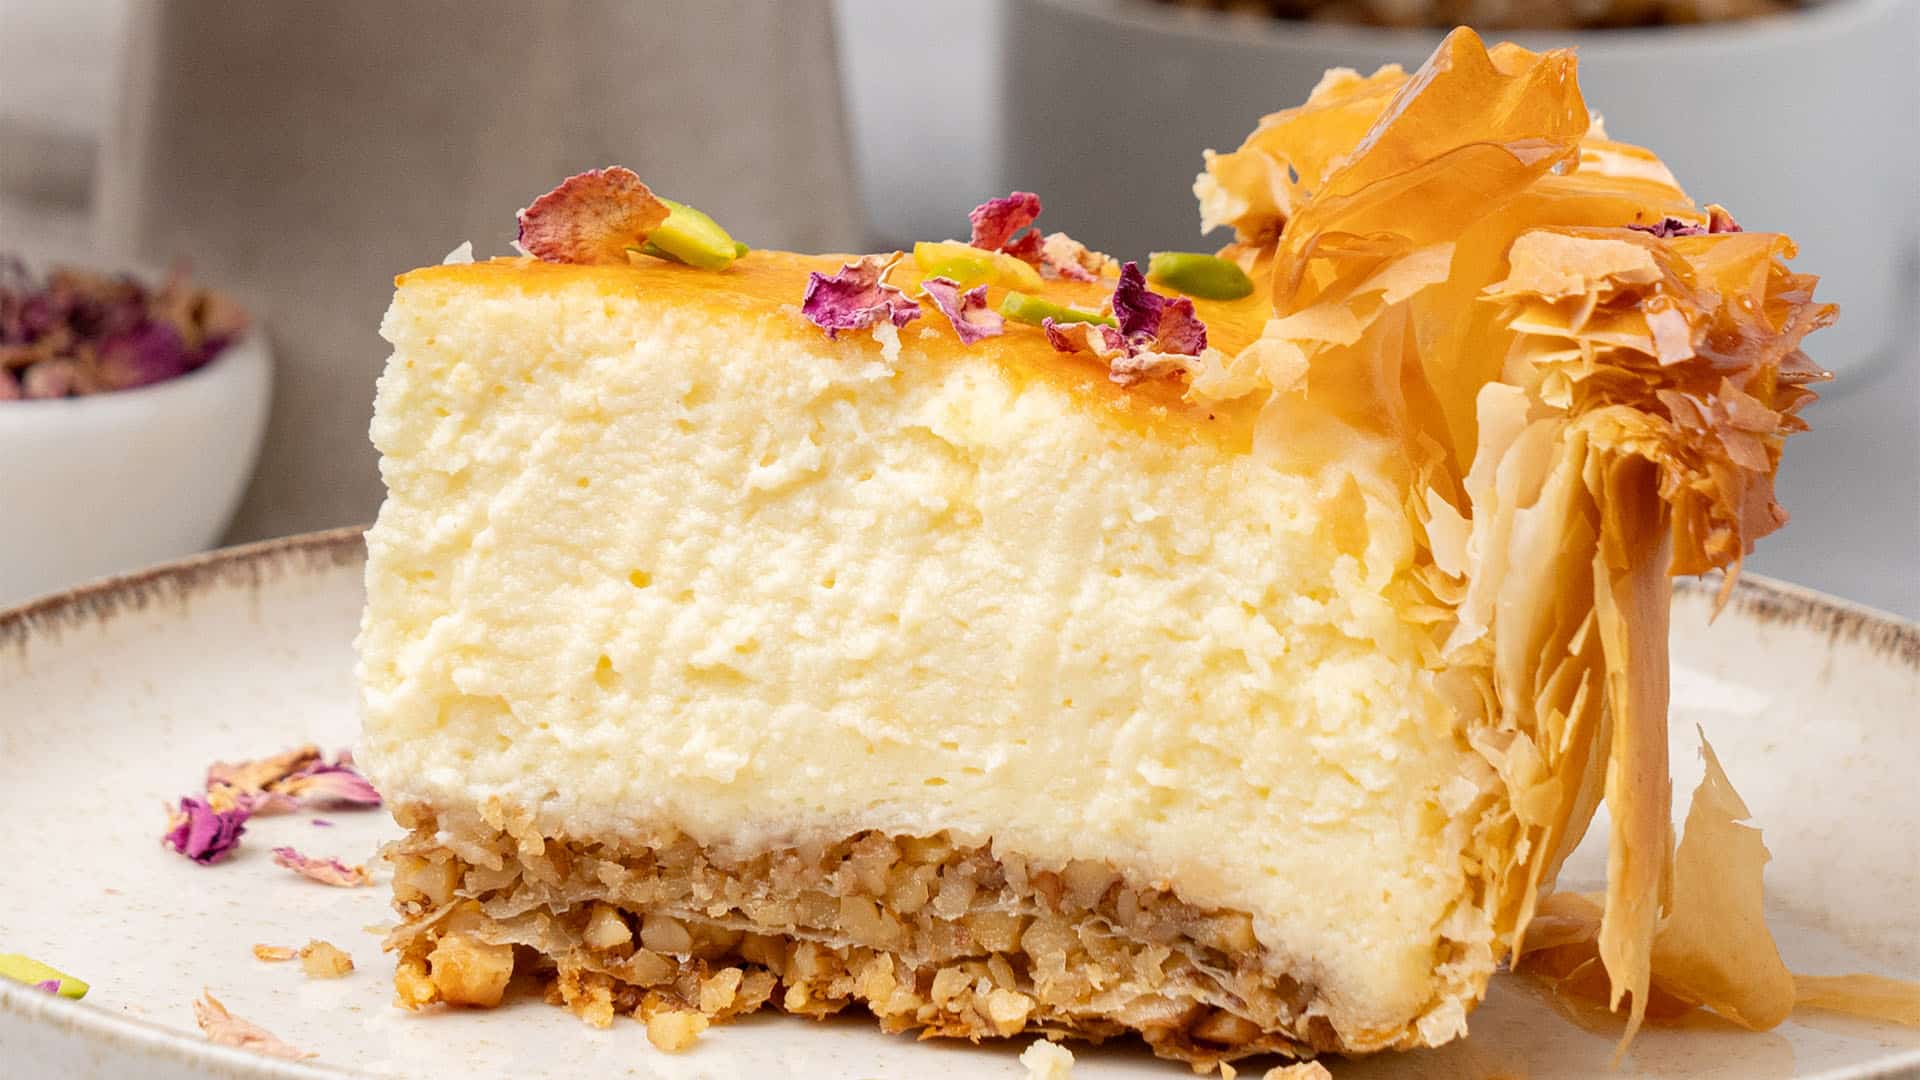
While you may have enjoyed baklava in its traditional form of small squares or triangles, this Baklava cheesecake recipe introduces a delicious twist - cheesecake! Layers of roasted walnuts and filo dough alternate at the bottom of this dessert, each generously brushed with the signature honey syrup that imparts baklava with its unmistakable luster and luxurious taste.
Go to the recipe: Baklava Cheesecake
Leave a Reply