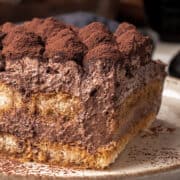
Chocolate Tiramisu
Layered with crisp, spongy ladyfingers and a luscious chocolate mascarpone cream that combines rich cocoa powder and smooth melted chocolate, this easy chocolate tiramisu is pure bliss for chocolate lovers!
Servings: 6
Calories: 1089kcal
Equipment
Ingredients
Mascarpone cream
- 6 Egg yolk
- 100 g Granulated sugar
- 170 g Semi-sweet chocolate
- 500 g Mascarpone high fat, use it cold
- 350 g Heavy Cream 36% fat, use it very cold - can be substituted with equal amount of mascarpone
- 50 g Cocoa powder unsweetened, Dutch processed
Assemble
- 20 pieces Ladyfinger cookies store-bought or make my homemade ladyfingers recipe
- 1 cup Coffee mildly sweetened strong espresso to soak the ladyfingers in
Decoration
- 230 g Heavy cream 36% fat, use it very cold
- 75 g Mascarpone high fat, use it cold
- 60 g Powdered sugar sifted
- 25 g Cocoa powder unsweetened, Dutch processed
- 1-2 tablespoons Cocoa powder unsweetened Dutch processed to decorate the top
Instructions
Chocolate Mascarpone Cream
- Prepare the egg yolk mixture: Start by setting up a double boiler. A double boiler consists of two stacked pots: the bottom pot holds simmering water, while the top pot sits above the water without touching it. The steam from the simmering water gently heats the contents of the top pot.Once your double boiler is ready, whisk the egg yolks and sugar together in the top pot over the simmering water. Whisk continuously until the sugar has fully dissolved, which will take about 5 minutes, though the time may vary depending on your bowl size and the water temperature. Keep the heat low to prevent the egg yolks from cooking. The egg yolk mixture is ready when it reaches 85C / 185F.
- Then, move the egg yolk mixture into a stand mixer fitted with a whisk attachment and whip it until the mixture becomes airy and its temperature lowers.
- Meanwhile, gently melt semi-sweet chocolate in the microwave until runny but not hot. Then, slowly pour it into the egg mixture while the mixer is running. Whip it until the egg yolk chocolate mixture temperature cools to about 24C / 75F.
- To prepare the mascarpone part, use an electric hand mixer to whip the cold mascarpone and heavy cream together until soft peaks start to form. Then add cocoa powder and continue whipping until the mixture reaches early stiff peaks, remaining airy and fluffy—about 3 minutes. Be careful not to overwhip, as this can make it runny.
- Then, switch to a rubber spatula and carefully fold the whipped mascarpone into the egg yolk mixture, making sure that you don't break the air we just incorporated into both mixtures. At this point, the cream should be airy and fluffy, and it will further set in the fridge.
Assembling
- Prepare a container (I’m using one that measures 18x24 cm / 7x9 inches, but an 8x8-inch pan will work too).
- Dip the ladyfingers into the coffee, then arrange them in a single layer at the bottom of the pan. For my pan, I can fit 10 ladyfingers in the first layer and another 10 in the second layer.
- Spread half of the chocolate mascarpone cream on top. Repeat with the next layer, then smooth the top with an offset spatula.
- Refrigerate the tiramisu for at least 4 hours to allow it to set.
Decoration
- To make the decoration, follow a similar process as with the previous mascarpone cream. Whip the cold mascarpone, heavy cream, and powdered sugar together until soft peaks form. Add cocoa powder and continue whipping until stiff peaks develop and the mixture is airy and fluffy. Move the chocolate whipped mascarpone frosting into a piping bag and decorate the top of the tiramisu.
- Before serving, dust with cocoa powder.
- Store any leftovers in an airtight container in the refrigerator for 2-3 days. I don’t recommend freezing the tiramisu, as the mascarpone cream doesn't freeze well.
Notes
INGREDIENT NOTES:
- Measure your ingredients with a digital scale for accuracy.
- For the ladyfingers, it is totally fine for this recipe to use a store-bought one, but homemade ladyfingers can also be made easily.
- Use full-fat mascarpone and heavy cream to make the tiramisu cream.
- While tiramisu can be prepared in a hundred different ways, if you want to skip heavy cream, feel free to substitute it with an equal amount of mascarpone.
- There is no substitute for mascarpone, if no mascarpone, no tiramisu.
- There is no substitute for eggs to make authentic tiramisu. I offer a shortcut to using mascarpone and heavy cream only; feel free to check my limoncello tiramisu recipe for more details, which is an eggless version.
- Use unsweetened, dark cocoa powder to finish for the best dark cocoa flavor and color.
- Use high-quality semi-sweet chocolate, such as Lindt or Callebaut. Don't use milk chocolate unless you want a very sweet tiramisu.
- When making the mascarpone filling, it is crucial to follow the steps explained in the recipe. After the right airy consistency is achieved, carefully fold the mixture together without breaking the airy texture.
- Make sure you do not serve the tiramisu before it actually sets, which is about 4 hours. It honestly gets better over time.
Nutrition
Calories: 1089kcal | Carbohydrates: 56g | Protein: 17g | Fat: 96g | Saturated Fat: 58g | Polyunsaturated Fat: 3g | Monounsaturated Fat: 15g | Trans Fat: 0.02g | Cholesterol: 409mg | Sodium: 99mg | Potassium: 498mg | Fiber: 7g | Sugar: 30g | Vitamin A: 3055IU | Vitamin C: 1mg | Calcium: 258mg | Iron: 4mg
